应用场景简介
- 智能家居。
今天打造的这一款全新智能家庭控制系统,凸显应用在智能控制和用户体验的特点,开创国内智能家居系统体验新局面。新的系统主要应用在鸿蒙生态。
工程版本
- 系统版本/API版本:OpenHarmony SDK API 8
- IDE版本:DevEco Studio 3.0 Beta4
快速上手
准备硬件环境
- [获取OpenHarmony系统版本]:标准系统解决方案(二进制)
- [搭建标准系统环境]
- [完成Dayu200开发板的烧录]
准备开发环境
- 安装最新版[DevEco Studio]。
- 请参考[配置OpenHarmony SDK],完成DevEco Studio的安装和开发环境配置。
- 开发环境配置完成后,请参考[使用工程向导] 创建工程(模板选择“Empty Ability”),选择eTS语言开发。
- 工程创建完成后,选择使用[真机进行调测]。
HarmonyOS与OpenHarmony鸿蒙文档籽料:mau123789是v直接拿
准备工程
工程下载
git clone https://gitee.com/openharmony-sig/knowledge_demo_smart_home.git --depth=1工程导入
DevEco Studio导入本工程;
打开DevEco Studio,点击File->Open->下载路径/FA/SmartHomeCenter
编译
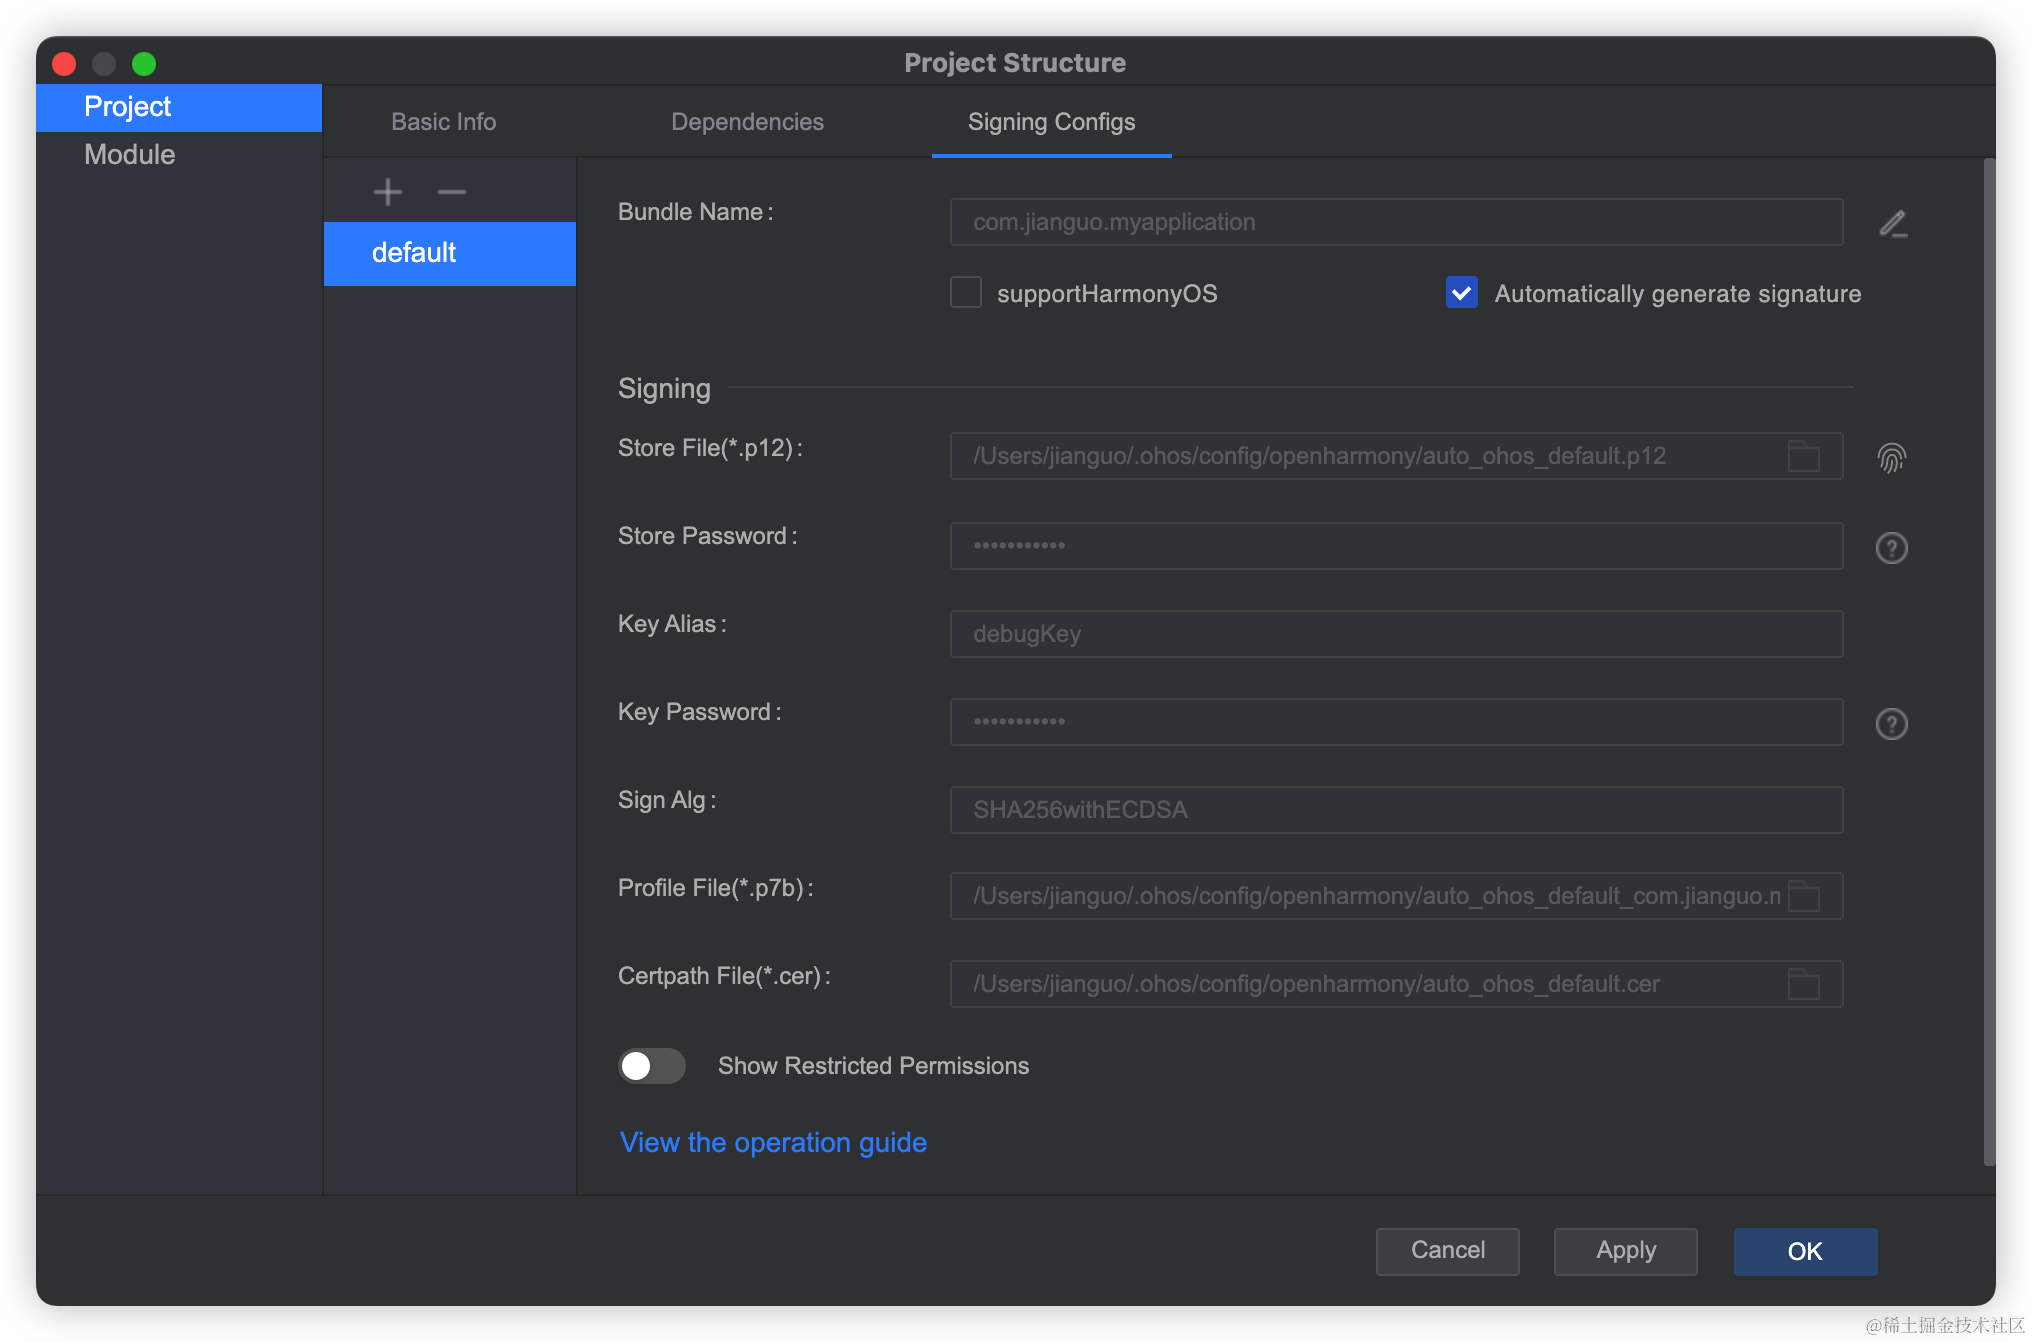
- 点击File > Project Structure > Project > Signing Configs界面勾选“Automatically generate signing”,等待自动签名完成即可,点击“OK”。如下图所示:
- 点击Build->Build Hap/APPs 编译,编译成功生成entry-debug-rich-signed.hap
烧录/安装
- 识别到设备后点击,或使用默认快捷键Shift+F10(macOS为Control+R)运行应用。

[安装应用]如果IDE没有识别到设备就需要通过命令安装,如下
打开OpenHarmony SDK路径 \toolchains 文件夹下,执行如下hdc_std命令,其中path为hap包所在绝对路径。
hdc_std install -r path\entry-debug-rich-signed.hap//安装的hap包需为xxx-signed.hap,即安装携带签名信息的hap包。
好的接下来我将详细讲解如何制作
开发教学
创建好的 eTS工程目录
新建工程的ETS目录如下图所示。

各个文件夹和文件的作用:
- index.ets:用于描述UI布局、样式、事件交互和页面逻辑。
- app.ets:用于全局应用逻辑和应用生命周期管理。
- pages:用于存放所有组件页面。
- resources:用于存放资源配置文件。
接下来开始正文。
我们的主要操作都是在在pages目录中,然后我将用不到10分钟的时间,带大家实现这个功能。
鸿蒙开发参考指导文件
鸿蒙开发指导文档:gitee.com/li-shizhen-skin/harmony-os/blob/master/README.md点击或者复制转到。
拆解
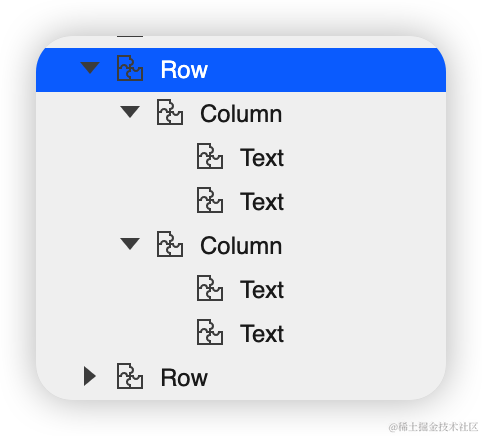
根据设计图,我们可以分层展示,用Column包裹,大致分为这几步
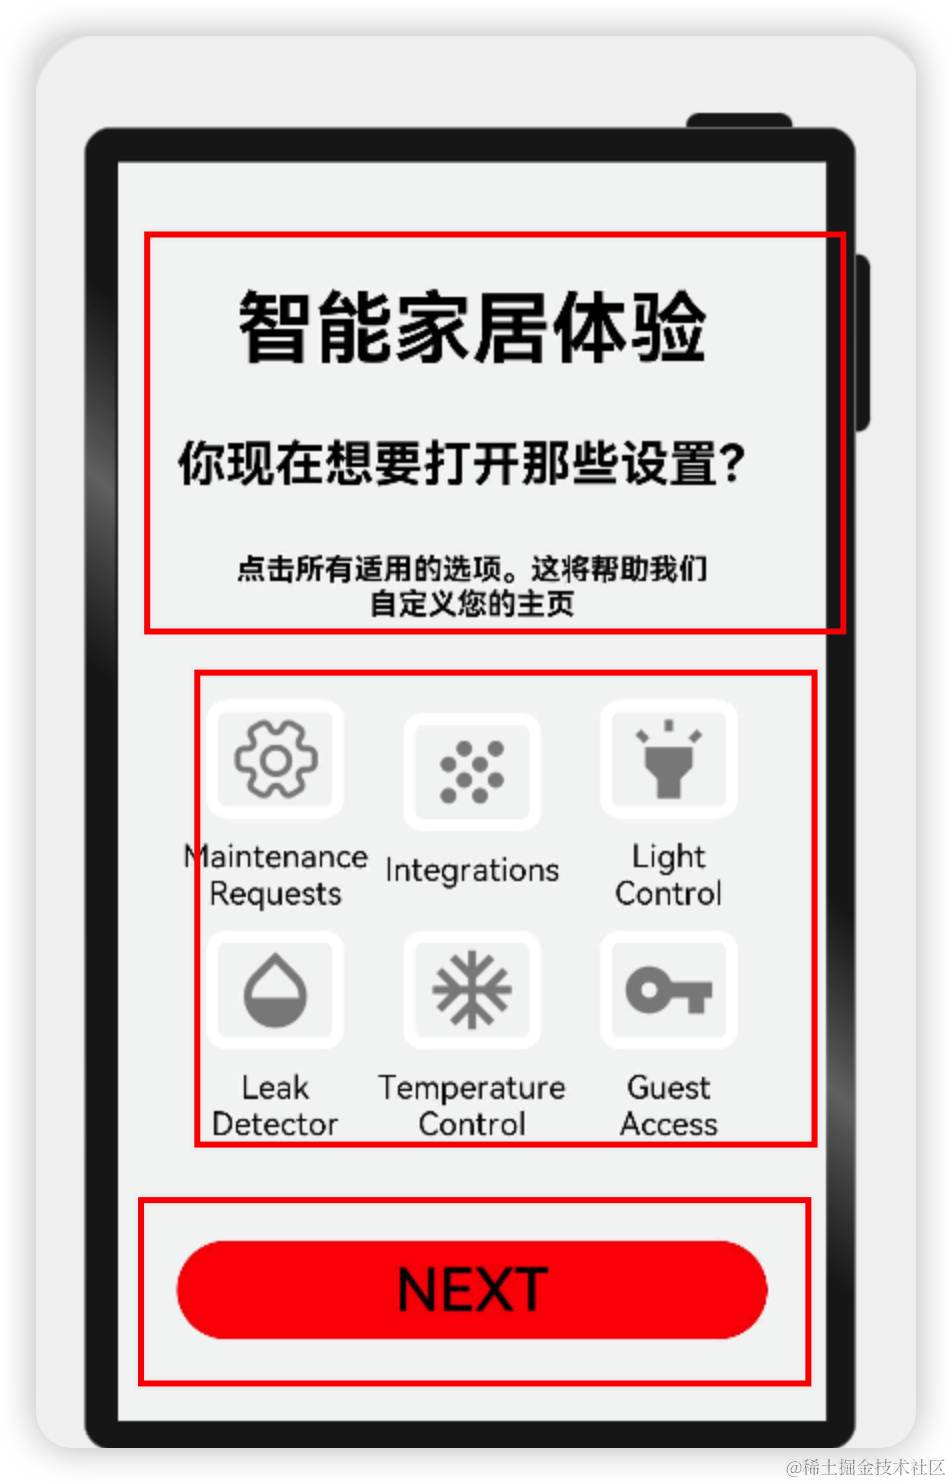
可以看下本页的结构:
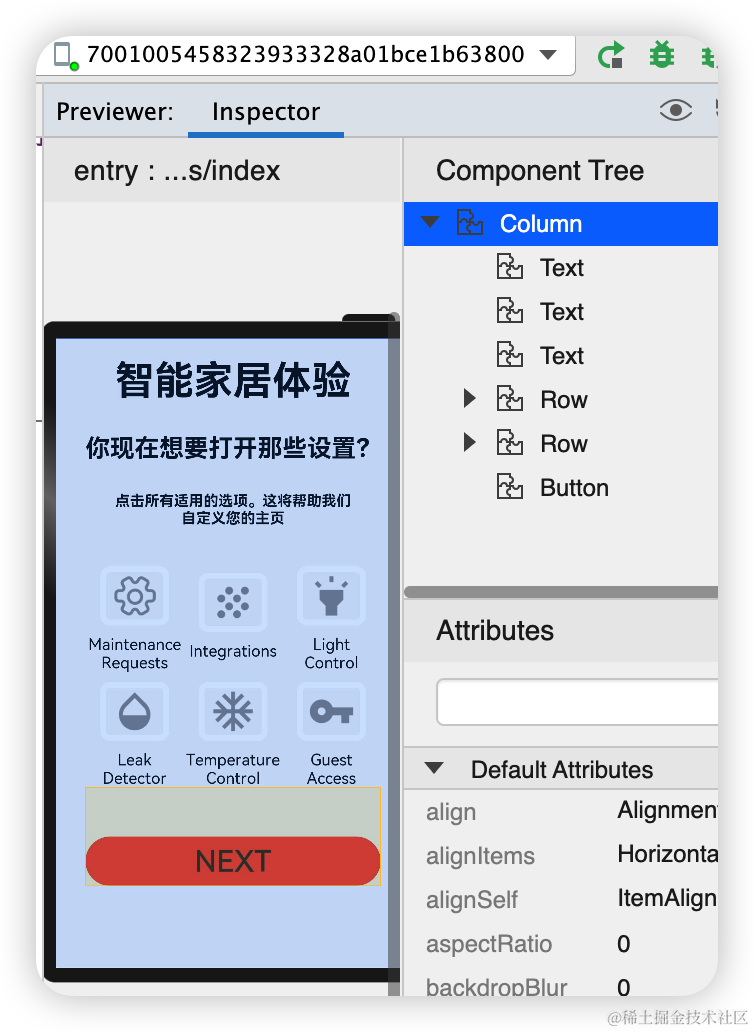
再详细一点:

import { SettingDetails } from './common/SettingDetails';
import router from '@ohos.router';
@Entry
@Component
struct Index {
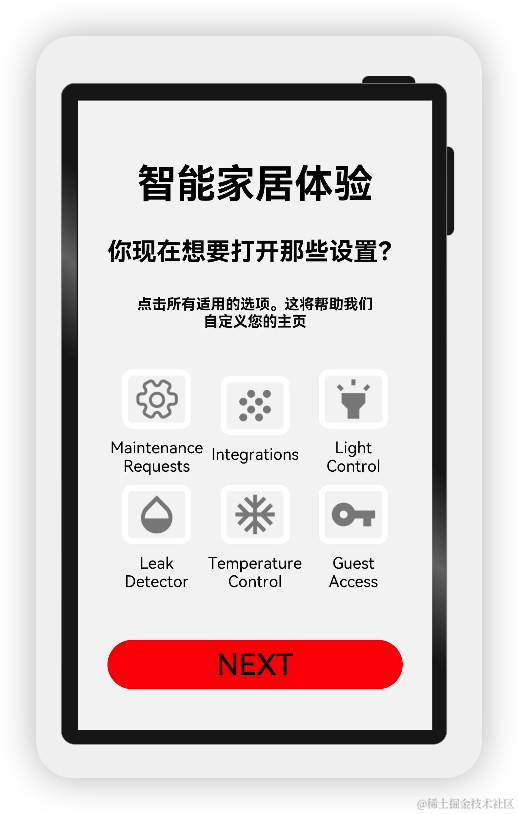
@State title: string = '智能家居体验'
@State message: string = '你现在想要打开那些设置?'
@State desc: string = '点击所有适用的选项。这将帮助我们\n自定义您的主页'
@State Number: String[] = ['0', '1', '2', '3', '4']
@State private isSelect: boolean = true;
build() {
Column() {
Text(this.title)
.fontSize(80)
.fontWeight(FontWeight.Bold).onClick(() => {
router.push({ url: 'pages/SensorScreen' })
}).margin({ bottom: 60, top: 40 })
Text(this.message)
.fontSize(50)
.fontWeight(FontWeight.Bold).onClick(() => {
router.push({ url: 'pages/SensorScreen' })
}).margin({ bottom: 60 })
Text(this.desc)
.fontSize(30)
.textAlign(TextAlign.Center)
.fontWeight(FontWeight.Bold)
.onClick(() => {
})
.margin({ bottom: 60 })
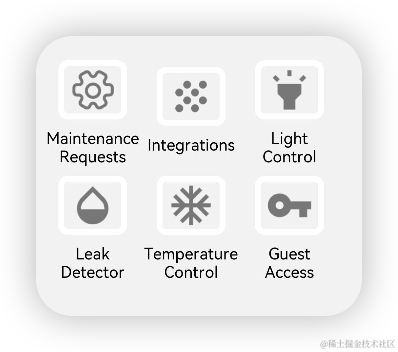
Row() {
SettingDetails({
image: "common/images/setting.png",
title: "Maintenance\nRequests",
isSelected: this.isSelect!
})
SettingDetails({ image: "common/images/grain.png", title: "Integrations\n", isSelected: this.isSelect! })
SettingDetails({
image: "common/images/ic_highlight.png",
title: "Light\nControl",
isSelected: this.isSelect!
})
}
Row() {
SettingDetails({ image: "common/images/opacity.png", title: "Leak\nDetector", isSelected: this.isSelect! })
SettingDetails({
image: "common/images/ac_unit.png",
title: "Temperature\nControl",
isSelected: this.isSelect!
})
SettingDetails({ image: "common/images/key.png", title: "Guest\nAccess", isSelected: this.isSelect! })
}
Button("NEXT")
.fontSize(60)
.fontColor(Color.Black)
.width(600)
.height(100)
.backgroundColor(Color.Red)
.margin({ top: 100 })
.onClick(() => {
router.push({ url: 'pages/SensorScreen' })
})
}
.width('100%')
.height('100%').backgroundColor("#F5F5F5")
}
}具体布局
具体布局设计到一些细节的地方,例如间隔,边框,当前组件尺寸设置等一些特殊情况,基本上就是嵌套,一层一层去实现。
代码结构

编码
Index.ets
import { SettingDetails } from './common/SettingDetails';
import router from '@ohos.router';
@Entry
@Component
struct Index {
  @State title: string = '智能家居体验'
  @State message: string = '你现在想要打开那些设置?'
  @State desc: string = '点击所有适用的选项。这将帮助我们\n自定义您的主页'
  @State Number: String[] = ['0', '1', '2', '3', '4']
  @State private isSelect: boolean = true;
  build() {

      Column() {
        Text(this.title)
          .fontSize(80)
          .fontWeight(FontWeight.Bold).onClick(() => {
          router.push({ url: 'pages/SensorScreen' })
        }).margin({ bottom: 60, top: 40 })
        Text(this.message)
          .fontSize(50)
          .fontWeight(FontWeight.Bold).onClick(() => {
          router.push({ url: 'pages/SensorScreen' })
        }).margin({ bottom: 60 })
        Text(this.desc)
          .fontSize(30)
          .textAlign(TextAlign.Center)
          .fontWeight(FontWeight.Bold)
          .onClick(() => {
          })
          .margin({ bottom: 60 })
        Row() {
          SettingDetails({
            image: "common/images/setting.png",
            title: "Maintenance\nRequests",
            isSelected: this.isSelect!
          })
          SettingDetails({ image: "common/images/grain.png", title: "Integrations\n", isSelected: this.isSelect! })

          SettingDetails({
            image: "common/images/ic_highlight.png",
            title: "Light\nControl",
            isSelected: this.isSelect!
          })
        }
        Row() {
          SettingDetails({ image: "common/images/opacity.png", title: "Leak\nDetector", isSelected: this.isSelect! })
          SettingDetails({
            image: "common/images/ac_unit.png",
            title: "Temperature\nControl",
            isSelected: this.isSelect!
          })
          SettingDetails({ image: "common/images/key.png", title: "Guest\nAccess", isSelected: this.isSelect! })
        }
        Button("NEXT")
          .fontSize(60)
          .fontColor(Color.Black)
          .width(600)
          .height(100)
          .backgroundColor(Color.Red)
          .margin({ top: 100 })
          .onClick(() => {
            router.push({ url: 'pages/SensorScreen' })
          })
      }
      .width('100%')
    .height('100%').backgroundColor("#F5F5F5")
  }
}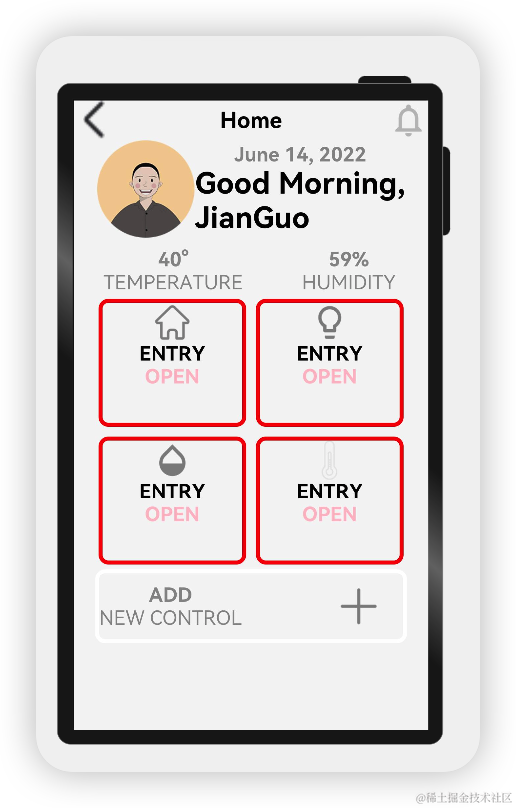
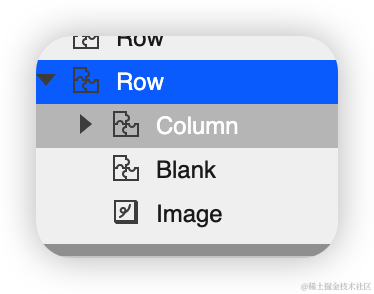
针对这一页:首先是头部
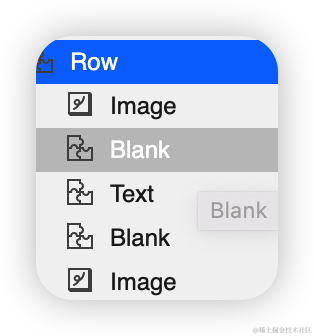
代码如下:
Row() {
Image($r("app.media.back"))
.objectFit(ImageFit.Contain)
.width(80)
.height(80)
.onClick(() => {
router.back()
})
Blank()
Text('Home')
.fontSize(45)
.fontWeight(FontWeight.Bold)
Blank()
Image($r("app.media.notifications_none"))
.objectFit(ImageFit.Contain)
.width(80)
.height(80)
.onClick(() => {
router.back()
})
}
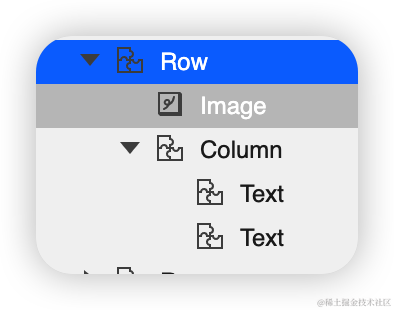
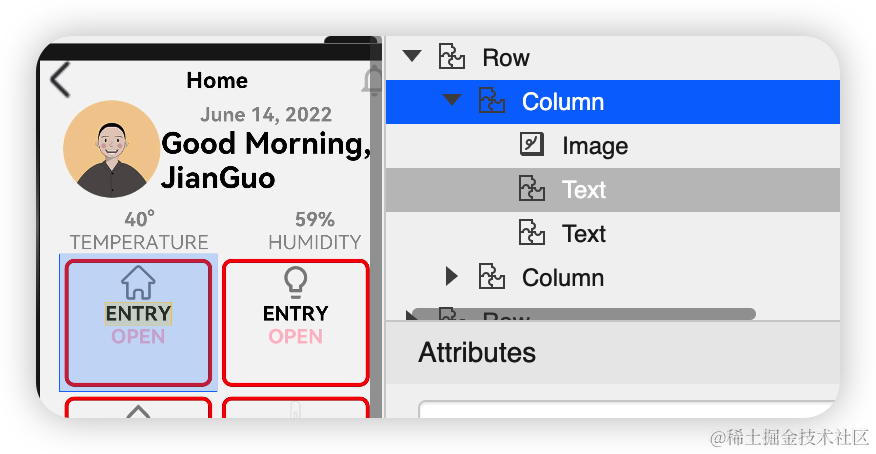
.width('100%')其次是个人信息,包括头像等信息:
代码如下:
 Row() {

        Image($r("app.media.logo"))//头像
          .objectFit(ImageFit.Contain)
          .width(200)
          .height(200)
          .borderRadius(21)
        Column() {
          Text('June 14, 2022')
            .fontSize(40).opacity(0.4)
            .fontWeight(FontWeight.Bold)
          Text('Good Morning,\nJianGuo',)
            .fontSize(60)
            .fontWeight(FontWeight.Bold)
        }
      }
接下来就是温度和湿度
代码如下:
ow({ space: 120 }) {
        Column() {
          Text('40°',)
            .fontSize(40).opacity(0.4)
            .fontWeight(FontWeight.Bold)
          Text('TEMPERATURE',)
            .fontSize(40).opacity(0.4)
        }.margin({ left: 60 })

        Column() {
          Text('59%',)
            .fontSize(40).opacity(0.4)
            .fontWeight(FontWeight.Bold)
          Text('HUMIDITY',)
            .fontSize(40).opacity(0.4)
        }.margin({ right: 60 })
      }.margin({ top: 20 })
SensorScreen.ets
import { HomeDetails } from './common/homedetails';
// second.ets
import router from '@ohos.router';

@Entry
@Component
struct Second {
  @State message: string = 'Hi there'
  @State private isSelect: boolean = true;
  build() {
    Column() {
      Row() {
        Image($r("app.media.back"))
          .objectFit(ImageFit.Contain)
          .width(80)
          .height(80)
          .onClick(() => {
            router.back()
          })
        Blank()
        Text('Home')
          .fontSize(45)
          .fontWeight(FontWeight.Bold)
        Blank()
        Image($r("app.media.notifications_none"))
          .objectFit(ImageFit.Contain)
          .width(80)
          .height(80)
          .onClick(() => {
            router.back()
          })
      }
      .width('100%')
      Row() {

        Image($r("app.media.logo"))
          .objectFit(ImageFit.Contain)
          .width(200)
          .height(200)
          .borderRadius(21)
        Column() {
          Text('June 14, 2022')
            .fontSize(40).opacity(0.4)
            .fontWeight(FontWeight.Bold)
          Text('Good Morning,\nJianGuo',)
            .fontSize(60)
            .fontWeight(FontWeight.Bold)
        }
      }

      Row({ space: 120 }) {
        Column() {
          Text('40°',)
            .fontSize(40).opacity(0.4)
            .fontWeight(FontWeight.Bold)
          Text('TEMPERATURE',)
            .fontSize(40).opacity(0.4)
        }.margin({ left: 60 })

        Column() {
          Text('59%',)
            .fontSize(40).opacity(0.4)
            .fontWeight(FontWeight.Bold)
          Text('HUMIDITY',)
            .fontSize(40).opacity(0.4)
        }.margin({ right: 60 })
      }.margin({ top: 20 })
      Row() {
        HomeDetails({})
        HomeDetails({ image: "common/images/lightbull.png", isSelected: this.isSelect! })
      }
      Row() {
        HomeDetails({ image: "common/images/opacity.png" })
        HomeDetails({ image: "common/images/yytem0.png" })
      }

      Row(){
       Column(){
         Text('ADD',)
           .fontSize(40).opacity(0.4)
           .fontWeight(FontWeight.Bold)
         Text('NEW CONTROL',)
           .fontSize(40).opacity(0.4)
       }
       Blank()
       Image($r("app.media.add"))
         .objectFit(ImageFit.Contain)
         .width(100)
         .height(100)
         .borderRadius(21).margin({right:40})
      }.border({
        color:Color.White,
        width:8,
        radius:20
      }).width("88%").height(150)
    }.width("100%")
    .height('100%').backgroundColor("#F5F5F5")
  }
}
我们可以对下面的这块进行
我们可以对下面的这块进行封装
代码如下
@Entry
@Component
export struct SettingDetails {
  @State  private image: string = "common/images/setting.png"
  @State  private title: string = "Maintenance\nRequests"
  @State private isSelected: boolean = true;
  build() {
  Column() {
    Image(this.image)
      .objectFit(ImageFit.Contain)
      .width(140)
      .height(120)
      .margin(20)
      .border({
        width: 12, color: this.isSelected ? Color.White : Color.Red,
        radius: 20
      })
      .onClick(() => {
        this.isSelected = !this.isSelected;
      })
    Text(this.title).fontSize(32).width(200).textAlign(TextAlign.Center)
  }
}}
我们可以对,下面的这块进行封装

代码如下
@Entry
@Component
export struct SettingDetails {
  @State  private image: string = "common/images/setting.png"
  @State  private title: string = "Maintenance\nRequests"
  @State private isSelected: boolean = true;
  build() {
  Column() {
    Image(this.image)
      .objectFit(ImageFit.Contain)
      .width(140)
      .height(120)
      .margin(20)
      .border({
        width: 12, color: this.isSelected ? Color.White : Color.Red,
        radius: 20
      })
      .onClick(() => {
        this.isSelected = !this.isSelected;
      })
    Text(this.title).fontSize(32).width(200).textAlign(TextAlign.Center)
  }
}}
最后就是底部
代码如下:
 Row(){
       Column(){
         Text('ADD',)
           .fontSize(40).opacity(0.4)
           .fontWeight(FontWeight.Bold)
         Text('NEW CONTROL',)
           .fontSize(40).opacity(0.4)
       }
       Blank()
       Image($r("app.media.add"))
         .objectFit(ImageFit.Contain)
         .width(100)
         .height(100)
         .borderRadius(21).margin({right:40})
      }.border({
        color:Color.White,
        width:8,
        radius:20
      }).width("88%").height(150)
最后呢,很多开发朋友不知道需要学习那些鸿蒙技术?鸿蒙开发岗位需要掌握那些核心技术点?为此鸿蒙的开发学习必须要系统性的进行。
而网上有关鸿蒙的开发资料非常的少,假如你想学好鸿蒙的应用开发与系统底层开发。你可以参考这份资料,少走很多弯路,节省没必要的麻烦。由两位前阿里高级研发工程师联合打造的《鸿蒙NEXT星河版OpenHarmony开发文档》里面内容包含了(ArkTS、ArkUI开发组件、Stage模型、多端部署、分布式应用开发、音频、视频、WebGL、OpenHarmony多媒体技术、Napi组件、OpenHarmony内核、Harmony南向开发、鸿蒙项目实战等等)鸿蒙(Harmony NEXT)技术知识点
如果你是一名Android、Java、前端等等开发人员,想要转入鸿蒙方向发展。可以直接领取这份资料辅助你的学习。下面是鸿蒙开发的学习路线图。
高清完整版请点击→《鸿蒙NEXT星河版开发学习文档》
针对鸿蒙成长路线打造的鸿蒙学习文档。话不多说,我们直接看详细资料鸿蒙(OpenHarmony )学习手册(共计1236页)与鸿蒙(OpenHarmony )开发入门教学视频,帮助大家在技术的道路上更进一步。
《鸿蒙 (OpenHarmony)开发学习视频》
《鸿蒙生态应用开发V2.0白皮书》
《鸿蒙 (OpenHarmony)开发基础到实战手册》
获取这份鸿蒙星河版学习资料,请点击→《鸿蒙NEXT星河版开发学习文档》
OpenHarmony北向、南向开发环境搭建
《鸿蒙开发基础》
ArkTS语言
安装DevEco Studio
运用你的第一个ArkTS应用
ArkUI声明式UI开发
.……
《鸿蒙开发进阶》
Stage模型入门
网络管理
数据管理
电话服务
分布式应用开发
通知与窗口管理
多媒体技术
安全技能
任务管理
WebGL
国际化开发
应用测试
DFX面向未来设计
鸿蒙系统移植和裁剪定制
……
《鸿蒙开发实战》
ArkTS实践
UIAbility应用
网络案例
……
获取这份鸿蒙星河版学习资料,请点击→《鸿蒙NEXT星河版开发学习文档》
总结
鸿蒙—作为国家主力推送的国产操作系统。部分的高校已经取消了安卓课程,从而开设鸿蒙课程;企业纷纷跟进启动了鸿蒙研发。
并且鸿蒙是完全具备无与伦比的机遇和潜力的;预计到年底将有 5,000 款的应用完成原生鸿蒙开发,未来将会支持 50 万款的应用。那么这么多的应用需要开发,也就意味着需要有更多的鸿蒙人才。鸿蒙开发工程师也将会迎来爆发式的增长,学习鸿蒙势在必行!