使用Three.js创建炫酷的3D玻璃质感动态效果
在本教程中,我们将学习如何使用Three.js创建具有七彩反射光效果的3D玻璃质感动态效果。这种效果模拟了阳光照射在玻璃棱镜上产生的彩虹效果,非常适合用于创意网站的背景、产品展示或艺术作品。
这里写目录标题
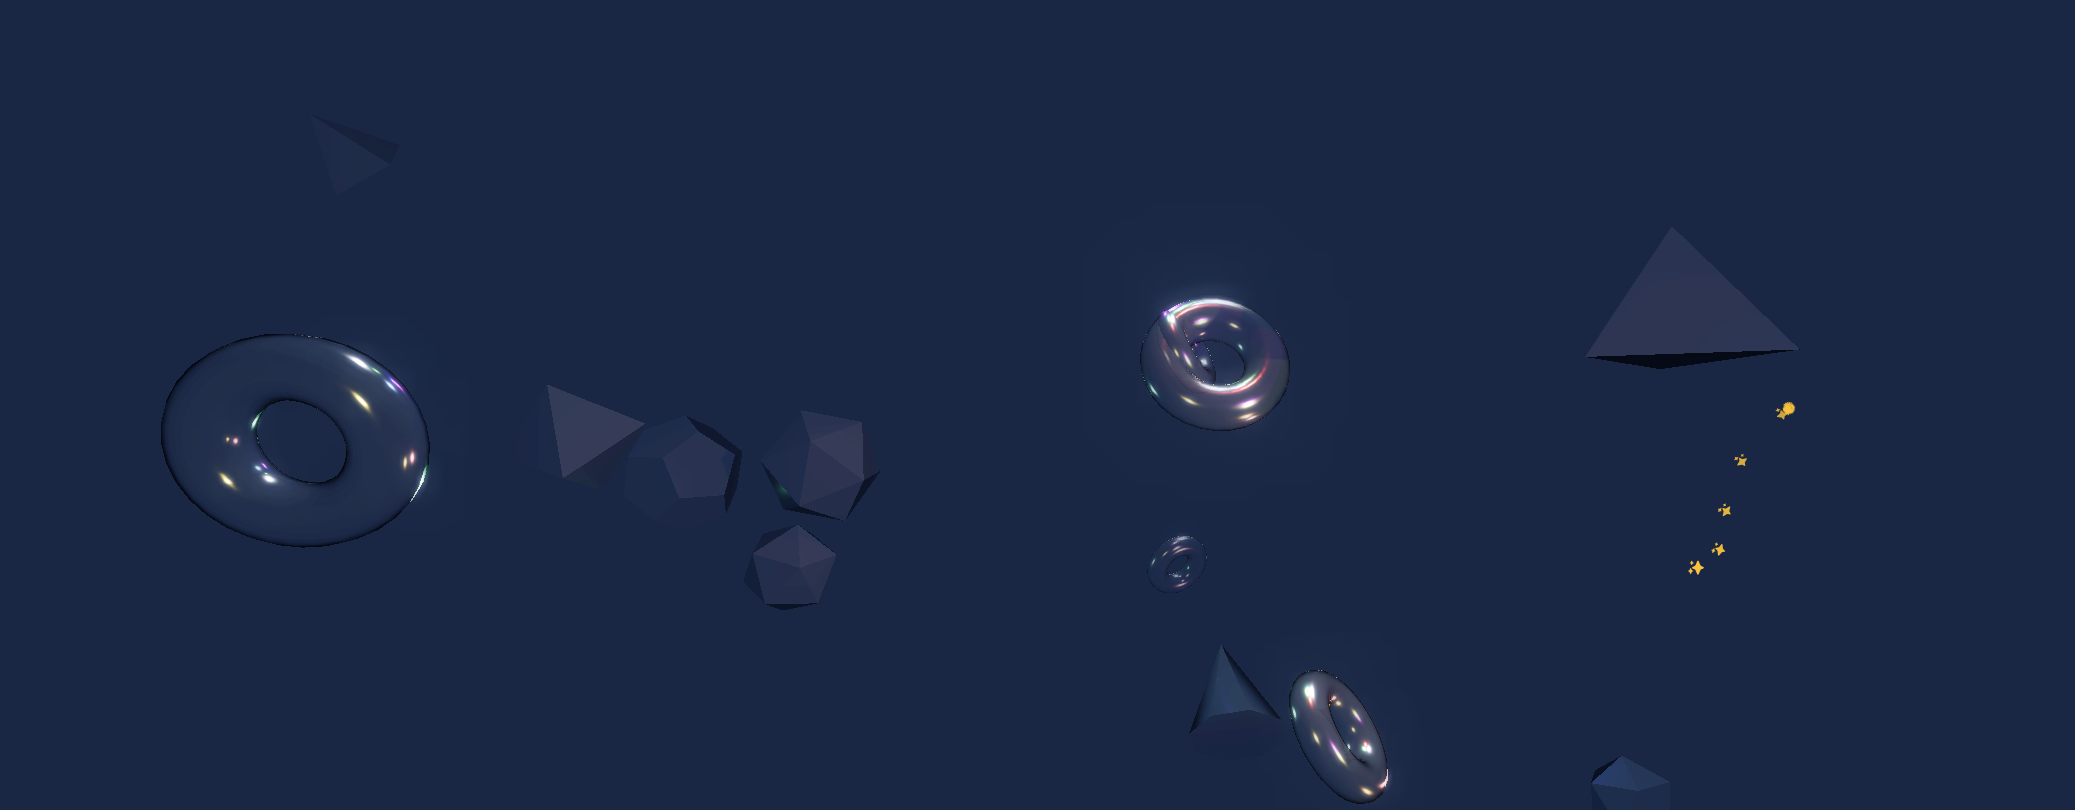
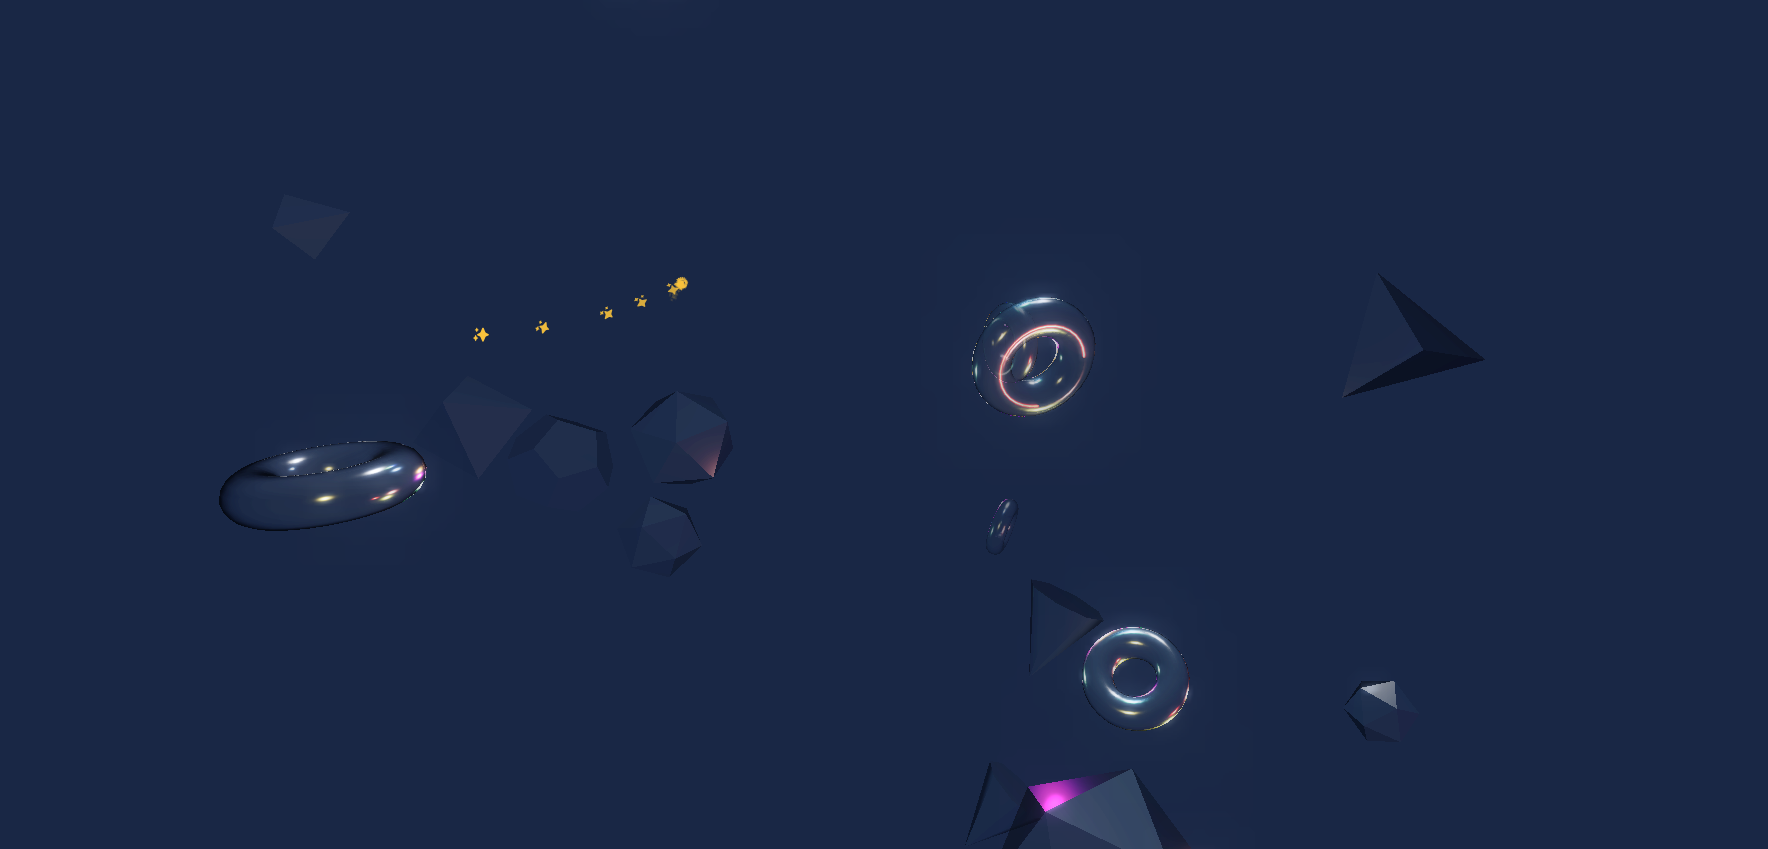
效果预览
我们将创建一个场景,其中包含多个具有玻璃质感的3D几何体,它们会随机旋转和浮动,并反射七彩光源,产生梦幻般的视觉效果。
技术要点
- Three.js基础场景设置
- 玻璃材质的物理特性模拟
- 动态光源和七彩反射
- 后期处理效果
- 交互控制
前置知识
- 基本的HTML、CSS和JavaScript知识
- Three.js的基础概念(场景、相机、渲染器等)
步骤一:创建基本HTML结构
首先,我们需要创建一个基本的HTML文件,引入Three.js库和相关依赖:
<!DOCTYPE html>
<html lang="zh-CN">
<head>
    <meta charset="UTF-8">
    <meta name="viewport" content="width=device-width, initial-scale=1.0">
    <title>3D玻璃质感动态效果</title>
    <link rel="stylesheet" href="style.css">
</head>
<body>
    <div id="container"></div>
    <div class="info">
        <h1>3D玻璃质感</h1>
        <p>高品质动态效果展示</p>
    </div>

    <script src="https://cdn.jsdelivr.net/npm/three@0.132.2/build/three.min.js"></script>
    <script src="https://cdn.jsdelivr.net/npm/three@0.132.2/examples/js/controls/OrbitControls.js"></script>
    <script src="https://cdn.jsdelivr.net/npm/three@0.132.2/examples/js/loaders/GLTFLoader.js"></script>
    <script src="https://cdn.jsdelivr.net/npm/three@0.132.2/examples/js/postprocessing/EffectComposer.js"></script>
    <script src="https://cdn.jsdelivr.net/npm/three@0.132.2/examples/js/postprocessing/RenderPass.js"></script>
    <script src="https://cdn.jsdelivr.net/npm/three@0.132.2/examples/js/postprocessing/UnrealBloomPass.js"></script>
    <script src="https://cdn.jsdelivr.net/npm/three@0.132.2/examples/js/shaders/CopyShader.js"></script>
    <script src="https://cdn.jsdelivr.net/npm/three@0.132.2/examples/js/shaders/LuminosityHighPassShader.js"></script>
    <script src="https://cdn.jsdelivr.net/npm/three@0.132.2/examples/js/postprocessing/ShaderPass.js"></script>
    <script src="main.js"></script>
</body>
</html>
步骤二:添加CSS样式
创建一个style.css文件,设置页面布局和效果样式:
* {
    margin: 0;
    padding: 0;
    box-sizing: border-box;
}

body {
    font-family: 'Arial', sans-serif;
    background: linear-gradient(135deg, #1a237e, #0d47a1, #1565c0, #0288d1);
    color: #fff;
    overflow: hidden;
}

#container {
    position: fixed;
    top: 0;
    left: 0;
    width: 100%;
    height: 100%;
    z-index: 1;
}

.info {
    position: absolute;
    bottom: 30px;
    left: 30px;
    z-index: 2;
    color: rgba(255, 255, 255, 0.9);
    text-shadow: 0 0 15px rgba(255, 255, 255, 0.7);
    backdrop-filter: blur(8px);
    padding: 25px;
    border-radius: 20px;
    background: rgba(255, 255, 255, 0.15);
    border: 1px solid rgba(255, 255, 255, 0.3);
    box-shadow: 0 8px 32px rgba(31, 38, 135, 0.2);
}

.info h1 {
    font-size: 2.5rem;
    margin-bottom: 10px;
    font-weight: 300;
    letter-spacing: 1px;
}

.info p {
    font-size: 1.1rem;
    opacity: 0.9;
}
步骤三:初始化Three.js场景
在main.js文件中,我们首先初始化Three.js场景、相机和渲染器:
// 初始化场景、相机和渲染器
let scene, camera, renderer, composer;
let geometry, material, glassMesh;
let clock = new THREE.Clock();
let mouseX = 0, mouseY = 0;
let windowHalfX = window.innerWidth / 2;
let windowHalfY = window.innerHeight / 2;
let glassPrisms = [];
let rainbowLights = [];

// 初始化场景
init();

// 动画循环
animate();

function init() {
    // 创建场景
    scene = new THREE.Scene();
    scene.background = new THREE.Color(0x111827);
    scene.fog = new THREE.Fog(0x111827, 2, 25);

    // 创建相机
    camera = new THREE.PerspectiveCamera(75, window.innerWidth / window.innerHeight, 0.1, 1000);
    camera.position.z = 8;

    // 创建渲染器
    renderer = new THREE.WebGLRenderer({ antialias: true, alpha: true });
    renderer.setSize(window.innerWidth, window.innerHeight);
    renderer.setPixelRatio(window.devicePixelRatio);
    renderer.shadowMap.enabled = true;
    renderer.shadowMap.type = THREE.PCFSoftShadowMap;
    renderer.toneMapping = THREE.ACESFilmicToneMapping;
    renderer.toneMappingExposure = 1.5;
    document.getElementById('container').appendChild(renderer.domElement);

    // 添加事件监听
    window.addEventListener('resize', onWindowResize);
    document.addEventListener('mousemove', onDocumentMouseMove);
}
步骤四:添加光源
接下来,我们需要添加多种光源,包括环境光、点光源和模拟太阳光的定向光源:
// 在init函数中添加以下代码

// 添加环境光
const ambientLight = new THREE.AmbientLight(0xffffff, 0.8);
scene.add(ambientLight);

// 添加点光源
const pointLight1 = new THREE.PointLight(0x4285F4, 2, 20);
pointLight1.position.set(5, 5, 5);
scene.add(pointLight1);

const pointLight2 = new THREE.PointLight(0xEA4335, 2, 20);
pointLight2.position.set(-5, -5, 5);
scene.add(pointLight2);

const pointLight3 = new THREE.PointLight(0xFBBC05, 2, 20);
pointLight3.position.set(-5, 5, -5);
scene.add(pointLight3);

const pointLight4 = new THREE.PointLight(0x34A853, 2, 20);
pointLight4.position.set(5, -5, -5);
scene.add(pointLight4);

// 添加太阳光源 - 模拟强烈的白光
const sunLight = new THREE.DirectionalLight(0xffffff, 3);
sunLight.position.set(15, 15, 15);
scene.add(sunLight);
步骤五:创建七彩光源
为了实现彩虹效果,我们需要创建七彩光源:
// 添加七彩光源函数
function addRainbowLights() {
    // 彩虹颜色数组
    const rainbowColors = [
        0xFF0000, // 红
        0xFF7F00, // 橙
        0xFFFF00, // 黄
        0x00FF00, // 绿
        0x0000FF, // 蓝
        0x4B0082, // 靛
        0x9400D3  // 紫
    ];

    // 创建七彩光源
    for (let i = 0; i < rainbowColors.length; i++) {
        const angle = (i / rainbowColors.length) * Math.PI * 2;
        const radius = 12;

        // 创建彩色聚光灯
        const spotLight = new THREE.SpotLight(
            rainbowColors[i],
            5,           // 强度
            30,          // 距离
            Math.PI / 8, // 角度
            0.5,         // 半影
            1.5          // 衰减
        );

        // 设置位置,围绕一个圆形分布
        spotLight.position.set(
            Math.cos(angle) * radius,
            Math.sin(angle) * radius,
            5
        );

        // 设置光照方向朝向中心
        spotLight.target.position.set(0, 0, 0);
        scene.add(spotLight.target);

        // 启用阴影
        spotLight.castShadow = true;
        spotLight.shadow.mapSize.width = 1024;
        spotLight.shadow.mapSize.height = 1024;

        // 添加到场景和数组
        scene.add(spotLight);
        rainbowLights.push({
            light: spotLight,
            angle: angle,
            radius: radius,
            speed: 0.005 + Math.random() * 0.01 // 不同的旋转速度
        });
    }
}

// 在init函数中调用
addRainbowLights();
步骤六:创建玻璃质感对象
现在,我们需要创建具有玻璃质感的3D几何体:
function createGlassPrisms() {
    // 创建多个不同形状的玻璃棱镜
    const shapes = [
        new THREE.IcosahedronGeometry(1, 0), // 二十面体
        new THREE.OctahedronGeometry(1, 0),  // 八面体
        new THREE.TetrahedronGeometry(1, 0), // 四面体
        new THREE.DodecahedronGeometry(1, 0), // 十二面体
        new THREE.TorusGeometry(0.7, 0.3, 16, 32), // 环状体
        new THREE.ConeGeometry(0.7, 1.5, 8) // 圆锥体
    ];

    // 创建玻璃材质
    const glassMaterial = new THREE.MeshPhysicalMaterial({
        color: 0xffffff,
        metalness: 0.1,
        roughness: 0,
        transmission: 0.99, // 透明度
        thickness: 0.2,     // 厚度
        envMapIntensity: 2.0, // 环境贴图强度
        clearcoat: 1.5,     // 清漆层
        clearcoatRoughness: 0.05, // 清漆层粗糙度
        ior: 2.33, // 折射率,接近钻石
        transparent: true,  // 启用透明
        opacity: 0.6,       // 不透明度
        specularIntensity: 1.0, // 镜面反射强度
        specularColor: 0xffffff // 镜面反射颜色
    });

    // 创建环境贴图
    const cubeRenderTarget = new THREE.WebGLCubeRenderTarget(512);
    cubeRenderTarget.texture.type = THREE.HalfFloatType;
    const cubeCamera = new THREE.CubeCamera(0.1, 100, cubeRenderTarget);
    scene.add(cubeCamera);
    glassMaterial.envMap = cubeRenderTarget.texture;

    // 创建多个棱镜并随机放置
    for (let i = 0; i < 20; i++) {
        const randomShape = shapes[Math.floor(Math.random() * shapes.length)];
        const prism = new THREE.Mesh(randomShape, glassMaterial.clone());

        // 随机缩放
        const scale = Math.random() * 0.6 + 0.4;
        prism.scale.set(scale, scale, scale);

        // 随机位置
        prism.position.x = (Math.random() - 0.5) * 12;
        prism.position.y = (Math.random() - 0.5) * 12;
        prism.position.z = (Math.random() - 0.5) * 12;

        // 随机旋转
        prism.rotation.x = Math.random() * Math.PI;
        prism.rotation.y = Math.random() * Math.PI;
        prism.rotation.z = Math.random() * Math.PI;

        // 启用阴影
        prism.castShadow = true;
        prism.receiveShadow = true;

        // 添加到场景和数组
        scene.add(prism);
        glassPrisms.push({
            mesh: prism,
            rotationSpeed: {
                x: (Math.random() - 0.5) * 0.01,
                y: (Math.random() - 0.5) * 0.01,
                z: (Math.random() - 0.5) * 0.01
            },
            floatSpeed: (Math.random() - 0.5) * 0.005
        });
    }

    // 更新环境贴图
    updateEnvironmentMap = () => {
        cubeCamera.update(renderer, scene);
    };
}

// 在init函数中调用
createGlassPrisms();
步骤七:添加后期处理效果
为了增强视觉效果,我们添加辉光后期处理效果:
function addBloomEffect() {
    // 创建后期处理效果
    composer = new THREE.EffectComposer(renderer);
    const renderPass = new THREE.RenderPass(scene, camera);
    composer.addPass(renderPass);

    // 辉光效果
    const bloomPass = new THREE.UnrealBloomPass(
        new THREE.Vector2(window.innerWidth, window.innerHeight),
        1.5, // 辉光强度
        0.5, // 半径
        0.3  // 阈值,越低越多物体发光
    );
    composer.addPass(bloomPass);
}

// 在init函数中调用
addBloomEffect();
步骤八:添加交互控制
添加轨道控制器,使用户可以旋转和缩放场景:
// 在init函数中添加
// 添加交互控制
const controls = new THREE.OrbitControls(camera, renderer.domElement);
controls.enableDamping = true;
controls.dampingFactor = 0.05;
controls.enableZoom = true;
controls.autoRotate = true;
controls.autoRotateSpeed = 0.5;
步骤九:实现动画效果
最后,我们需要实现动画效果,包括棱镜旋转、浮动以及光源移动:
function onWindowResize() {
    windowHalfX = window.innerWidth / 2;
    windowHalfY = window.innerHeight / 2;
    camera.aspect = window.innerWidth / window.innerHeight;
    camera.updateProjectionMatrix();
    renderer.setSize(window.innerWidth, window.innerHeight);
    composer.setSize(window.innerWidth, window.innerHeight);
}

function onDocumentMouseMove(event) {
    mouseX = (event.clientX - windowHalfX) * 0.0005;
    mouseY = (event.clientY - windowHalfY) * 0.0005;
}

function animate() {
    requestAnimationFrame(animate);
    render();
}

function render() {
    const delta = clock.getDelta();
    const time = clock.getElapsedTime();

    // 更新每个棱镜的位置和旋转
    glassPrisms.forEach(prism => {
        // 旋转
        prism.mesh.rotation.x += prism.rotationSpeed.x;
        prism.mesh.rotation.y += prism.rotationSpeed.y;
        prism.mesh.rotation.z += prism.rotationSpeed.z;

        // 浮动效果
        prism.mesh.position.y += Math.sin(time * 0.5) * prism.floatSpeed;

        // 添加一点鼠标互动
        prism.mesh.rotation.y += mouseX * 0.5;
        prism.mesh.rotation.x += mouseY * 0.5;
    });

    // 更新彩虹光源位置
    rainbowLights.forEach(light => {
        // 让光源围绕中心旋转
        light.angle += light.speed;
        light.light.position.x = Math.cos(light.angle) * light.radius;
        light.light.position.y = Math.sin(light.angle) * light.radius;

        // 脉动效果
        light.light.intensity = 5 + Math.sin(time * 2 + light.angle) * 2;
    });

    // 更新环境贴图
    if (typeof updateEnvironmentMap === 'function' && time % 0.5 < 0.05) {
        updateEnvironmentMap();
    }

    // 使用后期处理渲染器
    composer.render();
}
效果优化技巧
玻璃材质参数调整:
- 增加
transmission值可以提高透明度 - 增加
ior值可以增强折射效果 - 减小
thickness值可以使玻璃看起来更薄更通透
- 增加
光源效果增强:
- 使用不同颜色的光源可以创造更丰富的视觉效果
- 让光源动态移动可以产生更生动的反射效果
后期处理调整:
- 调整辉光效果的强度和阈值可以改变整体氛围
- 考虑添加其他后期处理效果,如色彩校正或景深效果
常见问题解决
性能问题:
- 减少棱镜数量
- 降低环境贴图分辨率
- 减少阴影质量
兼容性问题:
- 检查浏览器是否支持WebGL
- 为不支持WebGL的浏览器提供备用内容
扩展和创意
添加交互:
- 点击棱镜时改变其颜色或大小
- 添加音频可视化效果
集成到实际项目:
- 作为网站背景
- 作为产品展示的一部分
- 作为艺术装置的数字组件
总结
通过以上步骤,我们成功创建了一个具有七彩反射光效果的3D玻璃质感动态效果。这种效果不仅视觉上令人印象深刻,而且可以根据需要进行自定义和扩展。
希望本教程对你有所帮助!如果你有任何问题或想法,欢迎分享和讨论。