前言
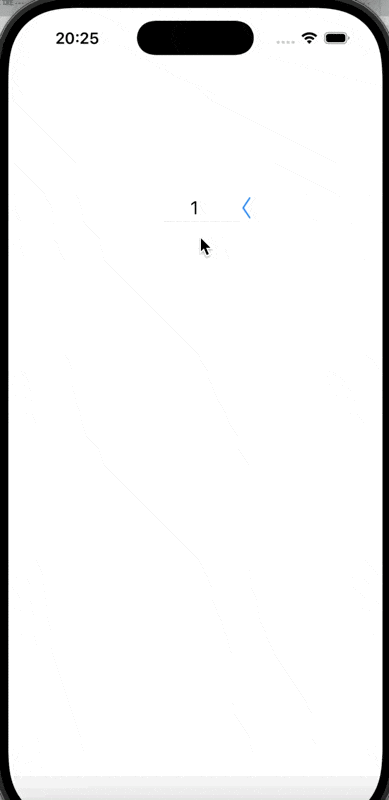
折叠cell的实现效果即为一个可点击的cell格,未点击时显示的只有最上面的那一格,可以点击后将点击的替换最上面的那格并把这个单元格恢复为只有一格的状态,主要的步骤即为在点击时设置按钮函数来调整cell的高度
代码示例
按钮函数
在点击这里,我主要设置了一个BOOL类型的实例变量,来记录每次的点击的状态,点击函数:
- (void)pressUp: (UIButton*)btn {
    _isFold = !_isFold;
  //这里必须进行状态的改变,保证两种点击的状态可以进行交换
    if (_isFold == NO) {
        [btn setImage: [UIImage imageNamed: @"left.png"] forState: UIControlStateNormal];
        _tableView.frame = CGRectMake(150, 200, 100, 30);
    } else {
        [btn setImage: [UIImage imageNamed: @"bottom.png"] forState: UIControlStateNormal];
        _tableView.frame = CGRectMake(150, 200, 100, 150);
    }
}
点击单元格的函数
点击时我们要记录点击时选择的单元格的字符,将这个字符插入到数组的第一个位置(其他的就相当被挤至下一个),之后再更新单元格的状态,并恢复单元格的点击前的状态:
- (void)tableView:(UITableView *)tableView didSelectRowAtIndexPath:(NSIndexPath *)indexPath {
  //获取选择字符
    NSString *selected = _dataArray[indexPath.section];
  //从整个数组移除所获取字符并插入到第一个位置
  [_dataArray removeObjectAtIndex: indexPath.section];
    [_dataArray insertObject: selected atIndex:0];
  //重新加载更新单元格
    [_tableView reloadData];
    [self pressUp: _fold];
}
完整代码
- (void)viewDidLoad {
    [super viewDidLoad];
    // Do any additional setup after loading the view.
    _tableView = [[UITableView alloc] initWithFrame: CGRectMake(150, 200, 100, 150) style: UITableViewStylePlain];
    _tableView.delegate = self;
    _tableView.dataSource = self;
    _dataArray = [NSMutableArray arrayWithObjects: @"1", @"2", @"3", @"4", @"5", nil];
    [self.view addSubview: _tableView];
    _fold = [UIButton buttonWithType: UIButtonTypeSystem];
    _fold.frame = CGRectMake(150 + 100, 200, 20, 30);
    _fold.backgroundColor = [UIColor whiteColor];
    [_fold setImage: [UIImage imageNamed: @"left.png"] forState: UIControlStateNormal];
    [_fold addTarget: self action: @selector(pressUp:) forControlEvents: UIControlEventTouchUpInside];
    _isFold = NO;
    [self.view addSubview: _fold];
    if (_isFold == NO) {
        _tableView.frame = CGRectMake(150, 200, 100, 30);
    }
}
- (void)tableView:(UITableView *)tableView didSelectRowAtIndexPath:(NSIndexPath *)indexPath {
    NSString *selected = _dataArray[indexPath.section];
    [_dataArray removeObjectAtIndex: indexPath.section];
    [_dataArray insertObject: selected atIndex:0];
    [_tableView reloadData];
    [self pressUp: _fold];
}
- (void)pressUp: (UIButton*)btn {
    _isFold = !_isFold;
    if (_isFold == NO) {
        [btn setImage: [UIImage imageNamed: @"left.png"] forState: UIControlStateNormal];
        _tableView.frame = CGRectMake(150, 200, 100, 30);
    } else {
        [btn setImage: [UIImage imageNamed: @"bottom.png"] forState: UIControlStateNormal];
        _tableView.frame = CGRectMake(150, 200, 100, 150);
    }
}
- (UITableViewCell *)tableView:(UITableView *)tableView cellForRowAtIndexPath:(NSIndexPath *)indexPath {
    NSString *strID = @"ID";
    UITableViewCell *cell = [_tableView dequeueReusableCellWithIdentifier: strID];
    if (cell == nil) {
        cell = [[UITableViewCell alloc] initWithStyle: UITableViewCellStyleDefault reuseIdentifier: strID];
    }
    cell.textLabel.text = [_dataArray objectAtIndex: indexPath.section];
    cell.textLabel.font = [UIFont systemFontOfSize: 20];
    cell.textLabel.textAlignment = NSTextAlignmentCenter;
    return cell;
}
- (NSInteger)tableView:(UITableView *)tableView numberOfRowsInSection:(NSInteger)section {
    return 1;
}
- (NSInteger)numberOfSectionsInTableView:(UITableView *)tableView {
    return 5;
}
- (CGFloat)tableView:(UITableView *)tableView heightForRowAtIndexPath:(NSIndexPath *)indexPath {
    return 30;
}
实现效果