今天来带大家写一个小练习,我们使用Spring写一下验证码的小程序:
还是我们熟悉的步骤,需求分析很定义接口文档,前端还是直接模版王,哈哈,一会直接给大家,但是ajax还是需要我们自己写的;
1,需求分析
我们后端需要提供1的服务有两个
1,生成验证码返回给前端
2,对于前端发来的验证码进行校验
2,接口文档
生成验证码的:
1,请求
/Captcha/get
2,参数
无,需要设置Session
3,响应
返回/image/ipeg
校验验证码的:
1,请求
/Captcha/check
2,参数
String captcha
3,响应
boolean 类型
3,代码实现
我们先来准备工作,我们这次实现验证码要使用一个工具Hutool,我们进去官网,直接搜验证码,就有实现的功能了,我们直接拿来用,我们先导入lombok和hutool的依赖,
        </dependency>
        <!-- https://mvnrepository.com/artifact/org.projectlombok/lombok -->
        <dependency>
            <groupId>org.projectlombok</groupId>
            <artifactId>lombok</artifactId>
            <version>1.18.30</version>
        </dependency>

        <dependency>
            <groupId>cn.hutool</groupId>
            <artifactId>hutool-all</artifactId>
            <version>5.8.38</version>
        </dependency>
放pom文件中
把前端代码放到这里,
<html lang="en">
<head>
<meta charset="utf-8">
<title>验证码</title>
<style>
#inputCaptcha {
height: 30px;
vertical-align: middle;
}
#verificationCodeImg{
vertical-align: middle;
}
#checkCaptcha{
height: 40px;
width: 100px;
}
</style>
</head>
<body>
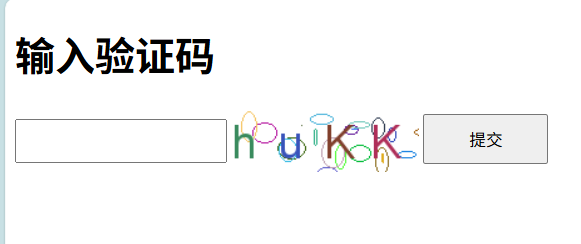
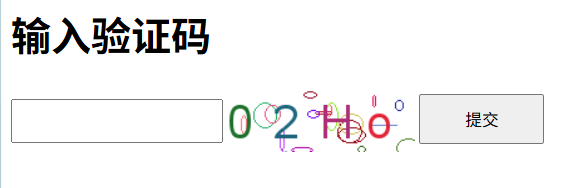
<h1>输入验证码</h1>
<div id="confirm">
<input type="text" name="inputCaptcha" id="inputCaptcha">
<img id="verificationCodeImg" src="/admin/captcha" style="cursor: pointer;" title="看不清?换一张" />
<input type="button" value="提交" id="checkCaptcha">
</div>
<script src="https://cdn.bootcdn.net/ajax/libs/jquery/3.6.4/jquery.min.js"></script>
<script>
$("#verificationCodeImg").click(function(){
$(this).hide().attr('src', '/admin/captcha?dt=' + new Date().getTime()).fadeIn();
});
$("#checkCaptcha").click(function () {
alert("验证码校验");
});
</script>
</body>
</html><html lang="en">
<head>
<meta charset="UTF-8">
<meta name="viewport" content="width=device-width, initial-scale=1.0">
<title>验证成功页</title>
</head>
<body>
<h1>验证成功</h1>
</body>
</html>先来model层的;
@ConfigurationProperties(prefix = "captcha")
@Configuration
@Data
public class CaptchaProperties {
    private Integer width;
    private Integer height;
    private Session session;
    @Data
    public static class Session{
        private String key;
        private String data;
    }
}
我们把验证码的参数都写成配置文件了,这样顺便也能带上Session,而且在配置文件中修改的好处不必多说了吧,还记得这些注解吗,@data是lombok的那些重写的方法都帮我们写了,@configuration就是把这个类交给Spring管理,@configurationProperties(prefox="captcha")就是根据这个配置文件由Spring来创建这个对象;为啥Session要使用静态的呢因为要使用Session呀,这个类都没有交个Spring管理,我们拿不到它但是静态的话就能拿到了;
来上yml配置文件:
captcha:
  width: 150
  height: 50
  session:
    key: capkey
    data: capdata
来第一个接口,生成验证码:
@RequestMapping("/Captcha")
@RestController
public class CaptchaController {
    //为了打印日志
    public static final Logger logger = LoggerFactory.getLogger(CaptchaController.class);
    @Autowired
    private CaptchaProperties captchaProperties;

    @RequestMapping("/get")
    public void get(HttpSession session, HttpServletResponse response) throws IOException {
        //设置验证码生成的时间
        Long start = System.currentTimeMillis();
        //设置响应报文的正文类型是图片
        response.setContentType("image/jpeg");
        //目的是为了让浏览器禁止缓存,让每次获取到的都是新的验证码
        response.setHeader("pragma","No-cache");
        //生成验证码,圆形验证码,从我们注入的对象中拿配置文件,后两个参数是验证码字符数和干扰数
        CircleCaptcha captcha = CaptchaUtil.createCircleCaptcha(captchaProperties.getWidth(),
                captchaProperties.getHeight(), 4, 20);
        //获取验证码的数字用来放到Session中,来check时候检验发来的和我们服务器发过去的验证码是否是一样的;
        String code = captcha.getCode();
        //设置我们发给客户端的验证码是啥
        session.setAttribute(captchaProperties.getSession().getKey(),code);
        //设置发送的时间,来实现验证码有效时间
        session.setAttribute(captchaProperties.getSession().getData(),new Date());
        //把验证码输入到浏览器上
        captcha.write(response.getOutputStream());
        //设置验证码结束生成的时间,其实也没必要但是我们可以看看我们这个验证码用了多长时间:
        Long end = System.currentTimeMillis();
        logger.info("验证码生成时间"+(end-start)+"ms");
    }
}
我把每一步都详细解释了;
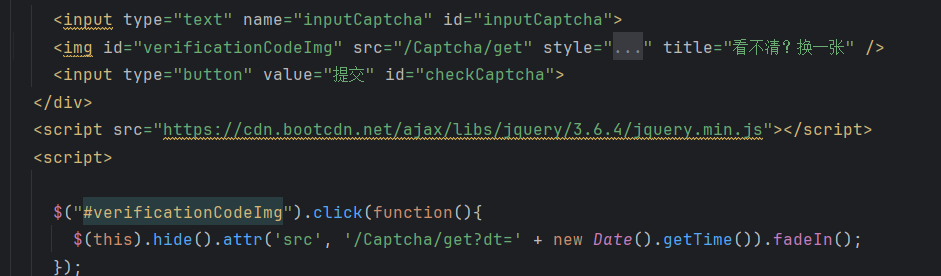
要把这个img标签下的和$this下面的/路径改成我们后端得到验证码方法的路径;
这样就ok了,可以试试,接下来我们来实现验证码的校验功能:
来Check接口:
    @RequestMapping("/check")
    public boolean check(String captcha,HttpSession session){
        if(captcha==null) return false;
        //获取我们之前给用户发的验证码,我们已经存储到Session中了,我们只需要再和用户输入的进行比对就行了
        String code = (String) session.getAttribute(captchaProperties.getSession().getKey());
        //用来限制验证码的输入时间
        Date date = (Date) session.getAttribute(captchaProperties.getSession().getData());
        if(date!=null && captcha.equalsIgnoreCase(code) && System.currentTimeMillis()-date.getTime()<VALID_TIME){
            return true;
        }
        return false;
    }
接下来完善前端的ajax,
$("#checkCaptcha").click(function () {
$.ajax({
type: "post",
url: "Captcha/check",
data: {
captcha: $("#inputCaptcha").val()
},
success: function (result) {
if(result==true){
location.href="success.html"
}else {
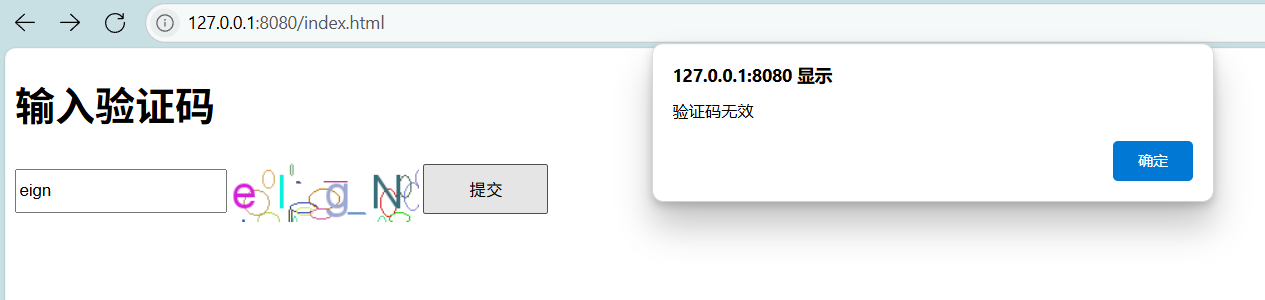
alert("验证码无效")
}
}
})
});来测试:注意ajax要使用Post
输入正确的

输入错误的

下面等超时再输入