RA4M2开发IOT.4--MEMS读取数据
概述
本文围绕瑞萨 RA4M2 单片机对 ST LSM6DSV16X 六轴 IMU 的完整读取链路,梳理从硬件连线到上层展示/上报的关键步骤与设计要点。
最近在瑞萨RA的课程,需要样片的可以加qun申请:925643491。
视频教学
https://www.bilibili.com/video/BV1STTHzkE2e
RA4M2开发IOT(4)----MEMS读取数据
样品申请
https://www.wjx.top/vm/rCrkUrz.aspx
硬件准备
首先需要准备一个开发板,这里我准备的是自己绘制的开发板,需要的可以进行申请。
主控为R7FA4M2AD3CFL#AA0

参考程序
https://github.com/CoreMaker-lab/RA4M2_IOT
https://gitee.com/CoreMaker/RA4M2_IOT
IOT板

MEMS传感小板原理图如下所示。

本文使用的转接板原理图如下所示。

其中MEMS接入RA4M2端口如下所示。

IIC通信模式
在使用IIC通讯模式的时候,SA0是用来控制IIC的地址位的。
对于IIC的地址,可以通过SDO/SA0引脚修改。SDO/SA0引脚可以用来修改设备地址的最低有效位。如果SDO/SA0引脚连接到电源电压,LSb(最低有效位)为’1’(地址1101011b)0x6B;否则,如果SDO/SA0引脚连接到地线,LSb的值为’0’(地址1101010b)0x6A。

IIC接口如下所示。
主要使用的管脚为CS、SCL、SDA、SA0。

速率
该模块支持的速度为普通模式(100k)和快速模式(400k)以及快速模式+(1M)。

IIC配置
IIC接口为P301和P302。

点击Stacks->New Stack->Connectivity -> I2C Master(r_sci_iic)。

设置IIC的配置,需要注意从机的地址,这里从机地址为0x6B。

选择对应的IIC管脚。

R_SCI_I2C_Open()函数原型

R_SCI_I2C_Open()函数为执行IIC初始化,开启配置如下所示。
    /* Initialize the I2C module */
    err = R_SCI_I2C_Open(&g_i2c2_ctrl, &g_i2c2_cfg);
    /* Handle any errors. This function should be defined by the user. */
    assert(FSP_SUCCESS == err);

R_SCI_I2C_Write()函数原型

R_SCI_I2C_Write()函数是向IIC设备中写入数据,写入格式如下所示。
err = R_SCI_I2C_Write(&g_i2c2_ctrl, ®, 1, true);
assert(FSP_SUCCESS == err);
R_SCI_I2C_Read()函数原型

R_SCI_I2C_Read()函数是向IIC设备中读取数据,读取格式如下所示。
    /* Read data from I2C slave */
    err = R_SCI_I2C_Read(&g_i2c2_ctrl, data, len+1, true);
    assert(FSP_SUCCESS == err);
主程序下面添加读写函数。
/*
* @brief Write generic device register (platform dependent)
*
* @param handle customizable argument. In this examples is used in
* order to select the correct sensor bus handler.
* @param reg register to write
* @param bufp pointer to data to write in register reg
* @param len number of consecutive register to write
*
*/
static int32_t platform_write(void *handle, uint8_t reg, const uint8_t *bufp,uint16_t len)
{
// 创建一个足够大的缓冲区来包含寄存器地址和数据
uint8_t data[len + 1];
data[0] = reg; // 将寄存器地址放在数据的开始
memcpy(&data[1], bufp, len); // 复制数据到缓冲区
err = R_SCI_I2C_Write(&g_i2c2_ctrl, data, len+1, true);
assert(FSP_SUCCESS == err);
/* Since there is nothing else to do, block until Callback triggers*/
//while ((I2C_MASTER_EVENT_TX_COMPLETE != i2c_event) && timeout_ms)
while ((I2C_MASTER_EVENT_TX_COMPLETE != i2c_event) && timeout_ms>0)
{
R_BSP_SoftwareDelay(1U, BSP_DELAY_UNITS_MICROSECONDS);
timeout_ms--;
}
if (I2C_MASTER_EVENT_ABORTED == i2c_event)
{
__BKPT(0);
}
/* Read data back from the I2C slave */
i2c_event = I2C_MASTER_EVENT_ABORTED;
timeout_ms = 100000;
return 0;
}
/*
* @brief Read generic device register (platform dependent)
*
* @param handle customizable argument. In this examples is used in
* order to select the correct sensor bus handler.
* @param reg register to read
* @param bufp pointer to buffer that store the data read
* @param len number of consecutive register to read
*
*/
static int32_t platform_read(void *handle, uint8_t reg, uint8_t *bufp,uint16_t len)
{
err = R_SCI_I2C_Write(&g_i2c2_ctrl, ®, 1, true);
assert(FSP_SUCCESS == err);
/* Since there is nothing else to do, block until Callback triggers*/
//while ((I2C_MASTER_EVENT_TX_COMPLETE != i2c_event) && timeout_ms)
while ((I2C_MASTER_EVENT_TX_COMPLETE != i2c_event) && timeout_ms>0)
{
R_BSP_SoftwareDelay(1U, BSP_DELAY_UNITS_MICROSECONDS);
timeout_ms--;
}
if (I2C_MASTER_EVENT_ABORTED == i2c_event)
{
__BKPT(0);
}
/* Read data back from the I2C slave */
i2c_event = I2C_MASTER_EVENT_ABORTED;
timeout_ms = 100000;
/* Read data from I2C slave */
err = R_SCI_I2C_Read(&g_i2c2_ctrl, bufp, len, false);
assert(FSP_SUCCESS == err);
while ((I2C_MASTER_EVENT_RX_COMPLETE != i2c_event) && timeout_ms)
{
R_BSP_SoftwareDelay(1U, BSP_DELAY_UNITS_MILLISECONDS);
timeout_ms--;
}
if (I2C_MASTER_EVENT_ABORTED == i2c_event)
{
__BKPT(0);
}
i2c_event = I2C_MASTER_EVENT_ABORTED;
timeout_ms = 100000;
return 0;
}
/*
* @brief platform specific delay (platform dependent)
*
* @param ms delay in ms
*
*/
static void platform_delay(uint32_t ms)
{
R_BSP_SoftwareDelay(ms, BSP_DELAY_UNITS_MILLISECONDS);
}

sci_i2c_master_callback()回调函数
对于数据是否发送完毕,可以查看是否获取到I2C_MASTER_EVENT_TX_COMPLETE字段。

/* Callback function */
i2c_master_event_t i2c_event = I2C_MASTER_EVENT_ABORTED;
uint32_t  timeout_ms = 100000;
void sci_i2c_master_callback(i2c_master_callback_args_t *p_args)
{
    i2c_event = I2C_MASTER_EVENT_ABORTED;
    if (NULL != p_args)
    {
        /* capture callback event for validating the i2c transfer event*/
        i2c_event = p_args->event;
    }
}

CS和SA0设置

P002在和LED灯进行服用,这里设置为输出模式。


对P102设置为输出模式。

P200只能设置为输入模式,这里主要起到片选作用,这里要注意给他进行一个上拉。

参考程序
https://github.com/STMicroelectronics/lsm6dsv16x-pid/tree/main
把对应驱动包导入到src文件夹。
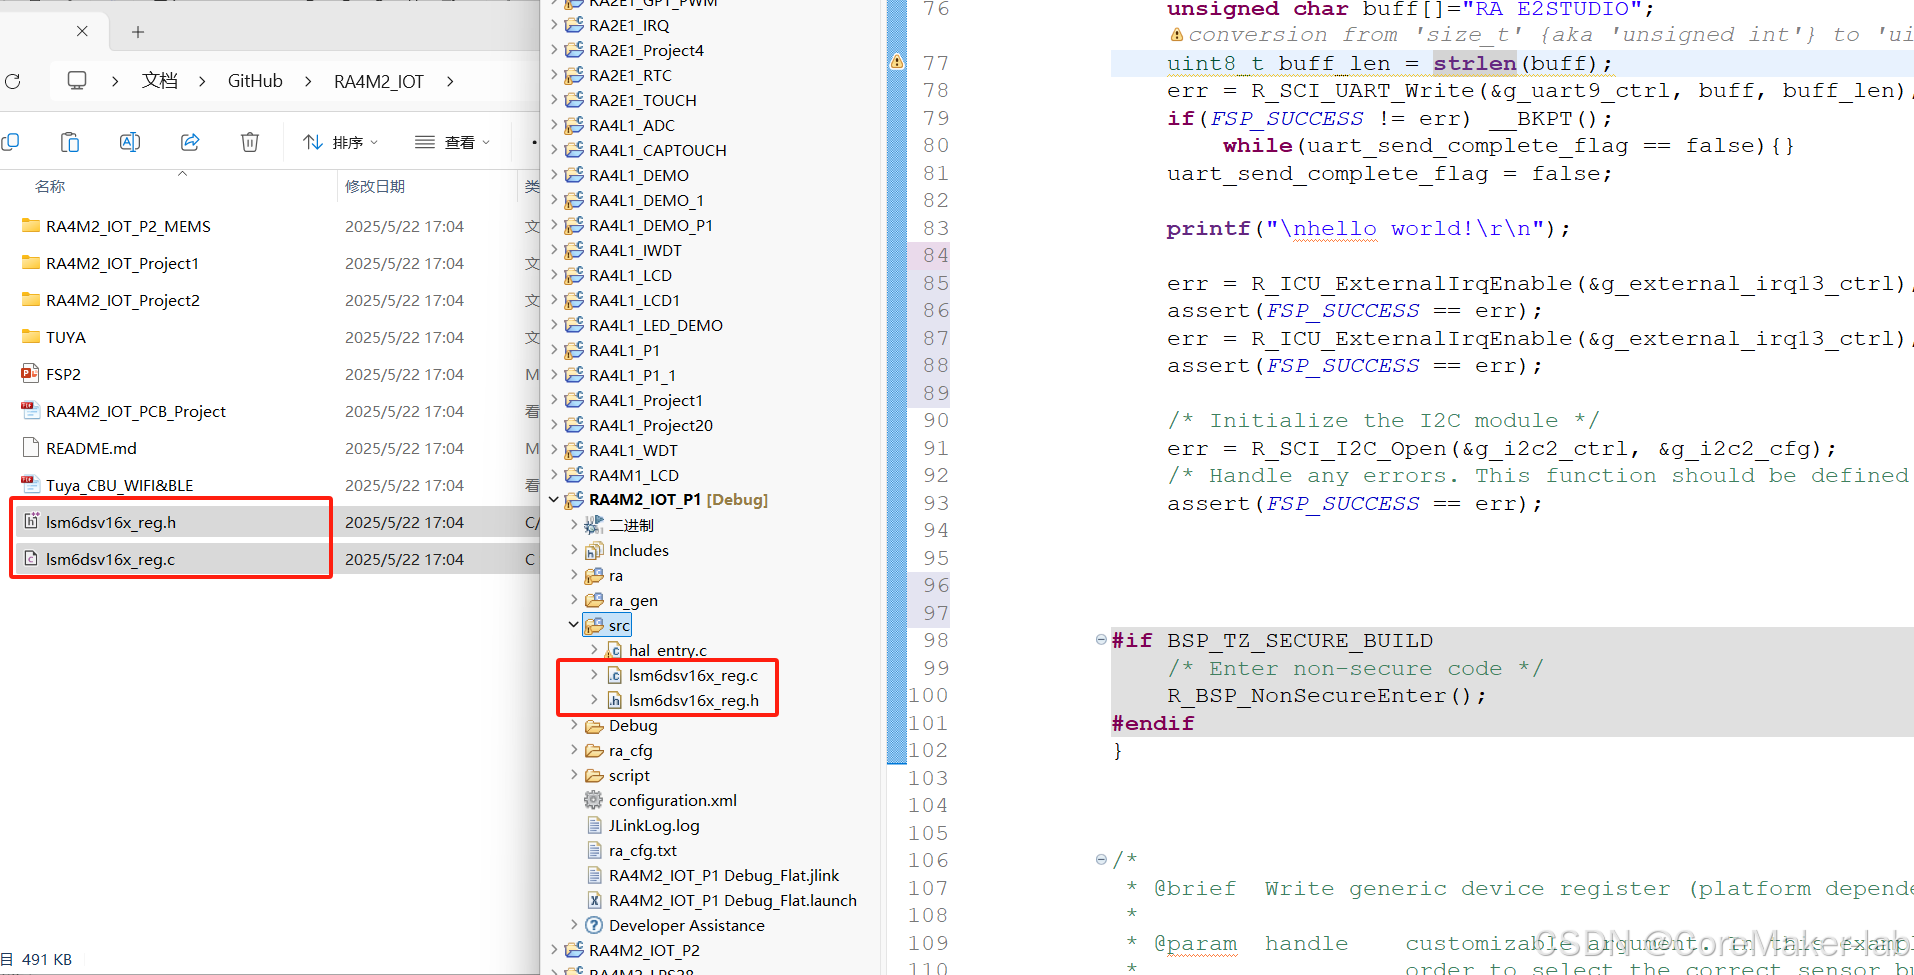
添加头文件。
#include "lsm6dsv16x_reg.h"

添加预设定义。
#define SENSOR_BUS g_i2c2_ctrl

/* Private macro -------------------------------------------------------------*/
#define    BOOT_TIME            10 //ms

/* Private variables ---------------------------------------------------------*/
static int16_t data_raw_acceleration[3];
static int16_t data_raw_angular_rate[3];
static int16_t data_raw_temperature;
static double_t acceleration_mg[3];
static double_t angular_rate_mdps[3];
static double_t temperature_degC;
static uint8_t whoamI;
static uint8_t tx_buffer[1000];

static lsm6dsv16x_filt_settling_mask_t filt_settling_mask;

/* Extern variables ----------------------------------------------------------*/

/* Private functions ---------------------------------------------------------*/

/*
 *   WARNING:
 *   Functions declare in this section are defined at the end of this file
 *   and are strictly related to the hardware platform used.
 *
 */
static int32_t platform_write(void *handle, uint8_t reg, const uint8_t *bufp,
                              uint16_t len);
static int32_t platform_read(void *handle, uint8_t reg, uint8_t *bufp,
                             uint16_t len);
static void tx_com( uint8_t *tx_buffer, uint16_t len );
static void platform_delay(uint32_t ms);
static void platform_init(void *handle);

初始化管脚
由于需要向LSM6DSV16X_I2C_ADD_L写入以及为IIC模式。

所以使能CS为高电平,配置为IIC模式。
在最开始配置中已经将SA0端口设置了上拉,不需要输入。
    //LIS2MDL CS2->1
    R_IOPORT_PinWrite(&g_ioport_ctrl, BSP_IO_PORT_00_PIN_02, BSP_IO_LEVEL_HIGH);
    //LSM6DSV16X CS1->1
    R_IOPORT_PinWrite(&g_ioport_ctrl, BSP_IO_PORT_01_PIN_02, BSP_IO_LEVEL_HIGH);

添加定义。
  lsm6dsv16x_reset_t rst;
    stmdev_ctx_t dev_ctx;
    /* Initialize mems driver interface */
    dev_ctx.write_reg = platform_write;
    dev_ctx.read_reg = platform_read;
    dev_ctx.mdelay = platform_delay;
    dev_ctx.handle = &SENSOR_BUS;

获取ID
可以向WHO_AM_I (0Fh)获取固定值,判断是否为0x70。

lsm6dsv16x_device_id_get为获取函数。

对应的获取ID驱动程序,如下所示。
    /* Init test platform */
//    platform_init(dev_ctx.handle);
    /* Wait sensor boot time */
    platform_delay(BOOT_TIME);

    /* Check device ID */
    lsm6dsv16x_device_id_get(&dev_ctx, &whoamI);
    printf("LSM6DSV16X_ID=0x%x,whoamI=0x%x\n",LSM6DSV16X_ID,whoamI);
    if (whoamI != LSM6DSV16X_ID)
      while (1);

下载程序获取ID

添加MEMS对应初始化
    /* Restore default configuration */
    lsm6dsv16x_reset_set(&dev_ctx, LSM6DSV16X_RESTORE_CTRL_REGS);
    do {
      lsm6dsv16x_reset_get(&dev_ctx, &rst);
    } while (rst != LSM6DSV16X_READY);

    /* Enable Block Data Update */
    lsm6dsv16x_block_data_update_set(&dev_ctx, PROPERTY_ENABLE);
    /* Set Output Data Rate.
     * Selected data rate have to be equal or greater with respect
     * with MLC data rate.
     */
    lsm6dsv16x_xl_data_rate_set(&dev_ctx, LSM6DSV16X_ODR_AT_7Hz5);
    lsm6dsv16x_gy_data_rate_set(&dev_ctx, LSM6DSV16X_ODR_AT_7Hz5);

主程序
while (1)
{
lsm6dsv16x_data_ready_t drdy;
/* Read output only if new xl value is available */
lsm6dsv16x_flag_data_ready_get(&dev_ctx, &drdy);
if (drdy.drdy_xl) {
/* Read acceleration field data */
memset(data_raw_acceleration, 0x00, 3 * sizeof(int16_t));
lsm6dsv16x_acceleration_raw_get(&dev_ctx, data_raw_acceleration);
acceleration_mg[0] =
lsm6dsv16x_from_fs2_to_mg(data_raw_acceleration[0]);
acceleration_mg[1] =
lsm6dsv16x_from_fs2_to_mg(data_raw_acceleration[1]);
acceleration_mg[2] =
lsm6dsv16x_from_fs2_to_mg(data_raw_acceleration[2]);
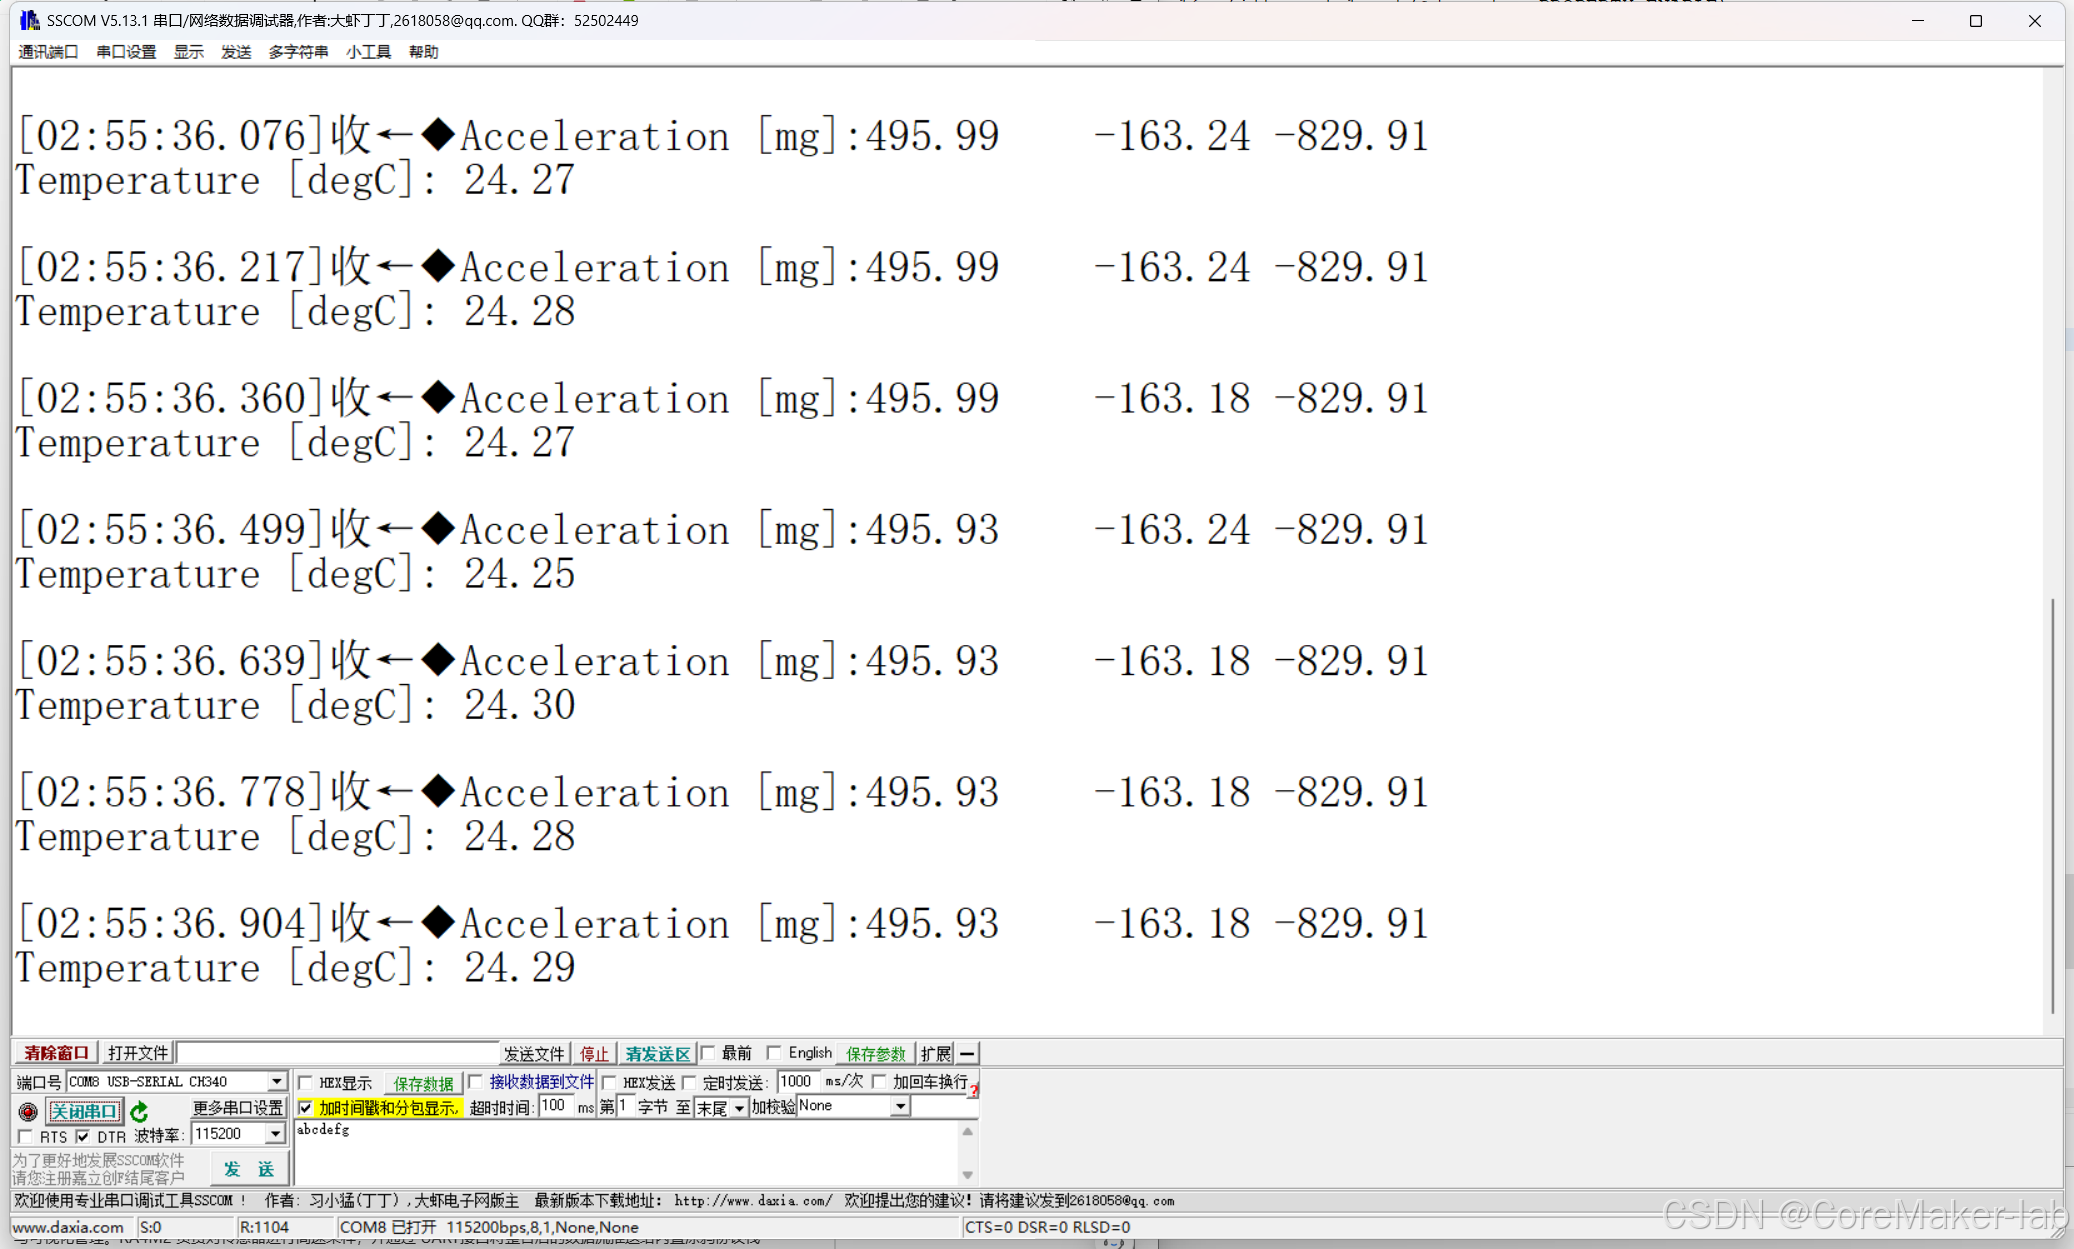
printf("Acceleration [mg]:%4.2f\t%4.2f\t%4.2f\r\n",
acceleration_mg[0], acceleration_mg[1], acceleration_mg[2]);
/* Read temperature data */
memset(&data_raw_temperature, 0x00, sizeof(int16_t));
lsm6dsv16x_temperature_raw_get(&dev_ctx, &data_raw_temperature);
temperature_degC = lsm6dsv16x_from_lsb_to_celsius(
data_raw_temperature);
printf("Temperature [degC]:%6.2f\r\n", temperature_degC);
}
R_BSP_SoftwareDelay(10, BSP_DELAY_UNITS_MILLISECONDS);
}

烧录