一、引言
Cesium 是一个强大的开源 JavaScript 库,用于创建基于 Web 的 3D 地理信息系统 (GIS) 应用程序。它提供了丰富的 API,可以实现各种复杂的地理可视化效果,包括地形渲染、建筑物建模、矢量数据显示等。本文将详细介绍如何使用 Cesium 实现 3D 地图中的水面效果,包括水面材质的配置、动画效果的实现以及性能优化。
二、Cesium 基础与水面效果原理
2.1 Cesium 基础概念
- Viewer:Cesium 的核心组件,负责管理整个地图视图和交互
- Primitive:Cesium 中渲染的基本单位,用于组织和渲染几何图形
- Geometry:定义几何形状,如点、线、面等
- Appearance:定义几何图形的外观,包括材质和着色方式
- Material:定义物体表面的视觉特性,如颜色、光泽等
2.2 水面效果原理
Cesium 中的水面效果主要通过以下技术实现:
- 使用
PolygonGeometry创建水面区域 - 应用内置的 "Water" 材质模拟水面反射和折射
- 通过法线贴图和动画参数实现水面波浪效果
- 调整频率、振幅和速度参数控制波浪形态和流动效果
三、实现 3D 地图水面效果的代码解析
下面是实现 Cesium 3D 地图水面效果的核心代码:
<template>
<div id="cesiumContainer" style="width: 100%; height: 100vh"></div>
</template>
<script>
import initMap from '@/config/initMap.js';
import { mapConfig } from '@/config/mapConfig';
export default {
data() {
return {
viewer: null,
waterEntity: null,
};
},
mounted() {
// 初始化地图并设置初始视图
this.viewer = initMap(mapConfig.gaode.url3, true);
this.drawWater();
this.viewer.scene.globe.depthTestAgainstTerrain = false;
this.viewer.camera.setView({
destination: Cesium.Cartesian3.fromDegrees(118.006, 39.7128, 150000),
});
},
methods: {
// 创建水面效果
drawWater() {
this.viewer.scene.primitives.add(
new Cesium.Primitive({
geometryInstances: new Cesium.GeometryInstance({
geometry: new Cesium.PolygonGeometry({
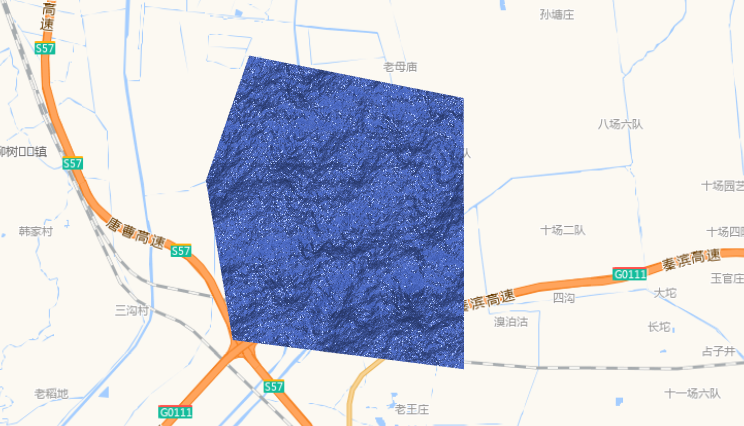
polygonHierarchy: new Cesium.PolygonHierarchy(
Cesium.Cartesian3.fromDegreesArray([
// 定义水面多边形的顶点坐标
117.18714141845703, 39.377288818359375,
117.172721862792957, 39.345016479492188,
117.18164825439453, 39.303817749023438,
117.25855255126953, 39.2962646484375,
117.25855255126953, 39.366302490234375,
117.18714141845703, 39.377288818359375,
])
),
vertexFormat: Cesium.EllipsoidSurfaceAppearance.VERTEX_FORMAT,
}),
}),
appearance: new Cesium.EllipsoidSurfaceAppearance({
aboveGround: true,
material: new Cesium.Material({
fabric: {
type: 'Water',
uniforms: {
normalMap: Cesium.buildModuleUrl(
'Assets/Textures/waterNormals.jpg'
),
frequency: 1000.0,
animationSpeed: 0.01,
amplitude: 10,
},
},
}),
}),
show: true,
})
);
},
// 设置初始视角
setInitialView() {
const center = Cesium.Cartesian3.fromDegrees(116.39, 39.9, 1000);
const heading = Cesium.Math.toRadians(1110);
const pitch = Cesium.Math.toRadians(-20);
this.viewer.camera.setView({
destination: center,
orientation: {
heading: heading,
pitch: pitch,
roll: 0,
},
});
},
},
beforeDestroy() {
// 清理资源,防止内存泄漏
if (this.waterEntity) {
this.viewer.entities.remove(this.waterEntity);
}
if (this.viewer) {
this.viewer.destroy();
}
},
};
</script>
<style lang="scss" scoped>
#cesiumContainer {
width: 100%;
height: 100vh;
touch-action: none;
}
</style>
3.1 代码关键部分解析
3.1.1 初始化与地图设置
mounted() {
  // 初始化地图,使用高德地图3D服务
  this.viewer = initMap(mapConfig.gaode.url3, true);
  this.drawWater(); // 绘制水面

  // 设置地形深度测试,影响水面与地形的交互
  this.viewer.scene.globe.depthTestAgainstTerrain = false;

  // 设置初始相机位置和高度
  this.viewer.camera.setView({
    destination: Cesium.Cartesian3.fromDegrees(118.006, 39.7128, 150000),
  });
},
3.1.2 水面效果实现
drawWater() {
  this.viewer.scene.primitives.add(
    new Cesium.Primitive({
      geometryInstances: new Cesium.GeometryInstance({
        geometry: new Cesium.PolygonGeometry({
          // 定义水面多边形区域
          polygonHierarchy: new Cesium.PolygonHierarchy(
            Cesium.Cartesian3.fromDegreesArray([...])
          ),
          vertexFormat: Cesium.EllipsoidSurfaceAppearance.VERTEX_FORMAT,
        }),
      }),
      appearance: new Cesium.EllipsoidSurfaceAppearance({
        aboveGround: true,
        material: new Cesium.Material({
          fabric: {
            type: 'Water', // 使用内置水面材质
            uniforms: {
              // 水面材质参数配置
              normalMap: Cesium.buildModuleUrl('Assets/Textures/waterNormals.jpg'),
              frequency: 1000.0, // 波浪频率
              animationSpeed: 0.01, // 波浪动画速度
              amplitude: 10, // 波浪振幅
            },
          },
        }),
      }),
      show: true,
    })
  );
},
3.1.3 资源清理
beforeDestroy() {
  // 组件销毁前清理Cesium资源
  if (this.waterEntity) {
    this.viewer.entities.remove(this.waterEntity);
  }
  if (this.viewer) {
    this.viewer.destroy(); // 释放查看器资源
  }
},
四、水面效果参数调优
Cesium 的水面效果通过多个参数控制,合理调整这些参数可以获得不同的水面效果:
4.1 主要参数说明
- normalMap:法线贴图,控制水面的波浪形态
- frequency:频率,控制波纹的紧密程度,值越大波纹越密集
- animationSpeed:动画速度,控制水面流动的速度
- amplitude:振幅,控制波浪的高度,值越大波浪越明显
4.2 参数调优建议
- 对于平静的湖泊,可以使用较低的 frequency (500-1000) 和 amplitude (5-10)
- 对于海洋效果,可以使用较高的 frequency (1500-2000) 和 amplitude (15-30)
- animationSpeed 通常在 0.005-0.02 之间调整,过大的值会使水面看起来不自然
五、性能优化与注意事项
5.1 性能优化
- 复杂的水面效果会影响性能,特别是在移动设备上
- 可以通过降低 frequency 和 amplitude 值来提高性能
- 对于大面积水域,可以考虑将水域分割成多个较小的区域
5.2 注意事项
depthTestAgainstTerrain属性会影响水面与地形的交互,开启后可能导致水面在某些视角下不可见- 确保在组件销毁时正确清理 Cesium 资源,避免内存泄漏
- 水面效果在不同的 Cesium 版本中可能有差异,建议查看对应版本的文档
六、总结
通过本文的介绍,我们了解了如何使用 Cesium 实现 3D 地图中的水面效果。主要步骤包括初始化地图、创建水面多边形、应用水面材质以及设置动画效果。通过调整材质参数,可以模拟不同类型的水体,从平静的湖泊到波涛汹涌的海洋。同时,我们也提到了性能优化和资源管理的重要性,这些都是开发高质量 Cesium 应用的关键因素。
希望本文对您理解和使用 Cesium 实现水面效果有所帮助,欢迎在评论区分享您的经验和问题。