实践Ghost安装好后侦听端口是2368,在1.5主机进行了测试,设置主机名为fb5,并在浏览器所在的主机进行了hosts名字解析。
Ghost介绍
Ghost是一款基于Node.js开发的开源博客平台,专为创作者设计,核心特点如下:
🧱 核心特性
高效内容创作
- 内置实时预览的Markdown编辑器,支持快捷键排版。
- 支持多用户协作编辑,适合团队创作场景。
轻量架构
- 默认使用SQLite数据库,兼容MySQL/PostgreSQL扩展。
- 跨平台支持Linux/Windows/macOS系统。
商业拓展能力
- 原生集成付费订阅和邮件推送功能,可直接变现内容。
- 支持SEO元数据自定义,优化搜索引擎可见性。
️ 技术实现
- 运行环境:需Node.js 0.10+运行环境。
repo地址:https://github.com/tryghost/ghost/
安装手册:How to install & setup Ghost on Ubuntu 20.04 or 22.04
发现ghost的安装手册非常详细,可以把前置技术都重新温习一下。
部署生产实例的最简单方法是使用官方的Ghost(Pro)托管服务。启动一个具有全球CDN的新网站大约需要2分钟,备份、安全和维护都为我们自动完成。
现在我们来时间一下本地部署。
Ubuntu下安装
安装需要的依赖和软件
The officially recommended production installation requires the following stack:
- Ubuntu 20.04 or Ubuntu 22.04
- NGINX (minimum of 1.9.5 for SSL)
- A supported version of Node.js
- MySQL 8
- Systemd
- A server with at least 1GB memory
- A registered domain name
Before getting started you should set up a working DNS A-Record from you domain, pointing to the server’s IP address. This must be done in advance so that SSL can be configured during setup.
安装需要Ubuntu20.04或22.04 Nginx Node.js MySQL8 Systemd 1G内存,和一个域名。
跟其它web软件不同,Ghost需要一个DNS A记录
服务设置Server Setup
This part of the guide will ensure all prerequisites are met for installing the Ghost-CLI.
Create a new user创建一个有root权限的用户
Open up your terminal and login to your new server as the root user:
# Login via SSH
ssh root@your_server_ip

# Create a new user and follow prompts
adduser <user>
Note: Using the user name
ghostcauses conflicts with the Ghost-CLI, so it’s important to use an alternative name.
# Add user to superuser group to unlock admin privileges
usermod -aG sudo <user>

# Then log in as the new user
su - <user>
需要一个有sudo权限的账户,先创建一个ghost专用的账户
综合命令
# 添加新账户
adduser <user>

# 给账户添加sudo权限
usermod -aG sudo <user>

# 切换到新账户登录
su - <user>
更新软件包
# Update package lists
sudo apt-get update

# Update installed packages
sudo apt-get upgrade
安装Nginx
# Install NGINX
sudo apt-get install nginx
如果有ufw防火墙,需要打开
sudo ufw allow 'Nginx Full'
安装mysql
# Install MySQL
sudo apt-get install mysql-server
mysql使用socket验证,但是ghost不支持,所以需要给root账户设置一个密码
# Enter mysql
sudo mysql
# Update permissions
ALTER USER 'root'@'localhost' IDENTIFIED WITH 'mysql_native_password' BY '<your-new-root-password>';
# Reread permissions
FLUSH PRIVILEGES;
# exit mysql
exit
安装node.js
# Download and import the Nodesource GPG key
sudo apt-get update
sudo apt-get install -y ca-certificates curl gnupg
sudo mkdir -p /etc/apt/keyrings
curl -fsSL https://deb.nodesource.com/gpgkey/nodesource-repo.gpg.key | sudo gpg --dearmor -o /etc/apt/keyrings/nodesource.gpg

# Create deb repository
NODE_MAJOR=22 # Use a supported version
echo "deb [signed-by=/etc/apt/keyrings/nodesource.gpg] https://deb.nodesource.com/node_$NODE_MAJOR.x nodistro main" | sudo tee /etc/apt/sources.list.d/nodesource.list

# Run update and install
sudo apt-get update
sudo apt-get install nodejs -y
安装Ghost CLI
sudo npm install ghost-cli@latest -g
安装Ghost
创建目录并进入
# Create directory: Change `sitename` to whatever you like
sudo mkdir -p /var/www/sitename

# Set directory owner: Replace <user> with the name of your user
sudo chown <user>:<user> /var/www/sitename

# Set the correct permissions
sudo chmod 775 /var/www/sitename

# Then navigate into it
cd /var/www/sitename
安装ghost
ghost install local
设置blog
FreeBSD下安装
因为是基于node.js的,所以是跨平台的,在FreeBSD系统下也可以使用。
添加账户
sudo adduser添加权限,编辑/usr/local/etc/sudoers 文件,添加一句
username ALL=(ALL) ALL
这里的username改成用户名,比如ghostwork
安装Ghost-CLI
sudo npm install ghost-cli@latest -g
创建目录
创建目录
# Create directory: Change `sitename` to whatever you like
sudo mkdir -p /var/www/sitename

# Set directory owner: Replace <user> with the name of your user
sudo chown <user>:<user> /var/www/sitename

# Set the correct permissions
sudo chmod 775 /var/www/sitename

# Then navigate into it
cd /var/www/sitename
ghostwork@fb5:~ $ sudo mkdir -p /var/www/sitenamedemo
ghostwork@fb5:~ $ sudo chown ghostwork:ghostwork  /var/www/sitenamedemo
ghostwork@fb5:~ $ sudo chmod 775  /var/www/sitenamedemo
ghostwork@fb5:~ $ cd /var/www/sitenamedemo/
安装ghost
ghost install local
整个过程大约需要几十分钟,估计还是因为国内网络连通ghost服务器慢的问题。
ghost install local

Love open source? We’re hiring JavaScript Engineers to work on Ghost full-time.
https://careers.ghost.org


✔ Checking system Node.js version - found v22.13.1
(node:84375) [DEP0040] DeprecationWarning: The `punycode` module is deprecated. Please use a userland alternative instead.
(Use `node --trace-deprecation ...` to show where the warning was created)
✔ Checking current folder permissions
✔ Checking memory availability
✔ Checking free space
✔ Checking for latest Ghost version
✔ Setting up install directory
✔ Downloading and installing Ghost v5.130.1
✔ Finishing install process
✔ Configuring Ghost
✔ Setting up instance
✔ Starting Ghost

Ghost uses direct mail by default. To set up an alternative email method read our docs at https://ghost.org/docs/config/#mail

------------------------------------------------------------------------------

Ghost was installed successfully! To complete setup of your publication, visit:

    http://localhost:2368/ghost/
按照提示,使用浏览器打开地址 http://localhost:2368/ghost/,可以看到ghost进一步的安装界面:

修改配置
因为是在远程服务器安装的ghost,所以相比官方,还需要进一步配置一下,需要加上域名信息。
配置文件在网站根目录的config.development.json ,默认如下:
cat config.development.json
{
  "url": "http://localhost:2368/",
  "server": {
    "port": 2368,
    "host": "127.0.0.1"
  },
  "database": {
    "client": "sqlite3",
    "connection": {
      "filename": "/var/www/sitenamedemo/content/data/ghost-local.db"
    }
  },
  "mail": {
    "transport": "Direct"
  },
  "logging": {
    "transports": [
      "file",
      "stdout"
    ]
  },
  "process": "local",
  "paths": {
    "contentPath": "/var/www/sitenamedemo/content"
  }
}
修改配置如下:
cat config.development.json
{
  "url": "http://fb5:2368/",
  "server": {
    "port": 2368,
    "host": "0.0.0.0"
  },
修改完之后需要用ghost stop ;ghost start 重启一下服务。
在服务器的/etc/hosts文件中加入自解析:
127.0.0.1 fb5
在浏览器所在的机器,加上对fb5的解析,如:
192.168.1.5 fb5
这时候就可以在浏览器,浏览http://fb5:2368/ghost/ 进行配置了。如果配置
Starting & Stopping启动和停止
Ghost runs in a separate background process and remains running until you stop it or restart your computer. So you may find these commands useful for taming it:
ghost stopto stop Ghostghost startto start Ghostghost logviews logsghost lsto list all running Ghost blogs
Run ghost help for a list of available commands, or explore the full Ghost-CLI documentation.
使用GScan验证Validating with GScan
# Install gscan globally
npm install gscan -g

# Scan a theme directory for compatibility
gscan /path/to/ghost/content/themes/casper

# Scan a theme zip file for compatibility
gscan -z /path/to/downloads/theme.zip
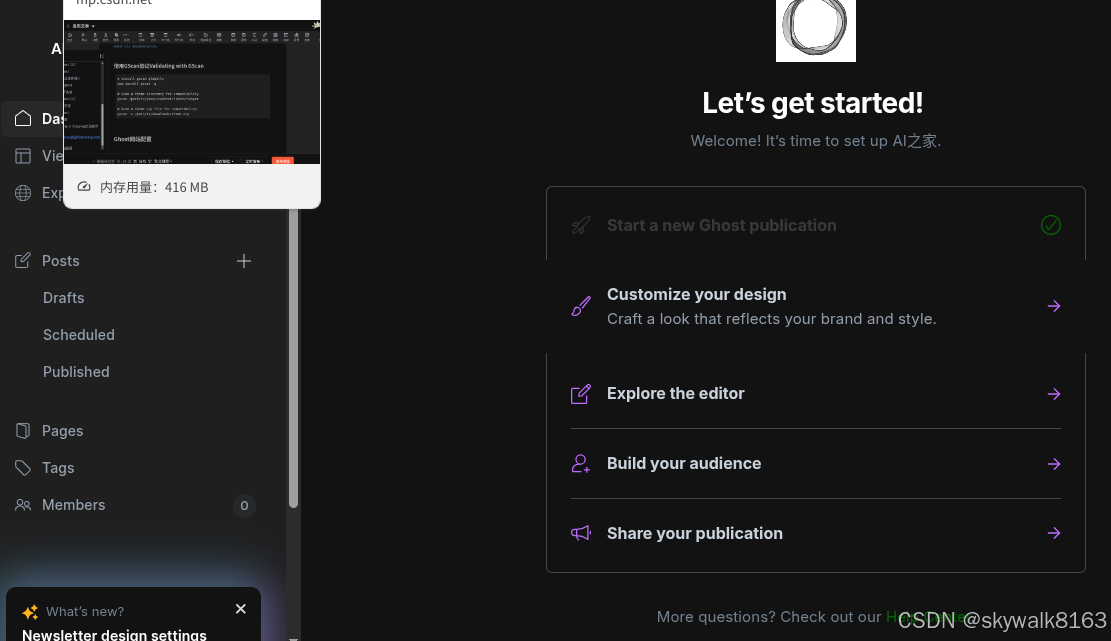
Ghost网站配置
浏览http://fb5:2368/ghost/ 进入配置界面
网站名字设为AI之家
配置中文
配置-Publication Language
设置为cn
网站设置
设置非常繁多,不过好消息是可以用默认.....
自定义网站的样式和布局
主题
像WordPress一样,可以换主题

感觉官方的主题太少了,可以自己去找,然后上传自己的主题包。
Navigation导航
设置一级和二级菜单
公告栏Announcement bar
突出显示重要更新或优惠
分层Tiers
设置价格和付费会员注册设置
分析Analytics
决定您在出版物中收集哪些数据
通讯打开
通讯点击
成员来源
出站链接标记
增长Growth
建议Beta
推荐任何你的读者会觉得有价值的出版物,并了解别人何时推荐你。
Mailgun
Mailgun API用于批量发送电子邮件时事通讯。为什么需要这样做?
迁移工具
从其他平台导入内容、成员和订阅,或导出Ghost数据。
就先实践到这里吧。