1、什么是 Axios?
Axios 是一个基于 Promise 的 HTTP 客户端,用于浏览器和 Node.js 环境,用来发送 HTTP 请求(如 GET、POST、PUT、DELETE 等)。
它常用于:
- 向后台 API 发送请求获取数据
- 提交表单数据
- 上传文件
- 与 RESTful API 进行交互
在 Vue.js项目中,Axios 是最流行、最推荐的 HTTP 请求库之一,用来替代原生 fetch,因为它功能更强大、使用更方便、支持拦截器、取消请求等高级功能。
中文网地址:axios中文网|axios API 中文文档 | axios
2、Axios特性
- 从浏览器中创建XMLHttpRequests
- 从 node.js 创建http请求
- 支持 Promise API
- 拦截请求和响应
- 转换请求数据和响应数据
- 取消请求
- 自动转换 JSON 数据
- 客户端支持防御XSRF
3、Axios下载
1、使用 npm 安装
npm install axios2、使用 yarn 安装
yarn add axios3、直接通过 CDN 引入
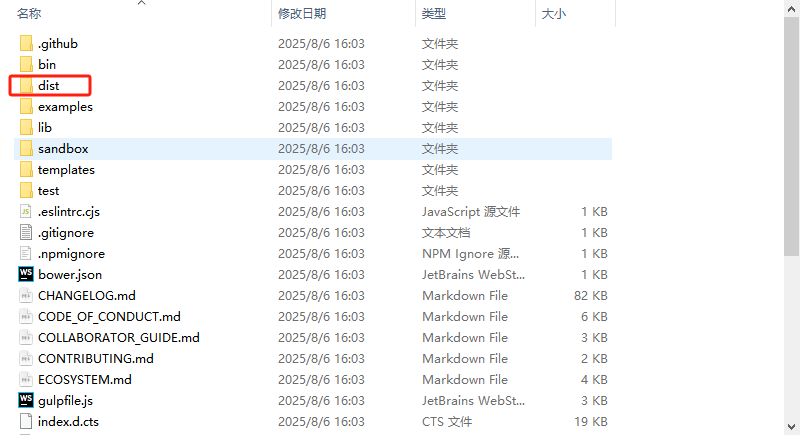
<script src="https://cdn.jsdelivr.net/npm/axios/dist/axios.min.js"></script>4、下载Js文件
Gitee下载地址:https://gitee.com/mirrors/axios

4、Axios 的基本用法
1.、发送 GET 请求
import axios from 'axios'

// 方式1:直接使用 then/catch
axios.get('https://localhost:8081/list/1')
  .then(response => {
    console.log('获取的数据:', response.data)
  })
  .catch(error => {
    console.error('请求出错:', error)
  })

// 方式2:使用 async/await(推荐)
async function fetchData() {
  try {
    const response = await axios.get('https://localhost:8081/list/1')
    console.log('获取的数据:', response.data)
  } catch (error) {
    console.error('请求失败:', error)
  }
}

fetchData()
2、发送 POST 请求
axios.post('https://localhost:8081/list', {
  title: 'Hello Axios',
  body: 'This is a post sent by Axios',
  userId: 1
})
  .then(response => {
    console.log('创建成功:', response.data)
  })
  .catch(error => {
    console.error('创建失败:', error)
  })
3、执行多个并发请求
function getUserAccount() {
  return axios.get('/user/12345');
}

function getUserPermissions() {
  return axios.get('/user/12345/permissions');
}

axios.all([getUserAccount(), getUserPermissions()])
  .then(axios.spread(function (acct, perms) {
    // 两个请求现在都执行完成
  }));
4、带参数的 GET 请求(Query 参数)
axios.get('https://localhost:8081/posts', {
  params: {
    userId: 1
  }
})
  .then(response => {
    console.log(response.data) // 获取 userId 为 1 的所有文章
  })


//实际请求的 URL 类似:
//https://localhost:8081/posts?userId=1
5、Axios 常用配置项
在发送请求时,可以传入一个 配置对象,常用选项包括:
axios({
  method: 'post',                  // 请求方法:get, post, put, delete 等
  url: '/user/12345',              // 请求地址
  data: {                          // 请求体(通常用于 POST、PUT)
    firstName: 'John',
    lastName: 'Doe'
  },
  params: {                        // URL 查询参数(GET 参数)
    ID: 12345
  },
  headers: {                       // 自定义请求头
    'X-Custom-Header': 'foobar'
  },
  timeout: 5000                    // 请求超时时间(毫秒)
})
6、Axios 实例
通常我们不会直接使用全局的 axios,而是创建一个 Axios 实例,这样可以:
- 设置 基础 URL
- 设置 默认请求头(如 Token)
- 统一的 超时时间
- 更好的 模块化管理
创建实例
import axios from 'axios'

// 创建一个 axios 实例
const api = axios.create({
  baseURL: 'https://localhost:8081', // 基础路径
  timeout: 5000, // 请求超时时间
  headers: { 'Content-Type': 'application/json' }
})
使用实例发送请求
// GET
api.get('/posts/1')
  .then(response => {
    console.log(response.data)
  })

// POST
api.post('/posts', {
  title: 'Hello',
  body: 'World',
  userId: 1
})
7、请求 & 响应拦截器
在请求发出去之前或收到响应之后,统一做一些处理,比如:
- 添加 token 到请求头
- 统一处理错误
- 加载状态控制
1、请求拦截器(Request Interceptor)
api.interceptors.request.use(
  config => {
    // 在发送请求之前做些什么
    const token = localStorage.getItem('token')
    if (token) {
      config.headers.Authorization = `Bearer ${token}`
    }
    console.log('请求配置:', config)
    return config // 必须返回 config
  },
  error => {
    // 请求错误时做些什么
    return Promise.reject(error)
  }
)
2、响应拦截器(Response Interceptor)
api.interceptors.response.use(
  response => {
    // 对响应数据做点什么,比如只返回 data 部分
    return response.data // 直接返回数据部分,简化后续处理
  },
  error => {
    // 对响应错误做点什么
    if (error.response) {
      switch (error.response.status) {
        case 401:
          console.error('未授权,请登录')
          break
        case 404:
          console.error('请求资源不存在')
          break
        case 500:
          console.error('服务器错误')
          break
        default:
          console.error('请求错误:', error.response.status)
      }
    } else {
      console.error('网络或未知错误:', error.message)
    }
    return Promise.reject(error)
  }
)
8、在 Vue 项目中使用 Axios
在实际的 Vue 项目中,通常会:
1、封装 axios(创建实例 + 拦截器)
2、在 main.js 或插件中全局挂载(可选)
3、在组件或 API 模块中调用
项目结构:
src/
├── api/
│   └── user.js       # 用户相关的接口
├── utils/
│   └── request.js    # axios 实例和基础配置
└── components/
    └── ...
1、创建 axios 实例(utils/request.js)
// utils/request.js
import axios from 'axios'

const request = axios.create({
  baseURL: 'https://localhost:8081', // 你的 API 地址
  timeout: 5000
})

// 请求拦截器
request.interceptors.request.use(
  config => {
    const token = localStorage.getItem('token')
    if (token) {
      config.headers.Authorization = `Bearer ${token}`
    }
    return config
  },
  error => Promise.reject(error)
)

// 响应拦截器
request.interceptors.response.use(
  response => response.data, // 直接返回数据部分
  error => {
    console.error('请求出错:', error)
    return Promise.reject(error)
  }
)

export default request
2、封装 API 请求(api/user.js)
// api/user.js
import request from '@/utils/request'

// 获取用户信息
export function getUser(id) {
  return request.get(`/users/${id}`)
}

// 创建用户
export function createUser(data) {
  return request.post('/users', data)
}
3、在 Vue 组件中使用
<template>
  <div>
    <button @click="fetchUser">获取用户</button>
    <p v-if="user">用户名: {{ user.name }}</p>
  </div>
</template>

<script>
import { getUser } from '@/api/user'

export default {
  data() {
    return {
      user: null
    }
  },
  methods: {
    async fetchUser() {
      try {
        const res = await getUser(1) // 获取 ID 为 1 的用户
        this.user = res
      } catch (error) {
        console.error('获取用户失败:', error)
      }
    }
  }
}
</script>
9、Vue 3 Composition API 中使用 Axios
如果使用 Vue 3 的 <script setup>,代码会更简洁:
<script setup>
import { ref } from 'vue'
import { getUser } from '@/api/user'

const user = ref(null)

const fetchUser = async () => {
  try {
    const res = await getUser(1)
    user.value = res
  } catch (error) {
    console.error('获取失败', error)
  }
}
</script>

<template>
  <button @click="fetchUser">获取用户</button>
  <p v-if="user">用户名: {{ user.name }}</p>
</template>