文章目录
多进程
- 多进程并发编程的效率比较低:创建销毁进程都需要申请和释放资源,所以引入了多线程
- 同一个进程的线程之间,共用同一份资源(硬盘资源/内存资源)
- 进程是资源分配的基本单位,线程是调度执行的基本单位
Thread
- 并发执行 = 并发 + 并行
- 并发:两个线程在同一个cpu核心上执行,执行速度很快,看不出来是在同一个核心上执行的
- 并行:两个线程同时在两个不同的cpu核心上同时执行
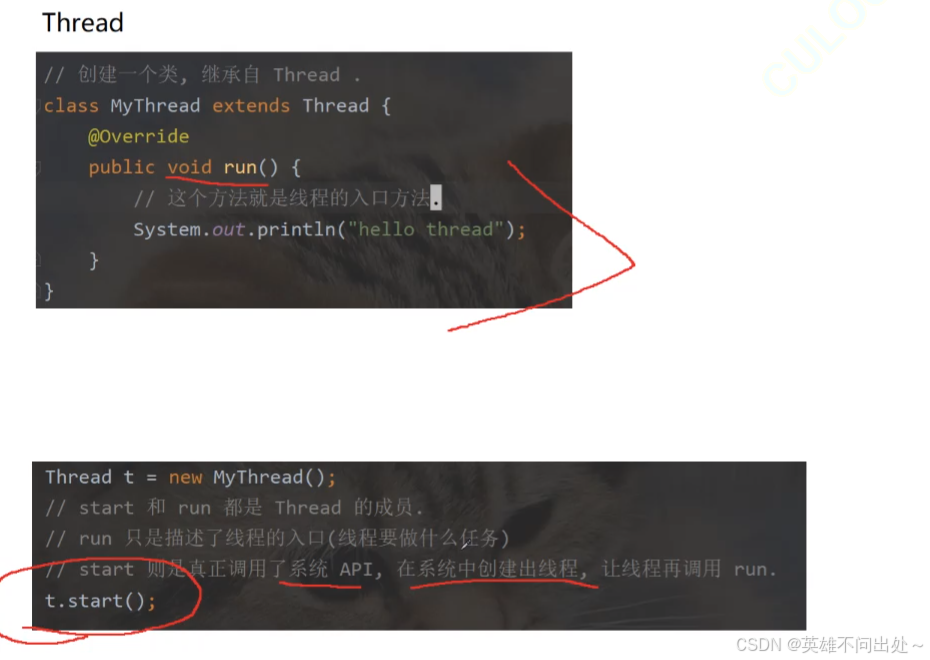
class MyThread extends Thread{
    public void run(){
        // run方法是线程的入口方法
        while(true) {
            System.out.println("hello Thread");
        }
    }
}
public class test {
    public static void main(String[] args) {
        Thread myThread = new MyThread();
        // run和start都是Thread的成员,start调用创建线程,线程再调用run方法
        // myThread.start();
        myThread.run();
        // 这句就是主动调用run,先执行完run的代码才会向下继续执行,就是单线程的执行流了
        while(true){
            System.out.println("hello main");
        }
        // 两者交替执行,并发执行
    }
}
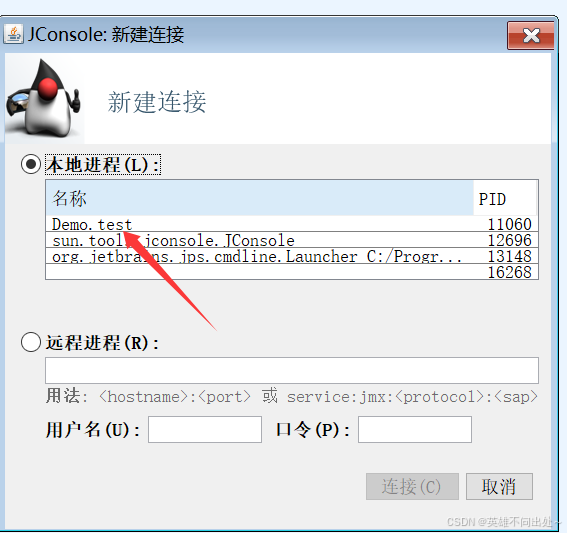
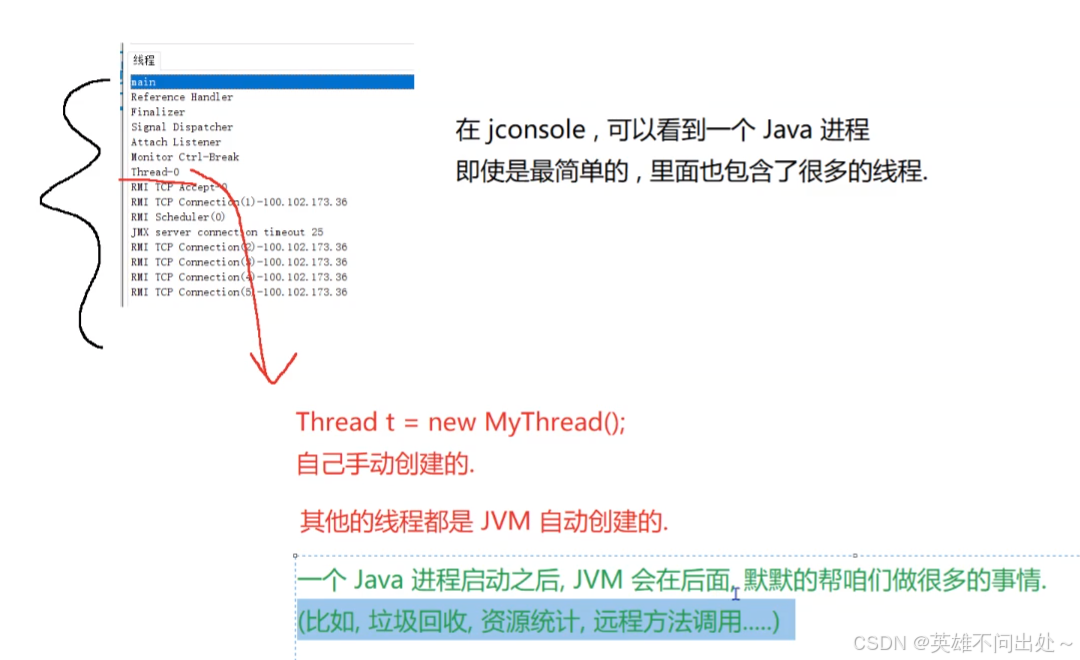
- 多线程程序运行的时候可以使用IDEA或者是jconsole观察到该进程里多线程的运行情况
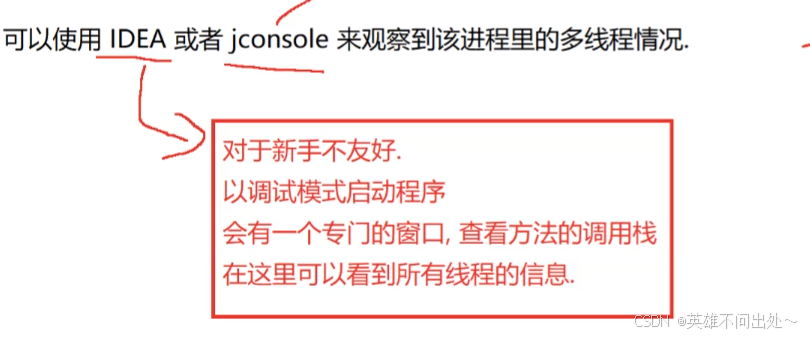
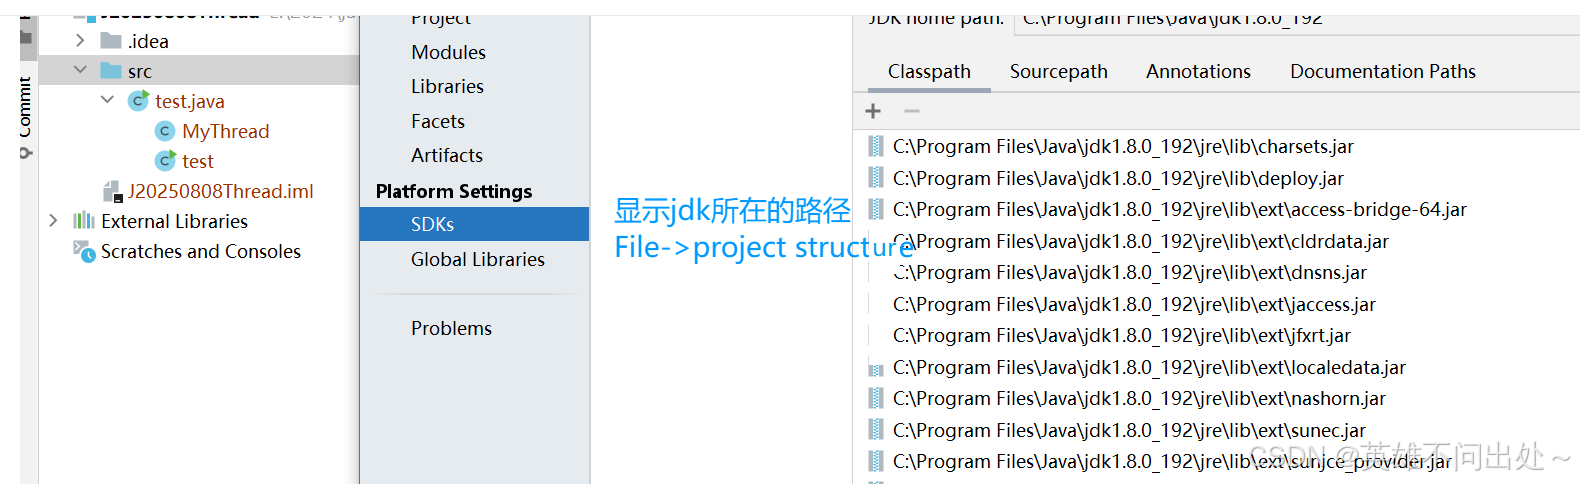
- 找到jconsole
启动jconsole要确保java中的进程已经跑起来了
如果什么都不显示的话,需要用管理员方式运行

6. 可以看到该线程运行的事实运行情况,比如,你的程序卡死了

7. sleep
package Demo;
import static java.lang.Thread.sleep;
class MyThread extends Thread{
public void run(){
// run方法是线程的入口方法
while(true) {
System.out.println("hello Thread");
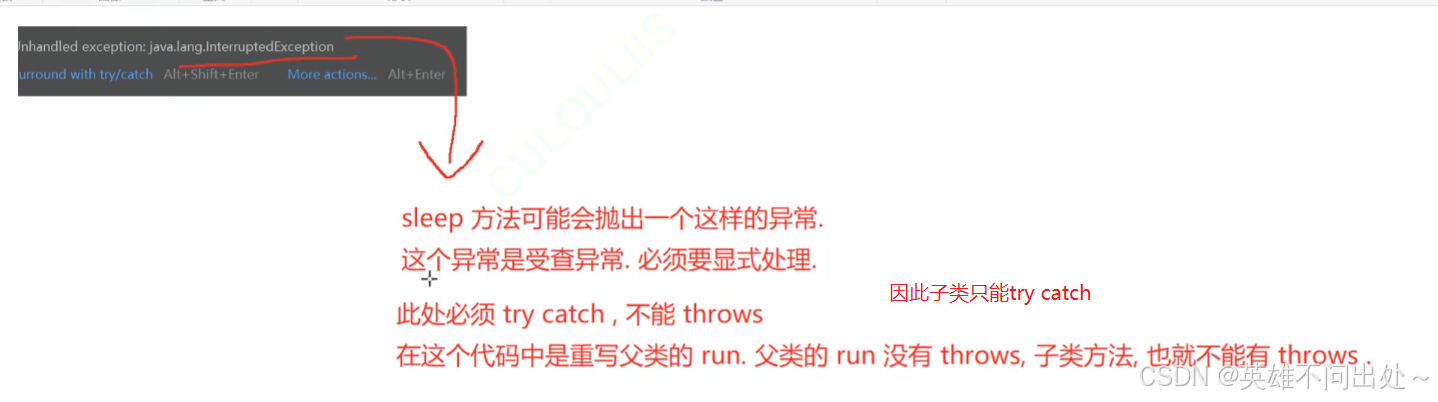
try {
sleep(1000);
} catch (InterruptedException e) {
throw new RuntimeException(e);
}
}
}
}
public class test {
public static void main(String[] args) throws InterruptedException {
Thread myThread = new MyThread();
// run和start都是Thread的成员,start调用创建线程,线程再调用run方法
myThread.start();
// myThread.run();
// 这句就是主动调用run,先执行完run的代码才会向下继续执行,就是单线程的执行流了
while(true){
System.out.println("hello main");
sleep(1000);
}
// 两者交替执行,并发执行
}
}
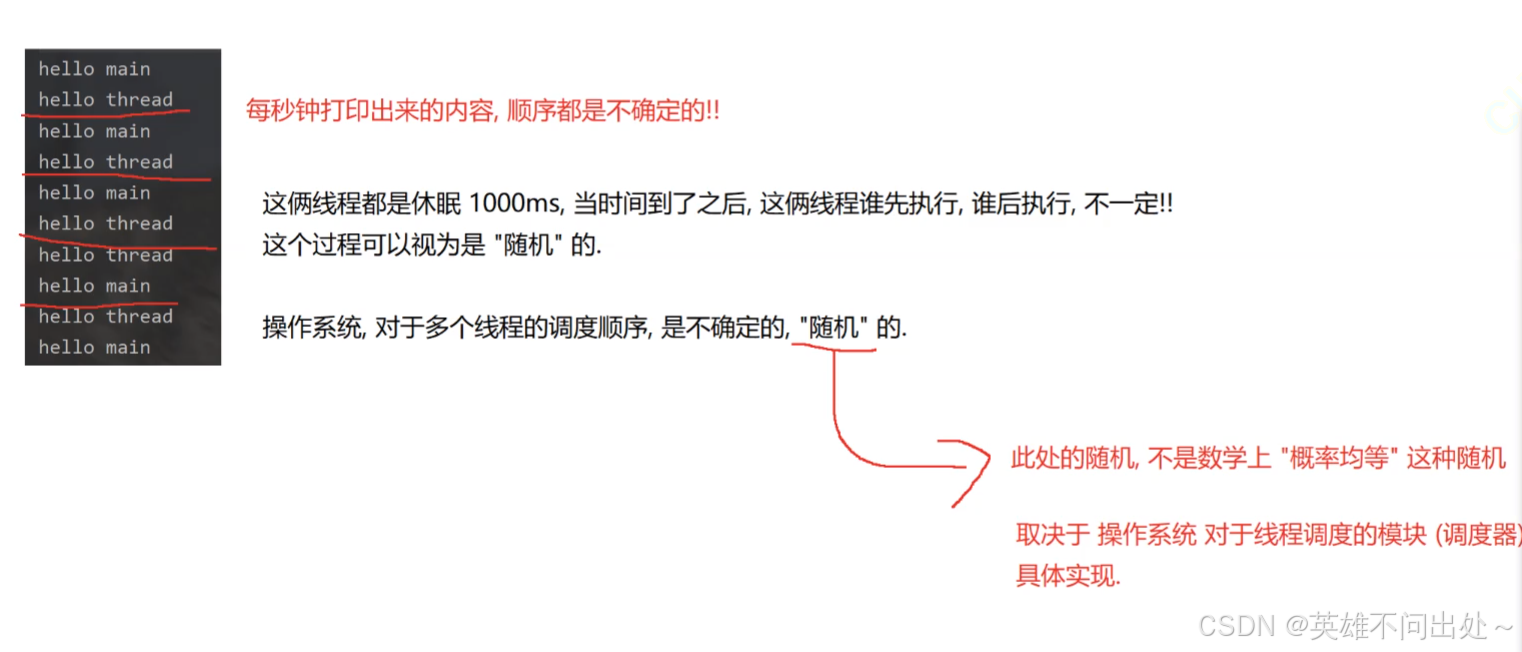
- 调度顺序是随机的
- main线程和mythread线程是并发执行的,是独立的执行流
创建线程,其它的写法
- 继承Thread,重写run
package Demo;

import static java.lang.Thread.sleep;

class MyThread extends Thread{
    public void run(){
        // run方法是线程的入口方法
        while(true) {
            System.out.println("hello Thread");
            try {
                Thread.sleep(1000);
            } catch (InterruptedException e) {
               e.printStackTrace();
            }
        }
    }
}
public class test {
    public static void main(String[] args) throws InterruptedException {
        Thread myThread = new MyThread();
        // run和start都是Thread的成员,start调用创建线程,线程再调用run方法
         myThread.start();
        // myThread.run();
        // 这句就是主动调用run,先执行完run的代码才会向下继续执行,就是单线程的执行流了
        while(true){
            System.out.println("hello main");
            Thread.sleep(1000);
        }
        // 两者交替执行,并发执行
    }
}
- 实现Runnable,重写run

package Demo;

class MyRunnable implements Runnable{
    @Override
    public void run() {
        while (true) {
            System.out.println("hello Thread");
            try {
                Thread.sleep(1000);
            } catch (InterruptedException e) {
                e.printStackTrace();
            }
        }
    }
}
public class Demo2 {
    public static void main(String[] args) throws InterruptedException {
        Runnable myRunnable = new MyRunnable();
        // 利用Thread构造方法
        Thread t = new Thread(myRunnable);
        t.start();

        while(true){
            System.out.println("hello main!");
            Thread.sleep(1000);
        }
    }
}
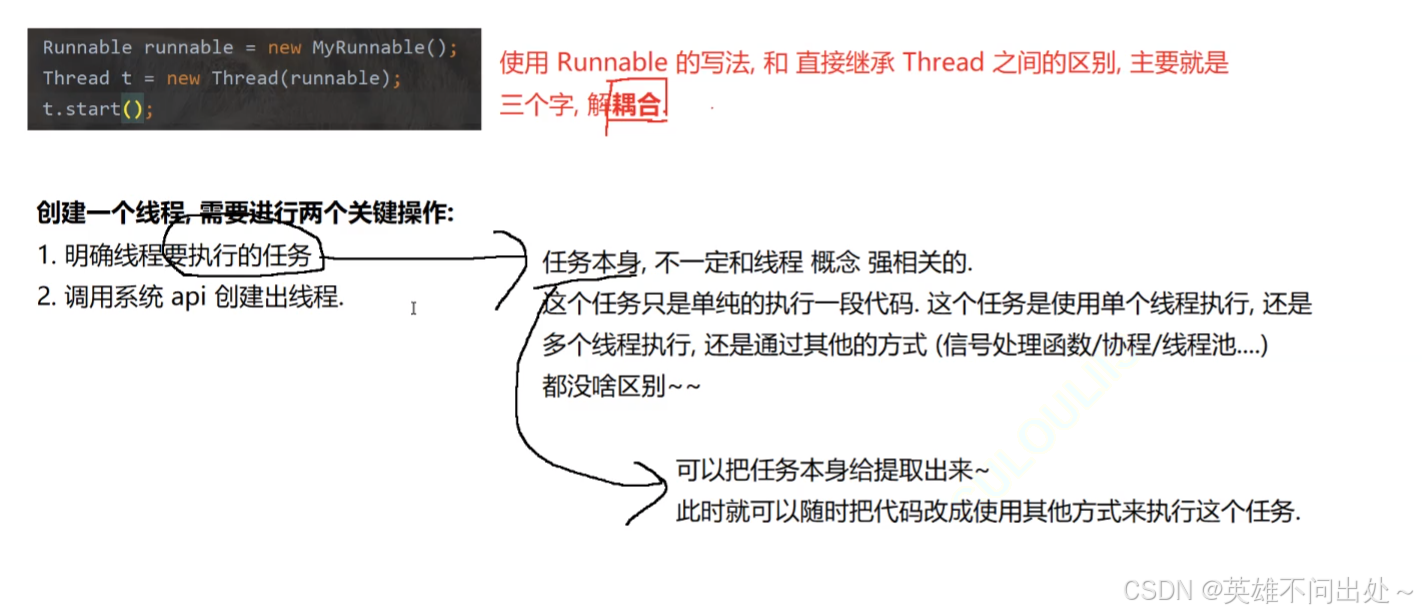
使用Runnable的写法,和直接继承Thread之间的区别是解耦合
解耦合:让这个任务和这个线程关联程度变低,使得任务更容易被拆解出来
3. 继承Thread,重写run,使用匿名内部类
package Demo;

public class Demo3 {
    public static void main(String[] args) throws InterruptedException {
        Thread t = new Thread(){
          public void run(){
              while(true) {
                  System.out.println("hello Thread!");
                  try {
                      Thread.sleep(1000);
                  } catch (InterruptedException e) {
                      e.printStackTrace();
                  }
              }
          }
        };

        t.start();
        while(true){
            System.out.println("hello main!");
            Thread.sleep(1000);
        }
    }
}
- 实现Runnable,重写run,使用匿名内部类
package Demo;

public class Demo4 {
    public static void main(String[] args) throws InterruptedException {
        /*Runnable runnable = new Runnable() {
            @Override
            public void run() {
                while(true){
                    System.out.println("hello Thread!");
                    try {
                        Thread.sleep(1000);
                    } catch (InterruptedException e) {
                        e.printStackTrace();
                    }
                }
            }
        };*/

        Thread t = new Thread(new Runnable(){
            public void run() {
                while(true){
                    System.out.println("hello Thread!");
                    try {
                        Thread.sleep(1000);
                    } catch (InterruptedException e) {
                        e.printStackTrace();
                    }
                }
            }
        });
        t.start();
        while(true){
            System.out.println("hello main!");
            Thread.sleep(1000);
        }
    }
}
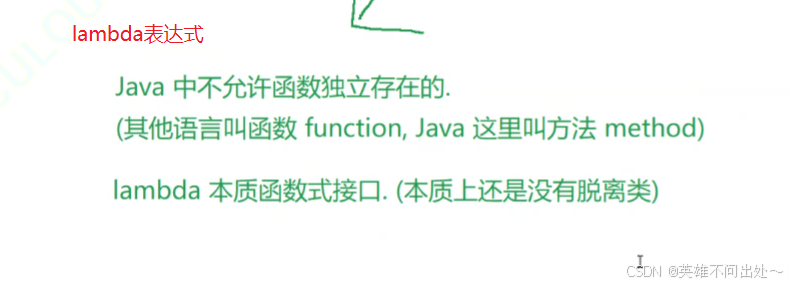
- 使用lambda表达式,相当于匿名内部类的简化版本,lambda表达式本质上是一个匿名函数(没有名字的函数,用一次就用完了),主要用来实现’回调函数’的效果
回调函数:不是你主动调用的,也不是现在就立即调用的,把调用的机会交给别人(操作系统,库,框架,别人写的代码)来使用,别人会在合适的时机来调用这个函数
回调函数是通过函数指针调用的函数。你把一个函数的指针(地址)作为参数传递给另一个函数,当这个指针被用来调用其所指向的函数时,这就是回调函数。
比如qsort就是使用回调函数,在qsort中用函数指针调用比较的函数进行比较
面试题
- Java中有哪些创建线程的方式?
除了上述的5中方法创建线程,还有其它的方式可以创建线程,后面我们也会学习到
Thread类的其它使用方式
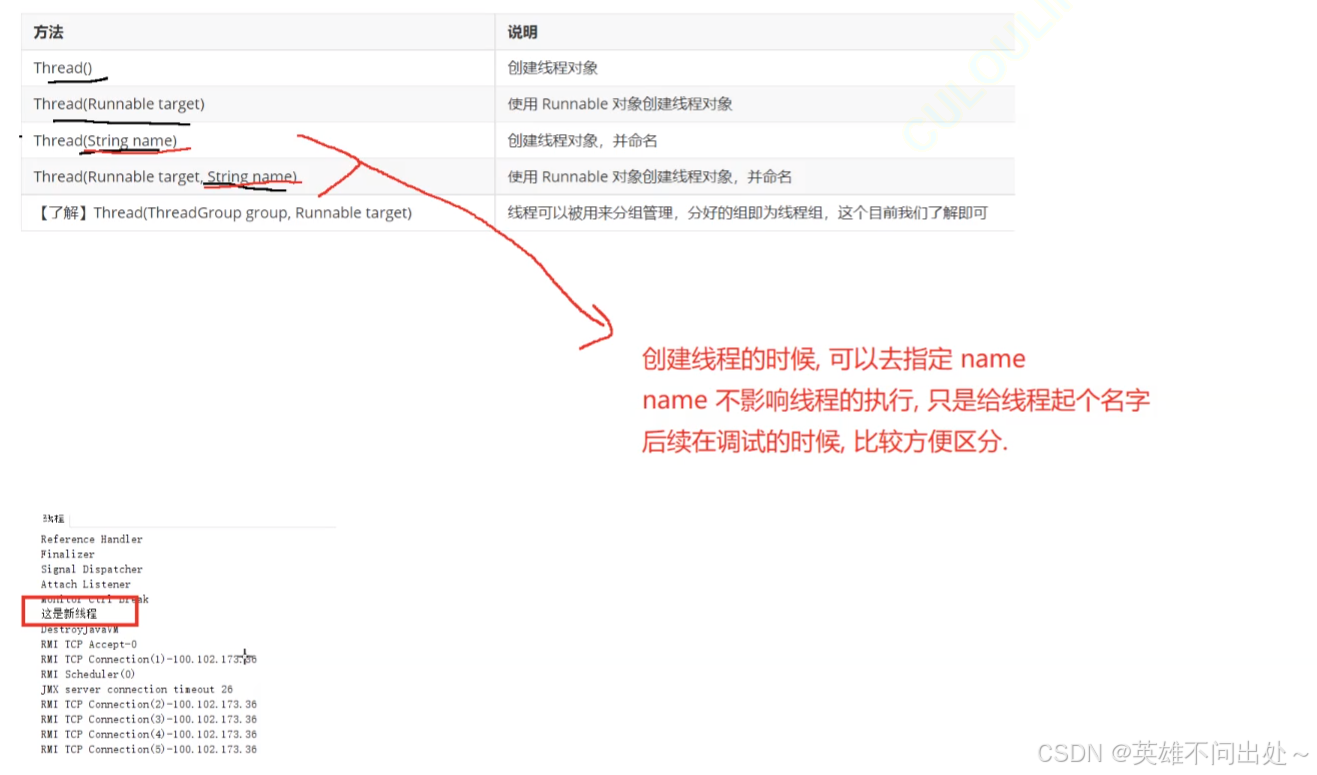
Thread的构造方法
Thread的属性
getName();

是否是后台线程,isDaemon();
后台线程(守护线程):后台线程不结束,并不影响整个线程的结束,整个线程结束了,后台线程也就结束了
前台线程:前台线程没有结束,整个进程是一定不会结束的
默认情况下一个线程是一个前台线程,如果isDaemon()设置为true就是后台线程
package Demo;

public class Demo6 {
    public static void main(String[] args) {
        Thread t = new Thread(()->{
           while(true){
               System.out.println("hello Thread!");
               try {
                   Thread.sleep(1000);
               } catch (InterruptedException e) {
                   e.printStackTrace();
               }
           }
        },"这是一个新线程!");

        t.setDaemon(true);

        t.start();
    }
}
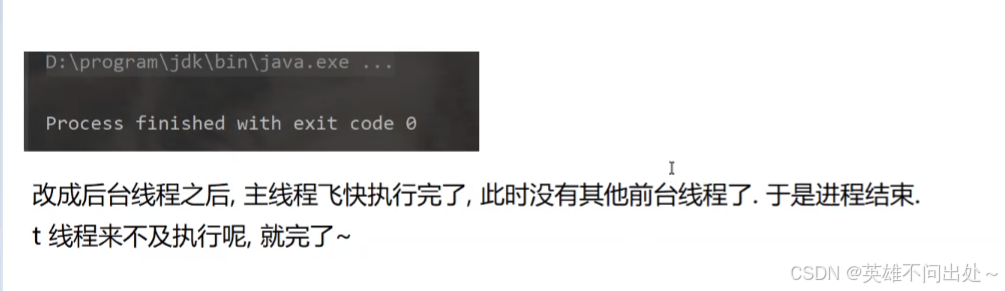
在你的Java代码中,当将线程设置为守护线程(setDaemon(true))后不打印任何内容,这是因为主线程退出时JVM会立即终止所有守护线程,而不等待它们执行完毕。主线程是前台线程,t线程设置为了后台线程
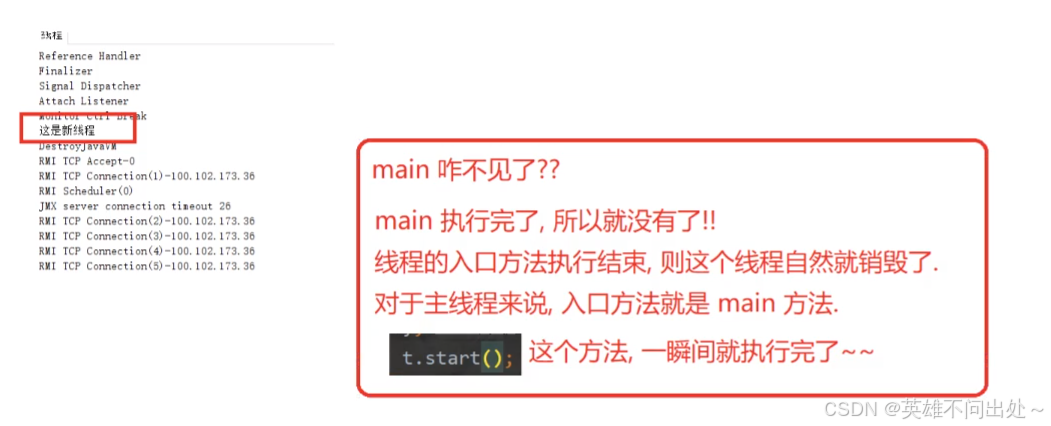
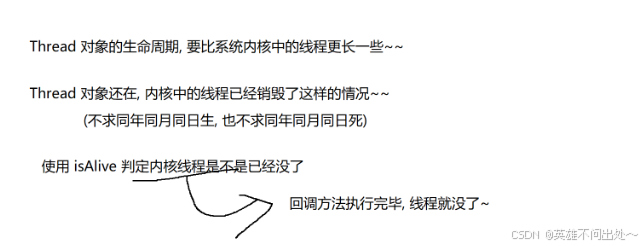
- 使用 t.isAlive() 判定内核线程是不是已经没了,内核线程的生命周期是回到方法执行完毕,线程就没有了
package Demo;
public class Demo7 {
public static void main(String[] args) {
Thread t = new Thread(()->{
System.out.println("线程开始!");
try {
Thread.sleep(2000);
} catch (InterruptedException e) {
e.printStackTrace();
}
System.out.println("线程结束!");
});
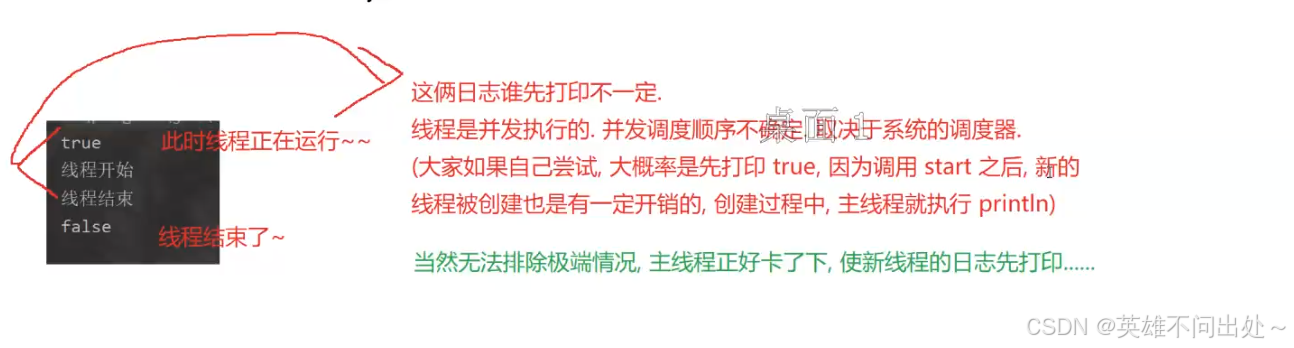
System.out.println(t.isAlive());
// 线程还没被创建出来是false
t.start();
System.out.println(t.isAlive());
// 线程创建出来了,但是还没有被销毁是true
try {
Thread.sleep(3000);
} catch (InterruptedException e) {
e.printStackTrace();
}
System.out.println(t.isAlive());
// t线程被销毁了是false
}
}
- lambda本身就是run方法
start和run方法的区别
- start方法内部会调用系统的api,在系统内核中创建线程
- run方法只是描述了线程中要执行的内容(会在start创建好之后就自动调用)
看起来两者的效果是相似的,但是本质上的区别是是否在系统内部创建出了新的线程
中断一个线程
- 中断一个线程就是让一个线程停止运行(销毁一个线程)
- 在Java中销毁/终止一个进程比较唯一,就是想办法让run方法尽快执行完毕
方法一:
可以在代码中手动创建出标志位作为run执行结束的条件
public class Demo8 {
    // 设置标志位来终止run方法的执行
    static boolean isQuit = false;
    public static void main(String[] args) throws InterruptedException {
        Thread t = new Thread(()->{
            while(!isQuit){
                System.out.println("正在执行任务!");
                try {
                    Thread.sleep(1000);
                } catch (InterruptedException e) {
                    throw new RuntimeException(e);
                }
            }
        });

        t.start();
        Thread.sleep(5000);

        isQuit = true;
    }
}

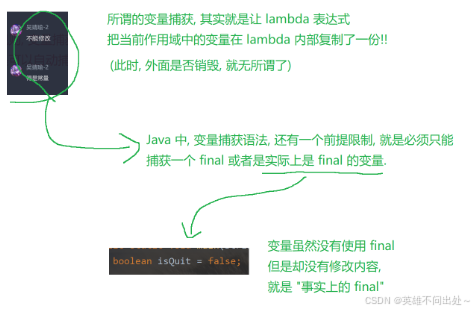
局部变量是lambda的捕获,改成是成员变量就是内部类访问外部类的属性了,不再受final的修饰了
该方法的缺点:
1.需要手动创建变量
2.当线程内部在sleep的时候,主线程在修改变量,新线程内部不能及时的响应,比如在修改变量的同时,执行完了第一个sleep,需要再回到while的判断处结束新线程
方法二:
public class Demo9 {
public static void main(String[] args){
Thread t = new Thread(()->{
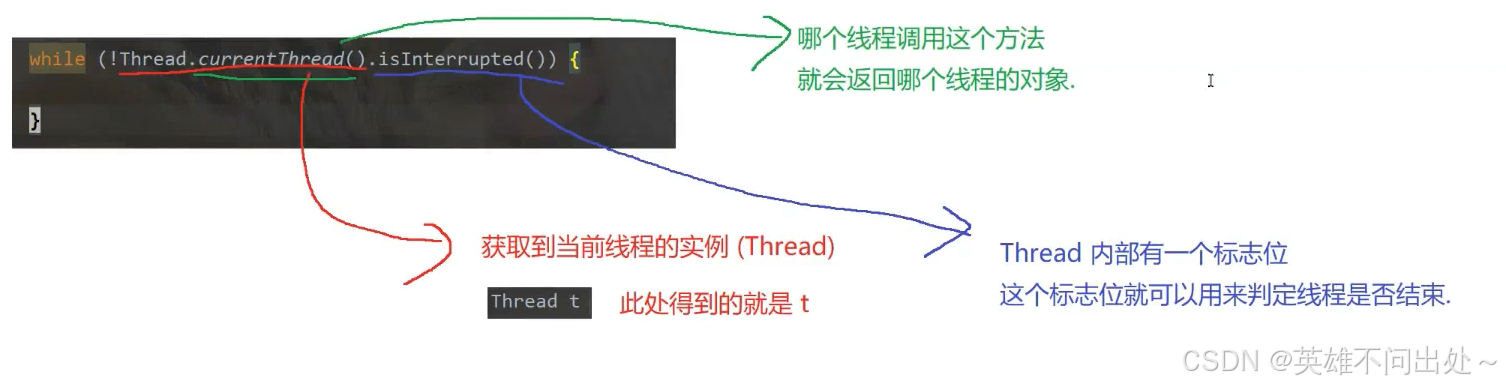
while(!Thread.currentThread().isInterrupted()){
System.out.println("线程正在工作!");
try {
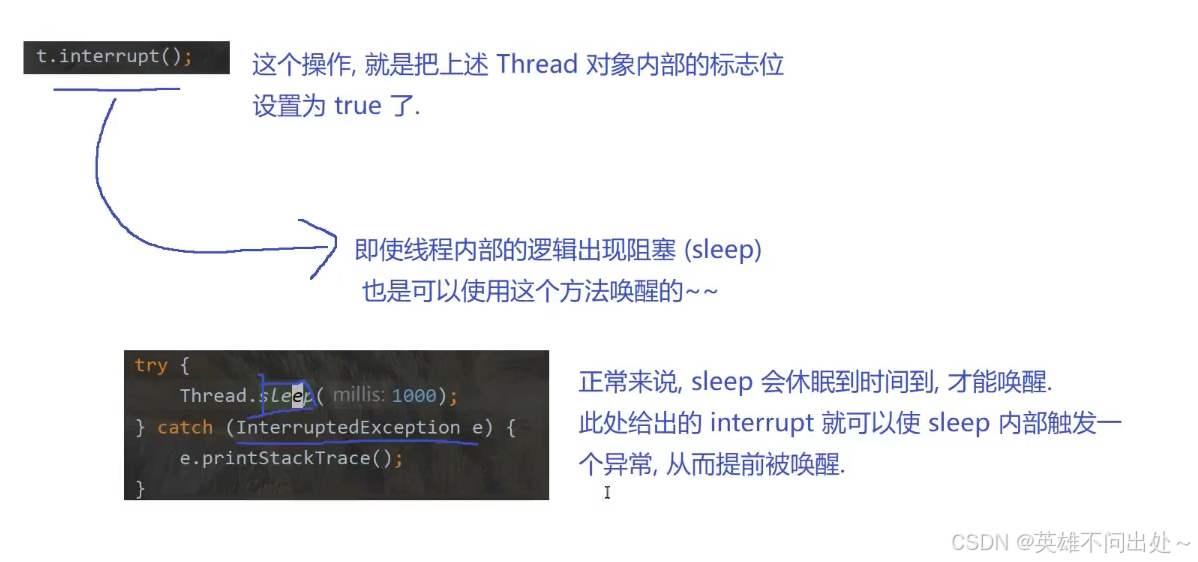
Thread.sleep(1000);
} catch (InterruptedException e) {
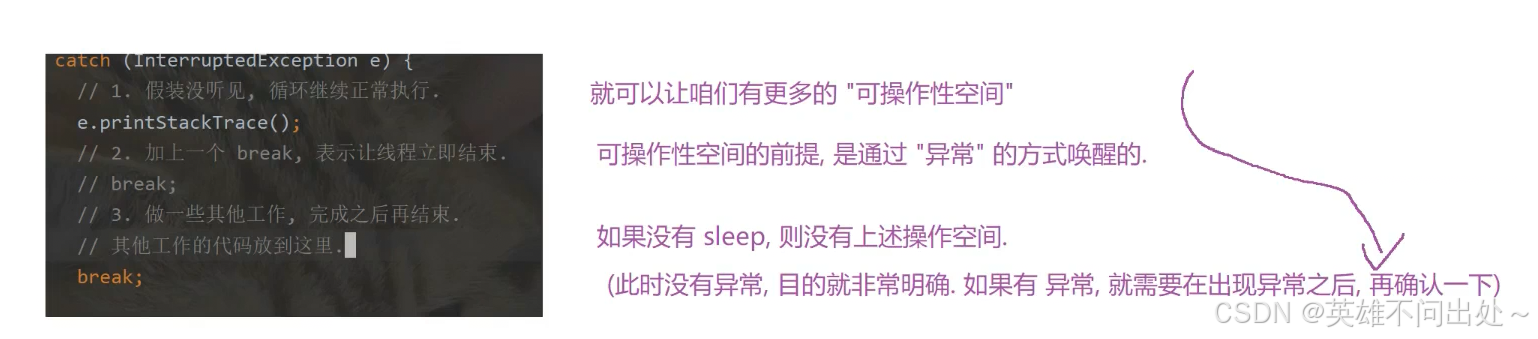
// 1.假装没有听见,循环继续正常执行
e.printStackTrace();
// 2.加上一个break,让线程立即结束
// 3.做一些其他工作,其他工作完成之后结束
// 其他工作的代码放这里
break;
}
}
});
// 报错是因为虽然 t.interrupt() 使 !Thread.currentThread().isInterrupted() 为false了
// 但是是引得sleep发生了异常,发生的异常清除了 !Thread.currentThread().isInterrupted()的标志位
t.start();
try {
Thread.sleep(5000);
} catch (InterruptedException e) {
throw new RuntimeException(e);
}
t.interrupt();
}
}

sleep清除的标志位是为了让我们有更多的操作空间(Java希望我们收到要中断的信号后可以自由决定,接下来要做什么)
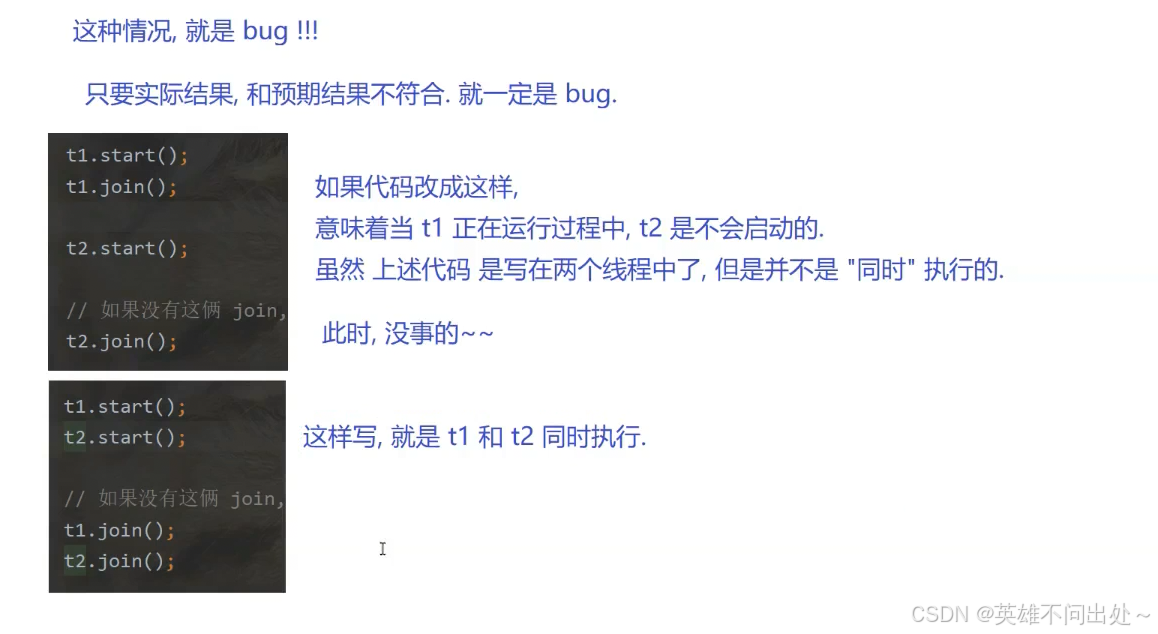
线程等待 - join
- 线程等待,让一个线程等待另一个线程执行结束,再继续执行,本质上是控制线程结束的顺序
- join实现线程等待效果
- 主线程中调用 t.join,就是主线程在等待t线程先结束
t.join的工作过程:
1.如果t线程正在执行时,调用join的线程(主线程)就会阻塞,要等待t线程执行完才会解除阻塞
2.如果t线程已经结束执行了,此时调用join线程就会直接返回,不会涉及线程阻塞
3.有一个超时时间的线程等待,如果超过这个线程就不会等待了,不会死等下去
public class Demo10 {
    public static void main(String[] args) throws InterruptedException {
        Thread t = new Thread(()->{
           for(int i = 0;i < 5;i++){
               System.out.println("线程执行中!");
               try {
                   Thread.sleep(1000);
               } catch (InterruptedException e) {
                   throw new RuntimeException(e);
               }
           }
        });

        t.start();
        System.out.println("线程开始等待!");
        // 主线程等待t线程结束
        // 一旦调用join主线程就会阻塞,此时t线程就会完成后续的工作
        // 执行到t线程执行完毕之后,join才会解除阻塞,主线程继续执行
        t.join();
        System.out.println("线程等待结束!");
    }
}
线程休眠
- Thread.sleep
- sleep是有时间误差的
- 系统休眠完这个1000ms后就会从阻塞状态变为就绪状态,成了就绪状态后,不是说就能立即回到cpu上执行的,这中间会有调度的开销
public class Demo11 {
    public static void main(String[] args) throws InterruptedException {
        long beg = System.currentTimeMillis();
        Thread.sleep(1000);
        long end = System.currentTimeMillis();
        System.out.println("时间:" + (end - beg) + "ms");
    }
}
线程的状态
- 通过三种阻塞的状态可以初步确定线程卡死的原因是什么
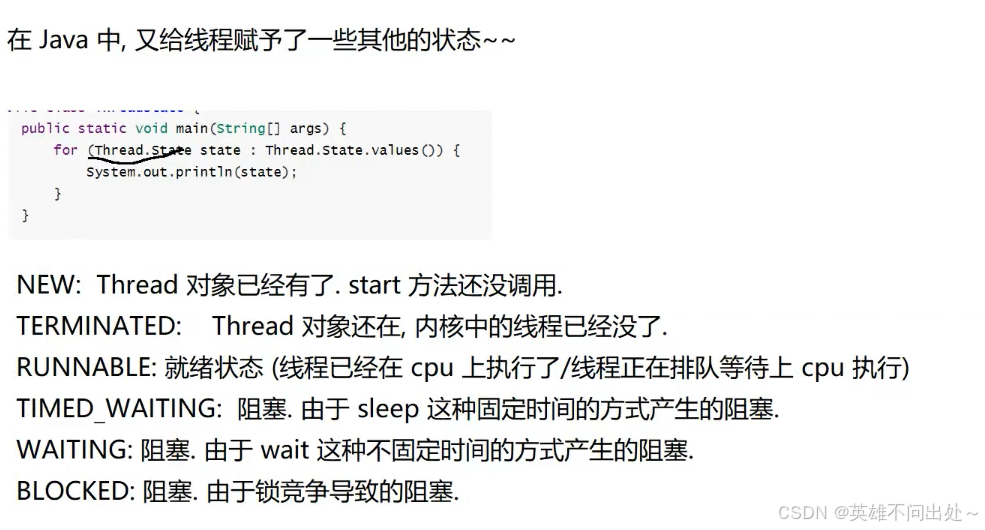
TERMINATED:比如t对象还在,但是t线程结束了
public class Demo12 {
    public static void main(String[] args) throws InterruptedException {
        Thread t = new Thread(()->{
           while(true){
               try {
                   Thread.sleep(1000);
               } catch (InterruptedException e) {
                   throw new RuntimeException(e);
               }
           }
        });

        System.out.println(t.getState());// New
        t.start();

        // 线程正在运行过程中或者是正在等待运行就是 RUNNABLE
        for(int i = 0;i < 5;i++){
            // 第一次还未执行上面的sleep是RUNNABLE
            // 后面有固定时间的阻塞了都是TIMED_WAITING
            System.out.println(t.getState());
            Thread.sleep(1000);
        }

        t.join();
        // t对象还在,但是t线程已经结束了
        System.out.println(t.getState());// TERMINATED
    }
}
线程安全问题(最重要,最复杂的部分)
- 概念:有些代码在单个线程的环境下能够正确执行,但是同样的代码在多个线程的环境下会出现bug
例子:
public class Demo13 {
    static int count = 0;
    public static void main(String[] args) throws InterruptedException {
        Thread t1 = new Thread(()->{
           for(int i = 0;i < 50000;i++){
               count++;
           }
        });

        Thread t2 = new Thread(()->{
            for(int i = 0;i < 50000;i++){
                count++;
            }
        });

        t1.start();
        t2.start();

        t1.join();
        t2.join();

        System.out.println(count);
    }
}
上面的代码存在bug

由于上述代码在多个线程的情况下执行,会存在线程调度是随机的问题,在某些情况下(不同的调度顺序)的逻辑是不正确的
例子:
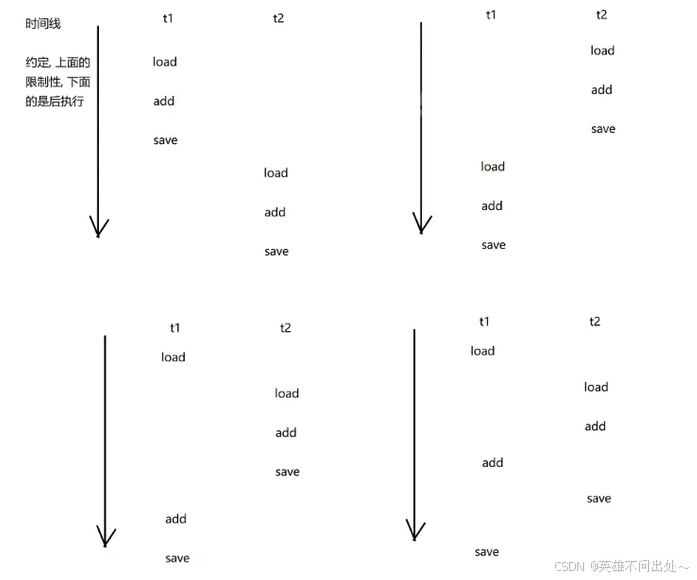
其实是有无数种可能的,因为可能t1执行一次,t2可以执行2次,3次…
产生线程安全的原因:
- 操作系统中,线程的调度执行顺序是随机的(抢占式执行)
- 两个线程针对同一个变量进行修改
- 修改操作不是原子的,count++,就分为三步,(先读,再修改)
类似的,如果一段逻辑中,需要根据一定的条件来决定是否修改,也会存在类似的问题 - 内存可见性问题(当前代码中不存在这种问题)
- 指令重排序问题(当前代码也不涉及)
要想解决线程安全问题要从上面的原因入手:
1.第一点是系统内核里实现的解决不了
2.第二点可以通过调整代码结构来规避上述问题,但是有很多情况是调整不了的
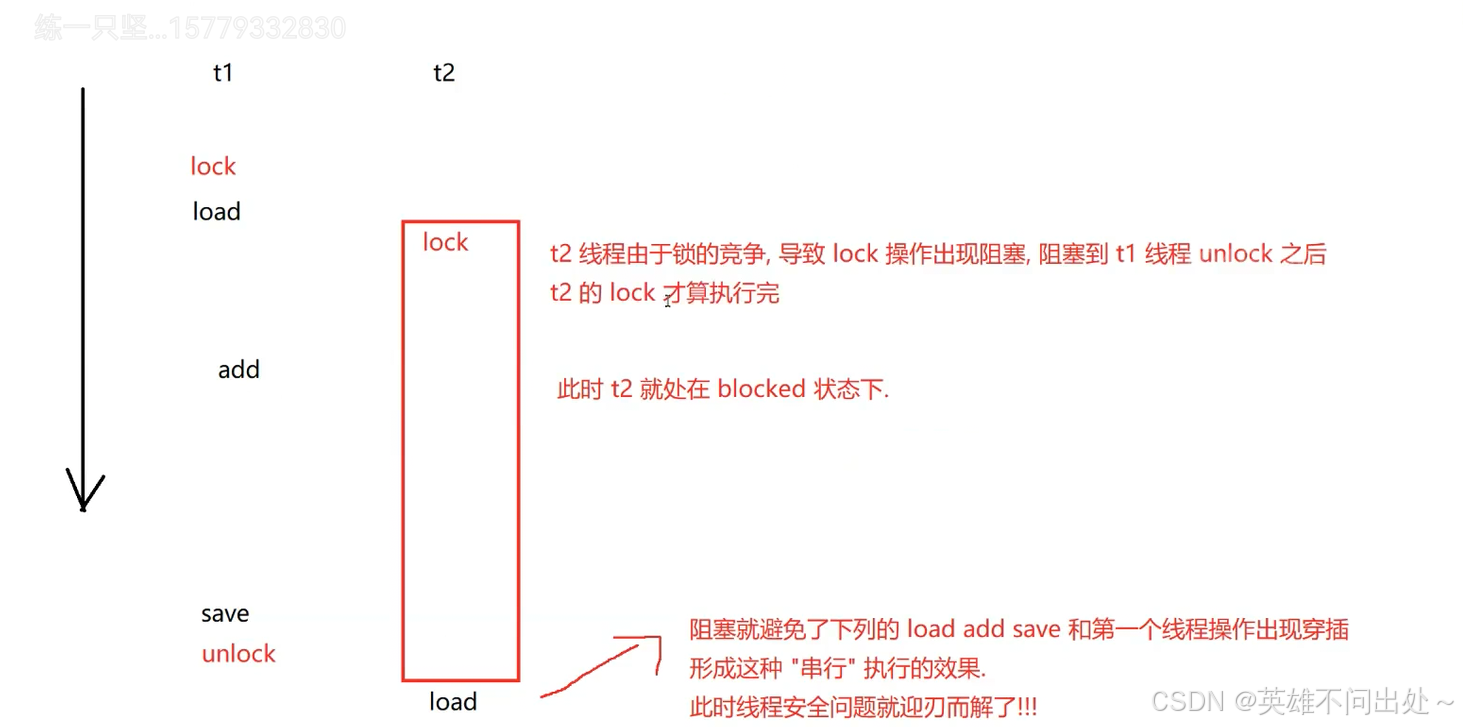
3.可以使用第三点 ,把count++变成原子的操作,可以进行加锁
使用加锁可以解决上面的问题,可以使用关键字synchronized
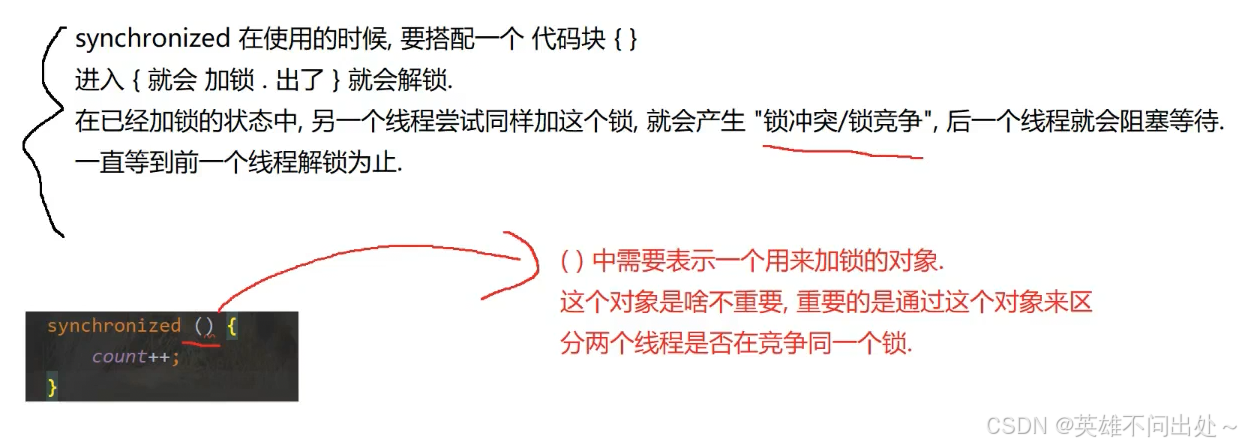
如果两个进程是在针对同一个对象进行加锁,就会产生锁竞争,如果不是针对同一个对象进行加锁,就不会产生锁竞争,就是并发执行
加锁的代码:
public class Demo13 {
    private static int count = 0;
    public static void main(String[] args) throws InterruptedException {
        // 加锁
        Object locker = new Object();

        Thread t1 = new Thread(()->{
           for(int i = 0;i < 50000;i++){
               synchronized(locker) {
                   // 对count这三步操作进行加锁,把它变成一个原子的操作
                   count++;
               }
           }
        });

        Thread t2 = new Thread(()->{
            for(int i = 0;i < 50000;i++){
                synchronized(locker){
                    count++;
                }
            }
        });

        t1.start();
        t2.start();

        t1.join();
        t2.join();

        System.out.println(count);// 10w
    }
}