1 项目概述
本项目旨在构建一个高可用、高性能的 MySQL 集群,能够处理大规模并发业务。通过容器化部署、多级缓存、完善的监控和备份策略,确保数据库服务的连续性和数据安全性。
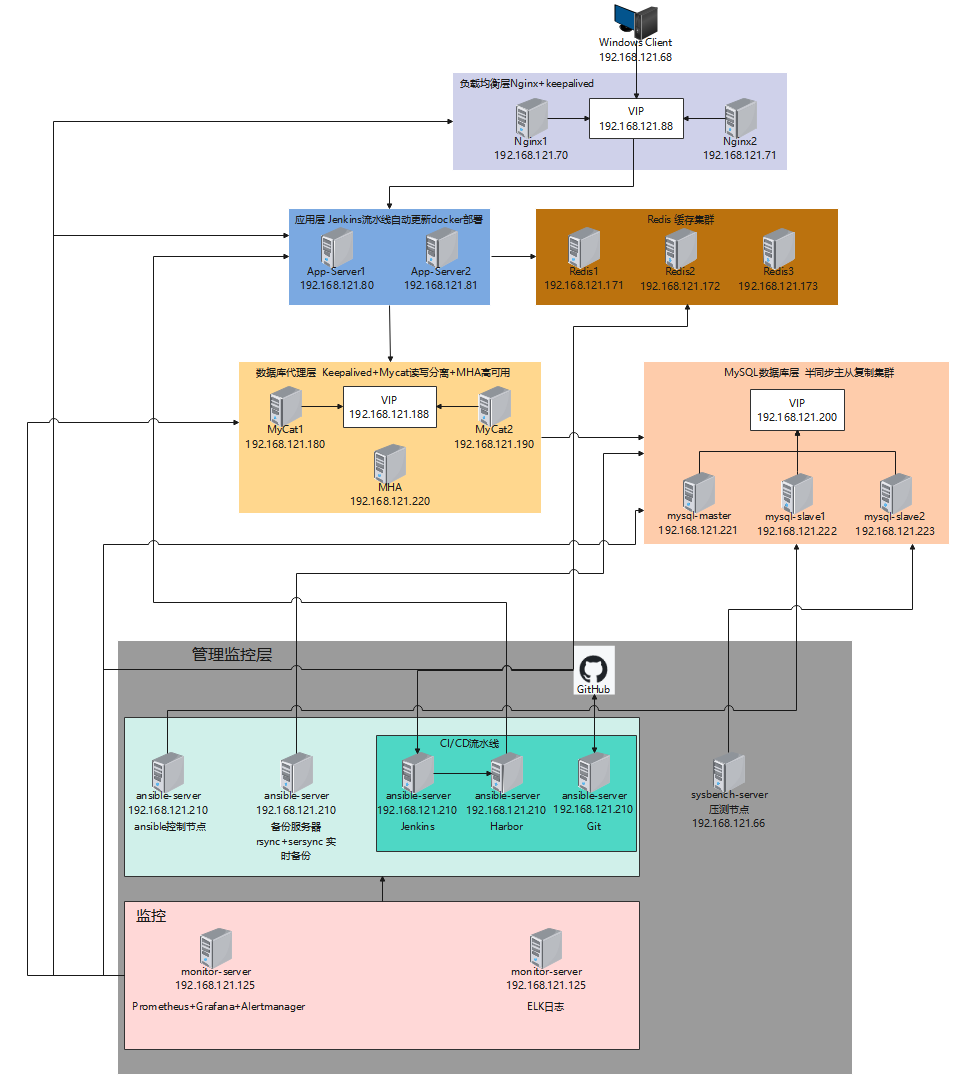
架构总览
预期目标
数据库服务可用性达到 99.99%
支持每秒 thousands 级别的并发访问
实现秒级故障检测和自动切换
数据备份 RPO<5 分钟,RTO<30 分钟
完善的监控告警体系
2 环境准备
2.1 硬件环境要求
| 角色 | 配置建议 | 数量 |
|---|---|---|
| MySQL 主库 | 1 核 CPU/2GB 内存 / 50GB SSD | 1 |
| MySQL 从库 | 1 核 CPU/2GB 内存 / 50GB SSD | 2 |
| MyCat 节点 | 1 核 CPU/2GB 内存 | 2 |
| MHA 管理节点 | 1 核 CPU/2GB 内存 | 1 |
| Redis 集群 | 1 核 CPU/2GB 内存 | 3 |
| 监控节点 | 2 核 CPU/6GB 内存 / 50GB 存储 | 1 |
| 备份节点 | 1 核 CPU/2GB 内存 / 100GB 存储 | 1 |
| 压测节点 | 1 核 CPU/2GB 内存 | 1 |
| Ansible 控制节点 | 1 核 CPU/2GB 内存 | 1 |
| Nginx节点 | 1 核 CPU/2GB 内存 | 2 |
| app-server节点 | 1 核 CPU/2GB 内存 | 2 |
2.2 网络规划
| 主机名 | IP 地址 | 角色 | VIP |
|---|---|---|---|
| windows-client | 192.168.121.68 | 客户端 | - |
| mycat1 | 192.168.121.180 | MyCat 节点 1 | 192.168.121.188 |
| mycat2 | 192.168.121.190 | MyCat 节点 2 | 192.168.121.199 |
| mha-manager | 192.168.121.220 | MHA 管理节点 | - |
| mysql-master | 192.168.121.221 | MySQL 主库 | 192.168.121.200 |
| mysql-slave1 | 192.168.121.222 | MySQL 从库 1 (候选主库) | 192.168.121.200 |
| mysql-slave2 | 192.168.121.223 | MySQL 从库 2 | - |
| ansible-server | 192.168.121.210 | Ansible 控制节点 / 备份服务器/CI/CD | - |
| sysbench-server | 192.168.121.66 | 压测服务器 | - |
| monitor-server | 192.168.121.125 | Prometheus+Grafana+ELK+alertmanager | - |
| redis1 | 192.168.121.171 | Redis 节点 1 | - |
| redis2 | 192.168.121.172 | Redis 节点 2 | - |
| redis3 | 192.168.121.173 | Redis 节点 3 | - |
| nginx1 | 192.168.121.70 | Nginx 主负载节点 | 192.168.121.88 |
| nginx2 | 192.168.121.71 | Nginx 备负载节点 | 192.168.121.88 |
| app-server1 | 192.168.121.80 | 应用服务器主节点 | - |
| app-server2 | 192.168.121.81 | 应用服务器备节点 | - |
2.3 软件版本规划
| 软件 | 版本 |
|---|---|
| 操作系统 | CentOS 7.9 |
| Docker | 26.1.4 |
| Docker Compose | 1.29.2 |
| Ansible | 2.9.27 |
| MySQL | 8.0.28 |
| MyCat2 | 1.21 |
| MHA | 0.58 |
| Redis | 6.2.6 |
| Prometheus | 2.33.5 |
| Grafana | 8.4.5 |
| ELK | 7.17.0 |
| Keepalived | 1.3.5 |
| Sysbench | 1.0.20 |
| Nginx | 1.27 |
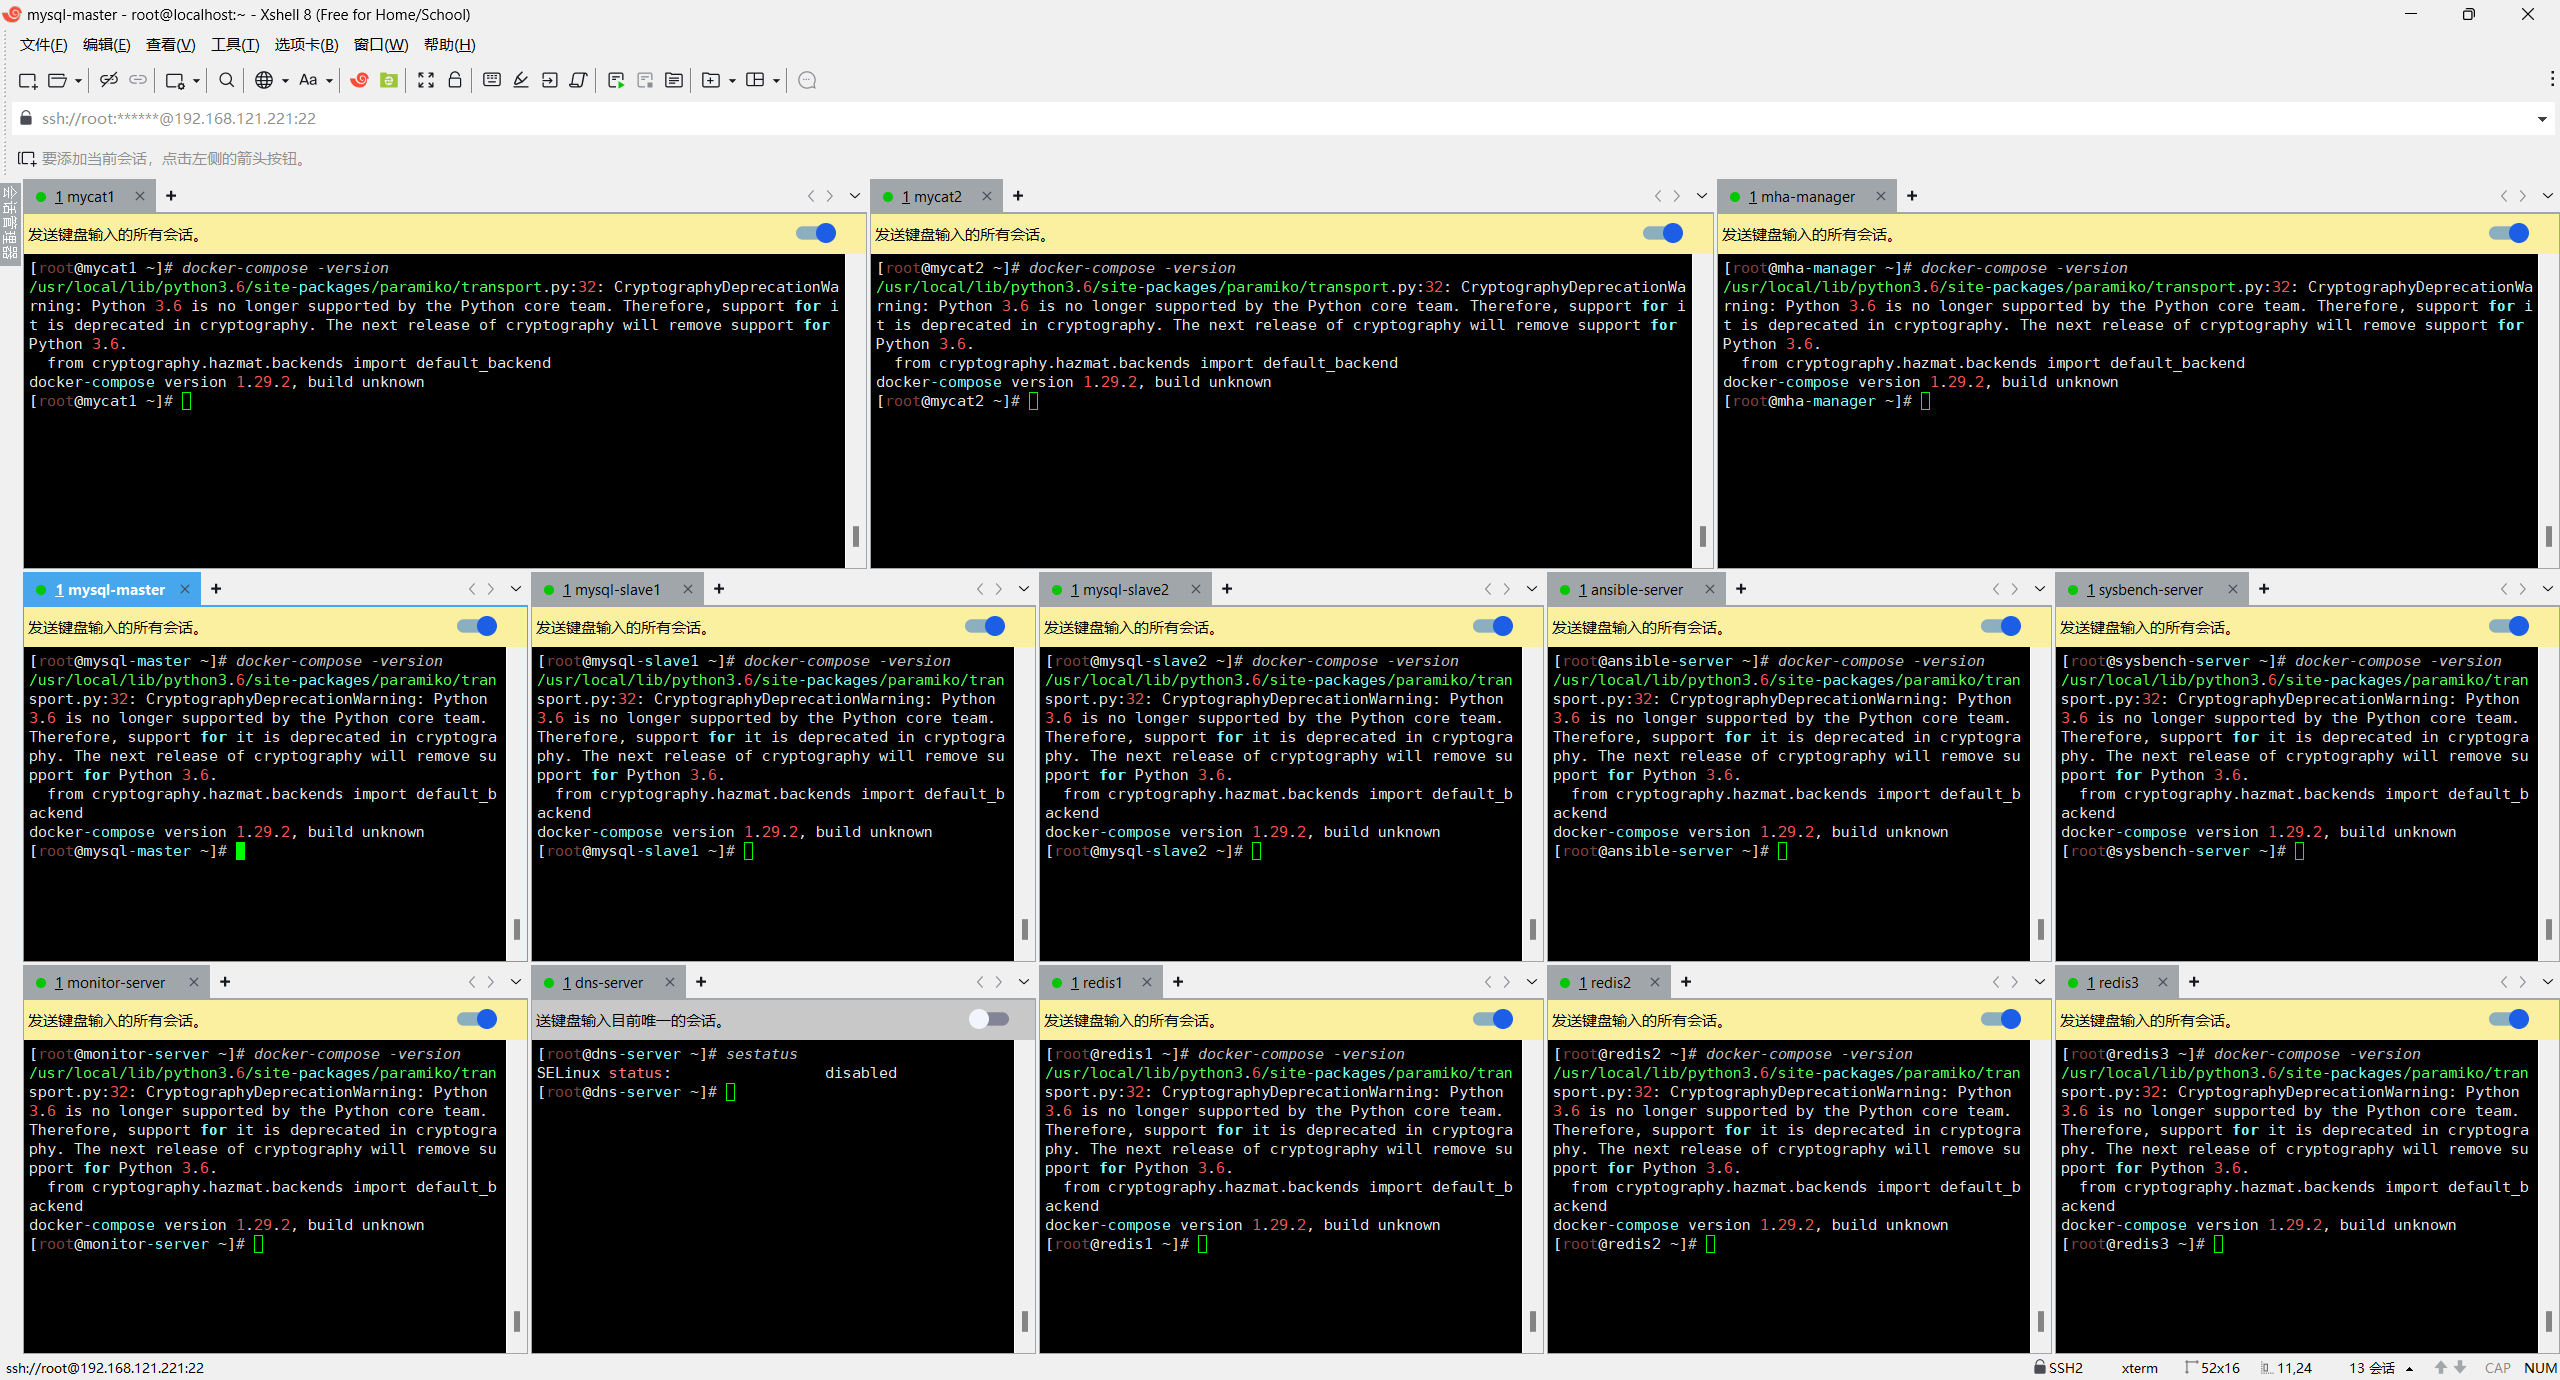
3 基础环境部署
3.1 操作系统初始化
所有节点执行以下操作
# 按照网络规划设置静态ip
vi /etc/sysconfig/network-scripts/ifcfg-ens32 # ens32根据实际修改可能是ens33
BOOTPROTO=static    # static表示静态ip地址
NAME=ens32          # 网络接口名称
DEVICE=ens32        # 网络接口的设备名称
ONBOOT=yes          # yes表示自启动
IPADDR=192.168.121.180      # 静态ip地址
NETMASK=255.255.255.0       # 子网掩码
GATEWAY=192.168.121.2       # 网关地址,具体见VMware虚拟网络编辑器设置
DNS1=114.114.114.114        # DNS首选服务器
DNS2=8.8.8.8

# 重启网卡
systemctl restart network

# 配置/etc/hosts文件ip 主机名映射
vim /etc/hosts
192.168.121.180  mycat1
192.168.121.190  mycat2
192.168.121.220  mha-manager
192.168.121.221  mysql-master
192.168.121.222  mysql-slave1
192.168.121.223  mysql-slave2
192.168.121.210  ansible-server
192.168.121.66  sysbench-server
192.168.121.125  monitor-server
192.168.121.171  redis1
192.168.121.172  redis2
192.168.121.173  redis3
192.168.121.70   nginx1
192.168.121.71   nginx2
192.168.121.80   app-server1
192.168.121.81   app-server2
# 按照网络规划修改主机名
hostnamectl set-hostname 主机名
su

# 关闭SELinux
sed -i 's/SELINUX=enforcing/SELINUX=disabled/' /etc/selinux/config
setenforce 0

# 关闭防火墙
systemctl stop firewalld
systemctl disable firewalld

# 安装必要工具
yum install -y vim net-tools wget curl lrzsz telnet

# 配置时间同步
yum install -y chrony
systemctl start chronyd
systemctl enable chronyd
chronyc sources

# 重启关闭selinux生效
reboot

# 查看selinux状态
sestatus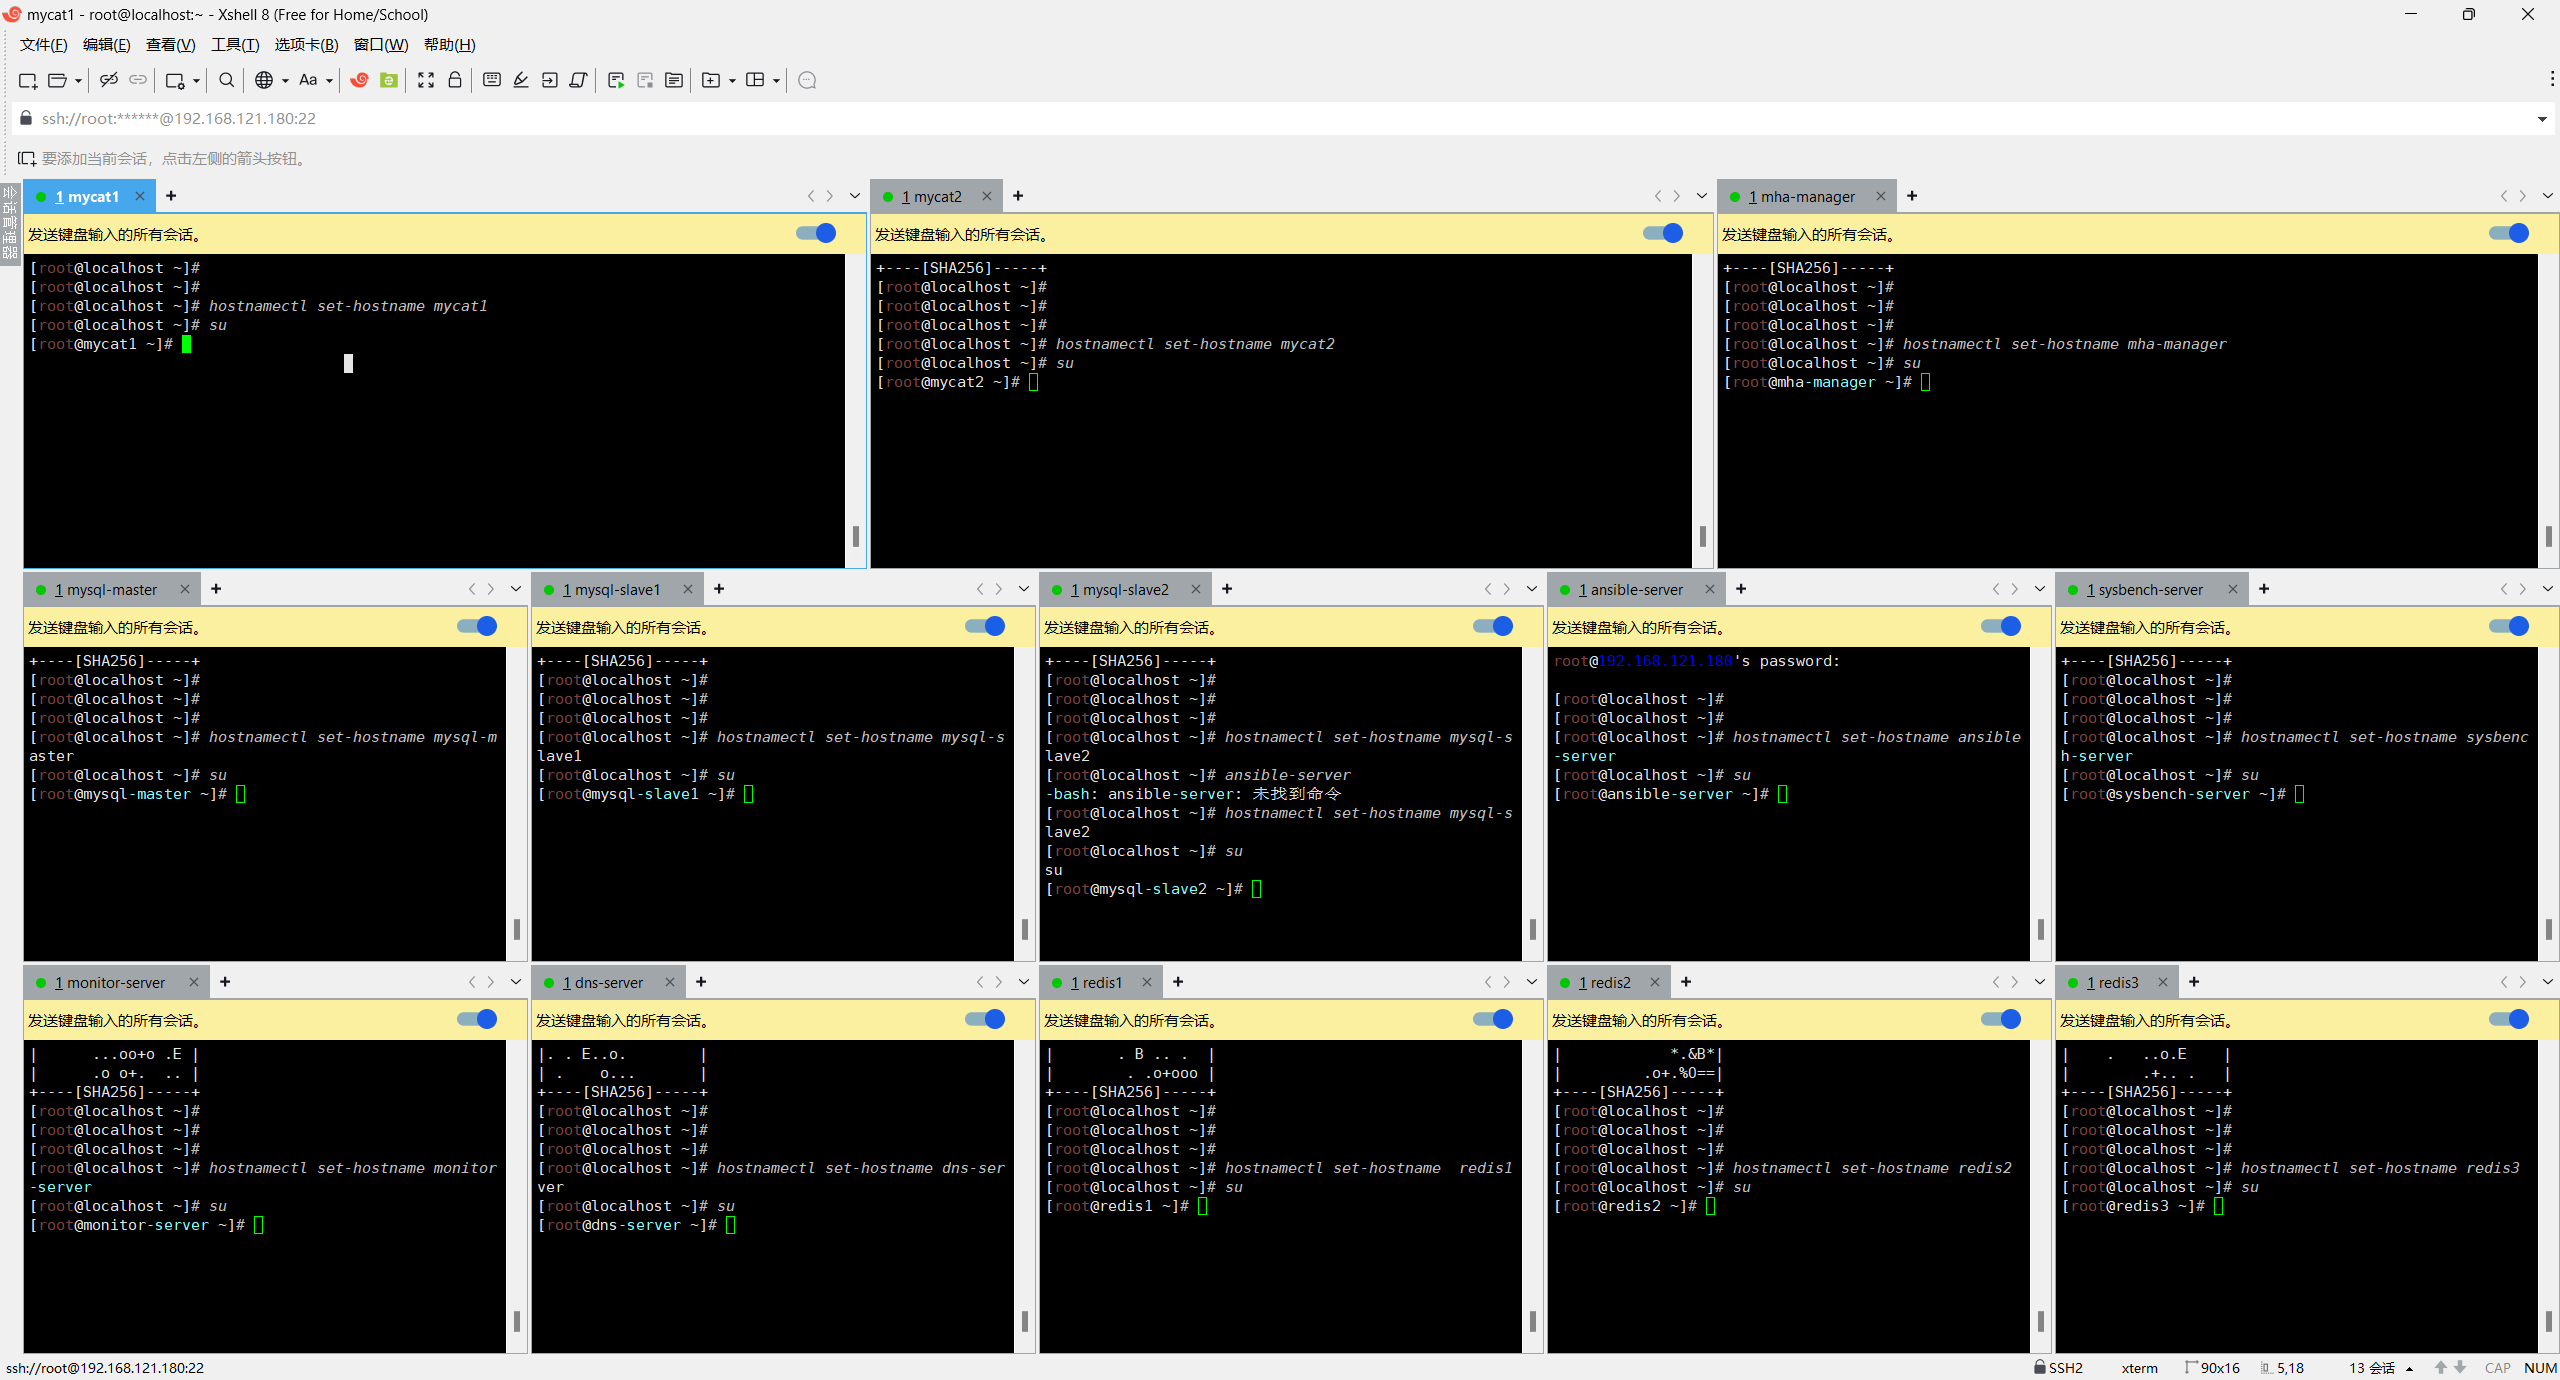
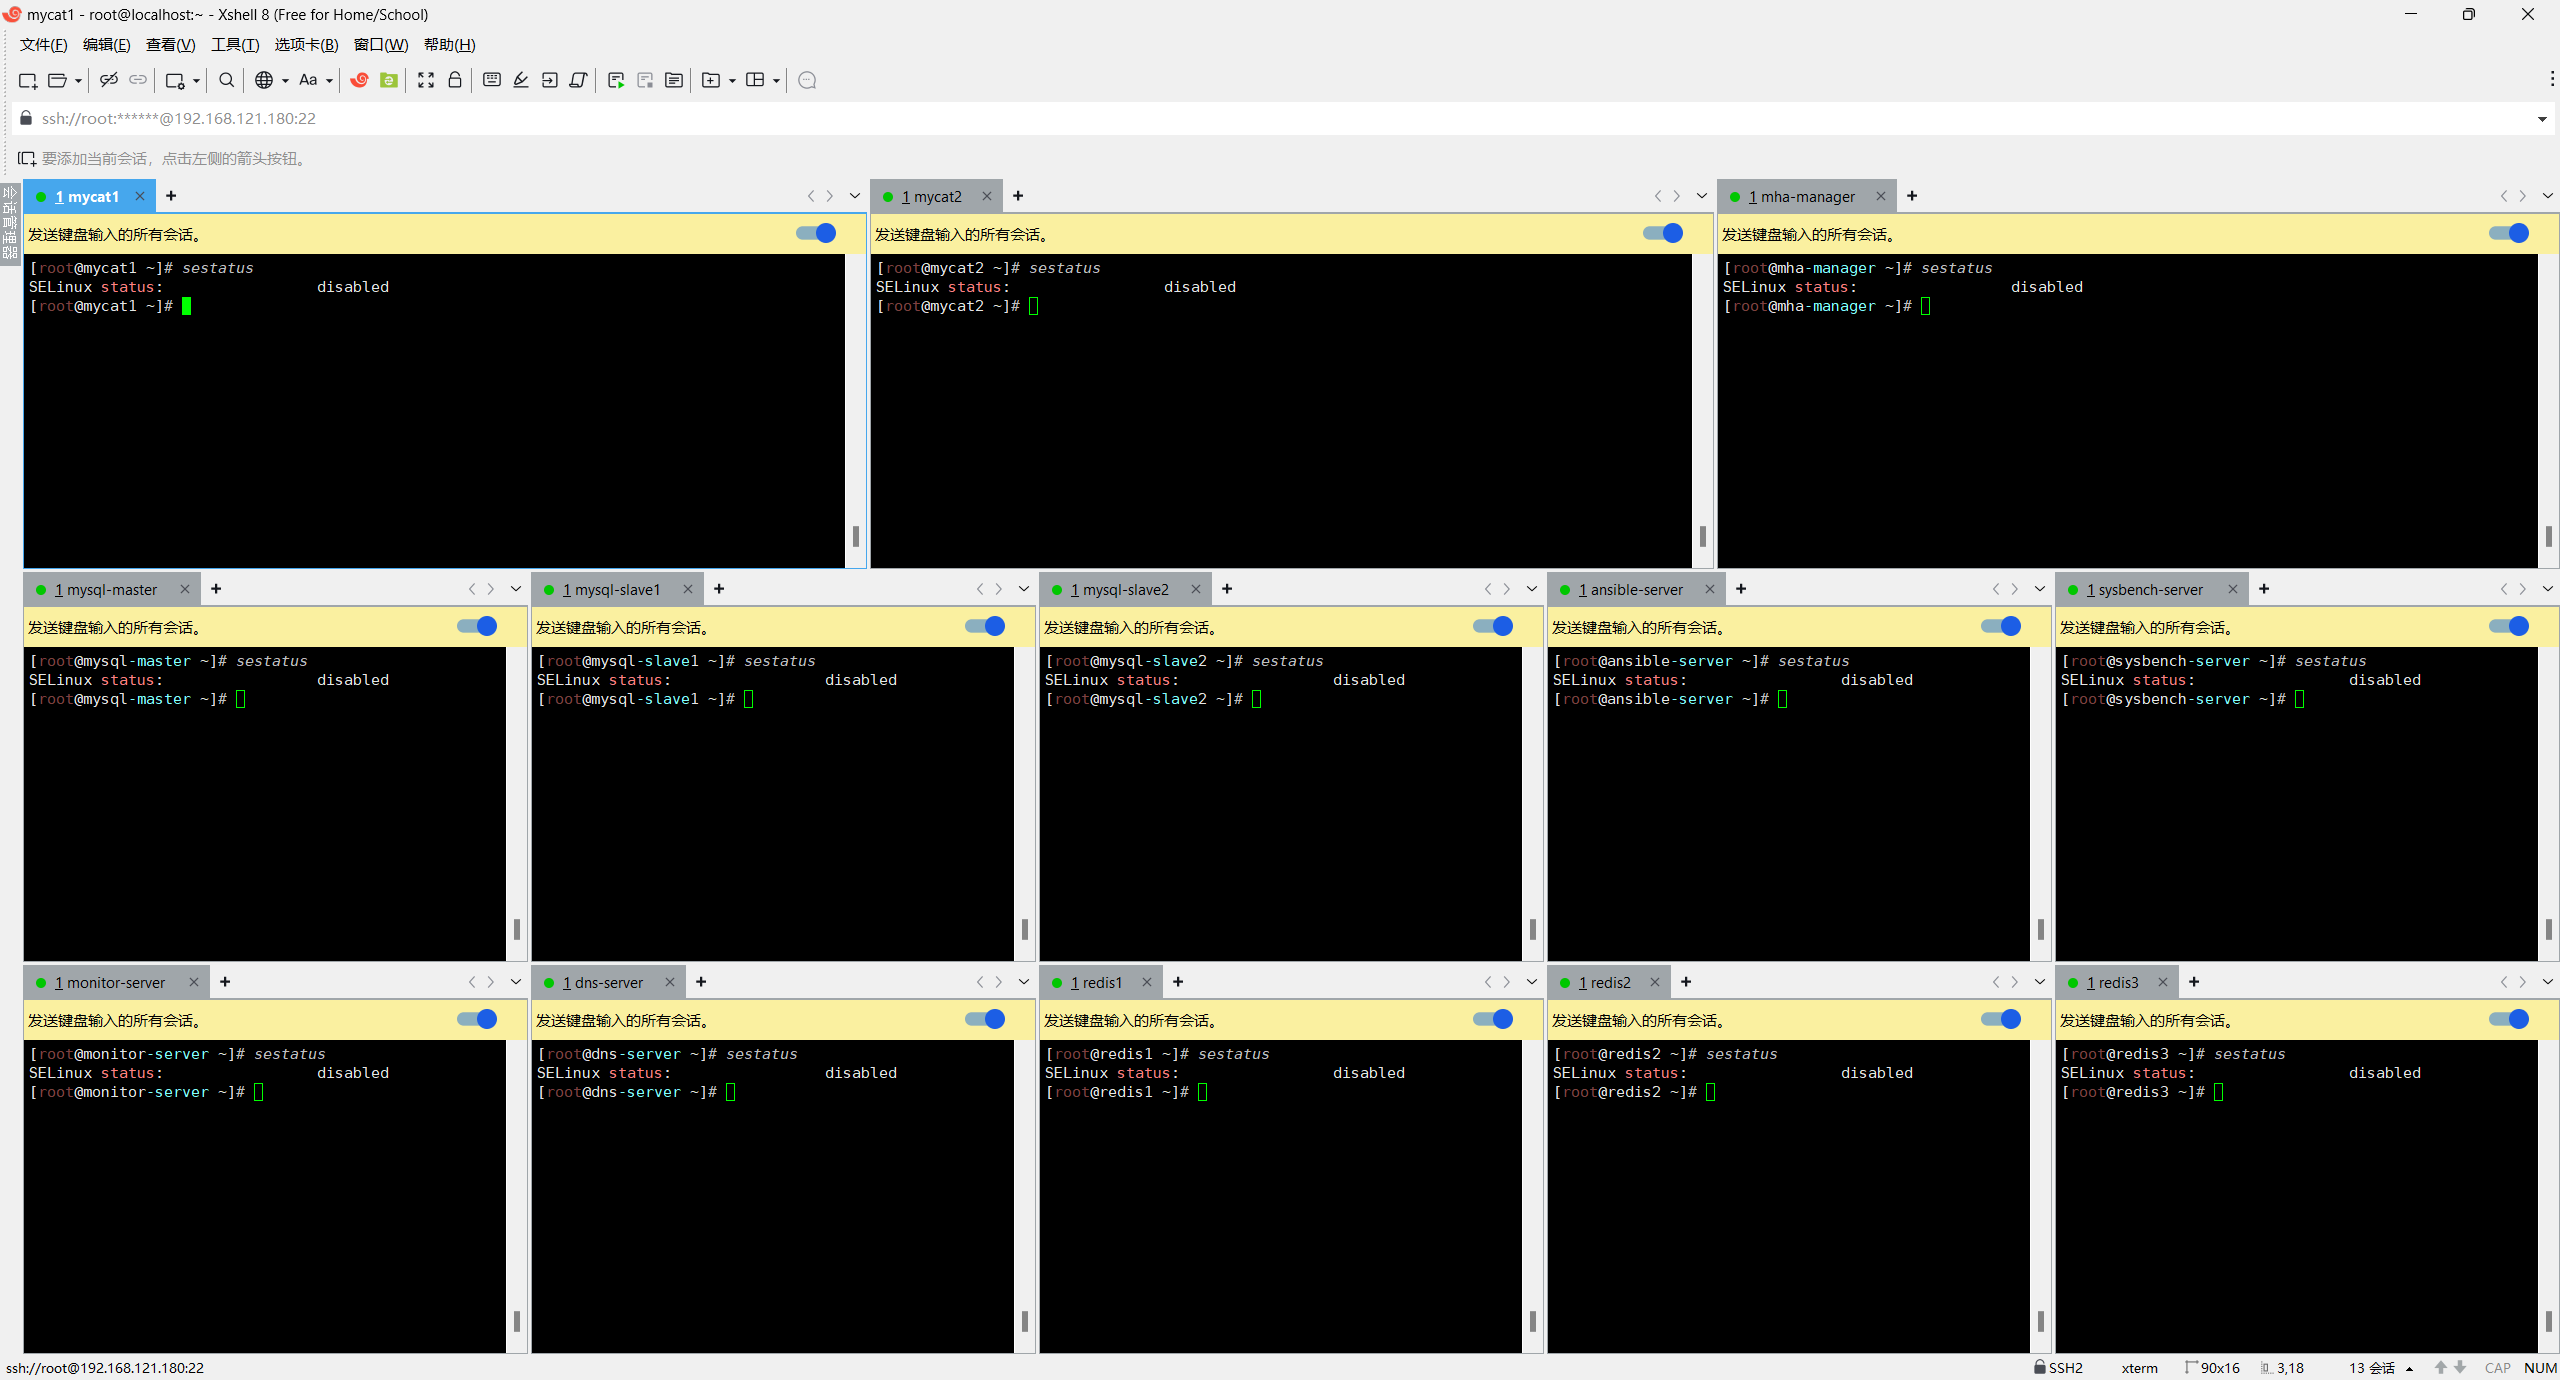
显示disabled表示关闭成功
3.2 部署 Docker 环境
在所有需要运行容器的节点(除了dns服务器节点)执行:
# 一键安装
bash <(curl -f -s --connect-timeout 10 --retry 3 https://linuxmirrors.cn/docker.sh) --source mirrors.tencent.com/docker-ce --source-registry docker.1ms.run --protocol https --install-latested true --close-firewall false --ignore-backup-tips

# 一键配置,简单快捷,告别拉取超时
bash <(curl -sSL https://n3.ink/helper)

# 安装docker-compose
yum install -y gcc python3-devel rust cargo

pip3 install --upgrade pip

pip3 install setuptools-rust

pip3 install docker-compose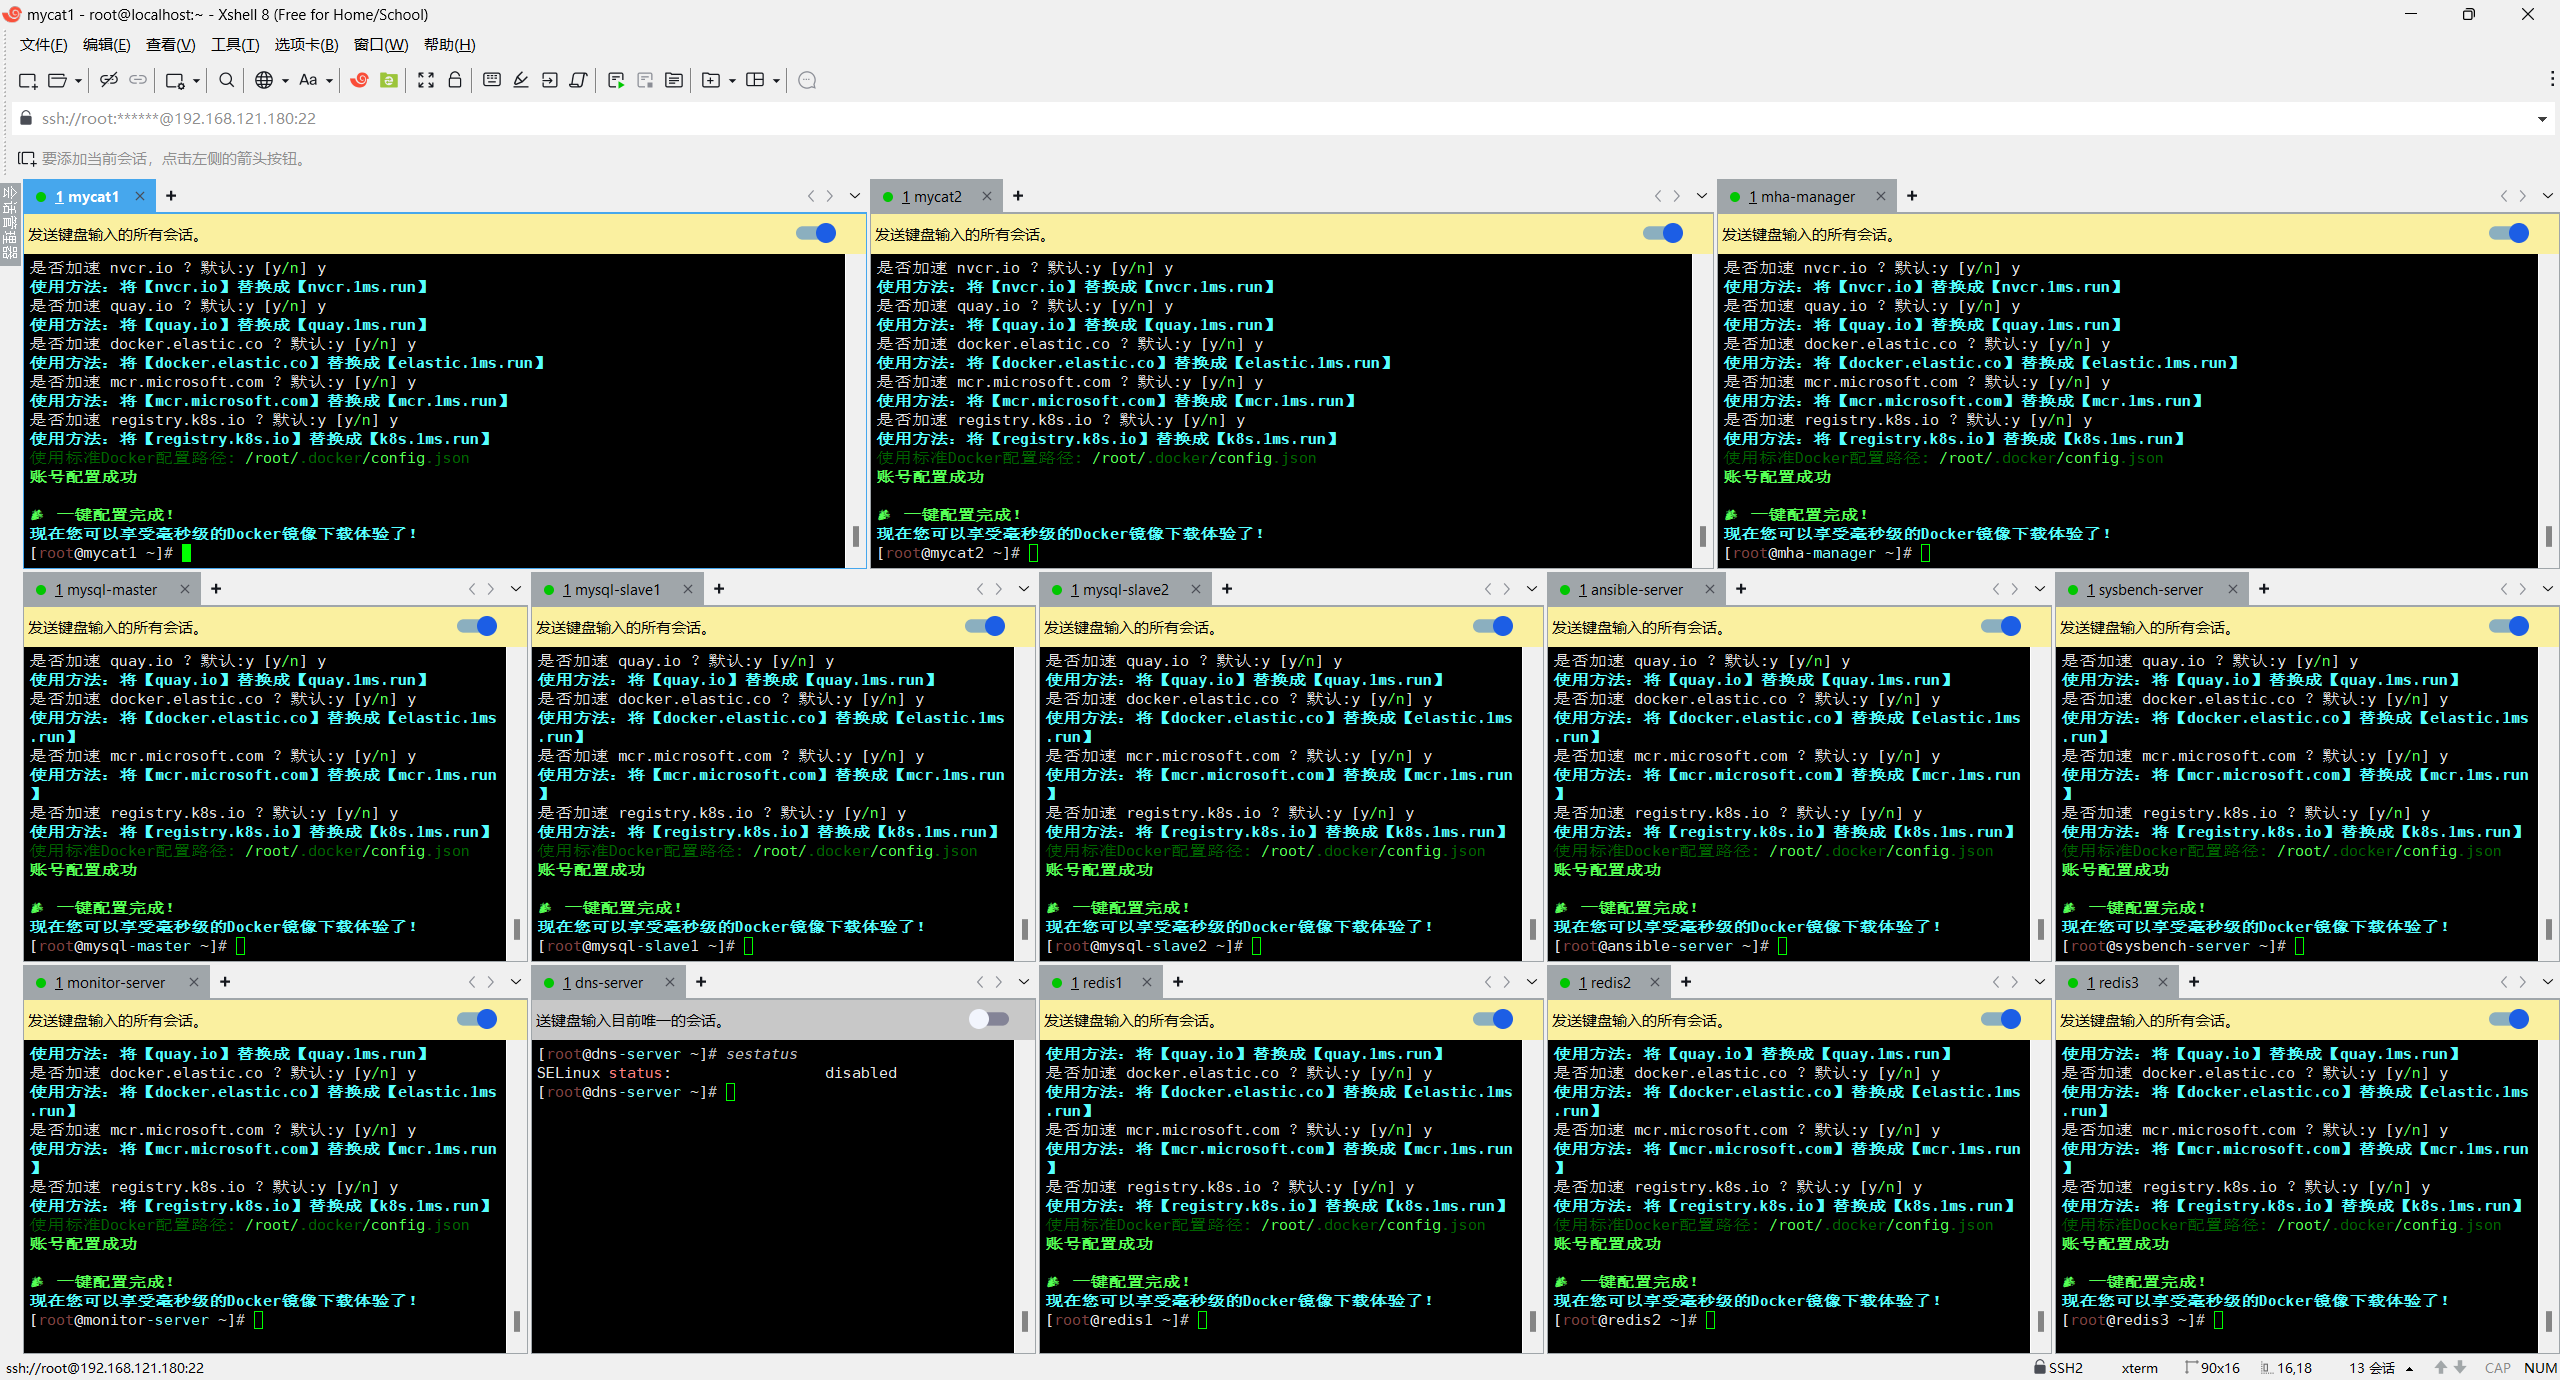
3.3 部署 Ansible 控制节点
在 ansible-server (192.168.121.210) 上执行:
yum install -y epel-release
yum install -y ansible

# 配置Ansible主机清单
cat > /etc/ansible/hosts << EOF
[mysql]
192.168.121.221
192.168.121.222
192.168.121.223

[mycat]
192.168.121.180
192.168.121.190

[mha]
192.168.121.220

[redis]
192.168.121.171
192.168.121.172
192.168.121.173

[monitor]
192.168.121.125

[backup]
192.168.121.210

[sysbench]
192.168.121.66

[nginx]
192.168.121.70
192.168.121.71

[app-server]
192.168.121.80
192.168.121.81
EOF

# 配置免密登录
ssh-keygen -t rsa -N "" -f ~/.ssh/id_rsa

# 批量分发公钥
for ip in 192.168.121.180 192.168.121.190 192.168.121.220 192.168.121.221 192.168.121.222 192.168.121.223 192.168.121.210 192.168.121.66 192.168.121.125 192.168.121.171 192.168.121.172 192.168.121.173 192.168.121.70 192.168.121.71; do
    ssh-copy-id root@$ip
done

# 测试Ansible连通性
ansible all -m ping
4 MySQL 集群部署
4.1 准备 MySQL Docker 镜像
在 ansible-server 上创建 Dockerfile:
mkdir -p /data/docker/mysql
cd /data/docker/mysql

[root@ansible-server tasks]# cat /data/docker/mysql/Dockerfile
FROM docker.1ms.run/mysql:8.0.28
# 安装必要工具
RUN yum clean all && \
    yum makecache fast && \
    yum install -y \
      vim \
      net-tools \
      iputils && \
    yum clean all && \
    rm -rf /var/cache/yum/* \
# 配置MySQL
COPY my.cnf /etc/mysql/conf.d/my.cnf
# 配置MHA相关脚本
COPY master_ip_failover /usr/local/bin/
COPY master_ip_online_change /usr/local/bin/
RUN chmod +x /usr/local/bin/master_ip_failover
RUN chmod +x /usr/local/bin/master_ip_online_change
# 设置时区
ENV TZ=Asia/Shanghai

# 分发Dokcerfile到三台mysql服务器
mkdir -p /data/docker/mysql    # 三台数据库服务器建立目录
scp /data/docker/mysql/Dockerfile mysql-master:/data/docker/mysql/Dockerfile
scp /data/docker/mysql/Dockerfile mysql-master:/data/docker/mysql/Dockerfile
scp /data/docker/mysql/Dockerfile mysql-master:/data/docker/mysql/Dockerfile
创建 MySQL 配置文件模板:
[root@ansible-server tasks]# cat /data/docker/mysql/my.cnf
[mysqld]
user = mysql
default-storage-engine = InnoDB
character-set-server = utf8mb4
collation-server = utf8mb4_general_ci
max_connections = 1000
wait_timeout = 600
interactive_timeout = 600
table_open_cache = 2048
max_heap_table_size = 64M
tmp_table_size = 64M
slow_query_log = 1
slow_query_log_file = /var/log/mysql/slow.log
long_query_time = 2
log_queries_not_using_indexes = 1
server-id = {

  { server_id }}
log_bin = /var/lib/mysql/mysql-bin
binlog_format = row
binlog_rows_query_log_events = 1
expire_logs_days = 7
gtid_mode = ON
enforce_gtid_consistency = ON
log_slave_updates = ON
relay_log_recovery = 1
sync_binlog = 1
innodb_flush_log_at_trx_commit = 1
plugin-load = "rpl_semi_sync_master=semisync_master.so;rpl_semi_sync_slave=semisync_slave.so"
loose_rpl_semi_sync_master_enabled = 1
loose_rpl_semi_sync_slave_enabled = 1
loose_rpl_semi_sync_master_timeout = 1000

[mysqld_safe]
log-error = /var/log/mysql/error.log
创建 MHA 相关脚本:
[root@ansible-server tasks]# cat /data/docker/mysql/master_ip_failover
#!/usr/bin/env perl
use strict;
use warnings FATAL => 'all';

use Getopt::Long;

my (
    $command,          $ssh_user,        $orig_master_host, $orig_master_ip,
    $orig_master_port, $new_master_host, $new_master_ip,    $new_master_port
);

my $vip = '192.168.121.200';								#指定vip的地址,自己指定
my $brdc = '192.168.121.255';								#指定vip的广播地址
my $ifdev = 'ens32';										#指定vip绑定的网卡
my $key = '1';												#指定vip绑定的虚拟网卡序列号
my $ssh_start_vip = "/sbin/ifconfig ens32:$key $vip";		#代表此变量值为ifconfig ens32:1 192.168.121.200
my $ssh_stop_vip = "/sbin/ifconfig ens32:$key down";		#代表此变量值为ifconfig ens32:1 192.168.121.200 down
my $exit_code = 0;											#指定退出状态码为0


GetOptions(
    'command=s'          => \$command,
    'ssh_user=s'         => \$ssh_user,
    'orig_master_host=s' => \$orig_master_host,
    'orig_master_ip=s'   => \$orig_master_ip,
    'orig_master_port=i' => \$orig_master_port,
    'new_master_host=s'  => \$new_master_host,
    'new_master_ip=s'    => \$new_master_ip,
    'new_master_port=i'  => \$new_master_port,
);

exit &main();

sub main {
    print "\n\nIN SCRIPT TEST====$ssh_stop_vip==$ssh_start_vip===\n\n";

    if ( $command eq "stop" || $command eq "stopssh" ) {
        my $host = $orig_master_host;
        my $ip = $orig_master_ip;
        print "Disabling the VIP on old master: $host \n";
        &stop_vip();
        $exit_code = 0;
    }
    elsif ( $command eq "start" ) {
        my $host = $new_master_host;
        my $ip = $new_master_ip;
        print "Enabling the VIP - $vip on the new master - $host \n";
        &start_vip();
        $exit_code = 0;
    }
    elsif ( $command eq "status" ) {
        print "Checking the Status of the script.. OK \n";
        $exit_code = 0;
    }
    else {
        &usage();
        $exit_code = 1;
    }
    return $exit_code;
}

sub start_vip() {
    `ssh $ssh_user\@$new_master_host \" $ssh_start_vip \"`;
}

sub stop_vip() {
    return 0 unless ($orig_master_host);
    `ssh $ssh_user\@$orig_master_host \" $ssh_stop_vip \"`;
}

sub usage {
    print
    "Usage: master_ip_failover --command=start|stop|stopssh|status --orig_master_host=host --orig_master_ip=ip --orig_master_port=port --new_master_host=host --new_master_ip=ip --new_master_port=port\n";
}
4.2 使用 Ansible 部署 MySQL 集群
创建 Ansible Playbook:
mkdir -p /data/ansible/roles/mysql/tasks
cd /data/ansible/roles/mysql/tasks

[root@ansible-server tasks]# pwd
/data/ansible/roles/mysql/tasks
[root@ansible-server tasks]# cat main.yml
- name: 创建MySQL数据目录
  file:
    path: /data/mysql/data
    state: directory
    mode: '0755'

- name: 创建MySQL日志目录
  file:
    path: /data/mysql/logs
    state: directory
    mode: '0755'

- name: 复制MySQL配置文件
  template:
    src: /data/docker/mysql/my.cnf
    dest: /data/mysql/my.cnf
    mode: '0644'

- name: 构建MySQL镜像
  docker_image:
    name: docker.1ms.run/mysql:8.0.28
    build:
      path: /data/docker/mysql
    source: build

- name: 启动MySQL容器
  docker_container:
    name: mysql
    image: docker.1ms.run/mysql:8.0.28
    state: started
    restart_policy: always
    ports:
      - "3306:3306"
    volumes:
      - /data/mysql/data:/var/lib/mysql
      - /data/mysql/logs:/var/log/mysql
      - /data/mysql/my.cnf:/etc/mysql/conf.d/my.cnf
    env:
      MYSQL_ROOT_PASSWORD: "{

  { mysql_root_password }}"
    privileged: yes

# 创建主Playbook
[root@ansible-server tasks]# cd /data/ansible
[root@ansible-server ansible]# cat deploy_mysql.yml
- hosts: mysql
  vars:
    mysql_root_password: "123456"
    server_id: "{

  { 221 if inventory_hostname == '192.168.121.221' else 222 if inventory_hostname == '192.168.121.222' else 223 }}"
  tasks:
    - include_role:
        name: mysql
分别为三个 MySQL 节点生成不同的配置文件:
# 为主库生成配置
sed 's/{

  { server_id }}/1/' /data/docker/mysql/my.cnf > /data/mysql/master_my.cnf
scp /data/mysql/master_my.cnf root@192.168.121.221:/data/mysql/my.cnf

# 为从库1生成配置
sed 's/{

  { server_id }}/2/' /data/docker/mysql/my.cnf > /data/mysql/slave1_my.cnf
scp /data/mysql/slave1_my.cnf root@192.168.121.222:/data/mysql/my.cnf

# 为从库2生成配置
sed 's/{

  { server_id }}/3/' /data/docker/mysql/my.cnf > /data/mysql/slave2_my.cnf
scp /data/mysql/slave2_my.cnf root@192.168.121.223:/data/mysql/my.cnf
执行部署:
ansible-playbook /data/ansible/deploy_mysql.yml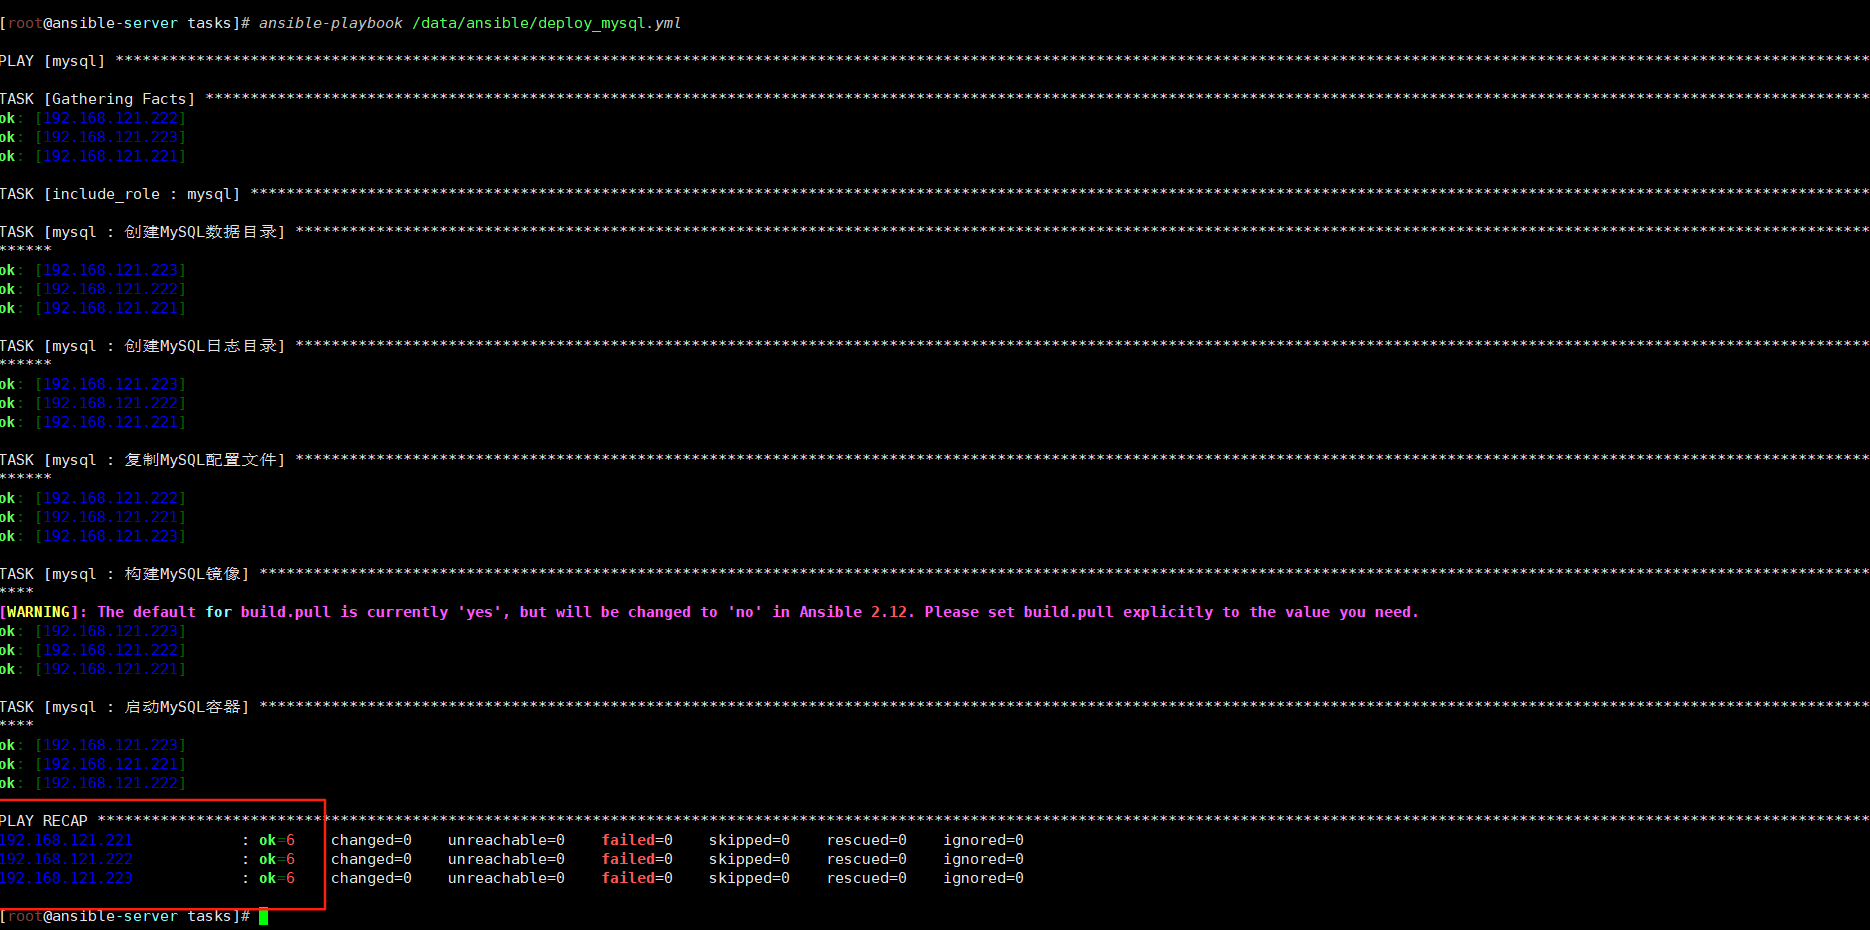
全部显示ok表示部署完成
4.3 配置 MySQL 主从复制
分别在主库 (192.168.121.221) 从库(192.168.121.222,192.168.121.223)上操作:
#说明:auto.cnf文件里保存的是每个数据库实例的UUID信息,代表数据库的唯一标识
[root@mysql-master]# rm -rf /data/mysql/data/auto.cnf
[root@mysql-slave1]# rm -rf /data/mysql/data    # 删除从库 data数据目录
[root@mysql-slave2]# rm -rf /data/mysql/data    # 删除从库 data数据目录
# 主从数据同步
[root@mysql-master]# scp -r /data/mysql/data mysql-slave1:/data/mysql/
[root@mysql-master]# scp -r /data/mysql/data mysql-slave2:/data/mysql/

# 进入容器
[root@mysql-master]# docker exec -it mysql bash

# 登录MySQL
mysql -uroot -p123456

# 创建复制用户
CREATE USER 'copy'@'%' IDENTIFIED BY '123456';
GRANT REPLICATION SLAVE ON *.* TO 'copy'@'%';
FLUSH PRIVILEGES;

# MySQL 8.0 及以上版本默认使用 caching_sha2_password 认证插件,该插件要求使用加密连接(SSL)或在特定配置下才能允许非加密连接。从库在连接主库时,由于未配置 SSL 且主库未放宽限制,导致认证失败。
# 使用mysql_native_password插件进行身份验证
ALTER USER 'copy'@'%'
IDENTIFIED WITH mysql_native_password BY '123456';
FLUSH PRIVILEGES;
# 查看主库状态
SHOW MASTER STATUS;
# 记录File和Position信息

mysql> show master status;
+------------------+----------+--------------+------------------+------------------------------------------+
| File             | Position | Binlog_Do_DB | Binlog_Ignore_DB | Executed_Gtid_Set                        |
+------------------+----------+--------------+------------------+------------------------------------------+
| mysql-bin.000003 |      902 |              |                  | 965d216d-7d64-11f0-8771-000c29111b7d:1-8 |
+------------------+----------+--------------+------------------+------------------------------------------+
1 row in set (0.00 sec)
在从库 1 (192.168.121.222) 上操作:
# 进入容器
docker exec -it mysql bahs

# 登录MySQL
mysql -uroot -p123456

# 停止从库
mysql> STOP SLAVE;
Query OK, 0 rows affected, 2 warnings (0.00 sec)

# 配置主从复制
mysql> change master to
       master_host='192.168.121.221',
       master_user='copy',
       master_password='123456',
       master_port=3306,
       master_log_file='mysql-bin.000003',
       master_log_pos=902;
Query OK, 0 rows affected, 9 warnings (0.01 sec)
说明:
master_host   		master的IP
master_user	  		复制的用户
master_password  	复制用户密码
master_port			master的端口号
master_log_file	master正在写的二进制文件名,锁表后查看的
master_log_pos    master正在写的二进制位置

# 启动从库
mysql> start slave;
Query OK, 0 rows affected, 1 warning (0.00 sec)

# 查看从库状态确保Slave_IO_Running和Slave_SQL_Running都是Yes
mysql> show slave status\G
*************************** 1. row ***************************
               Slave_IO_State: Waiting for source to send event
                  Master_Host: 192.168.121.221
                  Master_User: chenjun
                  Master_Port: 3306
                Connect_Retry: 60
              Master_Log_File: mysql-bin.000003
          Read_Master_Log_Pos: 1354
               Relay_Log_File: mysql-slave1-relay-bin.000003
                Relay_Log_Pos: 366
        Relay_Master_Log_File: mysql-bin.000003
             Slave_IO_Running: Yes
            Slave_SQL_Running: Yes
              Replicate_Do_DB:
          Replicate_Ignore_DB:
           Replicate_Do_Table:
       Replicate_Ignore_Table:
      Replicate_Wild_Do_Table:
  Replicate_Wild_Ignore_Table:
                   Last_Errno: 0
                   Last_Error:
                 Skip_Counter: 0
          Exec_Master_Log_Pos: 1354
              Relay_Log_Space: 1204
              Until_Condition: None
               Until_Log_File:
                Until_Log_Pos: 0
           Master_SSL_Allowed: No
           Master_SSL_CA_File:
           Master_SSL_CA_Path:
              Master_SSL_Cert:
            Master_SSL_Cipher:
               Master_SSL_Key:
        Seconds_Behind_Master: 0
Master_SSL_Verify_Server_Cert: No
                Last_IO_Errno: 0
                Last_IO_Error:
               Last_SQL_Errno: 0
               Last_SQL_Error:
  Replicate_Ignore_Server_Ids:
             Master_Server_Id: 221
                  Master_UUID: 965d216d-7d64-11f0-8771-000c29111b7d
             Master_Info_File: mysql.slave_master_info
                    SQL_Delay: 0
          SQL_Remaining_Delay: NULL
      Slave_SQL_Running_State: Replica has read all relay log; waiting for more updates
           Master_Retry_Count: 86400
                  Master_Bind:
      Last_IO_Error_Timestamp:
     Last_SQL_Error_Timestamp:
               Master_SSL_Crl:
           Master_SSL_Crlpath:
           Retrieved_Gtid_Set: 965d216d-7d64-11f0-8771-000c29111b7d:9-10
            Executed_Gtid_Set: 965d216d-7d64-11f0-8771-000c29111b7d:9-10,
966066a6-7d64-11f0-9760-000c29236169:1-6
                Auto_Position: 0
         Replicate_Rewrite_DB:
                 Channel_Name:
           Master_TLS_Version:
       Master_public_key_path:
        Get_master_public_key: 0
            Network_Namespace:
1 row in set, 1 warning (0.00 sec)
在从库 2 (192.168.121.223) 上操作:
# 停止从库
mysql> stop slave;
Query OK, 0 rows affected, 2 warnings (0.00 sec)

# 配置同步信息
mysql> change master to
    -> master_host='192.168.121.221',
    -> master_user='copy',
    -> master_password='123456',
    -> master_port=3306,
    -> master_log_file='mysql-bin.000003',
    -> master_log_pos=902;

mysql> start slave;
Query OK, 0 rows affected, 1 warning (0.01 sec)


mysql> show slave status\G
*************************** 1. row ***************************
               Slave_IO_State: Waiting for source to send event
                  Master_Host: 192.168.121.221
                  Master_User: copy
                  Master_Port: 3306
                Connect_Retry: 60
              Master_Log_File: mysql-bin.000003
          Read_Master_Log_Pos: 1354
               Relay_Log_File: mysql-slave2-relay-bin.000002
                Relay_Log_Pos: 326
        Relay_Master_Log_File: mysql-bin.000003
             Slave_IO_Running: Yes
            Slave_SQL_Running: No    # 这里发现是no没有成功
              Replicate_Do_DB:
          Replicate_Ignore_DB:
           Replicate_Do_Table:
       Replicate_Ignore_Table:
      Replicate_Wild_Do_Table:
  Replicate_Wild_Ignore_Table:
                   Last_Errno: 1396
                   Last_Error: Coordinator stopped because there were error(s) in the worker(s). The most recent failure being: Worker 1 failed executing transaction '965d216d-7d64-11f0-8771-000c29111b7d:9' at master log mysql-bin.000003, end_log_pos 1187. See error log and/or performance_schema.replication_applier_status_by_worker table for more details about this failure or others, if any.
                 Skip_Counter: 0
          Exec_Master_Log_Pos: 902
              Relay_Log_Space: 995
              Until_Condition: None
               Until_Log_File:
                Until_Log_Pos: 0
           Master_SSL_Allowed: No
           Master_SSL_CA_File:
           Master_SSL_CA_Path:
              Master_SSL_Cert:
            Master_SSL_Cipher:
               Master_SSL_Key:
        Seconds_Behind_Master: NULL
Master_SSL_Verify_Server_Cert: No
                Last_IO_Errno: 0
                Last_IO_Error:
               Last_SQL_Errno: 1396
               Last_SQL_Error: Coordinator stopped because there were error(s) in the worker(s). The most recent failure being: Worker 1 failed executing transaction '965d216d-7d64-11f0-8771-000c29111b7d:9' at master log mysql-bin.000003, end_log_pos 1187. See error log and/or performance_schema.replication_applier_status_by_worker table for more details about this failure or others, if any.
  Replicate_Ignore_Server_Ids:
             Master_Server_Id: 221
                  Master_UUID: 965d216d-7d64-11f0-8771-000c29111b7d
             Master_Info_File: mysql.slave_master_info
                    SQL_Delay: 0
          SQL_Remaining_Delay: NULL
      Slave_SQL_Running_State:
           Master_Retry_Count: 86400
                  Master_Bind:
      Last_IO_Error_Timestamp:
     Last_SQL_Error_Timestamp: 250820 01:59:29
               Master_SSL_Crl:
           Master_SSL_Crlpath:
           Retrieved_Gtid_Set: 965d216d-7d64-11f0-8771-000c29111b7d:9-10
            Executed_Gtid_Set: 96621d3c-7d64-11f0-9a8b-000c290f45a7:1-5
                Auto_Position: 0
         Replicate_Rewrite_DB:
                 Channel_Name:
           Master_TLS_Version:
       Master_public_key_path:
        Get_master_public_key: 0
            Network_Namespace:
1 row in set, 1 warning (0.00 sec)
在搭建第二台从库的的时候发现了一个小问题,第一台从库配置完主从复制之后主库的Position发生了变化导致第二台从库Slave_SQL_Running: No # no没有成功,
接下来去主库重新获取file和position主库 (192.168.121.221) 上操作:
mysql> SHOW MASTER STATUS;
+------------------+----------+--------------+------------------+-------------------------------------------+
| File             | Position | Binlog_Do_DB | Binlog_Ignore_DB | Executed_Gtid_Set                         |
+------------------+----------+--------------+------------------+-------------------------------------------+
| mysql-bin.000003 |     1354 |              |                  | 965d216d-7d64-11f0-8771-000c29111b7d:1-10 |
+------------------+----------+--------------+------------------+-------------------------------------------+
1 row in set (0.00 sec)
# 发现position从原来的902变成了1354
在从库 2 (192.168.121.223) 上操作:
# 停止从库
mysql> stop slave;
Query OK, 0 rows affected, 1 warning (0.01 sec)

# 清除主从同步规则
mysql> reset slave;
Query OK, 0 rows affected, 1 warning (0.00 sec)

# 重新同步配置信息
mysql> change master to
    ->        master_host='192.168.121.221',
    ->        master_user='copy',
    ->        master_password='123456',
    ->        master_port=3306,
    ->        master_log_file='mysql-bin.000003',
    ->        master_log_pos=1354;    # 注意修改pos为目前主库的值
Query OK, 0 rows affected, 9 warnings (0.01 sec)

mysql> start slave;
Query OK, 0 rows affected, 1 warning (0.00 sec)

mysql> show slave status\G
*************************** 1. row ***************************
               Slave_IO_State: Waiting for source to send event
                  Master_Host: 192.168.121.221
                  Master_User: chenjun
                  Master_Port: 3306
                Connect_Retry: 60
              Master_Log_File: mysql-bin.000003
          Read_Master_Log_Pos: 1354
               Relay_Log_File: mysql-slave2-relay-bin.000002
                Relay_Log_Pos: 326
        Relay_Master_Log_File: mysql-bin.000003
             Slave_IO_Running: Yes
            Slave_SQL_Running: Yes    # 发现主从复制成功了
              Replicate_Do_DB:
          Replicate_Ignore_DB:
           Replicate_Do_Table:
       Replicate_Ignore_Table:
      Replicate_Wild_Do_Table:
  Replicate_Wild_Ignore_Table:
                   Last_Errno: 0
                   Last_Error:
                 Skip_Counter: 0
          Exec_Master_Log_Pos: 1354
              Relay_Log_Space: 543
              Until_Condition: None
               Until_Log_File:
                Until_Log_Pos: 0
           Master_SSL_Allowed: No
           Master_SSL_CA_File:
           Master_SSL_CA_Path:
              Master_SSL_Cert:
            Master_SSL_Cipher:
               Master_SSL_Key:
        Seconds_Behind_Master: 0
Master_SSL_Verify_Server_Cert: No
                Last_IO_Errno: 0
                Last_IO_Error:
               Last_SQL_Errno: 0
               Last_SQL_Error:
  Replicate_Ignore_Server_Ids:
             Master_Server_Id: 221
                  Master_UUID: 965d216d-7d64-11f0-8771-000c29111b7d
             Master_Info_File: mysql.slave_master_info
                    SQL_Delay: 0
          SQL_Remaining_Delay: NULL
      Slave_SQL_Running_State: Replica has read all relay log; waiting for more updates
           Master_Retry_Count: 86400
                  Master_Bind:
      Last_IO_Error_Timestamp:
     Last_SQL_Error_Timestamp:
               Master_SSL_Crl:
           Master_SSL_Crlpath:
           Retrieved_Gtid_Set:
            Executed_Gtid_Set: 96621d3c-7d64-11f0-9a8b-000c290f45a7:1-5
                Auto_Position: 0
         Replicate_Rewrite_DB:
                 Channel_Name:
           Master_TLS_Version:
       Master_public_key_path:
        Get_master_public_key: 0
            Network_Namespace:
1 row in set, 1 warning (0.00 sec)
4.4 配置半同步复制
编辑主库配置文件在主库 2 (192.168.121.221) 上操作
vim /data/mysql/my.cnf

# 在[mysqld]模块下添加以下参数:
[mysqld]
# 启用半同步主库模式(核心参数)
rpl_semi_sync_master_enabled = 1

# 半同步超时时间(单位:毫秒,默认10000ms=10秒,建议根据网络延迟调整)
# 若从库在超时时间内未确认,主库会降级为异步复制
rpl_semi_sync_master_timeout = 30000
编辑从库配置文件在从库1 (192.168.121.222)和从库2(192.168.121.223) 上操作
vim /data/mysql/my.cnf
同样在[mysqld]模块下添加以下参数:
[mysqld]
# 启用半同步从库模式(核心参数)
rpl_semi_sync_slave_enabled = 1

# 可选参数:从库是否在接收到binlog后立即发送确认(1=立即发送,0=等待SQL线程执行后发送)
# 建议保持默认1(仅确认接收,不等待执行,减少主库等待时间)
rpl_semi_sync_slave_trace_level = 32
重启主库和从库服务
docker restart mysql验证持久化配置是否生效
-- 主库验证
SHOW GLOBAL VARIABLES LIKE 'rpl_semi_sync_master_enabled';  -- 应返回ON
SHOW GLOBAL VARIABLES LIKE 'rpl_semi_sync_master_timeout';   -- 应返回配置的超时值

-- 从库验证
SHOW GLOBAL VARIABLES LIKE 'rpl_semi_sync_slave_enabled';   -- 应返回ON
确认半同步状态已激活
-- 主库
SHOW GLOBAL STATUS LIKE 'Rpl_semi_sync_master_status';  -- 应返回ON

-- 从库
SHOW GLOBAL STATUS LIKE 'Rpl_semi_sync_slave_status';   -- 应返回ON
如果报错
mysql> SHOW GLOBAL STATUS LIKE 'Rpl_semi_sync_slave_status';
+----------------------------+-------+
| Variable_name              | Value |
+----------------------------+-------+
| Rpl_semi_sync_slave_status | OFF   |
+----------------------------+-------+
1 row in set (0.01 sec)

mysql> STOP SLAVE;
Query OK, 0 rows affected, 2 warnings (0.00 sec)

mysql> START SLAVE;
ERROR 1200 (HY000): The server is not configured as slave; fix in config file or with CHANGE MASTER TO
重新配置两个从库连接主库的信息原因是主库binlog发生了变化
mysql> change master to
    -> master_host='192.168.121.221',
    -> master_user='copy',
    -> master_password='123456',
    -> master_port=3306,
    -> master_log_file='mysql-bin.000005',
    -> master_log_pos=197;
Query OK, 0 rows affected, 9 warnings (0.01 sec)

mysql> start slave;
Query OK, 0 rows affected, 1 warning (0.01 sec)

mysql> show slave status\G
*************************** 1. row ***************************
               Slave_IO_State: Waiting for source to send event
                  Master_Host: 192.168.121.221
                  Master_User: chenjun
                  Master_Port: 3306
                Connect_Retry: 60
              Master_Log_File: mysql-bin.000005
          Read_Master_Log_Pos: 197
               Relay_Log_File: mysql-slave1-relay-bin.000002
                Relay_Log_Pos: 326
        Relay_Master_Log_File: mysql-bin.000005
             Slave_IO_Running: Yes
            Slave_SQL_Running: Yes
              Replicate_Do_DB:
          Replicate_Ignore_DB:
           Replicate_Do_Table:
       Replicate_Ignore_Table:
      Replicate_Wild_Do_Table:
  Replicate_Wild_Ignore_Table:
                   Last_Errno: 0
                   Last_Error:
                 Skip_Counter: 0
          Exec_Master_Log_Pos: 197
              Relay_Log_Space: 543
              Until_Condition: None
               Until_Log_File:
                Until_Log_Pos: 0
           Master_SSL_Allowed: No
           Master_SSL_CA_File:
           Master_SSL_CA_Path:
              Master_SSL_Cert:
            Master_SSL_Cipher:
               Master_SSL_Key:
        Seconds_Behind_Master: 0
Master_SSL_Verify_Server_Cert: No
                Last_IO_Errno: 0
                Last_IO_Error:
               Last_SQL_Errno: 0
               Last_SQL_Error:
  Replicate_Ignore_Server_Ids:
             Master_Server_Id: 221
                  Master_UUID: ebd87b10-7d6c-11f0-965d-000c29111b7d
             Master_Info_File: mysql.slave_master_info
                    SQL_Delay: 0
          SQL_Remaining_Delay: NULL
      Slave_SQL_Running_State: Replica has read all relay log; waiting for more updates
           Master_Retry_Count: 86400
                  Master_Bind:
      Last_IO_Error_Timestamp:
     Last_SQL_Error_Timestamp:
               Master_SSL_Crl:
           Master_SSL_Crlpath:
           Retrieved_Gtid_Set:
            Executed_Gtid_Set: 965d216d-7d64-11f0-8771-000c29111b7d:1-5
                Auto_Position: 0
         Replicate_Rewrite_DB:
                 Channel_Name:
           Master_TLS_Version:
       Master_public_key_path:
        Get_master_public_key: 0
            Network_Namespace:
1 row in set, 1 warning (0.00 sec)
测试主从复制
# 主库执行
create database test;

# 从库执行
show databases;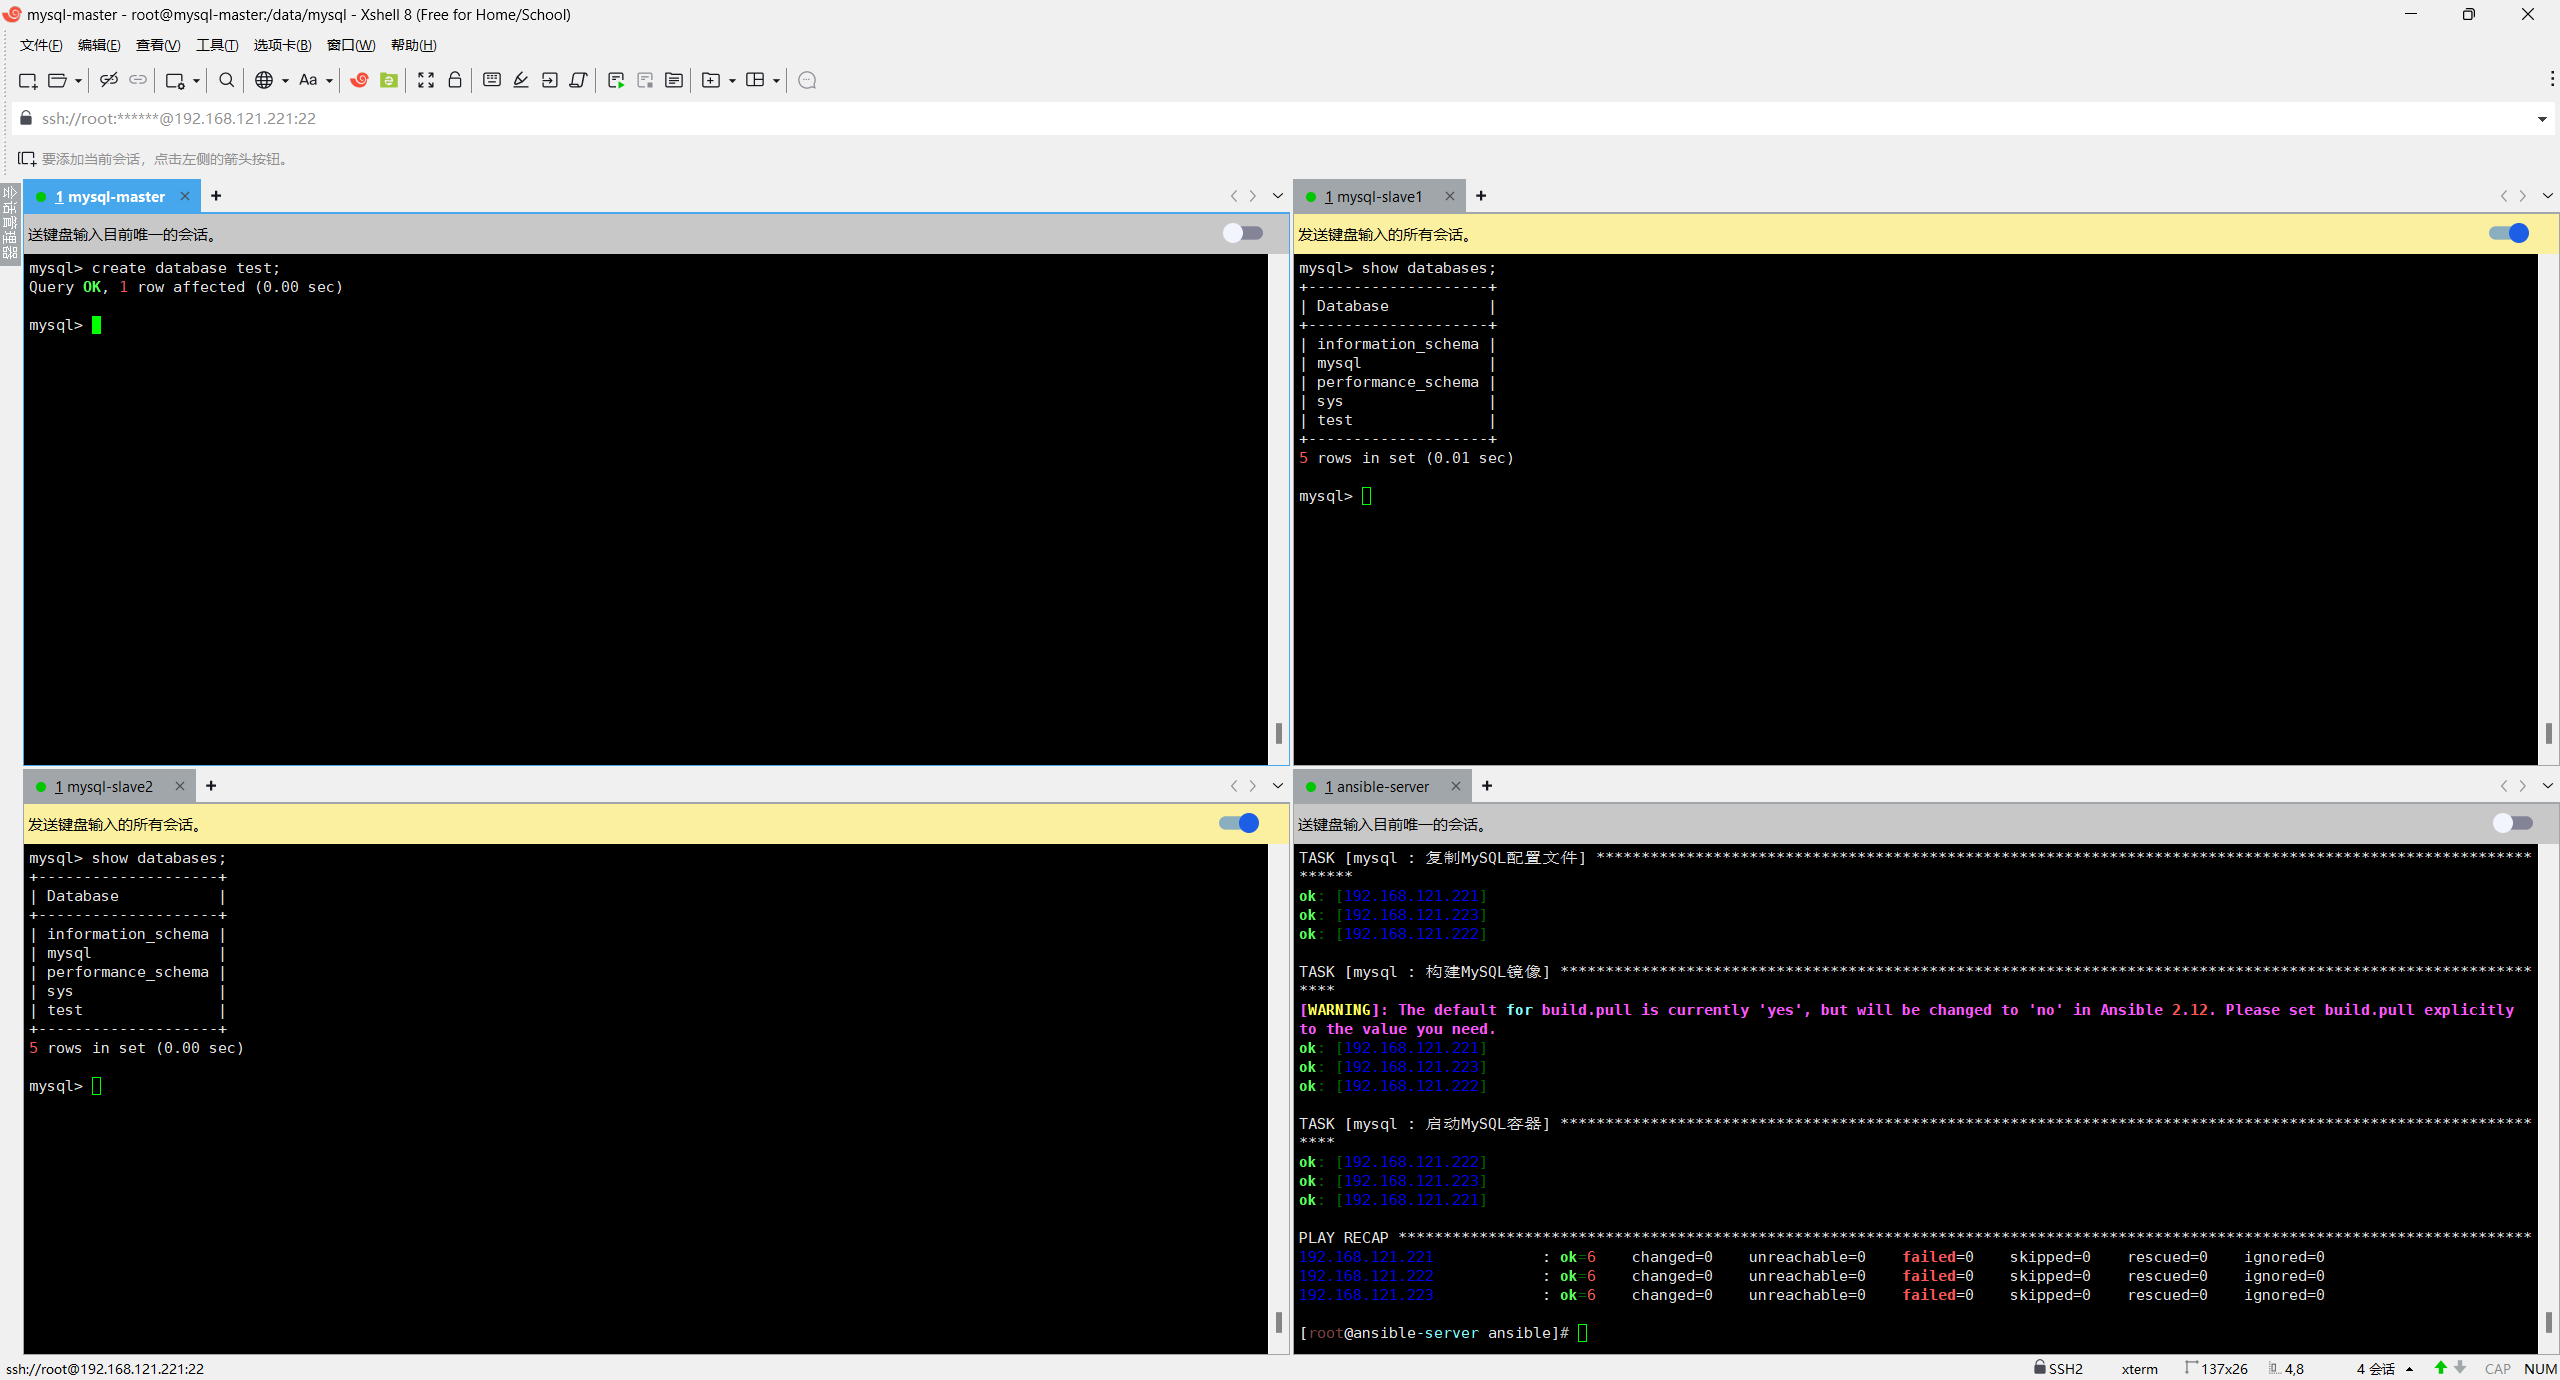
半同步测试
在主库(192.168.121.221)上操作:
# 记录初始事务计数,用于后续对比
mysql> SHOW GLOBAL STATUS LIKE 'Rpl_semi_sync_master_yes_tx';    #成功等待从库确认的事务数
+-----------------------------+-------+
| Variable_name               | Value |
+-----------------------------+-------+
| Rpl_semi_sync_master_yes_tx | 6     |
+-----------------------------+-------+
1 row in set (0.00 sec)

mysql> SHOW GLOBAL STATUS LIKE 'Rpl_semi_sync_master_no_tx';     #未等待确认的事务数(异步)
+----------------------------+-------+
| Variable_name              | Value |
+----------------------------+-------+
| Rpl_semi_sync_master_no_tx | 0     |
+----------------------------+-------+
1 row in set (0.00 sec)

# 主库创建测试库表并插入数据
mysql> CREATE DATABASE IF NOT EXISTS test;
Query OK, 1 row affected (0.00 sec)

mysql> USE test;
Database changed
mysql> CREATE TABLE IF NOT EXISTS t (id INT PRIMARY KEY, val VARCHAR(50));
Query OK, 0 rows affected (0.01 sec)

# 执行事务
mysql> INSERT INTO t VALUES (1, 'semi-sync-test');
Query OK, 1 row affected (0.00 sec)

mysql> SHOW GLOBAL STATUS LIKE 'Rpl_semi_sync_master_yes_tx';
+-----------------------------+-------+
| Variable_name               | Value |
+-----------------------------+-------+
| Rpl_semi_sync_master_yes_tx | 9     |
+-----------------------------+-------+
1 row in set (0.00 sec)

mysql> SHOW GLOBAL STATUS LIKE 'Rpl_semi_sync_master_no_tx';
+----------------------------+-------+
| Variable_name              | Value |
+----------------------------+-------+
| Rpl_semi_sync_master_no_tx | 0     |
+----------------------------+-------+
1 row in set (0.00 sec)

# 若yes_tx增加,说明事务在收到从库确认后才提交,半同步正常。
# 若no_tx增加,说明半同步未生效(需排查从库连接或配置)
5 MHA 部署与配置
5.1 部署 MHA 节点
在 mha-manager (192.168.121.220) 上操作:
# 安装依赖
yum install -y perl-DBD-MySQL perl-Config-Tiny perl-Log-Dispatch perl-Parallel-ForkManager perl-ExtUtils-CBuilder perl-ExtUtils-MakeMaker epel-release

# 安装MHA Node
wget https://github.com/yoshinorim/mha4mysql-node/releases/download/v0.58/mha4mysql-node-0.58-0.el7.centos.noarch.rpm
rpm -ivh mha4mysql-node-0.58-0.el7.centos.noarch.rpm

# 安装MHA Manager
wget https://github.com/yoshinorim/mha4mysql-manager/releases/download/v0.58/mha4mysql-manager-0.58-0.el7.centos.noarch.rpm
rpm -ivh mha4mysql-manager-0.58-0.el7.centos.noarch.rpm

# 创建MHA配置目录
mkdir -p /etc/mha/mysql_cluster
mkdir -p /var/log/mha/mysql_cluster

# 创建MHA配置文件
cat > /etc/mha/mysql_cluster.cnf << EOF
[server default]
manager_workdir=/var/log/mha/mysql_cluster
manager_log=/var/log/mha/mysql_cluster/manager.log
master_binlog_dir=/var/lib/mysql
user=mha
password=123456
ping_interval=1
remote_workdir=/tmp
repl_user=mha
repl_password=123456
ssh_user=root
master_ip_failover_script=/usr/local/bin/master_ip_failover
master_ip_online_change_script=/usr/local/bin/master_ip_online_change
secondary_check_script=masterha_secondary_check -s 192.168.121.222 -s 192.168.121.223
shutdown_script=""


[server1]
hostname=192.168.121.221
port=3306
candidate_master=1

[server2]
hostname=192.168.121.222
port=3306
candidate_master=1

[server3]
hostname=192.168.121.223
port=3306
candidate_master=0
EOF

scp root@192.168.121.210:/data/docker/mysql/master_ip_failover /usr/local/bin/
scp root@192.168.121.210:/data/docker/mysql/master_ip_online_change /usr/local/bin/
chmod +x /usr/local/bin/master_ip_failover
chmod +x /usr/local/bin/master_ip_online_change
在所有 MySQL 节点上安装 MHA Node:
# 在ansible-server上执行
ansible mysql -m shell -a 'yum install -y perl-DBD-MySQL'
cd /data/docker
wget https://github.com/yoshinorim/mha4mysql-node/releases/download/v0.58/mha4mysql-node-0.58-0.el7.centos.noarch.rpm

ansible mysql -m copy -a 'src=/data/docker/mha4mysql-node-0.58-0.el7.centos.noarch.rpm dest=/tmp/'

ansible mysql -m shell -a 'rpm -ivh /tmp/mha4mysql-node-0.58-0.el7.centos.noarch.rpm'
5.2 配置 MySQL 监控用户
在主库上创建 MHA 监控用户(主从复制从库会同步):
# 登录MySQL
mysql -uroot -p123456

# 创建监控用户
CREATE USER 'mha'@'%' IDENTIFIED BY '123456';
GRANT ALL PRIVILEGES ON *.* TO 'mha'@'%';
ALTER USER 'mha'@'%' IDENTIFIED WITH mysql_native_password BY '123456';
FLUSH PRIVILEGES;
5.3 测试 MHA 配置
# 测试SSH连接,如果没用配置ssh免密登录可能会报错
[root@mha-manager mha]# masterha_check_ssh --conf=/etc/mha/mysql_cluster.cnf
Thu Aug 21 15:40:49 2025 - [warning] Global configuration file /etc/masterha_default.cnf not found. Skipping.
Thu Aug 21 15:40:49 2025 - [info] Reading application default configuration from /etc/mha/mysql_cluster.cnf..
Thu Aug 21 15:40:49 2025 - [info] Reading server configuration from /etc/mha/mysql_cluster.cnf..
Thu Aug 21 15:40:49 2025 - [info] Starting SSH connection tests..
Thu Aug 21 15:40:50 2025 - [debug]
Thu Aug 21 15:40:49 2025 - [debug]  Connecting via SSH from root@192.168.121.221(192.168.121.221:22) to root@192.168.121.222(192.168.121.222:22)..
Thu Aug 21 15:40:50 2025 - [debug]   ok.
Thu Aug 21 15:40:50 2025 - [debug]  Connecting via SSH from root@192.168.121.221(192.168.121.221:22) to root@192.168.121.223(192.168.121.223:22)..
Thu Aug 21 15:40:50 2025 - [debug]   ok.
Thu Aug 21 15:40:50 2025 - [debug]
Thu Aug 21 15:40:50 2025 - [debug]  Connecting via SSH from root@192.168.121.222(192.168.121.222:22) to root@192.168.121.221(192.168.121.221:22)..
Thu Aug 21 15:40:50 2025 - [debug]   ok.
Thu Aug 21 15:40:50 2025 - [debug]  Connecting via SSH from root@192.168.121.222(192.168.121.222:22) to root@192.168.121.223(192.168.121.223:22)..
Thu Aug 21 15:40:50 2025 - [debug]   ok.
Thu Aug 21 15:40:51 2025 - [debug]
Thu Aug 21 15:40:50 2025 - [debug]  Connecting via SSH from root@192.168.121.223(192.168.121.223:22) to root@192.168.121.221(192.168.121.221:22)..
Thu Aug 21 15:40:51 2025 - [debug]   ok.
Thu Aug 21 15:40:51 2025 - [debug]  Connecting via SSH from root@192.168.121.223(192.168.121.223:22) to root@192.168.121.222(192.168.121.222:22)..
Thu Aug 21 15:40:51 2025 - [debug]   ok.
Thu Aug 21 15:40:51 2025 - [info] All SSH connection tests passed successfully.


# 测试MySQL复制
[root@mha-manager mha]# masterha_check_repl --conf=/etc/mha/mysql_cluster.cnf
Thu Aug 21 15:40:33 2025 - [warning] Global configuration file /etc/masterha_default.cnf not found. Skipping.
Thu Aug 21 15:40:33 2025 - [info] Reading application default configuration from /etc/mha/mysql_cluster.cnf..
Thu Aug 21 15:40:33 2025 - [info] Reading server configuration from /etc/mha/mysql_cluster.cnf..
Thu Aug 21 15:40:33 2025 - [info] MHA::MasterMonitor version 0.58.
Thu Aug 21 15:40:34 2025 - [info] GTID failover mode = 1
Thu Aug 21 15:40:34 2025 - [info] Dead Servers:
Thu Aug 21 15:40:34 2025 - [info] Alive Servers:
Thu Aug 21 15:40:34 2025 - [info]   192.168.121.221(192.168.121.221:3306)
Thu Aug 21 15:40:34 2025 - [info]   192.168.121.222(192.168.121.222:3306)
Thu Aug 21 15:40:34 2025 - [info]   192.168.121.223(192.168.121.223:3306)
Thu Aug 21 15:40:34 2025 - [info] Alive Slaves:
Thu Aug 21 15:40:34 2025 - [info]   192.168.121.222(192.168.121.222:3306)  Version=8.0.28 (oldest major version between slaves) log-bin:enabled
Thu Aug 21 15:40:34 2025 - [info]     GTID ON
Thu Aug 21 15:40:34 2025 - [info]     Replicating from 192.168.121.221(192.168.121.221:3306)
Thu Aug 21 15:40:34 2025 - [info]     Primary candidate for the new Master (candidate_master is set)
Thu Aug 21 15:40:34 2025 - [info]   192.168.121.223(192.168.121.223:3306)  Version=8.0.28 (oldest major version between slaves) log-bin:enabled
Thu Aug 21 15:40:34 2025 - [info]     GTID ON
Thu Aug 21 15:40:34 2025 - [info]     Replicating from 192.168.121.221(192.168.121.221:3306)
Thu Aug 21 15:40:34 2025 - [info] Current Alive Master: 192.168.121.221(192.168.121.221:3306)
Thu Aug 21 15:40:34 2025 - [info] Checking slave configurations..
Thu Aug 21 15:40:34 2025 - [info]  read_only=1 is not set on slave 192.168.121.222(192.168.121.222:3306).
Thu Aug 21 15:40:34 2025 - [info]  read_only=1 is not set on slave 192.168.121.223(192.168.121.223:3306).
Thu Aug 21 15:40:34 2025 - [info] Checking replication filtering settings..
Thu Aug 21 15:40:34 2025 - [info]  binlog_do_db= , binlog_ignore_db=
Thu Aug 21 15:40:34 2025 - [info]  Replication filtering check ok.
Thu Aug 21 15:40:34 2025 - [info] GTID (with auto-pos) is supported. Skipping all SSH and Node package checking.
Thu Aug 21 15:40:34 2025 - [info] Checking SSH publickey authentication settings on the current master..
Thu Aug 21 15:40:34 2025 - [info] HealthCheck: SSH to 192.168.121.221 is reachable.
Thu Aug 21 15:40:34 2025 - [info]
192.168.121.221(192.168.121.221:3306) (current master)
 +--192.168.121.222(192.168.121.222:3306)
 +--192.168.121.223(192.168.121.223:3306)

Thu Aug 21 15:40:34 2025 - [info] Checking replication health on 192.168.121.222..
Thu Aug 21 15:40:34 2025 - [info]  ok.
Thu Aug 21 15:40:34 2025 - [info] Checking replication health on 192.168.121.223..
Thu Aug 21 15:40:34 2025 - [info]  ok.
Thu Aug 21 15:40:34 2025 - [info] Checking master_ip_failover_script status:
Thu Aug 21 15:40:34 2025 - [info]   /usr/local/bin/master_ip_failover --command=status --ssh_user=root --orig_master_host=192.168.121.221 --orig_master_ip=192.168.121.221 --orig_master_port=3306


IN SCRIPT TEST====/sbin/ifconfig ens32:1 down==/sbin/ifconfig ens32:1 192.168.121.200===

Checking the Status of the script.. OK
Thu Aug 21 15:40:34 2025 - [info]  OK.
Thu Aug 21 15:40:34 2025 - [warning] shutdown_script is not defined.
Thu Aug 21 15:40:34 2025 - [info] Got exit code 0 (Not master dead).

MySQL Replication Health is OK.


# 启动MHA Manager
nohup masterha_manager --conf=/etc/mha/mysql_cluster.cnf > /var/log/mha/mysql_cluster/manager.log 2>&1 &

# 查看MHA状态
[root@mha-manager mha]# masterha_check_status --conf=/etc/mha/mysql_cluster.cnf
mysql_cluster (pid:2942) is running(0:PING_OK), master:192.168.121.221
出现以下内容表示启动成功
5.4 故障转移效果测试,模拟mysql-matser宕机,指定mysql-slave1成为新的master
5.4.1 在mysql主节点手动开启vip
ifconfig ens32:1 192.168.121.200/245.4.2 mha-manager节点监控日志记录
[root@mha-manager mha]# tail -f /var/log/mha/mysql_cluster/manager.log 5.4.3 模拟mysql-master宕机,停掉master
[root@mysql-master ~]# docker stop mysql
mysql
查看vip是否漂移到了mysql-slave1
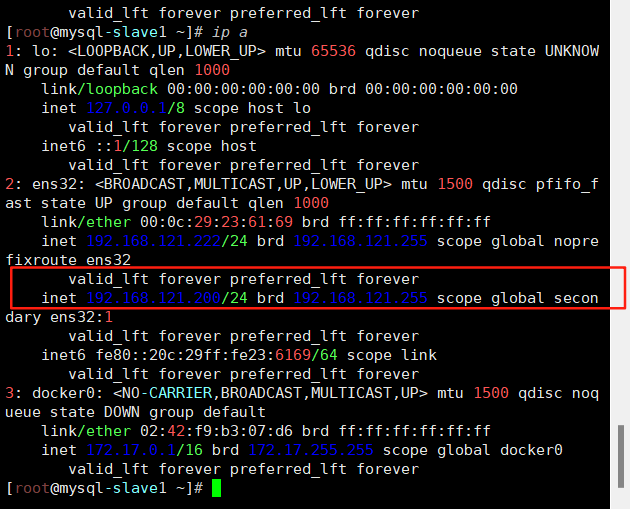
5.4.4 查看状态master是不是salve1的ip
[root@mha-manager mha]# masterha_check_status --conf=/etc/mha/mysql_cluster.cnf
mysql_cluster (pid:4680) is running(0:PING_OK), master:192.168.121.222
在看看mysql-slave2的主节点信息
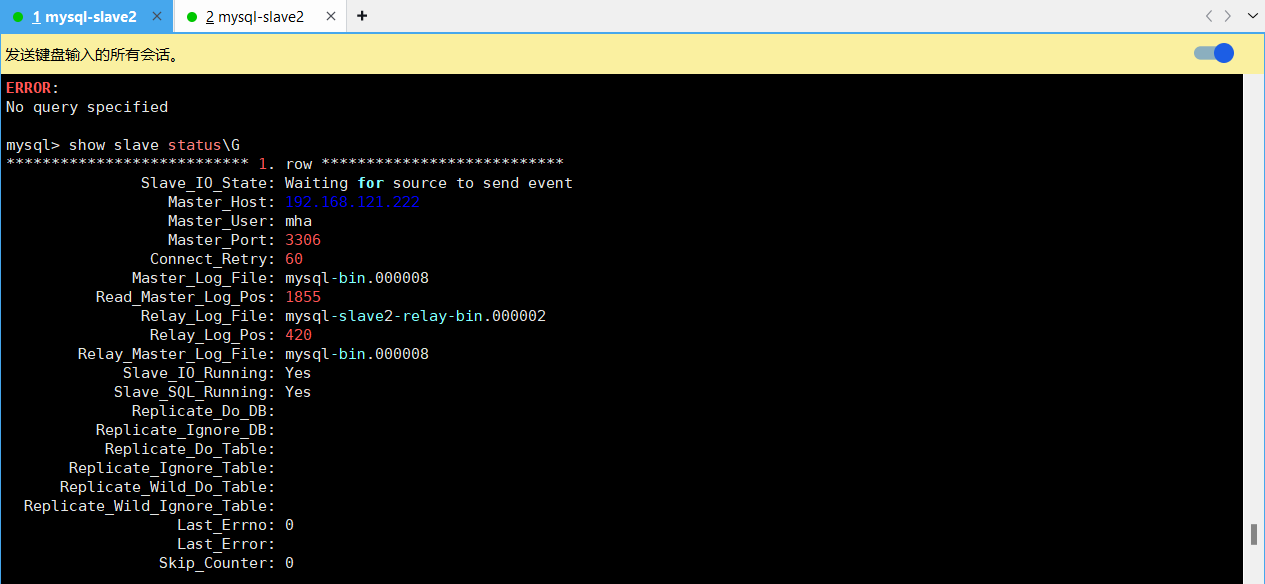
至此测试完成,故障主备自动切换master主切换到slave1为主节点,slave2也指向了slave1为主节点。
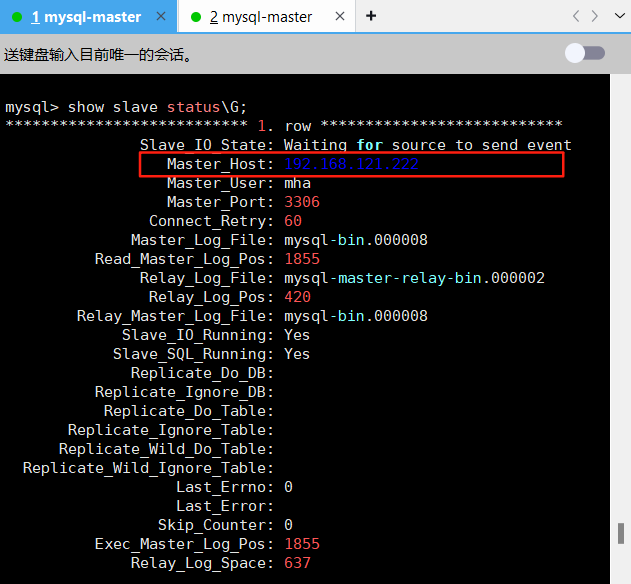
5.4.5 原mysql-master节点故障恢复
[root@mysql-master ~]# docker start mysql
mysql
[root@mysql-master ~]# docker exec -it mysql bash
root@mysql-master:/# mysql -uroot -p
Enter password:
Welcome to the MySQL monitor.  Commands end with ; or \g.
Your MySQL connection id is 10
Server version: 8.0.28 MySQL Community Server - GPL

Copyright (c) 2000, 2022, Oracle and/or its affiliates.

Oracle is a registered trademark of Oracle Corporation and/or its
affiliates. Other names may be trademarks of their respective
owners.

Type 'help;' or '\h' for help. Type '\c' to clear the current input statement.

mysql> change master to master_host='192.168.121.222',master_user='mha',master_password='123456',master_port=3306,master_auto_positioon=1;
Query OK, 0 rows affected, 8 warnings (0.01 sec)

mysql> start slave;
Query OK, 0 rows affected, 1 warning (0.00 sec)

mysql> show slave status\G;
*************************** 1. row ***************************
               Slave_IO_State: Waiting for source to send event
                  Master_Host: 192.168.121.222
                  Master_User: mha
                  Master_Port: 3306
                Connect_Retry: 60
              Master_Log_File: mysql-bin.000008
          Read_Master_Log_Pos: 1855
               Relay_Log_File: mysql-master-relay-bin.000002
                Relay_Log_Pos: 420
        Relay_Master_Log_File: mysql-bin.000008
             Slave_IO_Running: Yes
            Slave_SQL_Running: Yes
              Replicate_Do_DB:
          Replicate_Ignore_DB:
           Replicate_Do_Table:
       Replicate_Ignore_Table:
      Replicate_Wild_Do_Table:
  Replicate_Wild_Ignore_Table:
                   Last_Errno: 0
                   Last_Error:
                 Skip_Counter: 0
          Exec_Master_Log_Pos: 1855
              Relay_Log_Space: 637
              Until_Condition: None
               Until_Log_File:
                Until_Log_Pos: 0
           Master_SSL_Allowed: No
           Master_SSL_CA_File:
           Master_SSL_CA_Path:
              Master_SSL_Cert:
            Master_SSL_Cipher:
               Master_SSL_Key:
        Seconds_Behind_Master: 0
Master_SSL_Verify_Server_Cert: No
                Last_IO_Errno: 0
                Last_IO_Error:
               Last_SQL_Errno: 0
               Last_SQL_Error:
  Replicate_Ignore_Server_Ids:
             Master_Server_Id: 222
                  Master_UUID: e6b13ba9-7d6c-11f0-8a0b-000c29236169
             Master_Info_File: mysql.slave_master_info
                    SQL_Delay: 0
          SQL_Remaining_Delay: NULL
      Slave_SQL_Running_State: Replica has read all relay log; waiting for more updates
           Master_Retry_Count: 86400
                  Master_Bind:
      Last_IO_Error_Timestamp:
     Last_SQL_Error_Timestamp:
               Master_SSL_Crl:
           Master_SSL_Crlpath:
           Retrieved_Gtid_Set:
            Executed_Gtid_Set: 965d216d-7d64-11f0-8771-000c29111b7d:1-10,
e6b13ba9-7d6c-11f0-8a0b-000c29236169:1-4,
ebd87b10-7d6c-11f0-965d-000c29111b7d:1-56
                Auto_Position: 1
         Replicate_Rewrite_DB:
                 Channel_Name:
           Master_TLS_Version:
       Master_public_key_path:
        Get_master_public_key: 0
            Network_Namespace:
1 row in set, 1 warning (0.00 sec)
5.4.6 重启mha manager,并检查此时的master节点
[root@mha-manager mha]# systemctl restart mha
[root@mha-manager mha]# masterha_check_status --conf=/etc/mha/mysql_cluster.cnf
mysql_cluster (pid:5425) is running(0:PING_OK), master:192.168.121.222
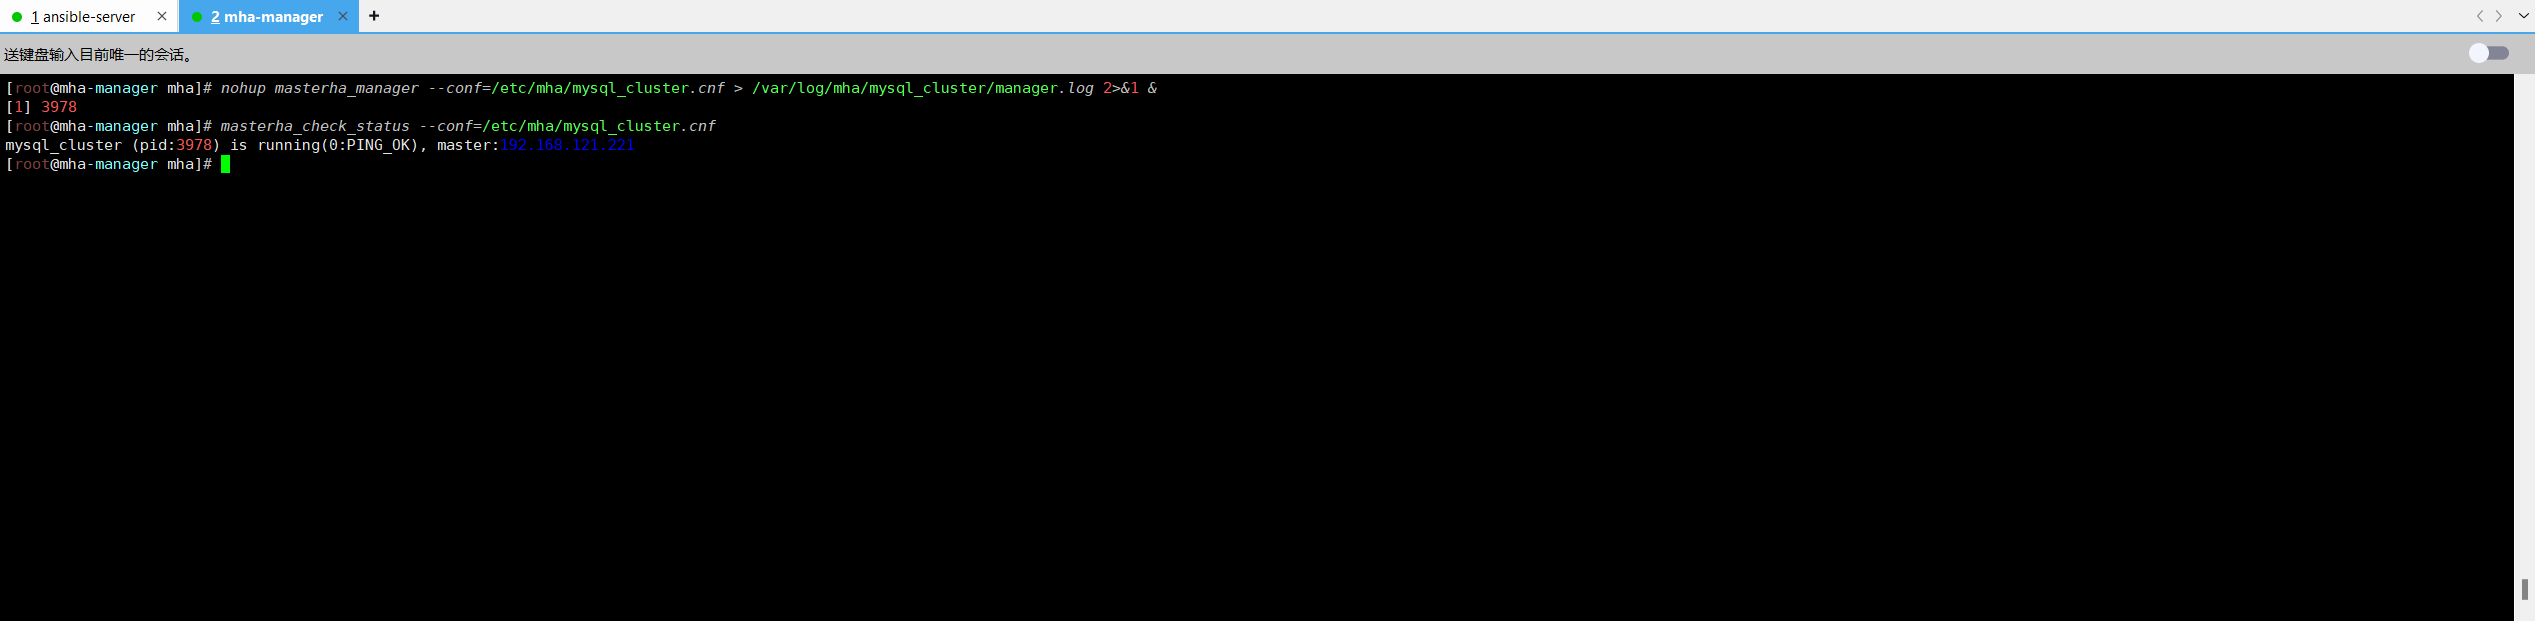
5.5 配置 MHA 自动启动
[root@mha-manager mha]# nohup masterha_manager --conf=/etc/mha/mysql_cluster.cnf > /var/log/mha/mysql_cluster/manager.log 2>&1 &
[1] 3978
[root@mha-manager mha]# masterha_check_status --conf=/etc/mha/mysql_cluster.cnf
mysql_cluster (pid:3978) is running(0:PING_OK), master:192.168.121.221
[root@mha-manager mha]# vim /etc/systemd/system/mha.service
[root@mha-manager mha]# systemctl daemon-reload
[root@mha-manager mha]# systemctl enable mha
Created symlink from /etc/systemd/system/multi-user.target.wants/mha.service to /etc/systemd/system/mha.service.
[root@mha-manager mha]# systemctl start mha
[root@mha-manager mha]# systemctl status mha
● mha.service - MHA Manager for MySQL Cluster
   Loaded: loaded (/etc/systemd/system/mha.service; enabled; vendor preset: disabled)
   Active: active (running) since 三 2025-08-20 02:24:22 CST; 4s ago
 Main PID: 4164 (perl)
    Tasks: 1
   Memory: 16.9M
   CGroup: /system.slice/mha.service
           └─4164 perl /usr/bin/masterha_manager --conf=/etc/mha/mysql_cluster.cnf

8月 20 02:24:22 mha-manager systemd[1]: Started MHA Manager for MySQL Cluster.
8月 20 02:24:22 mha-manager masterha_manager[4164]: Wed Aug 20 02:24:22 2025 - [warning] Global configuration file /etc/masterha_default.cnf not found. Skipping.
8月 20 02:24:22 mha-manager masterha_manager[4164]: Wed Aug 20 02:24:22 2025 - [info] Reading application default configuration from /etc/mha/mysql_cluster.cnf..
8月 20 02:24:22 mha-manager masterha_manager[4164]: Wed Aug 20 02:24:22 2025 - [info] Reading server configuration from /etc/mha/mysql_cluster.cnf..
6 MyCat2 部署与配置
6.1 安装部署MyCat2
6.1.1 在mycat1和mycat2服务器部署环境所需要的MySQL数据库
[root@mycat1 ~]# docker run -d --name mysql --restart=always -p 3306:3306 -v /data/mysql/data:/var/lib/mysql -v /data/mysql/logs:/var/log/mysql -e MYSQL_ROOT_PASSWORD=123456 docker.1ms.run/mysql:8.0.28

[root@mycat2 ~]# docker run -d --name mysql --restart=always -p 3306:3306 -v /data/mysql/data:/var/lib/mysql -v /data/mysql/logs:/var/log/mysql -e MYSQL_ROOT_PASSWORD=123456 docker.1ms.run/mysql:8.0.28
6.1.2 安装java环境
# 安装mycat需要的Java环境
[root@mycat1 ~]# yum install -y java
[root@mycat2 ~]# yum install -y java
6.1.3安装java环境下载mycat安装包和jar包
链接: https://pan.baidu.com/s/1w9hr2EH9Cpqt6LFjn8MPrw?pwd=63hu 提取码: 63hu
6.1.4 解压mycat ZIP包
[root@mycat1 ~]# yum install -y unzip
[root@mycat2 ~]# yum install -y unzip

[root@mycat1 ~]# unzip mycat2-install-template-1.21.zip
[root@mycat2 ~]# unzip mycat2-install-template-1.21.zip
6.1.5 把解压后的mycat目录移动到 /usr/local/目录下
[root@mycat1 ~]# mv mycat /usr/local/
[root@mycat2 ~]# mv mycat /usr/local/
6.1.6 将jar包放入/usr/local/mycat/lib下
[root@mycat1 ~]# mv mycat2-1.22-release-jar-with-dependencies-2022-10-13.jar /usr/local/mycat/lib/
[root@mycat2 ~]# mv mycat2-1.22-release-jar-with-dependencies-2022-10-13.jar /usr/local/mycat/lib/
6.1.7 授予bin目录可执行权限,防止启动报错
[root@mycat1 ~]# cd /usr/local/mycat/
[root@mycat1 mycat]# ls
bin  conf  lib  logs
[root@mycat1 mycat]# chmod +x bin/*
[root@mycat1 mycat]# cd bin/
[root@mycat1 bin]# ll
总用量 2588
-rwxr-xr-x 1 root root  15666 3月   5 2021 mycat
-rwxr-xr-x 1 root root   3916 3月   5 2021 mycat.bat
-rwxr-xr-x 1 root root 281540 3月   5 2021 wrapper-aix-ppc-32
-rwxr-xr-x 1 root root 319397 3月   5 2021 wrapper-aix-ppc-64
-rwxr-xr-x 1 root root 253808 3月   5 2021 wrapper-hpux-parisc-64
-rwxr-xr-x 1 root root 140198 3月   5 2021 wrapper-linux-ppc-64
-rwxr-xr-x 1 root root  99401 3月   5 2021 wrapper-linux-x86-32
-rwxr-xr-x 1 root root 111027 3月   5 2021 wrapper-linux-x86-64
-rwxr-xr-x 1 root root 114052 3月   5 2021 wrapper-macosx-ppc-32
-rwxr-xr-x 1 root root 233604 3月   5 2021 wrapper-macosx-universal-32
-rwxr-xr-x 1 root root 253432 3月   5 2021 wrapper-macosx-universal-64
-rwxr-xr-x 1 root root 112536 3月   5 2021 wrapper-solaris-sparc-32
-rwxr-xr-x 1 root root 148512 3月   5 2021 wrapper-solaris-sparc-64
-rwxr-xr-x 1 root root 110992 3月   5 2021 wrapper-solaris-x86-32
-rwxr-xr-x 1 root root 204800 3月   5 2021 wrapper-windows-x86-32.exe
-rwxr-xr-x 1 root root 220672 3月   5 2021 wrapper-windows-x86-64.exe


[root@mycat2 ~]# cd /usr/local/mycat/
[root@mycat2 mycat]# ls
bin  conf  lib  logs
[root@mycat2 mycat]# chmod +x bin/*
[root@mycat2 mycat]# cd bin/
[root@mycat2 bin]# ll
总用量 2588
-rwxr-xr-x 1 root root  15666 3月   5 2021 mycat
-rwxr-xr-x 1 root root   3916 3月   5 2021 mycat.bat
-rwxr-xr-x 1 root root 281540 3月   5 2021 wrapper-aix-ppc-32
-rwxr-xr-x 1 root root 319397 3月   5 2021 wrapper-aix-ppc-64
-rwxr-xr-x 1 root root 253808 3月   5 2021 wrapper-hpux-parisc-64
-rwxr-xr-x 1 root root 140198 3月   5 2021 wrapper-linux-ppc-64
-rwxr-xr-x 1 root root  99401 3月   5 2021 wrapper-linux-x86-32
-rwxr-xr-x 1 root root 111027 3月   5 2021 wrapper-linux-x86-64
-rwxr-xr-x 1 root root 114052 3月   5 2021 wrapper-macosx-ppc-32
-rwxr-xr-x 1 root root 233604 3月   5 2021 wrapper-macosx-universal-32
-rwxr-xr-x 1 root root 253432 3月   5 2021 wrapper-macosx-universal-64
-rwxr-xr-x 1 root root 112536 3月   5 2021 wrapper-solaris-sparc-32
-rwxr-xr-x 1 root root 148512 3月   5 2021 wrapper-solaris-sparc-64
-rwxr-xr-x 1 root root 110992 3月   5 2021 wrapper-solaris-x86-32
-rwxr-xr-x 1 root root 204800 3月   5 2021 wrapper-windows-x86-32.exe
-rwxr-xr-x 1 root root 220672 3月   5 2021 wrapper-windows-x86-64.exe
6.1.8 mycat2加入PATH环境变量,并设置开机启动
[root@mycat1 ~]# echo "PATH=/usr/local/mycat/bin/:$PATH" >>/root/.bashrc
[root@mycat1 ~]# PATH=/usr/local/mycat/bin/:$PATH


[root@mycat2 ~]# echo "PATH=/usr/local/mycat/bin/:$PATH" >>/root/.bashrc
[root@mycat2 ~]# PATH=/usr/local/mycat/bin/:$PATH
6.1.9 编辑prototypeDs.datasource.json默认数据源文件,并启动mycat(连接本机docker容器mysql数据库环境)
[root@mycat1 ~]# cd /usr/local/mycat/
[root@mycat1 mycat]# ls
bin  conf  lib  logs
[root@mycat1 mycat]# cd conf/datasources/
[root@mycat1 datasources]# ls
prototypeDs.datasource.json
[root@mycat1 datasources]# vim prototypeDs.datasource.json


[root@mycat2 ~]# cd /usr/local/mycat/
[root@mycat2 mycat]# ls
bin  conf  lib  logs
[root@mycat2 mycat]# cd conf/datasources/
[root@mycat2 datasources]# ls
prototypeDs.datasource.json
[root@mycat2 datasources]# vim prototypeDs.datasource.json

{
        "dbType":"mysql",
        "idleTimeout":60000,
        "initSqls":[],
        "initSqlsGetConnection":true,
        "instanceType":"READ_WRITE",
        "maxCon":1000,
        "maxConnectTimeout":3000,
        "maxRetryCount":5,
        "minCon":1,
        "name":"prototypeDs",
        "password":"123456",    # 本机MySQL密码