下载boost安装包
我的ubuntu系统版本是22.04.4
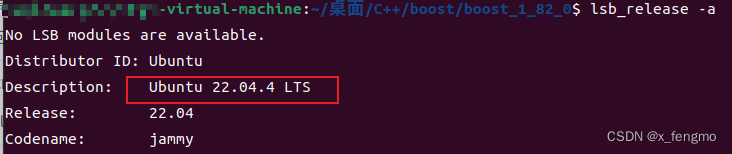
(我发现这两个版本之间可能存在关系,如果boost版本老但是ubuntu版本新可能存在问题)
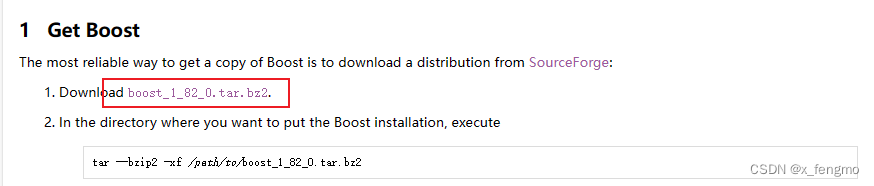
我是在官网下载的最新版本1_82_0(至博客写成时),官网地址
开始安装
将压缩包放在指定路径下,然后在文件夹中右键打开终端:
name@name:~file$ ls
boost_1_82_0.tar.gz
name@name:~file$ tar -zxvf boost_1_82_0.tar.gz
name@name:~file$ ls
boost_1_82_0  boost_1_82_0.tar.gz
name@name:~file$ cd boost_1_82_0
name@name:~file/boost_1_82_0$ ls
boost            boostcpp.jam  boost.png      bootstrap.sh  index.htm   INSTALL  libs             more     status
boost-build.jam  boost.css     bootstrap.bat  doc           index.html  Jamroot  LICENSE_1_0.txt  rst.css  tools
如果是没安装过g++编译器的,需要先安装。我直接安装了一个软件包组,名称为 “build-essential”,它包含了 GNU 编辑器集合,GNU 调试器,和其他编译软件所必需的开发库和工具。
sudo apt update
sudo apt install build-essential
这个命令将会安装一系列软件包,包括gcc,g++,和make。
通过运行下面的命令,打印 GCC 版本,来验证 GCC 编译器是否被成功地安装。gcc --version
运行bootstrap.sh工程编译构建程序:
name@name:~file/boost_1_82_0$ ./bootstrap.sh
Building Boost.Build engine with toolset gcc... tools/build/src/engine/bin.linuxx86_64/b2
Unicode/ICU support for Boost.Regex?... not found.
Generating Boost.Build configuration in project-config.jam...

Bootstrapping is done. To build, run:

    ./b2

To adjust configuration, edit 'project-config.jam'.
Further information:

   - Command line help:
     ./b2 --help

   - Getting started guide:
     http://www.boost.org/more/getting_started/unix-variants.html

   - Boost.Build documentation:
     http://www.boost.org/build/doc/html/index.html

name@name:~file/boost_1_82_0$ ls
b2     boost-build.jam  boost.png      bootstrap.sh  index.html  libs             project-config.jam  tools
bjam   boostcpp.jam     bootstrap.bat  doc           INSTALL     LICENSE_1_0.txt  rst.css
boost  boost.css        bootstrap.log  index.htm     Jamroot     more             status
源码根目录下生成了b2程序,运行b2程序如下:
name@name:~file/boost_1_82_0$ ./b2
编译完成后,会有如下打印:
The Boost C++ Libraries were successfully built!
The following directory should be added to compiler include paths:
/home/tony/file/boost_1_82_0(因人而异)
The following directory should be added to linker library paths:
/home/tony/file/boost_1_82_0/stage/lib(因人而异)
最后,再把上面的boost库头文件和lib库文件安装在默认的Linux系统头文件和库文件的搜索路径下。
头文件路径:
将头文件路径/home/tony/package/boost_1_82_0添加到默认的头文件搜索路径中,通常默认的头文件搜索路径是 /usr/include。
你可以通过执行以下命令将头文件路径添加到默认的头文件搜索路径中(需要管理员权限):
sudo cp -r /home/tony/file/boost_1_82_0 /usr/include
库文件路径:
将库文件路径/home/tony/file/boost_1_82_0/stage/lib添加到默认的库文件搜索路径中,通常默认的库文件搜索路径是 /usr/lib 或 /usr/lib64。
你可以通过执行以下命令将库文件路径添加到默认的库文件搜索路径中(需要管理员权限):
sudo cp /home/tony/file/boost_1_82_0/stage/lib/* /usr/lib
有说接下来的./b2工作可能因为安装的是boost的最新版本1_82_0导致出现问题的,需要安装python-dev,所以我直接安装了它,不知道不安装是不是确实出现问题。sudo apt-get install python-dev
之后运行命令name@name:~file/boost_1_82_0$ ./b2 install运行完打印出来应该是…updated 14831 targets…,我运行出来是100多点的target,因此我又运行了一边,这次17297了。
验证安装boost是否成功,通过下面的代码验证一下:
touch test.c
到图形界面双击点开,输入下面代码
#include <iostream>
#include <boost/bind/bind.hpp>
#include <string>
using namespace std;
using namespace boost::placeholders;
class Hello
{
public:
	void say(string name)
	{ cout << name << " say: hello world!" << endl; }
};

int main()
{
	Hello h;
	auto func = boost::bind(&Hello::say, &h, "zhang san");
	func();
	return 0;
}
然后执行g++ -o test test.c -std=c++11,之后ls应该能看见出现了一个文件test.c,然后./test。
出现
zhang san say: hello world!
成功!!!