登录代码
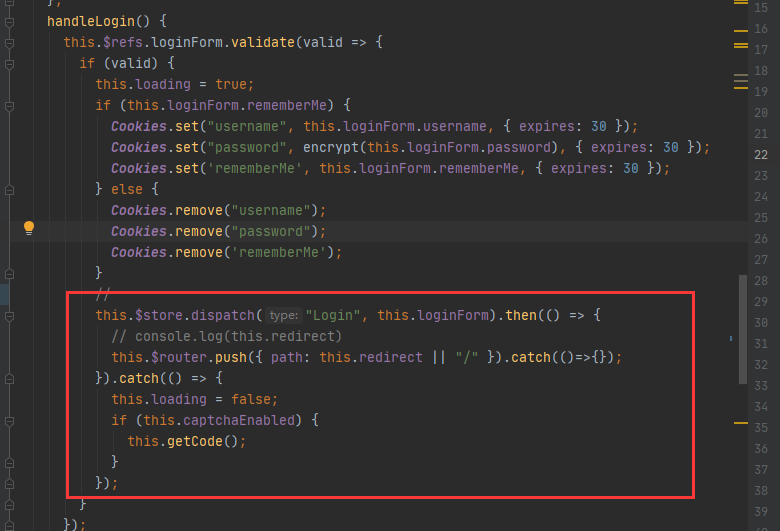
1、登录之后做了什么?
执行登陆方法,成功之后,路由跳转到指定路径或者根目录
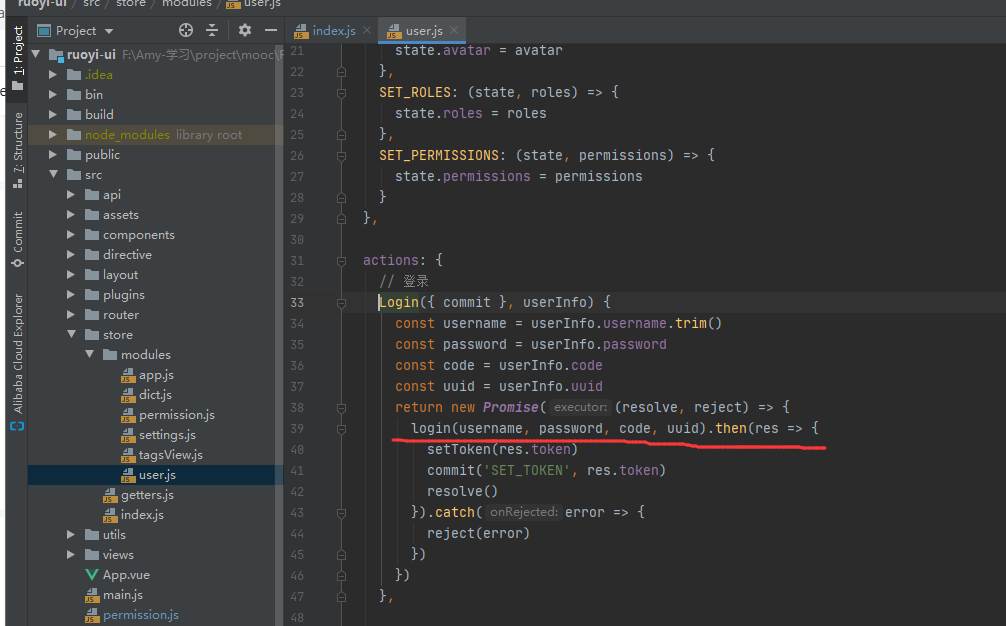
2、this.$store.dispatch是什么意思?
this.$store.dispatch(‘Login’, this.loginForm)
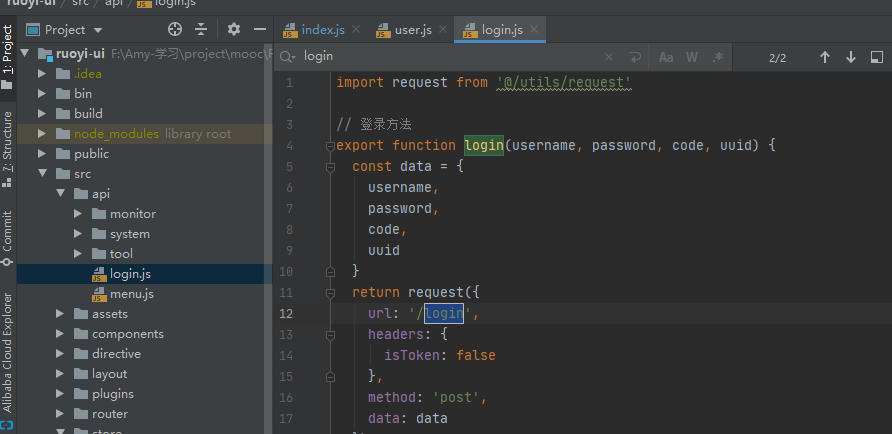
来调取store里的user.js的login方法
3、this.$router.push又是什么意思?
//修改 url,完成跳转
//push 后面可以是对象,也可以是字符串
// 字符串
this.$router.push('/home/first')
// 对象
this.$router.push({ path: '/home/first' })
// 命名的路由
this.$router.push({ name: 'home', params: { userId: wise }})
4、进入路由导航守卫
src\permission.js
to: 即将要进入的目标 用一种标准化的方式
from: 当前导航正要离开的路由 用一种标准化的方式
next: 进入指定的地址
进入 全局前置守卫 router.beforeEach
next({ path: ‘/’ }) 中的 ‘/’ 等于 src\router\index.js 中 path: ‘/’ 或 path: ‘’ 的路由信息
import router from './router'
import store from './store'
import { Message } from 'element-ui'
import NProgress from 'nprogress'
import 'nprogress/nprogress.css'
import { getToken } from '@/utils/auth'
import { isRelogin } from '@/utils/request'

NProgress.configure({ showSpinner: false })

//白名单
const whiteList = ['/login', '/register']

router.beforeEach((to, from, next) => {
  NProgress.start()
  //判断是否存在token
  if (getToken()) {
    // console.log("getToken():"+getToken())

    to.meta.title && store.dispatch('settings/setTitle', to.meta.title)
    /* has token*/
    //当前地址 是login 登录 则跳转到默认路由
    if (to.path === '/login') {
      next({ path: '/' })
      NProgress.done()
    } else {
      // console.log("store.getters.roles:"+store.getters.roles)
      if (store.getters.roles.length === 0) {
        isRelogin.show = true
        // 判断当前用户是否已拉取完user_info信息
        store.dispatch('GetInfo').then(() => {
          isRelogin.show = false
          store.dispatch('GenerateRoutes').then(accessRoutes => {
            // 根据roles权限生成可访问的路由表
            router.addRoutes(accessRoutes) // 动态添加可访问路由表
            next({ ...to, replace: true }) // hack方法 确保addRoutes已完成
          })
        }).catch(err => {
            store.dispatch('LogOut').then(() => {
              Message.error(err)
              next({ path: '/' })
            })
          })
      } else {
        next()
      }
    }
  } else {
    // 没有token
    if (whiteList.indexOf(to.path) !== -1) {
      // 在免登录白名单,直接进入
      next()
    } else {
      next(`/login?redirect=${to.fullPath}`) // 否则全部重定向到登录页
      NProgress.done()
    }
  }
})

router.afterEach(() => {
  NProgress.done()
})
登录流程
已知vue项目启动入口为 src\App.vue ,在 App.vue 中的 默认会获取 src\router\index.js中为
path: ‘/’ 或 path: ‘’ 的路由信息在当前项目中默认路由为
export const constantRoutes = [
{
    path: '',
    component: Layout,
    redirect: 'index',
    children: [
      {
        path: 'index',
        component: () => import('@/views/index'),
        name: 'Index',
        meta: { title: '首页', icon: 'dashboard', affix: true }
      }
    ]
  },
]
然后进入 src\permission.js 中进行路由跳转,进入 全局前置守卫 router.beforeEach后,判断是否存在token
存在token 进入地址验证,如果是从登录页过来的则将进入用户信息和路由信息的获取,
获取完成后 动态组装路由 ,组装完成后进入 默认页面(index.vue)
- store.dispatch(‘GetInfo’) 会进入 src\store\modules\user.js 中的 GetInfo 方法获取用户信息角色信息等存储到vuex中
 store.dispatch('GetInfo').then(() => {
          isRelogin.show = false
          store.dispatch('GenerateRoutes').then(accessRoutes => {
            // 根据roles权限生成可访问的路由表
            router.addRoutes(accessRoutes) // 动态添加可访问路由表
            next({ ...to, replace: true }) // hack方法 确保addRoutes已完成
          })
        })
- store.dispatch(‘GenerateRoutes’) 进入 src\store\modules\permission.js
中的 GenerateRoutes 方法获取用户路由数据并通过router.addRoutes 添加到路由管理
 store.dispatch('GenerateRoutes').then(accessRoutes => {
        // 根据roles权限生成可访问的路由表
        router.addRoutes(accessRoutes) // 动态添加可访问路由表
        next({ ...to, replace: true }) // hack方法 确保addRoutes已完成
      })
如果不存在token则判断是不是进入路由白名单中的地址,如果不是则重定向至登录页,注意重定向后登录页的地址
http://localhost/login ?redirect=%2Findex
其中 %2Findex = /index 只是被浏览器转义了基于以上登录后会进入/index页面