Qt 3D 提供了强大的纹理支持,可以实现各种复杂的材质效果。以下是 Qt 3D 纹理开发的全面技术方案。
一、纹理处理的流程图
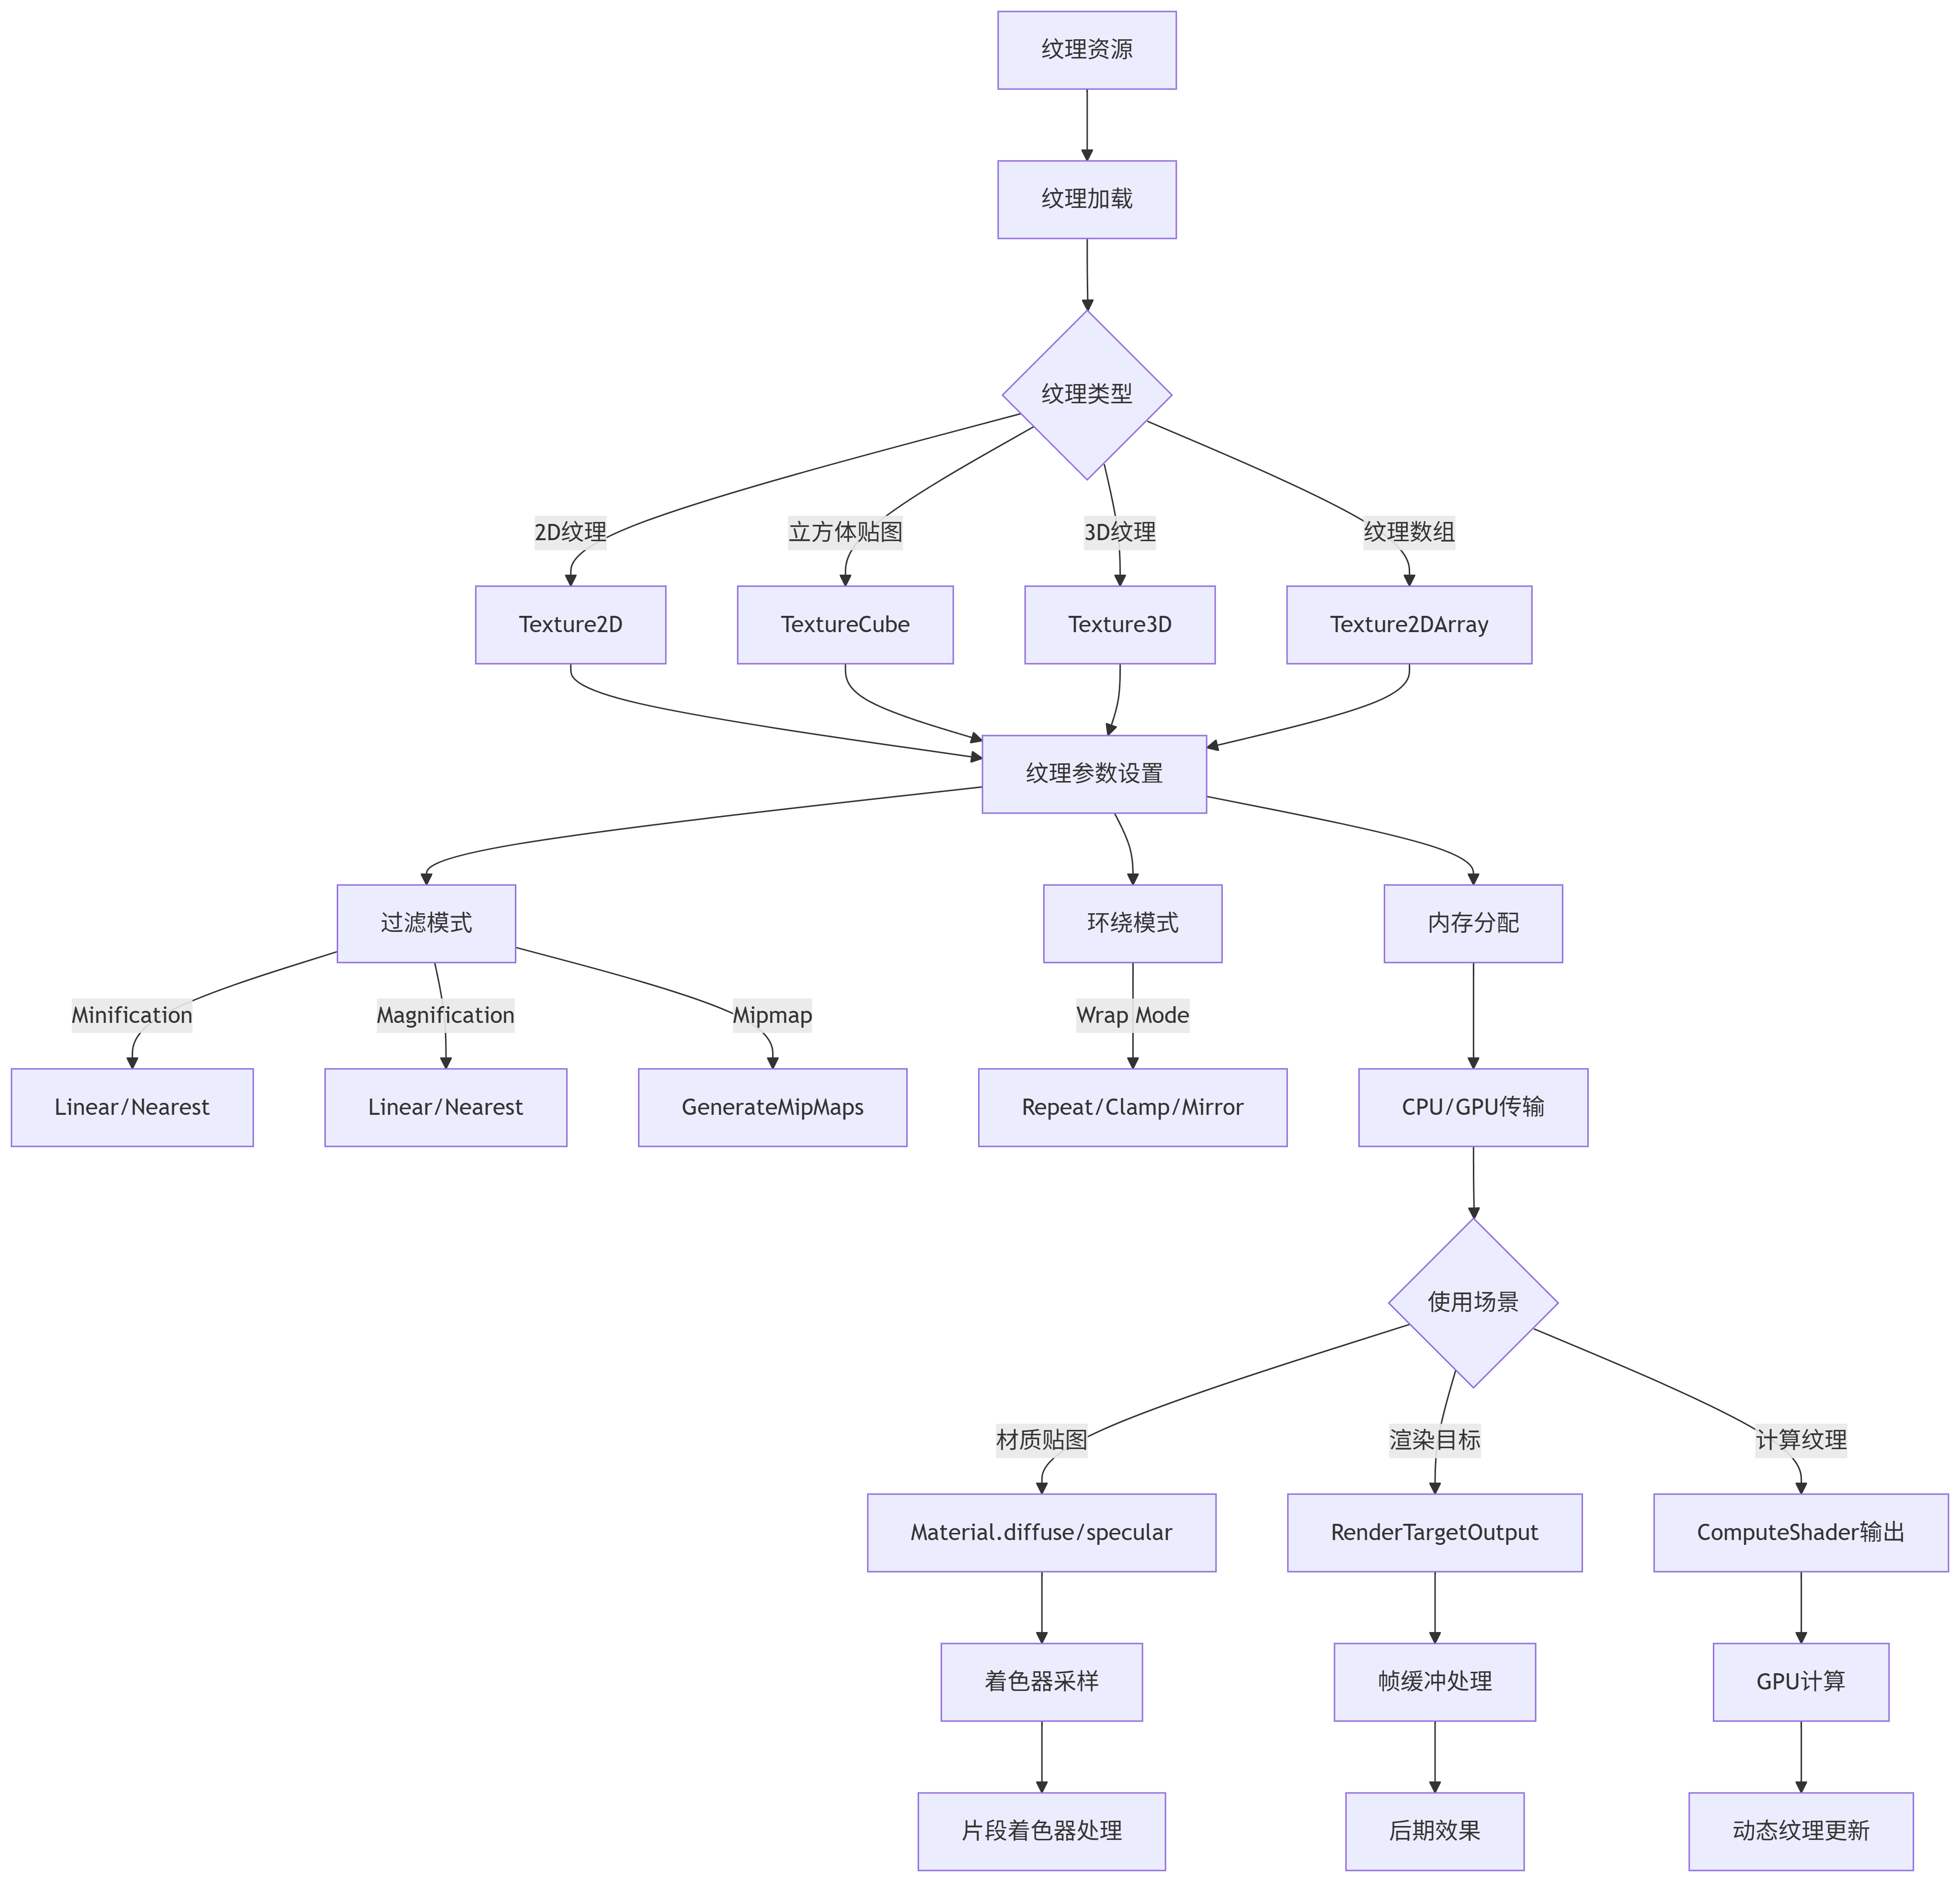
纹理处理关键步骤说明:
资源准备阶段
支持格式:PNG/JPG/KTX/DDS等
尺寸要求:建议2的幂次方(非强制)
纹理加载路径
qml
Texture2D {
    source: "qrc:/textures/wood.png"  // 资源文件
    // 或 source: "file:///C:/textures/stone.jpg" // 本地文件
}
参数配置矩阵
| 参数类型 | 可选值 | 性能影响 |
|---|---|---|
| minificationFilter | Linear/Nearest/LinearMipMap... | 高 |
| magnificationFilter | Linear/Nearest | 中 |
| wrapMode | Repeat/ClampToEdge/MirroredRepeat | 低 |
| anisotropy | 1.0-16.0 | 高 |
| generateMipMaps | true/false | 中 |
4. 纹理内存处理流程

二、基础纹理应用
1. 基本纹理贴图
qml
import Qt3D.Core 2.15
import Qt3D.Render 2.15
import Qt3D.Extras 2.15

Entity {
    components: [
        Transform { translation: Qt.vector3d(0, 0, -5) },
        CuboidMesh {},
        PhongMaterial {
            diffuse: Texture2D {
                generateMipMaps: true
                minificationFilter: Texture.LinearMipMapLinear
                magnificationFilter: Texture.Linear
                wrapMode {
                    x: WrapMode.Repeat
                    y: WrapMode.Repeat
                }
                TextureImage {
                    source: "textures/diffuse.png"
                }
            }
            specular: "gray"
            shininess: 50
        }
    ]
}
2. 多纹理混合
qml
Material {
    effect: Effect {
        techniques: [
            Technique {
                renderPasses: [
                    RenderPass {
                        shaderProgram: ShaderProgram {
                            vertexShaderCode: loadSource("qrc:/shaders/texture.vert")
                            fragmentShaderCode: loadSource("qrc:/shaders/texture.frag")
                        }
                    }
                ]
            }
        ]
    }

    parameters: [
        Parameter {
            name: "diffuseTex"
            value: Texture2D {
                TextureImage { source: "textures/base.png" }
            }
        },
        Parameter {
            name: "detailTex"
            value: Texture2D {
                TextureImage { source: "textures/detail.png" }
            }
        }
    ]
}
对应着色器代码:
glsl
// texture.vert
#version 330
in vec3 vertexPosition;
in vec2 vertexTexCoord;
uniform mat4 mvp;
out vec2 texCoord;

void main() {
    gl_Position = mvp * vec4(vertexPosition, 1.0);
    texCoord = vertexTexCoord;
}

// texture.frag
#version 330
uniform sampler2D diffuseTex;
uniform sampler2D detailTex;
in vec2 texCoord;
out vec4 fragColor;

void main() {
    vec4 diffuse = texture(diffuseTex, texCoord);
    vec4 detail = texture(detailTex, texCoord * 10.0);
    fragColor = mix(diffuse, detail, 0.3);
}
三、高级纹理技术
1. 动态纹理生成
qml
// 创建空纹理
Texture2D {
    id: dynamicTexture
    width: 512
    height: 512
    format: Texture.RGBA8_UNorm
    generateMipMaps: false
}

// 使用Compute Shader填充纹理
ComputeCommand {
    workGroupX: 16
    workGroupY: 16
    workGroupZ: 1

    shaderProgram: ShaderProgram {
        computeShaderCode: "
            #version 430
            layout(rgba8, binding = 0) uniform writeonly image2D destTex;
            layout(local_size_x = 16, local_size_y = 16) in;
            uniform float time;

            void main() {
                ivec2 texelCoord = ivec2(gl_GlobalInvocationID.xy);
                vec2 uv = vec2(texelCoord) / vec2(imageSize(destTex));

                float r = sin(uv.x * 10.0 + time) * 0.5 + 0.5;
                float g = cos(uv.y * 10.0 + time) * 0.5 + 0.5;
                float b = sin((uv.x + uv.y) * 5.0 + time) * 0.5 + 0.5;

                imageStore(destTex, texelCoord, vec4(r, g, b, 1.0));
            }
        "
    }

    onCompleted: {
        // 将计算着色器结果绑定到纹理
        dynamicTexture.setTextureData(0, 0, 512, 512,
            Texture.RGBA, Texture.UnsignedByte, this.outputTextureData)
    }
}
2. 渲染到纹理 (FBO)
qml
Entity {
    components: [
        RenderTarget {
            id: renderTarget
            attachments: [
                RenderTargetOutput {
                    attachmentPoint: RenderTargetOutput.Color0
                    texture: Texture2D {