一、软件介绍
文末提供程序和源码下载
Elixir 机器学习功能构建一个应用程序,该应用程序执行图像字幕和语义搜索,以使用您的语音查找上传的图像!
二、为什么做这个程序
- 在构建我们的应用程序时,我们认为
images这是一种必不可少的沟通媒介。 - 我们需要一个完全支持离线(无第三方 API/服务)的图像字幕服务,使用最先进的预训练图像和嵌入模型来描述上传到我们的
App. - 通过添加图片说明方式,我们让用户可以轻松地推荐描述图片的元标记,以便搜索到图片。
三、怎么使用这个程序
A step-by-step tutorial building a fully functional Phoenix LiveView web application that allows anyone to upload an image and have it described and searchable.
构建功能 Phoenix LiveView 齐全的 Web 应用程序的分步教程,允许任何人上传图像并对其进行描述和搜索。
In addition to this, the app will allow the person to record an audio which describes the image they want to find.
除此之外,该应用程序还将允许该人录制描述他们想要查找的图像的音频。
The audio will be transcribed into text and be semantically queryable. We do this by encoding the image captions as vectors and running knn search on them.
音频将被转录为文本,并在语义上可查询。我们通过将图像标题编码为矢量并在其 knn search 上运行来实现此目的。
We'll be using three different models:
我们将使用三种不同的模型:
- Salesforce's BLIP model blip-image-captioning-large for image captioning.
Salesforce 的 BLIP 模型blip-image-captioning-large,用于图像字幕。 - OpenAI's speech recognition model whisper-small.
OpenAI 的语音识别模型whisper-small。 - sentence-transformers/paraphrase-MiniLM-L6-v2 embedding model.
sentence-transformers/paraphrase-MiniLM-L6-v2embedding 模型。
本教程面向希望开始在 Phoenix 应用程序中探索 Elixir 语言的机器学习功能的 Phoenix 初学者。我们建议使用 Hugging Face via Bumblebee 的预训练模型,并掌握如何:
- run a model, in particular image captioning.
运行模型,特别是图像字幕。 - how to use embeddings.
如何使用嵌入。 - how to run a semantic search using an Approximate Nearest Neighbour algorithm.
如何使用 Approximate Nearest Neighbour 算法运行语义搜索。
If you are completely new to Phoenix and LiveView, we recommend you follow the LiveView Counter Tutorial:
如果您完全不熟悉 Phoenix 和 LiveView ,我们建议您遵循 LiveView 计数器教程:
dwyl/phoenix-liveview-counter-tutorial
四、Prerequisites 先决条件
This tutorial requires you to have Elixir and Phoenix installed.
本教程要求您拥有 Elixir 并 Phoenix 安装。
If you don't, please see how to install Elixir and Phoenix.
如果你不知道,请参阅如何安装 Elixir 和 Phoenix。
This guide assumes you know the basics of Phoenix and have some knowledge of how it works. If you don't, we highly suggest you follow our other tutorials first, e.g: github.com/dwyl/phoenix-chat-example
本指南假定您了解其工作原理的基础知识 Phoenix 并有一定的了解。如果您不这样做,我们强烈建议您先学习我们的其他教程,例如:github.com/dwyl/phoenix-chat-example
In addition to this, some knowledge of AWS - what it is, what an S3 bucket is/does - is assumed.
除此之外,还假设了一些知识 AWS - 它是什么, S3 存储桶是什么/做什么。
五、Image Captioning in Elixir 图像字幕 Elixir
让我们创建一个新 Phoenix 项目。在给定文件夹中运行以下命令:
mix phx.new . --app app --no-dashboard --no-ecto --no-gettext --no-mailer
We're running mix phx.new to generate a new project without a dashboard and mailer (email) service, since we don't need those features in our project.
我们正在运行 mix phx.new 以生成一个没有仪表板和邮件程序(电子邮件)服务的新项目,因为我们在项目中不需要这些功能。
After this, if you run mix phx.server to run your server, you should be able to see the following page.
在此之后,如果您运行 mix phx.server 以运行您的服务器,您应该能够看到以下页面。
We're ready to start building.
我们已准备好开始构建。
1. Installing initial dependencies
1. 安装初始依赖项
Now that we're ready to go, let's start by adding some dependencies.
现在我们已经准备好了,让我们从添加一些依赖项开始。
Head over to mix.exsand add the following dependencies to the deps section.
前往 mix.exs 并将以下依赖项添加到该 deps 部分。
{:bumblebee, "~> 0.5.0"},
{:exla, "~> 0.7.0"},
{:nx, "~> 0.7.0 "},
{:hnswlib, "~> 0.1.5"},
bumblebee is a framework that will allows us to integrate Transformer Models in
Phoenix. TheTransformers(from Hugging Face) are APIs that allow us to easily download and use pre-trained models. TheBumblebeepackage aims to support all Transformer Models, even if some are still lacking. You may check which ones are supported by visitingBumblebee's repository or by visiting Livebook and checking if the model is currently supported.
bumblebee是一个框架,它将允许我们集成到Transformer ModelsPhoenix.(Transformers来自 Hugging Face)是 API,允许我们轻松下载和使用预训练模型。该Bumblebee软件包旨在支持所有 Transformer 模型,即使仍然缺少一些模型。您可以通过访问Bumblebee的存储库或访问 https://jonatanklosko-bumblebee-tools.hf.space/apps/repository-inspector 并检查当前是否支持该模型来检查支持哪些模型。Nx is a library that allows us to work with Numerical Elixir, the Elixir's way of doing numerical computing. It supports tensors and numericla computations.
Nx是一个库,它允许我们使用Numerical Elixir,Elixir 进行数值计算的方式。它支持 Tensor 和 numericla 计算。EXLA is the Elixir implementation of Google's XLA, a compiler that provides faster linear algebra calculations with
TensorFlowmodels. This backend compiler is needed forNx. We are installingEXLAbecause it allows us to compile models just-in-time and run them on CPU and/or GPU.
EXLA是 Google XLA 的 Elixir 实现,XLA 是一个编译器,可使用TensorFlow模型提供更快的线性代数计算。此后端编译器是Nx.我们之所以安装EXLA,是因为它允许我们及时编译模型并在 CPU 和/或 GPU 上运行它们。Vix is an Elixir extension for libvips, an image processing library.
Vix是图像处理库 libvips 的 Elixir 扩展。
In config/config.exs, let's add our :nx configuration to use EXLA.
在 config/config.exs 中,让我们添加要使用的 :nx 配置 EXLA 。
config :nx, default_backend: EXLA.Backend
2. Adding LiveView capabilities to our project
2. 为我们的项目添加 LiveView 功能
As it stands, our project is not using LiveView. Let's fix this.
就目前而言,我们的项目没有使用 LiveView .让我们来解决这个问题。
This will launch a super-powered process that establishes a WebSocket connection between the server and the browser.
这将启动一个超级强大的进程,在服务器和浏览器之间建立 WebSocket 连接。
In lib/app_web/router.ex, change the scope "/" to the following.
在 lib/app_web/router.ex 中,将 更改为 scope "/" 以下内容。
  scope "/", AppWeb do
    pipe_through :browser

    live "/", PageLive
  end
Instead of using the PageController, we are going to be creating PageLive, a LiveView file.
我们将创建一个 PageLive LiveView 文件,而不是使用 PageController , 。
Let's create our LiveView files. Inside lib/app_web, create a folder called live and create the following file page_live.ex.
让我们创建我们的 LiveView 文件。在 中 lib/app_web ,创建一个名为 live 并创建以下文件 page_live.ex 的文件夹。
#/lib/app_web/live/page_live.ex
defmodule AppWeb.PageLive do
  use AppWeb, :live_view

  @impl true
  def mount(_params, _session, socket) do
    {:ok, socket}
  end
end
This is a simple LiveView controller.
这是一个简单的 LiveView 控制器。
In the same live folder, create a file called page_live.html.heex and use the following code.
在同一 live 文件夹中,创建一个名为 page_live.html.heex 并使用以下代码的文件。
<div
  class="h-full w-full px-4 py-10 flex justify-center sm:px-6 sm:py-28 lg:px-8 xl:px-28 xl:py-32"
>
  <div
    class="flex justify-center items-center mx-auto max-w-xl w-[50vw] lg:mx-0"
  >
    <form>
      <div class="space-y-12">
        <div>
          <h2 class="text-base font-semibold leading-7 text-gray-900">
            Image Classifier
          </h2>
          <p class="mt-1 text-sm leading-6 text-gray-600">
            Drag your images and we'll run an AI model to caption it!
          </p>

          <div class="mt-10 grid grid-cols-1 gap-x-6 gap-y-8 sm:grid-cols-6">
            <div class="col-span-full">
              <div
                class="mt-2 flex justify-center rounded-lg border border-dashed border-gray-900/25 px-6 py-10"
              >
                <div class="text-center">
                  <svg
                    class="mx-auto h-12 w-12 text-gray-300"
                    viewBox="0 0 24 24"
                    fill="currentColor"
                    aria-hidden="true"
                  >
                    <path
                      fill-rule="evenodd"
                      d="M1.5 6a2.25 2.25 0 012.25-2.25h16.5A2.25 2.25 0 0122.5 6v12a2.25 2.25 0 01-2.25 2.25H3.75A2.25 2.25 0 011.5 18V6zM3 16.06V18c0 .414.336.75.75.75h16.5A.75.75 0 0021 18v-1.94l-2.69-2.689a1.5 1.5 0 00-2.12 0l-.88.879.97.97a.75.75 0 11-1.06 1.06l-5.16-5.159a1.5 1.5 0 00-2.12 0L3 16.061zm10.125-7.81a1.125 1.125 0 112.25 0 1.125 1.125 0 01-2.25 0z"
                      clip-rule="evenodd"
                    />
                  </svg>
                  <div class="mt-4 flex text-sm leading-6 text-gray-600">
                    <label
                      for="file-upload"
                      class="relative cursor-pointer rounded-md bg-white font-semibold text-indigo-600 focus-within:outline-none focus-within:ring-2 focus-within:ring-indigo-600 focus-within:ring-offset-2 hover:text-indigo-500"
                    >
                      <span>Upload a file</span>
                      <input
                        id="file-upload"
                        name="file-upload"
                        type="file"
                        class="sr-only"
                      />
                    </label>
                    <p class="pl-1">or drag and drop</p>
                  </div>
                  <p class="text-xs leading-5 text-gray-600">
                    PNG, JPG, GIF up to 5MB
                  </p>
                </div>
              </div>
            </div>
          </div>
        </div>
      </div>
    </form>
  </div>
</div>
This is a simple HTML form that uses Tailwind CSS to enhance the presentation of the upload form. We'll also remove the unused header of the page layout, while we're at it.
这是一个简单的 HTML 表单,用于 Tailwind CSS 增强上传表单的表示。我们还将删除页面布局中未使用的标题。
Locate the file lib/app_web/components/layouts/app.html.heex and remove the <header> class. The file should only have the following code:
找到该文件 lib/app_web/components/layouts/app.html.heex 并删除该 <header> 类。该文件应仅包含以下代码:
<main class="px-4 py-20 sm:px-6 lg:px-8">
  <div class="mx-auto max-w-2xl">
    <.flash_group flash={@flash} /> <%= @inner_content %>
  </div>
</main>
Now you can safely delete the lib/app_web/controllers folder, which is no longer used.
现在,您可以安全地删除不再使用的 lib/app_web/controllers 文件夹。
If you run mix phx.server, you should see the following screen:
如果运行 mix phx.server ,您应该会看到以下屏幕:
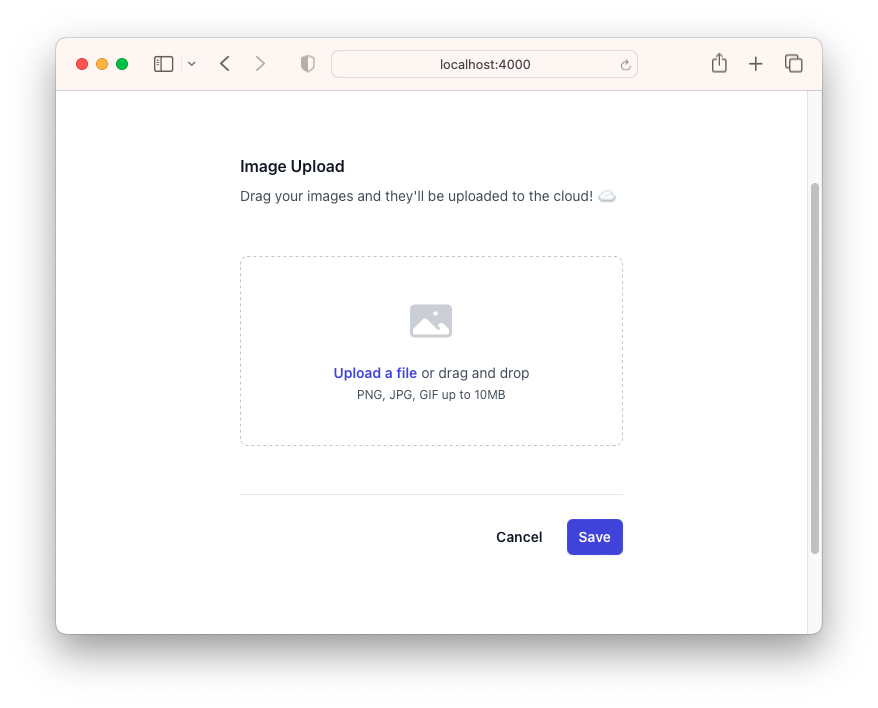
This means we've successfully added LiveView and changed our view!
这意味着我们已成功添加 LiveView 和更改视图!
3. Receiving image files 3. 接收图像文件
Now, let's start by receiving some image files.
现在,让我们从接收一些图像文件开始。
With LiveView, we can easily do this by using allow_upload/3 when mounting our LiveView. With this function, we can easily accept file uploads with progress. We can define file types, max number of entries, max file size, validate the uploaded file and much more!
有了 LiveView ,我们可以通过在 allow_upload/3 挂载 . LiveView 使用此功能,我们可以轻松接受有进度的文件上传。我们可以定义文件类型、最大条目数、最大文件大小、验证上传的文件等等!
Firstly, let's make some changes to lib/app_web/live/page_live.html.heex.
首先,让我们对 lib/app_web/live/page_live.html.heex 进行一些更改。
<div
  class="h-full w-full px-4 py-10 flex justify-center sm:px-6 sm:py-28 lg:px-8 xl:px-28 xl:py-32"
>
  <div
    class="flex justify-center items-center mx-auto max-w-xl w-[50vw] lg:mx-0"
  >
    <div class="space-y-12">
      <div class="border-gray-900/10 pb-12">
        <h2 class="text-base font-semibold leading-7 text-gray-900">
          Image Classification
        </h2>
        <p class="mt-1 text-sm leading-6 text-gray-600">
          Do simple captioning with this
          <a
            href="https://hexdocs.pm/phoenix_live_view/Phoenix.LiveView.html"
            class="font-mono font-medium text-sky-500"
            >LiveView</a
          >
          demo, powered by
          <a
            href="https://github.com/elixir-nx/bumblebee"
            class="font-mono font-medium text-sky-500"
            >Bumblebee</a
          >.
        </p>

        <!-- File upload section -->
        <div class="mt-10 grid grid-cols-1 gap-x-6 gap-y-8 sm:grid-cols-6">
          <div class="col-span-full">
            <div
              class="mt-2 flex justify-center rounded-lg border border-dashed border-gray-900/25 px-6 py-10"
              phx-drop-target="{@uploads.image_list.ref}"
            >
              <div class="text-center">
                <svg
                  class="mx-auto h-12 w-12 text-gray-300"
                  viewBox="0 0 24 24"
                  fill="currentColor"
                  aria-hidden="true"
                >
                  <path
                    fill-rule="evenodd"
                    d="M1.5 6a2.25 2.25 0 012.25-2.25h16.5A2.25 2.25 0 0122.5 6v12a2.25 2.25 0 01-2.25 2.25H3.75A2.25 2.25 0 011.5 18V6zM3 16.06V18c0 .414.336.75.75.75h16.5A.75.75 0 0021 18v-1.94l-2.69-2.689a1.5 1.5 0 00-2.12 0l-.88.879.97.97a.75.75 0 11-1.06 1.06l-5.16-5.159a1.5 1.5 0 00-2.12 0L3 16.061zm10.125-7.81a1.125 1.125 0 112.25 0 1.125 1.125 0 01-2.25 0z"
                    clip-rule="evenodd"
                  />
                </svg>
                <div class="mt-4 flex text-sm leading-6 text-gray-600">
                  <label
                    for="file-upload"
                    class="relative cursor-pointer rounded-md bg-white font-semibold text-indigo-600 focus-within:outline-none focus-within:ring-2 focus-within:ring-indigo-600 focus-within:ring-offset-2 hover:text-indigo-500"
                  >
                    <form phx-change="validate" phx-submit="save">
                      <label class="cursor-pointer">
                        <.live_file_input upload={@uploads.image_list}
                        class="hidden" /> Upload
                      </label>
                    </form>
                  </label>
                  <p class="pl-1">or drag and drop</p>
                </div>
                <p class="text-xs leading-5 text-gray-600">
                  PNG, JPG, GIF up to 5MB
                </p>
              </div>
            </div>
          </div>
        </div>
      </div>
    </div>
  </div>
</div>
We've added a few features:
我们添加了一些功能:
- we used <.live_file_input/> for
LiveViewfile upload. We've wrapped this component with an element that is annotated with thephx-drop-targetattribute pointing to the DOMidof the file input.
我们用于<.live_file_input/>LiveView文件上传。我们用一个元素包装了这个组件,该元素用指向文件输入的 DOMphx-drop-targetid的属性进行了注释。 - because we used
<.live_file_input/>, we need to annotate its wrapping element withphx-submitandphx-change, as per hexdocs.pm/phoenix_live_view/uploads.html#render-reactive-elements
因为我们使用了<.live_file_input/>,所以我们需要按照 hexdocs.pm/phoenix_live_view/uploads.html#render-reactive-elementsphx-change和phx-submit来注释它的包装元素
Because we've added these bindings, we need to add the event handlers in lib/app_web/live/page_live.ex. Open it and update it to:
因为我们已经添加了这些绑定,所以我们需要在 中添加 lib/app_web/live/page_live.ex 事件处理程序。打开它并将其更新为:
defmodule AppWeb.PageLive do
  use AppWeb, :live_view

  @impl true
  def mount(_params, _session, socket) do
    {:ok,
     socket
     |> assign(label: nil, upload_running?: false, task_ref: nil)
     |> allow_upload(:image_list,
       accept: ~w(image/*),
       auto_upload: true,
       progress: &handle_progress/3,
       max_entries: 1,
       chunk_size: 64_000
     )}
  end

  @impl true
  def handle_event("validate", _params, socket) do
    {:noreply, socket}
  end

  @impl true
  def handle_event("remove-selected", %{"ref" => ref}, socket) do
    {:noreply, cancel_upload(socket, :image_list, ref)}
  end

  @impl true
  def handle_event("save", _params, socket) do
    {:noreply, socket}
  end

  defp handle_progress(:image_list, entry, socket) when entry.done? do
    uploaded_file =
      consume_uploaded_entry(socket, entry, fn %{path: _path} = _meta ->
        {:ok, entry}
      end)
    {:noreply, socket}
  end

  defp handle_progress(:image_list, _, socket), do: {:noreply, socket}
end
when
mount/3ing the LiveView, we are creating three socket assigns:labelpertains to the model prediction;upload_running?is a boolean referring to whether the model is running or not;task_refrefers to the reference of the task that was created for image classification (we'll delve into this further later down the line). Additionally, we are using theallow_upload/3function to define our upload configuration. The most important settings here areauto_uploadset totrueand theprogressfields. By configuring these two properties, we are tellingLiveViewthat whenever the person uploads a file, it is processed immediately and consumed.
使用 LiveView 时mount/3,我们将创建三个套接字分配:label与模型预测有关;upload_running?是一个布尔值,表示模型是否正在运行;task_ref引用为图像分类创建的任务的引用(我们稍后将进一步深入研究此内容)。此外,我们还使用该allow_upload/3函数来定义我们的上传配置。此处最重要的设置是auto_uploadset totrue和 fieldsprogress.通过配置这两个属性,我们告诉LiveView人们,每当该人上传文件时,它都会立即被处理并被使用。the
progressfield is handled by thehandle_progress/3function. It receives chunks from the client with a build-inUploadWriterfunction (as explained in the docs). When the chunks are all consumed, we get the booleanentry.done? == true. We consume the file in this function by using consume_uploaded_entry/3. The anonymous function returns{:ok, data}or{:postpone, message}. Whilst consuming the entry/file, we can access its path and then use its content. For now, we don't need to use it. But we will in the future to feed our image classifier with it! After the callback function is executed, this function "consumes the entry", essentially deleting the image from the temporary folder and removing it from the uploaded files list.()
该progress字段由handle_progress/3函数处理。它使用内置UploadWriter函数从客户端接收数据块(如文档中所述)。当 chunk 全部被消耗时,我们得到布尔值entry.done? == true。我们使用此consume_uploaded_entry/3函数中的文件。匿名函数返回{:ok, data}或{:postpone, message}。在使用条目/文件时,我们可以访问其路径,然后使用其内容。目前,我们不需要使用它。但将来我们会用它来喂养我们的图像分类器!执行回调函数后,该函数 “consume the entry”,本质上是从临时文件夹中删除图片,并将其从上传的文件列表中删除。()the
"validate","remove-selected","save"event handlers are called whenever the person uploads the image, wants to remove it from the list of uploaded images and when wants to submit the form, respectively. You may see that we're not doing much with these handlers; we're simply replying with a:noreplybecause we don't need to do anything with them.
的"validate","remove-selected", 事件"save"处理程序 每当上传图像的人、想要将其从上传的图像列表中删除以及想要提交表单时,都会分别调用。您可能会看到,我们没有对这些处理程序做太多工作;我们只是用 a:noreply回复,因为我们不需要对它们做任何事情。
And that's it! If you run mix phx.server, nothing will change.
就是这样!如果运行 mix phx.server ,则不会发生任何变化。
4. Integrating Bumblebee 4. 集成 Bumblebee
Now here comes the fun part! It's time to do some image captioning! 🎉
现在有趣的部分来了!是时候做一些图像字幕了!🎉
4.1 Nx configuration
4.1 Nx 配置
We first need to add some initial setup in the lib/app/application.ex file. Head over there and change the start function like so:
我们首先需要在 lib/app/application.ex 文件中添加一些初始设置。前往那里并更改 start 函数,如下所示:
@impl true
def start(_type, _args) do
  children = [
    # Start the Telemetry supervisor
    AppWeb.Telemetry,
    # Start the PubSub system
    {Phoenix.PubSub, name: App.PubSub},
    {Nx.Serving, serving: serving(), name: ImageClassifier},
    # Start the Endpoint (http/https)
    AppWeb.Endpoint
  ]

  opts = [strategy: :one_for_one, name: App.Supervisor]
  Supervisor.start_link(children, opts)
end

def serving do
  {:ok, model_info} = Bumblebee.load_model({:hf, "microsoft/resnet-50"})
  {:ok, featurizer} = Bumblebee.load_featurizer({:hf, "microsoft/resnet-50"})

  Bumblebee.Vision.image_classification(model_info, featurizer,
    top_k: 1,
    compile: [batch_size: 10],
    defn_options: [compiler: EXLA]
  )
end
We are using Nx.Serving, which simply allows us to encapsulate tasks; it can be networking, machine learning, data processing or any other task.
我们正在使用 Nx.Serving ,它只是允许我们封装任务;它可以是网络、机器学习、数据处理或任何其他任务。
In this specific case, we are using it to batch requests. This is extremely useful and important because we are using models that typically run on GPU. The GPU is really good at parallelizing tasks. Therefore, instead of sending an image classification request one by one, we can batch them/bundle them together as much as we can and then send it over.
在此特定情况下,我们使用它来批处理请求。这非常有用和重要,因为我们使用的是通常在 GPU 上运行的模型。GPU 非常擅长并行化任务。因此,与其一个一个地发送图像分类请求,不如尽可能多地将它们批处理/捆绑在一起,然后发送。
We can define the batch_size and batch_timeout with Nx.Serving. We're going to use the default values, hence why we're not explicitly defining them.
我们可以用 batch_size Nx.Serving 来定义 和 batch_timeout 。我们将使用默认值,因此我们没有明确定义它们。
With Nx.Serving, we define a serving/0 function that is then used by it, which in turn is executed in the supervision tree since we declare it as a child in the Application module.
使用 Nx.Serving ,我们定义了一个 serving/0 函数,然后它由它使用,该函数又在监督树中执行,因为我们在 Application 模块中将其声明为子项。
In the serving/0 function, we are loading theResNet-50 model and its featurizer.
在该函数中 serving/0 ,我们将加载 ResNet-50 模型及其特征化器。
Note 注意
A featurizer can be seen as a Feature Extractor. It is essentially a component that is responsible for converting input data into a format that can be processed by a pre-trained language model.
A featurizer 可以看作是一个 Feature Extractor .它本质上是一个组件,负责将输入数据转换为可由预先训练的语言模型处理的格式。
It takes raw information and performs various transformations, such as tokenization, padding, and encoding to prepare the data for model training or inference.
它获取原始信息并执行各种转换,例如标记化、填充和编码,以为模型训练或推理准备数据。
Lastly, this function returns a serving for image classification by calling image_classification/3, where we can define our compiler and task batch size. We gave our serving function the name ImageClassifier as declared in the Application module.
最后,此函数通过调用 image_classification/3 返回用于图像分类的服务,我们可以在其中定义编译器和任务批处理大小。我们给 serving 函数指定了 Application 模块中声明的名称 ImageClassifier 。
4.2 Async processing the image for classification
Now we're ready to send the image to the model and get a prediction of it!
Every time we upload an image, we are going to run async processing. This means that the task responsible for image classification will be run in another process, thus asynchronously, meaning that the LiveView won't have to wait for this task to finish to continue working.
每次我们上传图像时,我们都会运行异步处理。这意味着负责图像分类的任务将在另一个进程中运行,因此是异步的,这意味着 LiveView 不必等待此任务完成即可继续工作。
For this scenario, we are going to be using the Task module to spawn processes to complete this task.
对于此方案,我们将使用该 Task 模块生成进程以完成此任务。
Go to lib/app_web/live/page_live.ex and change the following code.
转到 lib/app_web/live/page_live.ex 并更改以下代码。
def handle_progress(:image_list, entry, socket) when entry.done? do
    # Consume the entry and get the tensor to feed to classifier
    tensor = consume_uploaded_entry(socket, entry, fn %{} = meta ->
      {:ok, vimage} = Vix.Vips.Image.new_from_file(meta.path)
      pre_process_image(vimage)
    end)

    # Create an async task to classify the image
    task = Task.async(fn -> Nx.Serving.batched_run(ImageClassifier, tensor) end)

    # Update socket assigns to show spinner whilst task is running
    {:noreply, assign(socket, upload_running?: true, task_ref: task.ref)}
end

@impl true
def handle_info({ref, result}, %{assigns: %{task_ref: ref}} = socket) do
  # This is called everytime an Async Task is created.
  # We flush it here.
  Process.demonitor(ref, [:flush])

  # And then destructure the result from the classifier.
  %{predictions: [%{label: label}]} = result

  # Update the socket assigns with result and stopping spinner.
  {:noreply, assign(socket, label: label, upload_running?: false)}
end
Note 注意
The pre_process_image/1 function is yet to be defined. We'll do that in the following section.
该功能 pre_process_image/1 尚未定义。我们将在下一节中执行此作。
In the handle_progress/3 function, whilst we are consuming the image, we are first converting it to a Vix.Vips.Image Struct using the file path. We then feed this image to the pre_process_image/1 function that we'll implement later.
在该函数中 handle_progress/3 ,当我们使用图像时,我们首先使用文件路径将其转换为 。 Vix.Vips.Image Struct 然后,我们将此图像提供给我们稍后将实现的 pre_process_image/1 函数。
What's important is to notice this line:
重要的是要注意这一行:
task = Task.async(fn -> Nx.Serving.batched_run(ImageClassifier, tensor) end)
We are using Task.async/1 to call our Nx.Serving build function ImageClassifier we've defined earlier, thus initiating a batched run with the image tensor. While the task is spawned, we update the socket assigns with the reference to the task (:task_ref) and update the :upload_running? assign to true, so we can show a spinner or a loading animation.
我们用来 Task.async/1 调用之前定义的 Nx.Serving build 函数 ImageClassifier ,从而使用图像张量启动批处理运行。生成任务时,我们使用对任务 () :task_ref 的引用更新套接字分配,并将分配 :upload_running? 更新为 true ,以便我们可以显示微调器或加载动画。
When the task is spawned using Task.async/1, a couple of things happen in the background. The new process is monitored by the caller (our LiveView), which means that the caller will receive a {:DOWN, ref, :process, object, reason} message once the process it is monitoring dies. And, a link is created between both processes.
使用 Task.async/1 生成任务时,后台会发生一些事情。新进程由调用方 (our LiveView ) 监视,这意味着一旦它正在监视的进程终止,调用方将收到一条消息 {:DOWN, ref, :process, object, reason} 。并且,将在两个进程之间创建一个链接。
Therefore, we don't need to use Task.await/2. Instead, we create a new handler to receive the aforementioned. That's what we're doing in the handle_info({ref, result}, %{assigns: %{task_ref: ref}} = socket) function. The received message contains a {ref, result} tuple, where ref is the monitor’s reference. We use this reference to stop monitoring the task, since we received the result we needed from our task and we can discard an exit message.
因此,我们不需要使用 Task.await/2 .相反,我们创建一个新的处理程序来接收上述内容。这就是我们在 handle_info({ref, result}, %{assigns: %{task_ref: ref}} = socket) 函数中所做的。收到的消息包含一个 {ref, result} 元组,其中 ref 是监视器的引用。我们使用此引用来停止监视任务,因为我们从任务中收到了所需的结果,并且可以丢弃退出消息。
In this same function, we destructure the prediction from the model and assign it to the socket assign :label and set :upload_running? to false.
在同一个函数中,我们从模型中解构预测并将其分配给套接字 assign :label 并设置为 :upload_running? false 。
Quite beautiful, isn't it? With this, we don't have to worry if the person closes the browser tab. The process dies (as does our LiveView), and the work is automatically cancelled, meaning no resources are spent on a process for which nobody expects a result anymore.
很漂亮,不是吗?有了这个,我们不必担心这个人是否关闭了浏览器选项卡。进程会死去(就像我们的 LiveView 一样),并且工作会自动取消,这意味着不会将任何资源花费在没有人再期望结果的进程上。
4.2.1 Considerations regarding async processes
4.2.1 有关 async 流程的注意事项
When a task is spawned using Task.async/2, it is linked to the caller. Which means that they're related: if one dies, the other does too.
使用 Task.async/2 生成任务时,它会链接到调用方。这意味着它们是相关的:如果一个人死了,另一个也死了。
We ought to take this into account when developing our application. If we don't have control over the result of the task, and we don't want our LiveView to crash if the task crashes, we must use a different alternative to spawn our task - Task.Supervisor.async_nolink/3 can be used for this effect, meaning we can use it if we want to make sure our LiveView won't die and the error is reported, even if the task crashes.
我们在开发应用程序时应该考虑到这一点。如果我们无法控制任务的结果,并且我们不希望 LiveView 在任务崩溃时崩溃,我们必须使用不同的替代方案来生成我们的任务 - Task.Supervisor.async_nolink/3 可以用于此效果,这意味着如果我们想确保我们不会 LiveView 死并且不会报告错误,则可以使用它, 即使任务崩溃。
We've chosen Task.async/2 for this very reason. We are doing something that takes time/is expensive and we want to stop the task if LiveView is closed/crashes. However, if you are building something like a report that has to be generated even if the person closes the browser tab, this is not the right solution.
正是出于这个原因,我们选择了 Task.async/2 这个。我们正在做一些耗时/昂贵的事情,如果 LiveView 任务关闭/崩溃,我们想停止任务。但是,如果您正在构建类似报告的内容,即使该人关闭浏览器选项卡也必须生成该报表,则这不是正确的解决方案。
4.2.2 Alternative for better testing
4.2.2 更好的测试
We are spawning async tasks by calling Task.async/1. This is creating an unsupervised task. Although it's plausible for this simple app, it's best for us to create a Supervisor that manages their child tasks. This gives more control over the execution and lifetime of the child tasks.
我们通过调用 Task.async/1 来生成异步任务。这将创建无监督任务。尽管这个简单的应用程序似乎是合理的,但最好创建一个 Supervisor 管理其子任务的应用程序。这样可以更好地控制子任务的执行和生存期。
Additionally, it's better to have these tasks supervised because it makes it possible to create tests for our LiveView. For this, we need to make a couple of changes.
此外,最好监督这些任务,因为它可以为我们的 LiveView .为此,我们需要进行一些更改。
First, head over to lib/app/application.ex and add a supervisor to the start/2 function children array.
首先,前往 lib/app/application.ex 并将 supervisor 添加到 start/2 函数 children 数组中。
def start(_type, _args) do
  children = [
    AppWeb.Telemetry,
    {Phoenix.PubSub, name: App.PubSub},
    {Nx.Serving, serving: serving(), name: ImageClassifier},
    {Task.Supervisor, name: App.TaskSupervisor},      # add this line
    AppWeb.Endpoint
  ]

  opts = [strategy: :one_for_one, name: App.Supervisor]
  Supervisor.start_link(children, opts)
end
We are creating a Task.Supervisor with the name App.TaskSupervisor.
我们正在创建一个 Task.Supervisor 名为 App.TaskSupervisor .
Now, in lib/app_web/live/page_live.ex, we create the async task like so:
现在,在 lib/app_web/live/page_live.ex 中,我们像这样创建异步任务:
task = Task.Supervisor.async(App.TaskSupervisor, fn -> Nx.Serving.batched_run(ImageClassifier, tensor) end)
We are now using Task.Supervisor.async, passing the name of the supervisor defined earlier.
我们现在使用 Task.Supervisor.async ,传递前面定义的 supervisor 的名称。
And that's it! We are creating async tasks like before, the only difference is that they're now supervised.
就是这样!我们像以前一样创建异步任务,唯一的区别是它们现在是受监督的。
In tests, you can create a small module that waits for the tasks to be completed.
在测试中,您可以创建一个等待任务完成的小模块。
defmodule AppWeb.SupervisorSupport do

  @moduledoc """
    This is a support module helper that is meant to wait for all the children of a supervisor to complete.
    If you go to `lib/app/application.ex`, you'll see that we created a `TaskSupervisor`, where async tasks are spawned.
    This module helps us to wait for all the children to finish during tests.
  """

  @doc """
    Find all children spawned by this supervisor and wait until they finish.
  """
  def wait_for_completion() do
    pids = Task.Supervisor.children(App.TaskSupervisor)
    Enum.each(pids, &Process.monitor/1)
    wait_for_pids(pids)
  end

  defp wait_for_pids([]), do: nil
  defp wait_for_pids(pids) do
    receive do
      {:DOWN, _ref, :process, pid, _reason} -> wait_for_pids(List.delete(pids, pid))
    end
  end
end
You can call AppWeb.SupervisorSupport.wait_for_completion() in unit tests so they wait for the tasks to complete. In our case, we do that until the prediction is made.
您可以调用 AppWeb.SupervisorSupport.wait_for_completion() 单元测试,以便它们等待任务完成。在我们的例子中,我们会一直这样做,直到做出预测。
4.3 Image pre-processing 4.3 图像预处理
As we've noted before, we need to pre-process the image before passing it to the model. For this, we have three main steps:
正如我们之前提到的,我们需要在将图像传递给模型之前对其进行预处理。为此,我们有三个主要步骤:
- removing the alpha out of the image, flattening it out.
从图像中删除alphaout,将其拼合。 - convert the image to
sRGBcolourspace. This is needed to ensure that the image is consistent and aligns with the model's training data images.
将图像转换为sRGBColourspace。这是确保图像一致并与模型的训练数据图像保持一致所必需的。 - set the representation of the image as a
Tensortoheight, width, bands. The image tensor will then be organized as a three-dimensional array, where the first dimension represents the height of the image, the second refers to the width of the image, and the third pertains to the different spectral bands/channels of the image.
将图像的表示形式设置为height, width, bands。Tensor然后,图像张量将被组织成一个三维数组,其中第一个维度表示图像的高度,第二个维度表示图像的宽度,第三个维度与图像的不同光谱波段/通道有关。
Our pre_process_image/1 function will implement these three steps. Let's implement it now!
我们的 pre_process_image/1 函数将实现这三个步骤。现在就实施它吧!
In lib/app_web/live/page_live.ex, add the following:
在 lib/app_web/live/page_live.ex 中,添加以下内容:
  defp pre_process_image(%Vimage{} = image) do

    # If the image has an alpha channel, flatten it:
    {:ok, flattened_image} = case Vix.Vips.Image.has_alpha?(image) do
      true -> Vix.Vips.Operation.flatten(image)
      false -> {:ok, image}
    end

    # Convert the image to sRGB colourspace ----------------
    {:ok, srgb_image} = Vix.Vips.Operation.colourspace(flattened_image, :VIPS_INTERPRETATION_sRGB)

    # Converting image to tensor ----------------
    {:ok, tensor} = Vix.Vips.Image.write_to_tensor(srgb_image)

    # We reshape the tensor given a specific format.
    # In this case, we are using {height, width, channels/bands}.
    %Vix.Tensor{data: binary, type: type, shape: {x, y, bands}} = tensor
    format = [:height, :width, :bands]
    shape = {x, y, bands}

    final_tensor =
      binary
      |> Nx.from_binary(type)
      |> Nx.reshape(shape, names: format)

    {:ok, final_tensor}
  end
The function receives a Vix image, as detailed earlier. We use flatten/1 to flatten the alpha out of the image.
该函数接收图像 Vix ,如前所述。我们用来 flatten/1 将 alpha 从图像中展平。
The resulting image has its colourspace changed by calling colourspace/3, where we change the to sRGB.
生成的图像通过调用 colourspace/3 来更改其色彩空间,其中我们将 更改为 sRGB 。
The colourspace-altered image is then converted to a tensor, by calling write_to_tensor/1.
然后,通过调用 write_to_tensor/1 .
We then reshape the tensor according to the format that was previously mentioned.
然后,我们根据前面提到的格式重塑张量。
This function returns the processed tensor, that is then used as input to the model.
此函数返回处理后的张量,然后将其用作模型的输入。
4.4 Updating the view 4.4 更新视图
All that's left is updating the view to reflect these changes we've made to the LiveView. Head over to lib/app_web/live/page_live.html.heex and change it to this.
剩下的工作就是更新视图以反映我们对 LiveView .前往 lib/app_web/live/page_live.html.heex 并将其更改为此。
<.flash_group flash={@flash} />
<div
  class="h-full w-full px-4 py-10 flex justify-center sm:px-6 sm:py-28 lg:px-8 xl:px-28 xl:py-32"
>
  <div
    class="flex justify-center items-center mx-auto max-w-xl w-[50vw] lg:mx-0"
  >
    <div class="space-y-12">
      <div class="border-gray-900/10 pb-12">
        <h2 class="text-base font-semibold leading-7 text-gray-900">
          Image Classification
        </h2>
        <p class="mt-1 text-sm leading-6 text-gray-600">
          Do simple classification with this
          <a
            href="https://hexdocs.pm/phoenix_live_view/Phoenix.LiveView.html"
            class="font-mono font-medium text-sky-500"
            >LiveView</a
          >
          demo, powered by
          <a
            href="https://github.com/elixir-nx/bumblebee"
            class="font-mono font-medium text-sky-500"
            >Bumblebee</a
          >.
        </p>

        <!-- File upload section -->
        <div class="mt-10 grid grid-cols-1 gap-x-6 gap-y-8 sm:grid-cols-6">
          <div class="col-span-full">
            <div
              class="mt-2 flex justify-center rounded-lg border border-dashed border-gray-900/25 px-6 py-10"
              phx-drop-target="{@uploads.image_list.ref}"
            >
              <div class="text-center">
                <svg
                  class="mx-auto h-12 w-12 text-gray-300"
                  viewBox="0 0 24 24"
                  fill="currentColor"
                  aria-hidden="true"
                >
                  <path
                    fill-rule="evenodd"
                    d="M1.5 6a2.25 2.25 0 012.25-2.25h16.5A2.25 2.25 0 0122.5 6v12a2.25 2.25 0 01-2.25 2.25H3.75A2.25 2.25 0 011.5 18V6zM3 16.06V18c0 .414.336.75.75.75h16.5A.75.75 0 0021 18v-1.94l-2.69-2.689a1.5 1.5 0 00-2.12 0l-.88.879.97.97a.75.75 0 11-1.06 1.06l-5.16-5.159a1.5 1.5 0 00-2.12 0L3 16.061zm10.125-7.81a1.125 1.125 0 112.25 0 1.125 1.125 0 01-2.25 0z"
                    clip-rule="evenodd"
                  />
                </svg>
                <div class="mt-4 flex text-sm leading-6 text-gray-600">
                  <label
                    for="file-upload"
                    class="relative cursor-pointer rounded-md bg-white font-semibold text-indigo-600 focus-within:outline-none focus-within:ring-2 focus-within:ring-indigo-600 focus-within:ring-offset-2 hover:text-indigo-500"
                  >
                    <form id="upload-form" phx-change="noop" phx-submit="noop">
                      <label class="cursor-pointer">
                        <.live_file_input upload={@uploads.image_list}
                        class="hidden" /> Upload
                      </label>
                    </form>
                  </label>
                  <p class="pl-1">or drag and drop</p>
                </div>
                <p class="text-xs leading-5 text-gray-600">
                  PNG, JPG, GIF up to 5MB
                </p>
              </div>
            </div>
          </div>
        </div>

        <!-- Prediction text -->
        <div
          class="mt-6 flex space-x-1.5 items-center font-bold text-gray-900 text-xl"
        >
          <span>Description: </span>
          <!-- Spinner -->
          <%= if @upload_running? do %>
          <div role="status">
            <div
              class="relative w-6 h-6 animate-spin rounded-full bg-gradient-to-r from-purple-400 via-blue-500 to-red-400 "
            >
              <div
                class="absolute top-1/2 left-1/2 transform -translate-x-1/2 -translate-y-1/2 w-3 h-3 bg-gray-200 rounded-full border-2 border-white"
              ></div>
            </div>
          </div>
          <% else %> <%= if @label do %>
          <span class="text-gray-700 font-light"><%= @label %></span>
          <% else %>
          <span class="text-gray-300 font-light">Waiting for image input.</span>
          <% end %> <% end %>
        </div>
      </div>
    </div>
  </div>
</div>
In these changes, we've added the output of the model in the form of text. We are rendering a spinner if the :upload_running? socket assign is set to true. Otherwise, we add the :label, which holds the prediction made by the model.
在这些更改中,我们以文本形式添加了模型的输出。如果 :upload_running? socket assign 设置为 true,我们将渲染一个微调器。否则,我们将添加 :label ,它包含模型所做的预测。
You may have also noticed that we've changed the phx event handlers to noop. This is simply to simplify the LiveView.
您可能还注意到,我们已将 phx 事件处理程序更改为 noop .这只是为了简化 LiveView .
Head over to lib/app_web/live/page_live.ex. You can now remove the "validate", "save" and "remove-selected" handlers, because we're not going to be needing them. Replace them with this handler:
前往 lib/app_web/live/page_live.ex 。您现在可以删除 "validate" 和 "save" "remove-selected" handlers,因为我们不需要它们。将它们替换为此处理程序:
  @impl true
  def handle_event("noop", _params, socket) do
    {:noreply, socket}
  end
4.5 Check it out! 4.5 看看吧!
And that's it! Our app is now functional 🎉.
就是这样!我们的应用程序现在可以运行🎉了。
If you run the app, you can drag and drop or select an image. After this, a task will be spawned that will run the model against the image that was submitted.
如果您运行该应用程序,则可以拖放或选择图像。在此之后,将生成一个任务,该任务将针对提交的图像运行模型。
Once a prediction is made, display it!
做出预测后,显示它!
4.6 Considerations on user images
4.6 用户镜像注意事项
To keep the app as simple as possible, we are receiving the image from the person as is. Although we are processing the image, we are doing it so it is processable by the model.
为了使应用程序尽可能简单,我们按原样接收该人的图像。虽然我们正在处理图像,但我们正在这样做,以便模型可以对其进行处理。
We have to understand that:
我们必须明白:
- in most cases, full-resolution images are not necessary, because neural networks work on much smaller inputs (e.g.
ResNet-50works with224px x 224pximages). This means that a lot of data is unnecessarily uploaded over the network, increasing workload on the server to potentially downsize a large image.
在大多数情况下,全分辨率图像不是必需的,因为神经网络可以处理更小的输入(例如,ResNet-50处理224px x 224px图像)。这意味着大量数据会不必要地通过网络上传,从而增加服务器上的工作负载,从而可能缩小大型图像的大小。 - decoding an image requires an additional package, meaning more work on the server.
解码图像需要一个额外的包,这意味着服务器上需要做更多的工作。
We can avoid both of these downsides by moving this work to the client. We can leverage the Canvas API to decode and downsize this image on the client-side, reducing server workload.
我们可以通过将这项工作转移到客户端来避免这两个缺点。我们可以利用 Canvas API 在客户端解码和缩小此映像的大小,从而减少服务器工作负载。
You can see an example implementation of this technique in Bumblebee's repository at bumblebee/examples/phoenix/image_classification.exs at main · elixir-nx/bumblebee · GitHub
您可以在 https://github.com/elixir-nx/bumblebee/blob/main/examples/phoenix/image_classification.exs 的 存储库中 Bumblebee 查看此技术的示例实现
However, since we are not using JavaScript for anything, we can (and should!) properly downsize our images so they better fit the training dataset of the model we use. This will allow the model to process faster since larger images carry over more data that is ultimately unnecessary for models to make predictions.
然而,由于我们没有用于 JavaScript 任何事情,我们可以(也应该)适当地缩小我们的图像,以便它们更好地适应我们使用的模型的训练数据集。这将使模型处理得更快,因为较大的图像会携带更多的数据,而这些数据最终对于模型进行预测是不必要的。
Open lib/app_web/live/page_live.ex, find the handle_progress/3 function and change resize the image before processing it.
可选 lib/app_web/live/page_live.ex ,找到 handle_progress/3 函数并更改 调整图像大小 再处理它。
    file_binary = File.read!(meta.path)

    # Get image and resize
    # This is dependant on the resolution of the model's dataset.
    # In our case, we want the width to be closer to 640, whilst maintaining aspect ratio.
    width = 640
    {:ok, thumbnail_vimage} = Vix.Vips.Operation.thumbnail(meta.path, width, size: :VIPS_SIZE_DOWN)

    # Pre-process it
    {:ok, tensor} = pre_process_image(thumbnail_vimage)

    #...
We are using Vix.Vips.Operation.thumbnail/3 to resize our image to a fixed width whilst maintaining aspect ratio. The width variable can be dependent on the model that you use. For example, ResNet-50 is trained on 224px224 pictures, so you may want to resize the image to this width.
我们用于将 Vix.Vips.Operation.thumbnail/3 图像调整为固定宽度,同时保持纵横比。该 width 变量可以取决于您使用的模型。例如, ResNet-50 在图片上 224px224 进行了训练,因此您可能希望将图像大小调整为此宽度。
Note: We are using the
thumbnail/3function instead ofresize/3because it's much faster.
注意:我们使用该thumbnail/3函数而不是resize/3因为它要快得多。
Check HOWTO Image shrinking · libvips/libvips Wiki · GitHub to know why.
查看 https://github.com/libvips/libvips/wiki/HOWTO----Image-shrinking 了解原因。
5. Final Touches 5. 最后的润色
Although our app is functional, we can make it better. 🎨
虽然我们的应用程序功能强大,但我们可以让它变得更好。🎨
5.1 Setting max file size
5.1 设置最大文件大小
In order to better control user input, we should add a limit to the size of the image that is being uploaded. It will be easier on our server and ultimately save costs.
为了更好地控制用户输入,我们应该对正在上传的图像的大小添加限制。在我们的服务器上会更容易,并最终节省成本。
Let's add a cap of 5MB to our app! Fortunately for you, this is super simple! You just need to add the max_file_size to the allow_uploads/2 function when mounting the LiveView!
让我们 5MB 为应用程序添加一个上限!幸运的是,这非常简单!您只需在 max_file_size allow_uploads/2 挂载 LiveView !
  def mount(_params, _session, socket) do
    {:ok,
     socket
     |> assign(label: nil, upload_running?: false, task_ref: nil)
     |> allow_upload(:image_list,
       accept: ~w(image/*),
       auto_upload: true,
       progress: &handle_progress/3,
       max_entries: 1,
       chunk_size: 64_000,
       max_file_size: 5_000_000    # add this
     )}
  end
And that's it! The number is in bytes, hence why we set it as 5_000_000.
就是这样!数字在 中 bytes ,因此我们将其设置为 5_000_000 。
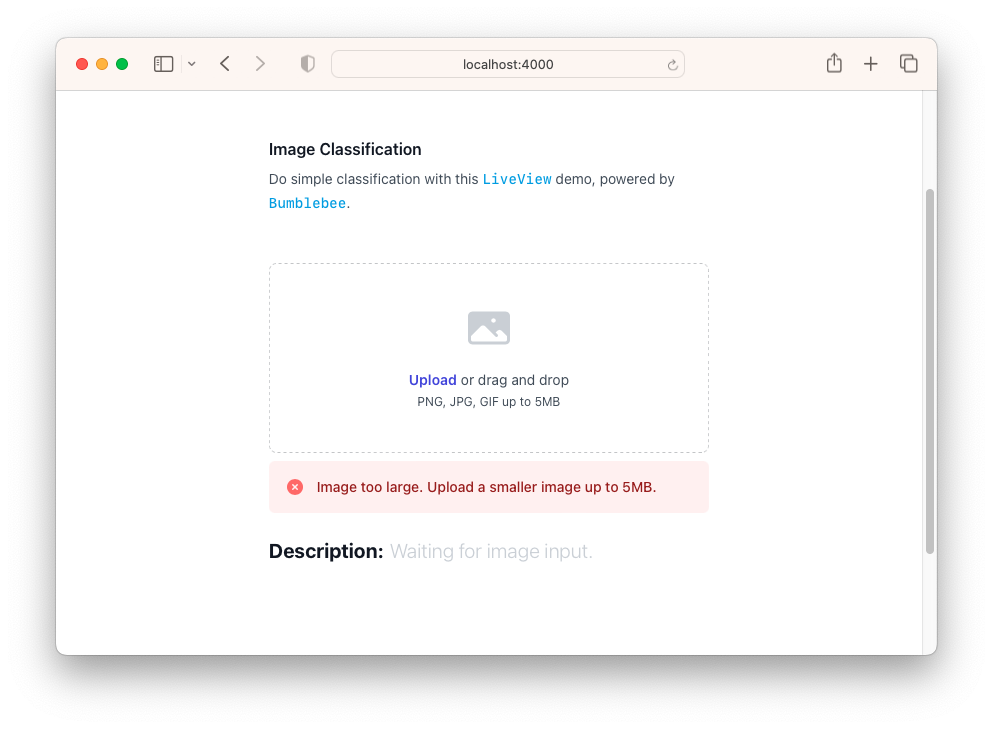
5.2 Show errors 5.2 显示错误
In case a person uploads an image that is too large, we should show this feedback to the person!
如果有人上传了太大的图片,我们应该向该人展示此反馈!
For this, we can leverage the upload_errors/2 function. This function will return the entry errors for an upload. We need to add a handler for one of these errors to show it first.
为此,我们可以利用该 upload_errors/2 函数。此函数将返回上传的输入错误。我们需要为其中一个错误添加一个处理程序,以首先显示它。
Head over lib/app_web/live/page_live.ex and add the following line.
前往 lib/app_web/live/page_live.ex 并添加以下行。
def error_to_string(:too_large), do: "Image too large. Upload a smaller image up to 5MB."
Now, add the following section below the upload form inside lib/app_web/live/page_live.html.heex.
现在,在 中的上传表单下方添加以下部分 lib/app_web/live/page_live.html.heex 。
<!-- Show errors -->
<%= for entry <- @uploads.image_list.entries do %>
<div class="mt-2">
  <%= for err <- upload_errors(@uploads.image_list, entry) do %>
  <div class="rounded-md bg-red-50 p-4 mb-2">
    <div class="flex">
      <div class="flex-shrink-0">
        <svg
          class="h-5 w-5 text-red-400"
          viewBox="0 0 20 20"
          fill="currentColor"
          aria-hidden="true"
        >
          <path
            fill-rule="evenodd"
            d="M10 18a8 8 0 100-16 8 8 0 000 16zM8.28 7.22a.75.75 0 00-1.06 1.06L8.94 10l-1.72 1.72a.75.75 0 101.06 1.06L10 11.06l1.72 1.72a.75.75 0 101.06-1.06L11.06 10l1.72-1.72a.75.75 0 00-1.06-1.06L10 8.94 8.28 7.22z"
            clip-rule="evenodd"
          />
        </svg>
      </div>
      <div class="ml-3">
        <h3 class="text-sm font-medium text-red-800">
          <%= error_to_string(err) %>
        </h3>
      </div>
    </div>
  </div>
  <% end %>
</div>
<% end %>
We are iterating over the errors returned by upload_errors/2 and invoking error_to_string/1, which we've just defined in our LiveView.
我们正在迭代 返回的错误 upload_errors/2 并调用 ,我们刚刚在 LiveView . error_to_string/1
Now, if you run the app and try to upload an image that is too large, an error will show up.
现在,如果您运行应用程序并尝试上传太大的图像,则会出现错误。
Awesome! 🎉 棒!🎉
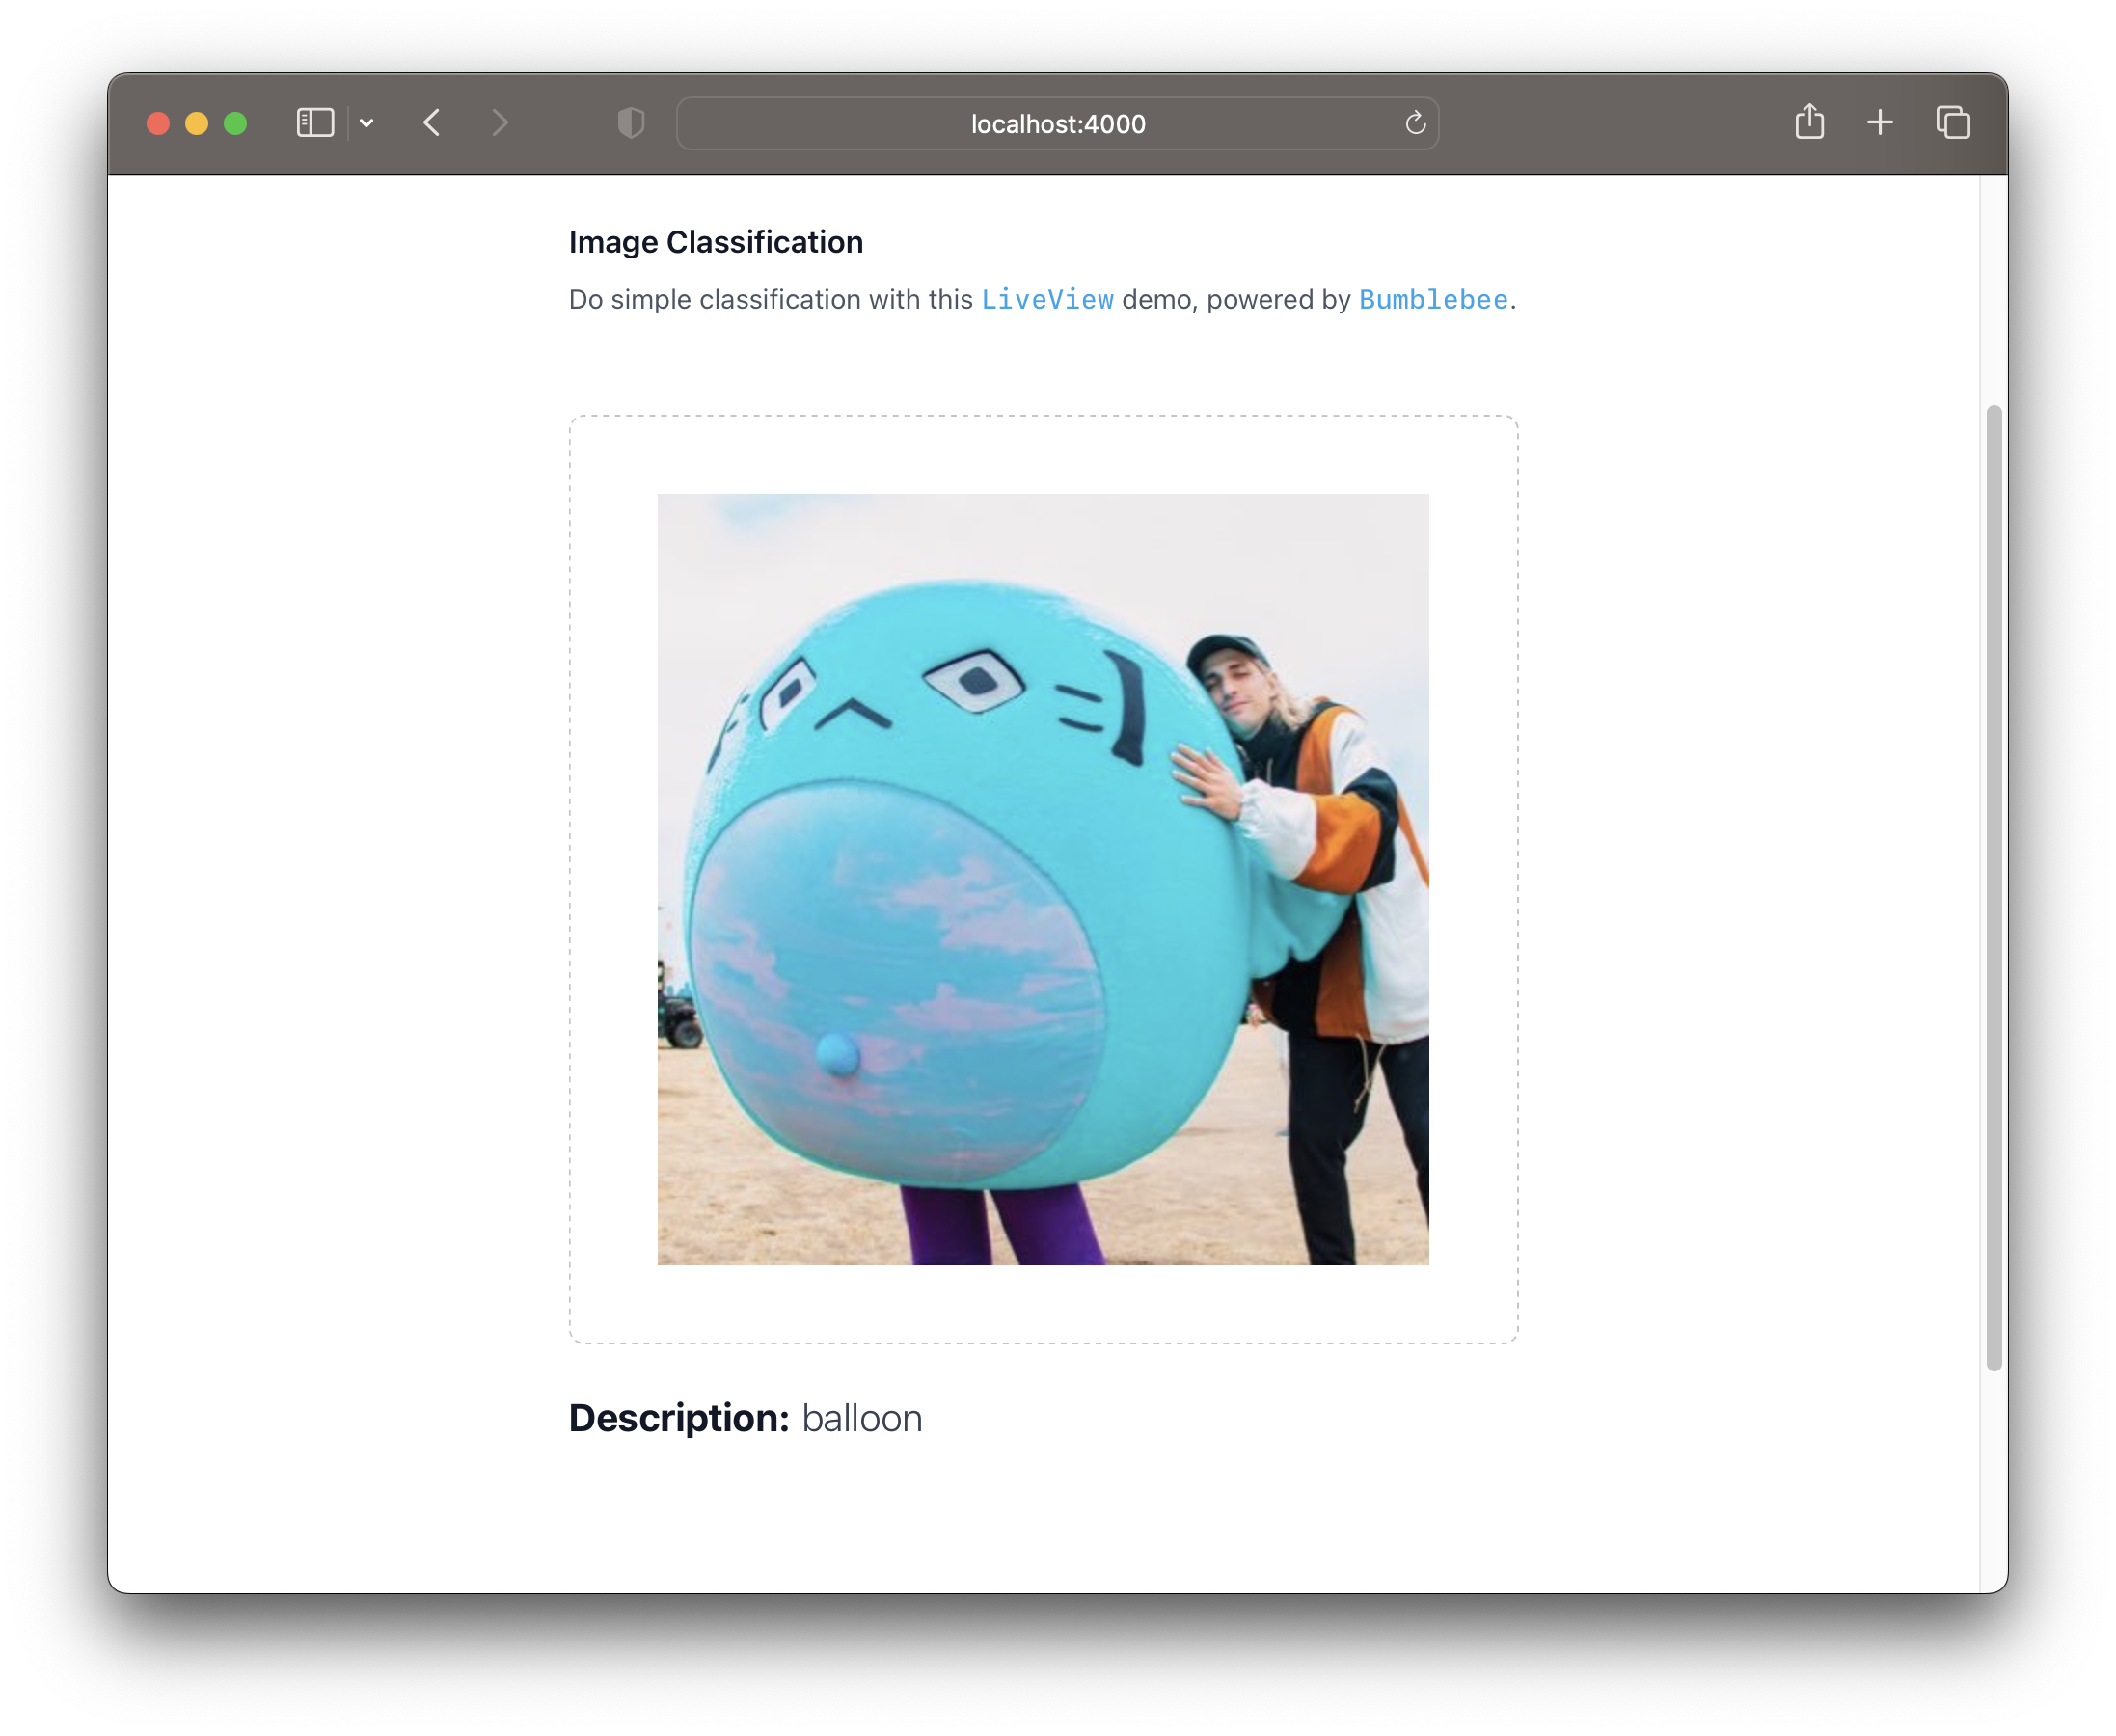
5.3 Show image preview 5.3 显示图像预览
As of now, even though our app predicts the given images, it is not showing a preview of the image the person submitted. Let's fix this 🛠️.
截至目前,即使我们的应用程序预测了给定的图像,它也不会显示该人提交的图像的预览。让我们修复这个 🛠️ .
Let's add a new socket assign variable pertaining to the base64 representation of the image in lib/app_web/live_page/live.ex
让我们添加一个新的 socket assign 变量,它与图像的 base64 表示有关 lib/app_web/live_page/live.ex
|> assign(label: nil, upload_running?: false, task_ref: nil, image_preview_base64: nil)
We've added image_preview_base64 as a new socket assign, initializing it as nil.
我们添加了 image_preview_base64 一个新的 socket 赋值,将其初始化为 nil .
Next, we need to read the file while consuming it, and properly update the socket assign so we can show it to the person.
接下来,我们需要在使用文件时读取文件,并正确更新 socket assignment,以便我们可以将其显示给用户。
In the same file, change the handle_progress/3 function to the following.
在同一文件中,将 handle_progress/3 函数更改为以下内容。
  def handle_progress(:image_list, entry, socket) when entry.done? do
      # Consume the entry and get the tensor to feed to classifier
      %{tensor: tensor, file_binary: file_binary} = consume_uploaded_entry(socket, entry, fn %{} = meta ->
        file_binary = File.read!(meta.path)

        {:ok, vimage} = Vix.Vips.Image.new_from_file(meta.path)
        {:ok, tensor} = pre_process_image(vimage)
        {:ok, %{tensor: tensor, file_binary: file_binary}}
      end)

      # Create an async task to classify the image
      task = Task.Supervisor.async(App.TaskSupervisor, fn -> Nx.Serving.batched_run(ImageClassifier, tensor) end)

      # Encode the image to base64
      base64 = "data:image/png;base64, " <> Base.encode64(file_binary)

      # Update socket assigns to show spinner whilst task is running
      {:noreply, assign(socket, upload_running?: true, task_ref: task.ref, image_preview_base64: base64)}
  end
We're using File.read!/1 to retrieve the binary representation of the image that was uploaded. We use Base.encode64/2 to encode this file binary and assign the newly created image_preview_base64 socket assign with this base64 representation of the image.
我们用于 File.read!/1 检索已上传图像的二进制表示形式。我们用于 Base.encode64/2 对此文件进行二进制编码,并将新创建的 image_preview_base64 套接字分配为图像的 base64 表示形式。
Now, all that's left to do is to render the image on our view. In lib/app_web/live/page_live.html.heex, locate the line:
现在,剩下要做的就是在我们的 View 上渲染图像。在 lib/app_web/live/page_live.html.heex 中,找到以下行:
<div class="text-center"></div>
We are going to update this <div> to show the image with the image_preview_base64 socket assign.
我们将更新它 <div> 以显示分配了 image_preview_base64 socket 的图像。
<div class="text-center">
  <!-- Show image preview -->
  <%= if @image_preview_base64 do %>
  <form id="upload-form" phx-change="noop" phx-submit="noop">
    <label class="cursor-pointer">
      <.live_file_input upload={@uploads.image_list} class="hidden" />
      <img src="{@image_preview_base64}" />
    </label>
  </form>
  <% else %>
  <svg
    class="mx-auto h-12 w-12 text-gray-300"
    viewBox="0 0 24 24"
    fill="currentColor"
    aria-hidden="true"
  >
    <path
      fill-rule="evenodd"
      d="M1.5 6a2.25 2.25 0 012.25-2.25h16.5A2.25 2.25 0 0122.5 6v12a2.25 2.25 0 01-2.25 2.25H3.75A2.25 2.25 0 011.5 18V6zM3 16.06V18c0 .414.336.75.75.75h16.5A.75.75 0 0021 18v-1.94l-2.69-2.689a1.5 1.5 0 00-2.12 0l-.88.879.97.97a.75.75 0 11-1.06 1.06l-5.16-5.159a1.5 1.5 0 00-2.12 0L3 16.061zm10.125-7.81a1.125 1.125 0 112.25 0 1.125 1.125 0 01-2.25 0z"
      clip-rule="evenodd"
    />
  </svg>
  <div class="mt-4 flex text-sm leading-6 text-gray-600">
    <label
      for="file-upload"
      class="relative cursor-pointer rounded-md bg-white font-semibold text-indigo-600 focus-within:outline-none focus-within:ring-2 focus-within:ring-indigo-600 focus-within:ring-offset-2 hover:text-indigo-500"
    >
      <form id="upload-form" phx-change="noop" phx-submit="noop">
        <label class="cursor-pointer">
          <.live_file_input upload={@uploads.image_list} class="hidden" />
          Upload
        </label>
      </form>
    </label>
    <p class="pl-1">or drag and drop</p>
  </div>
  <p class="text-xs leading-5 text-gray-600">PNG, JPG, GIF up to 5MB</p>
  <% end %>
</div>
As you can see, we are checking if @image_preview_base64 is defined. If so, we simply show the image with it as src 😊.
如你所见,我们正在检查是否已 @image_preview_base64 定义。如果是这样,我们只需将带有它 src 😊的图像显示为 。
Now, if you run the application, you'll see that after dragging the image, it is previewed and shown to the person!
现在,如果您运行该应用程序,您将看到在拖动图像后,它会被预览并显示给该人!
还有很多功能等待你发掘
六、软件下载
本文信息来源于GitHub作者地址:https://github.com/dwyl/image-classifier