STM32 VS Code Extension + openOCD + DAP
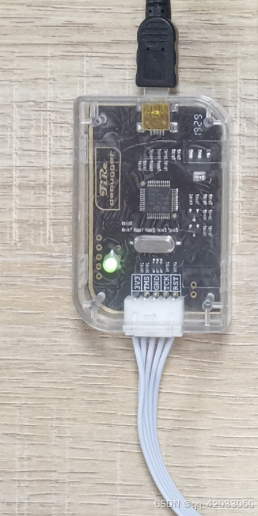
电脑配置是macOS 15.3,Air M2版本;使用野火CMSIS DAP工具(官网裁剪图),通过绿联的hub接入usb3.1;板子是野火霸天虎V2(STM32F407ZGT6),实现在VScode上在线调试的功能
1. 创建stm32项目
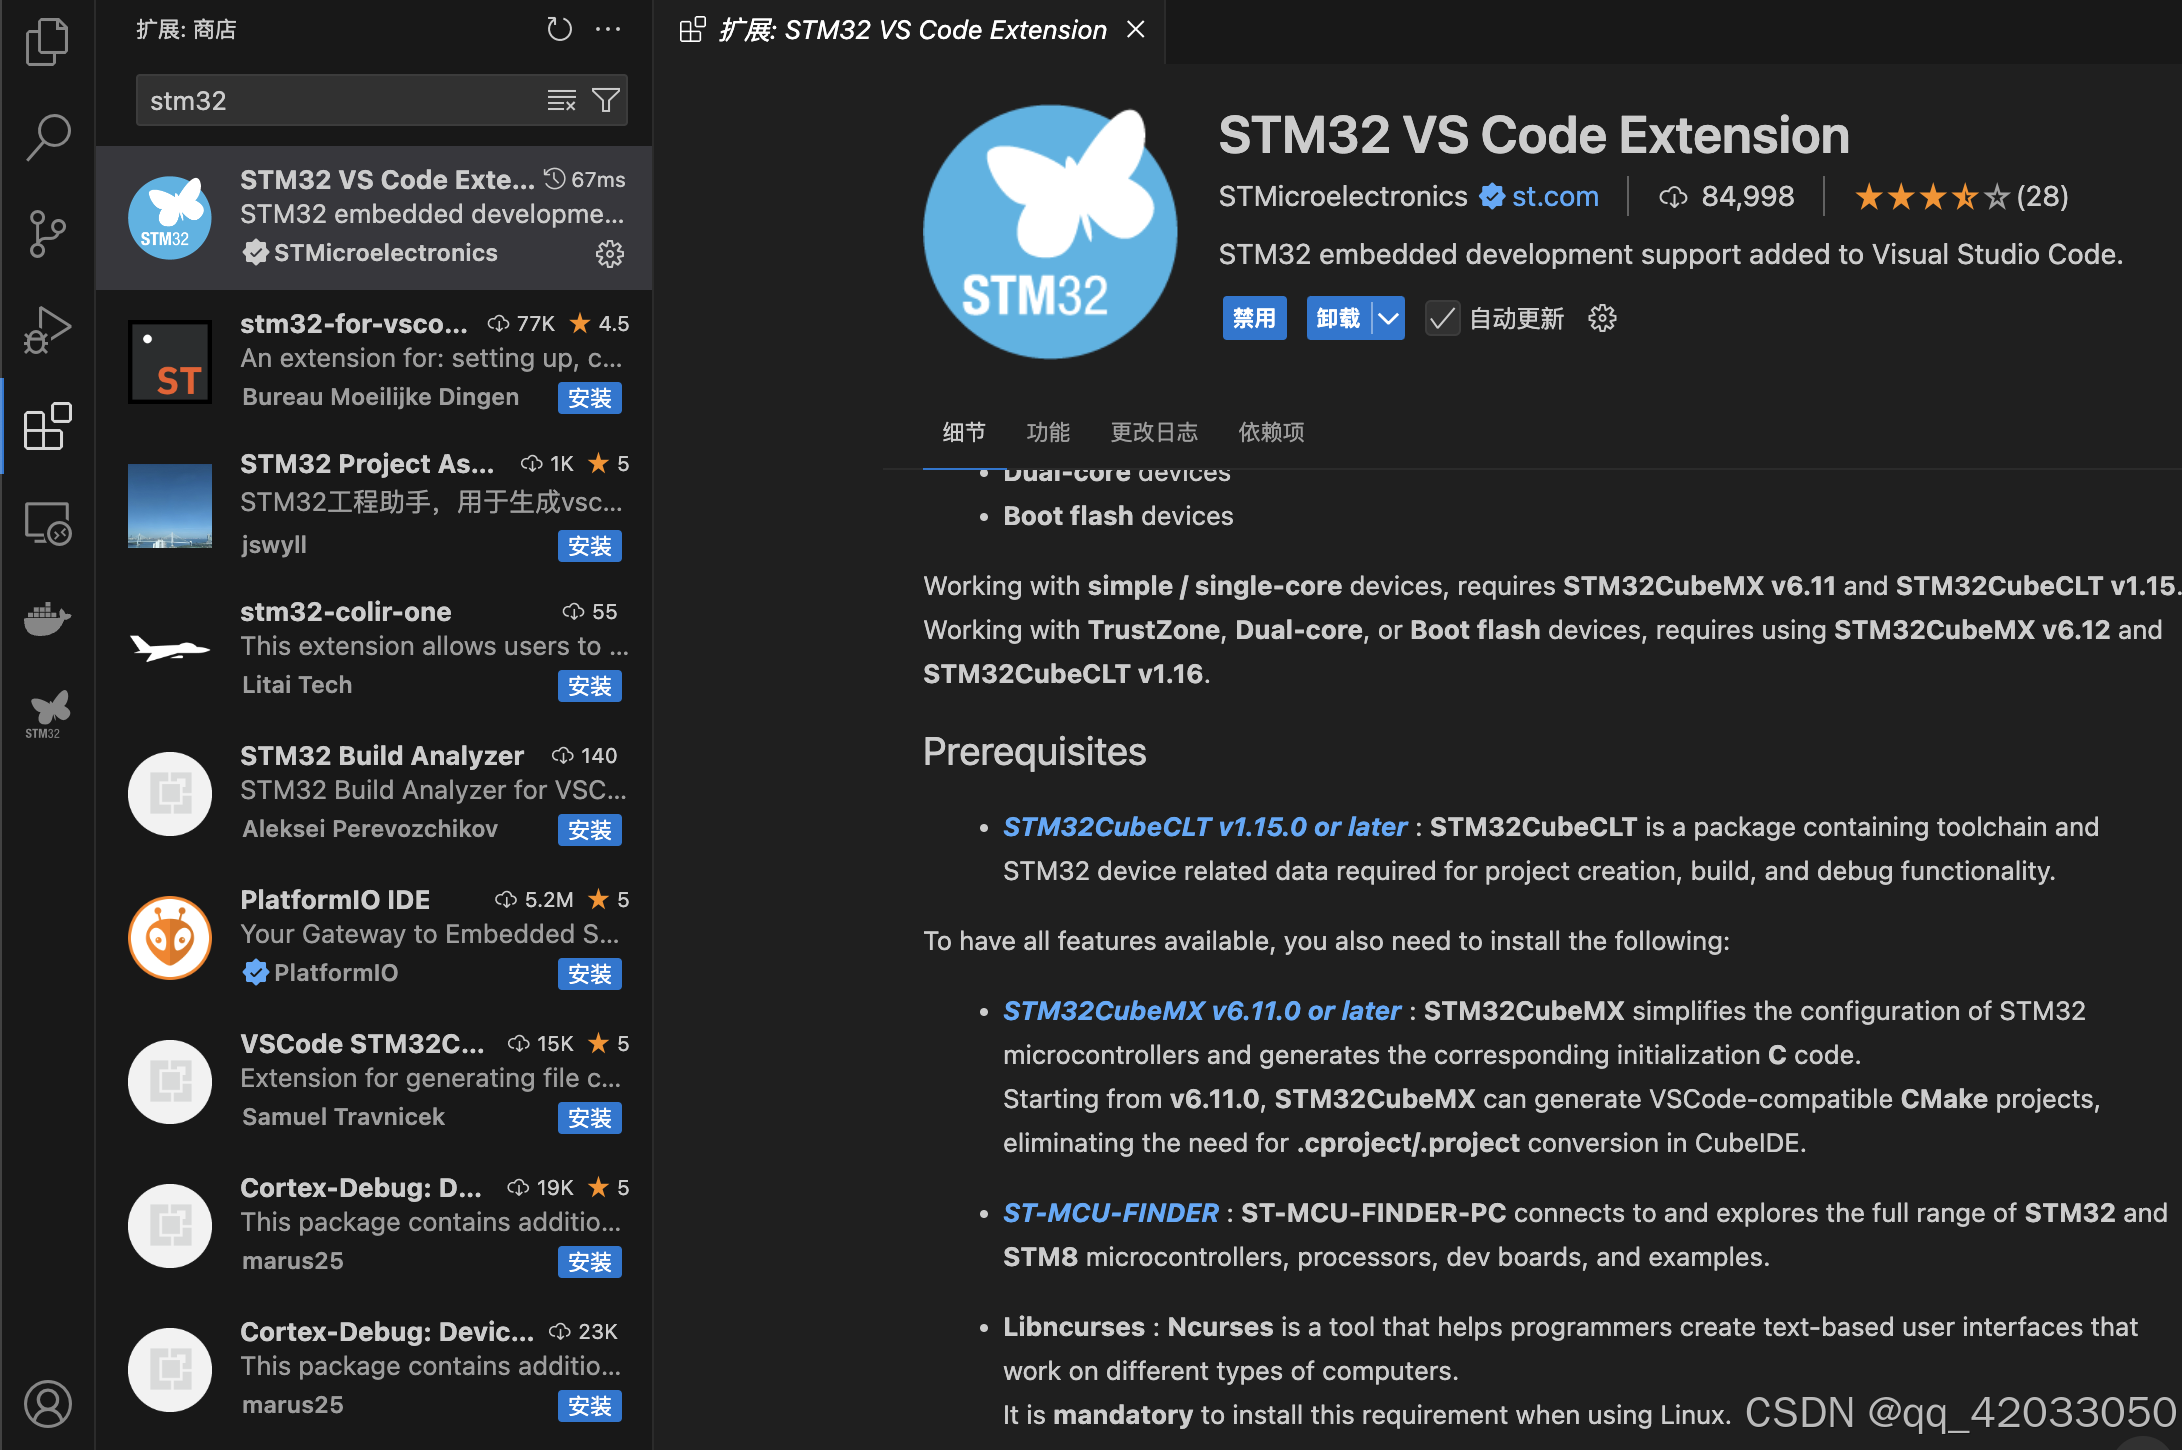
1)下载插件STM32 VS Code Extension
在 VScode 的扩展链接里下载和配置好了 STM32CubeMX 和 STMCUFinder(说明文档蓝色部分链接跳转官网下载,后者不知道在哪有用上,就先下载)
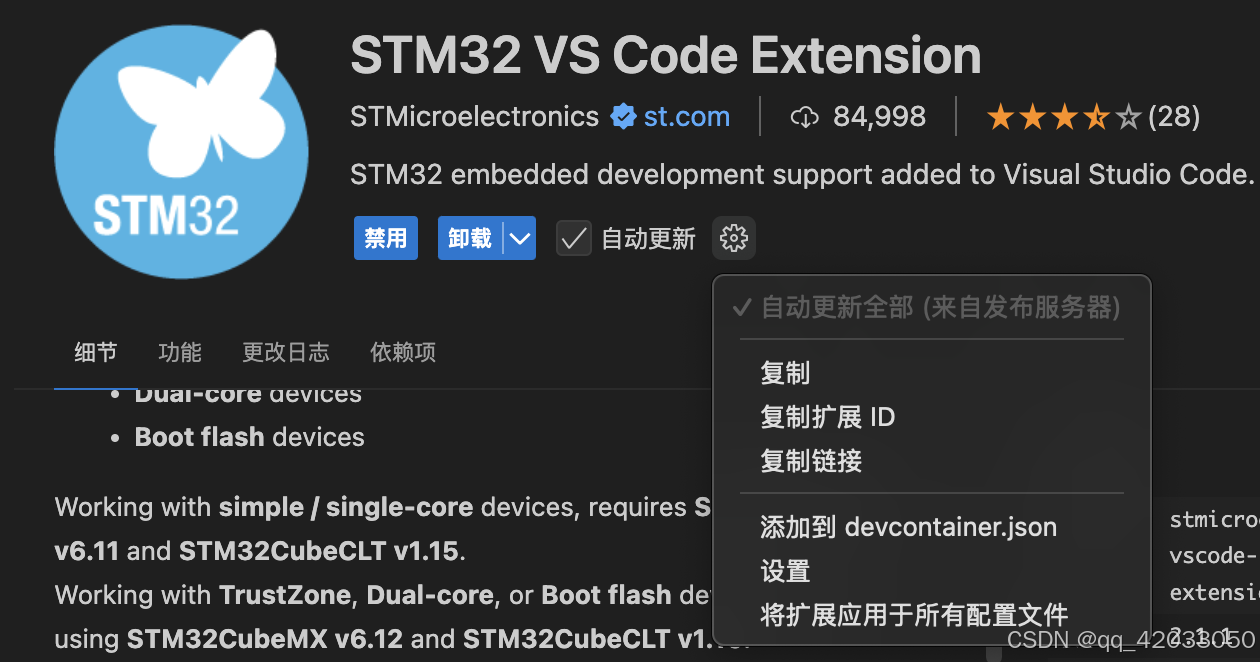
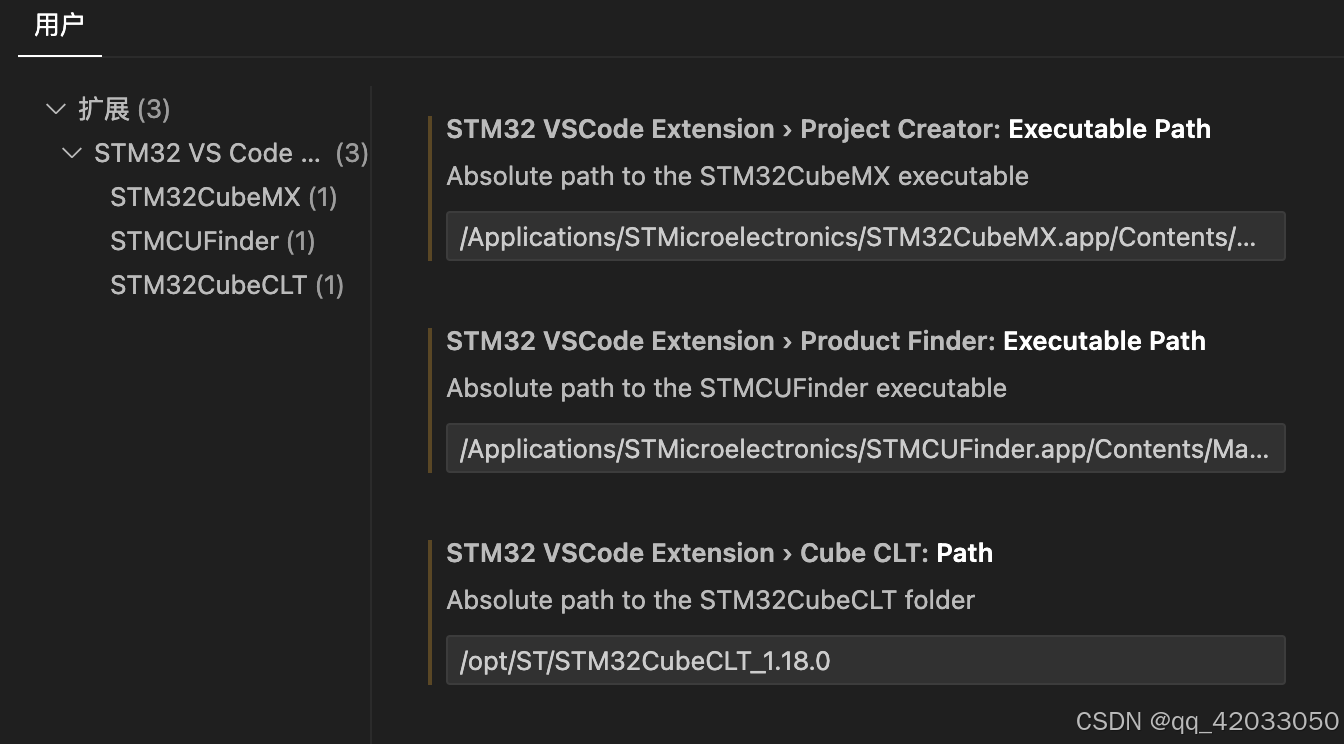
下载完成后配置路径:选择“设置”,配置路径
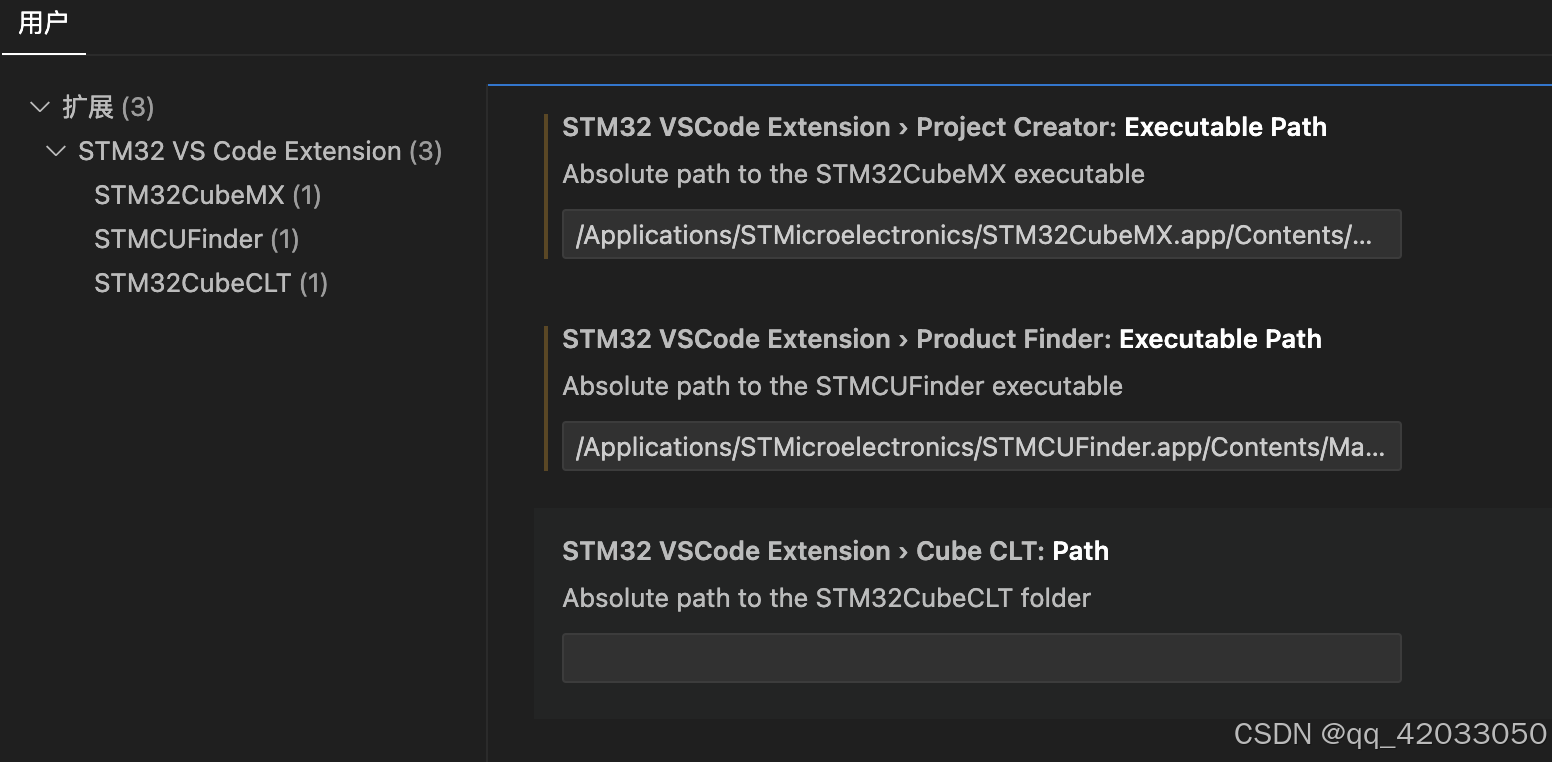
在下载CLT(Command Line Tools,命令行工具)插件的时候,怎么都无法安装到 /Applications/STMicroelectronics 路径下,且找不到安装路径,使用终端 brew 完成操作
brew install stlink
完成后检查路径
which stlink-server
终端回复
/usr/local/bin/stlink-server
点击三角形后出现CLT路径可选项,选择高亮部分
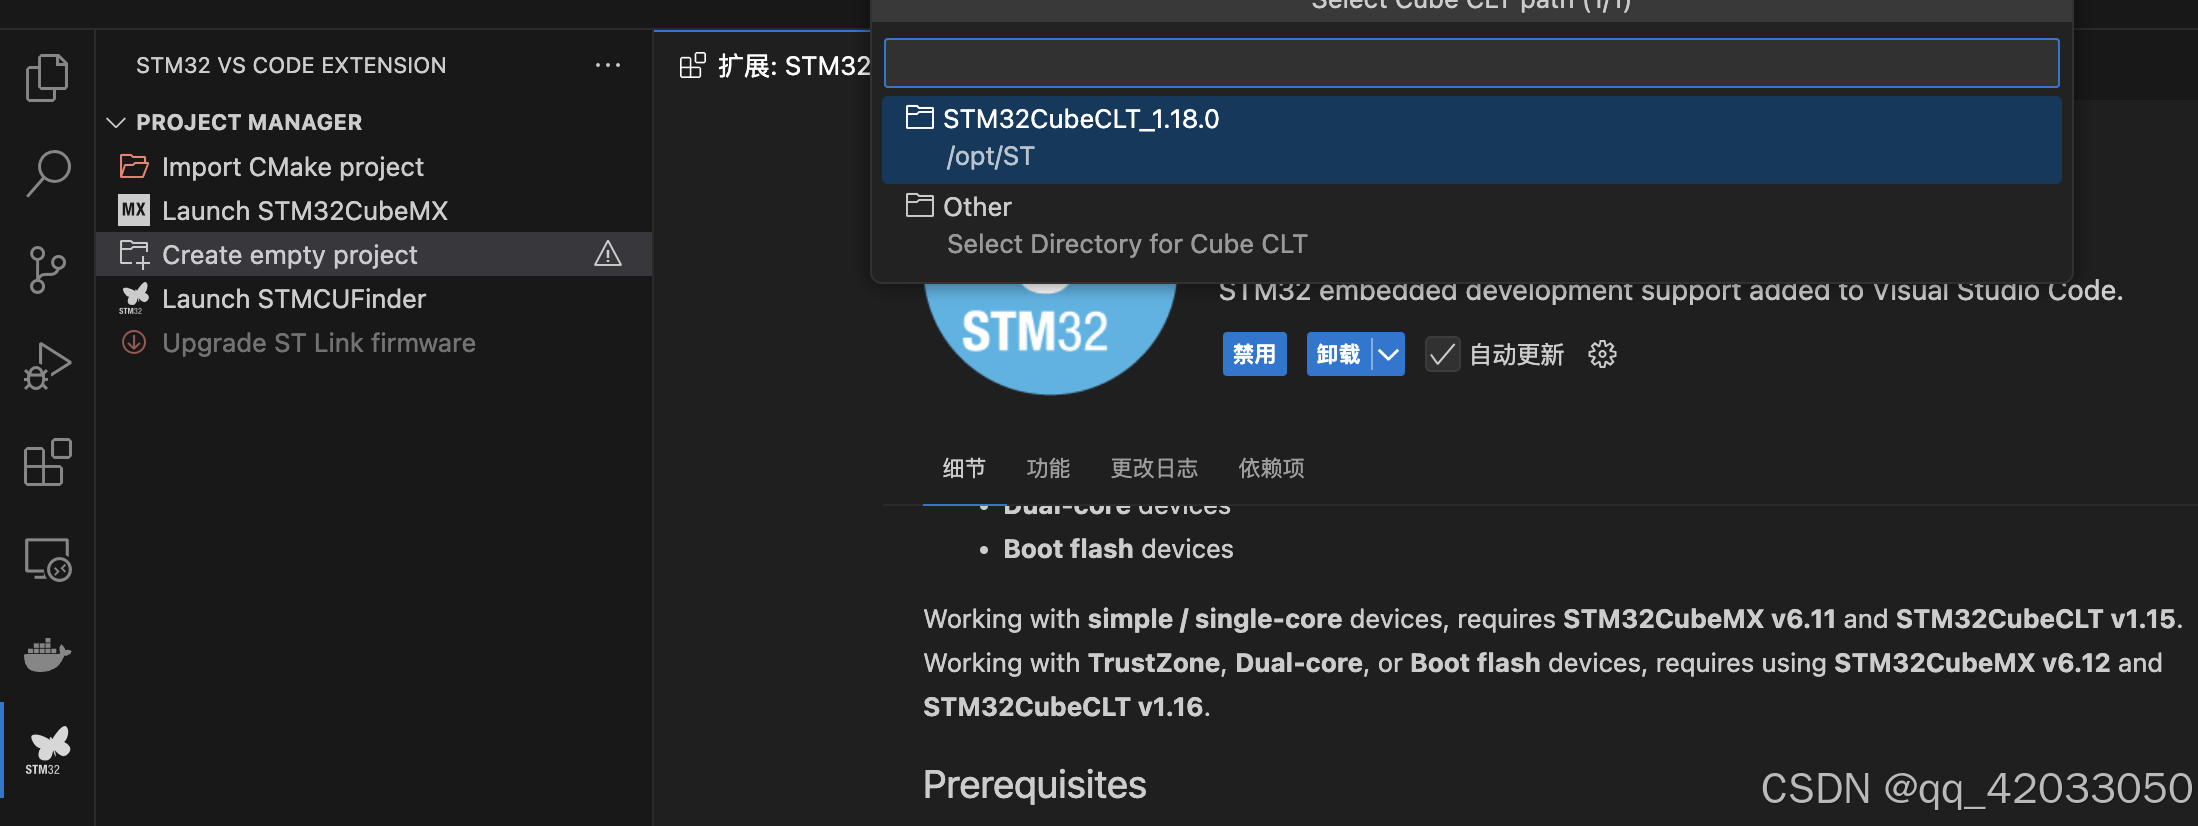
路径配置完成,如下
检查版本
stlink-server --version
终端回复

2)更新Stm32CubeMX包含的固件库
在创建项目前,更新固件库。Stm32F4固件包链接
选择对应所需要的安装包,安装完成后,框框显示绿色
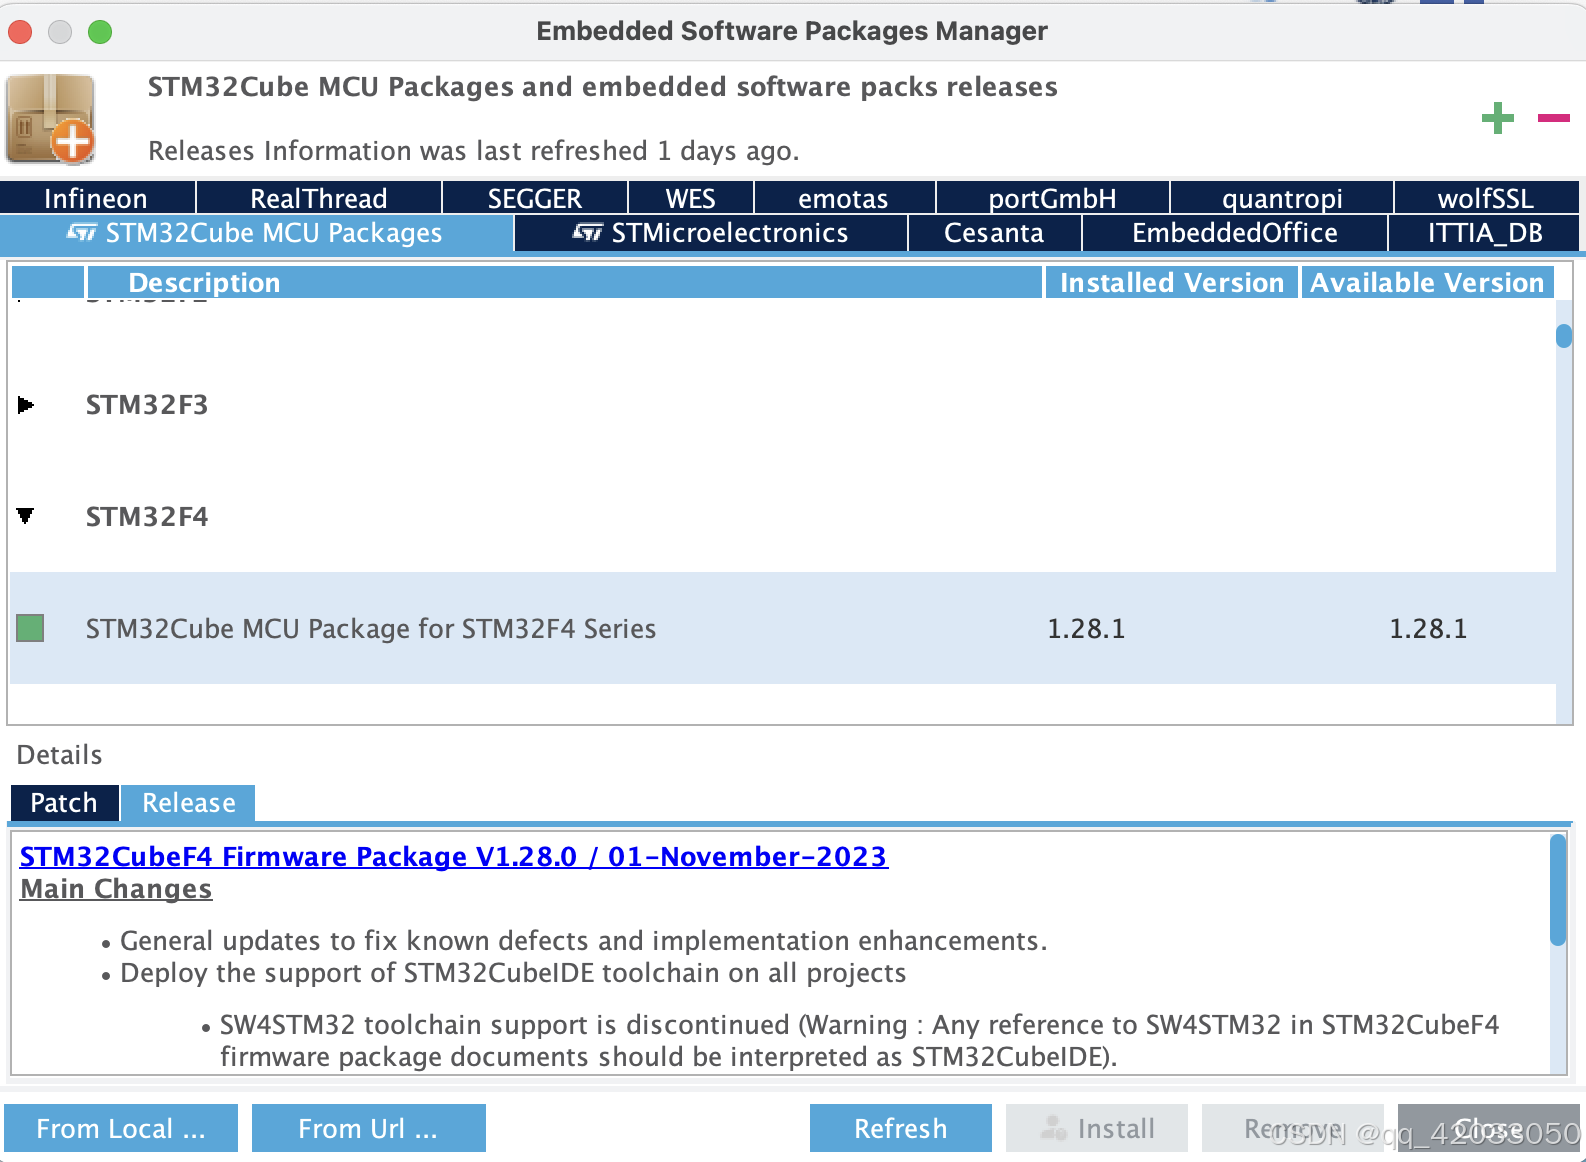
tips:如果使用From Local,需选择Zip文件,Safari浏览器下载的文件夹默认会自动解压缩,需取消改设定:safari浏览器->设置->取消“下载后打开‘安全’文件”

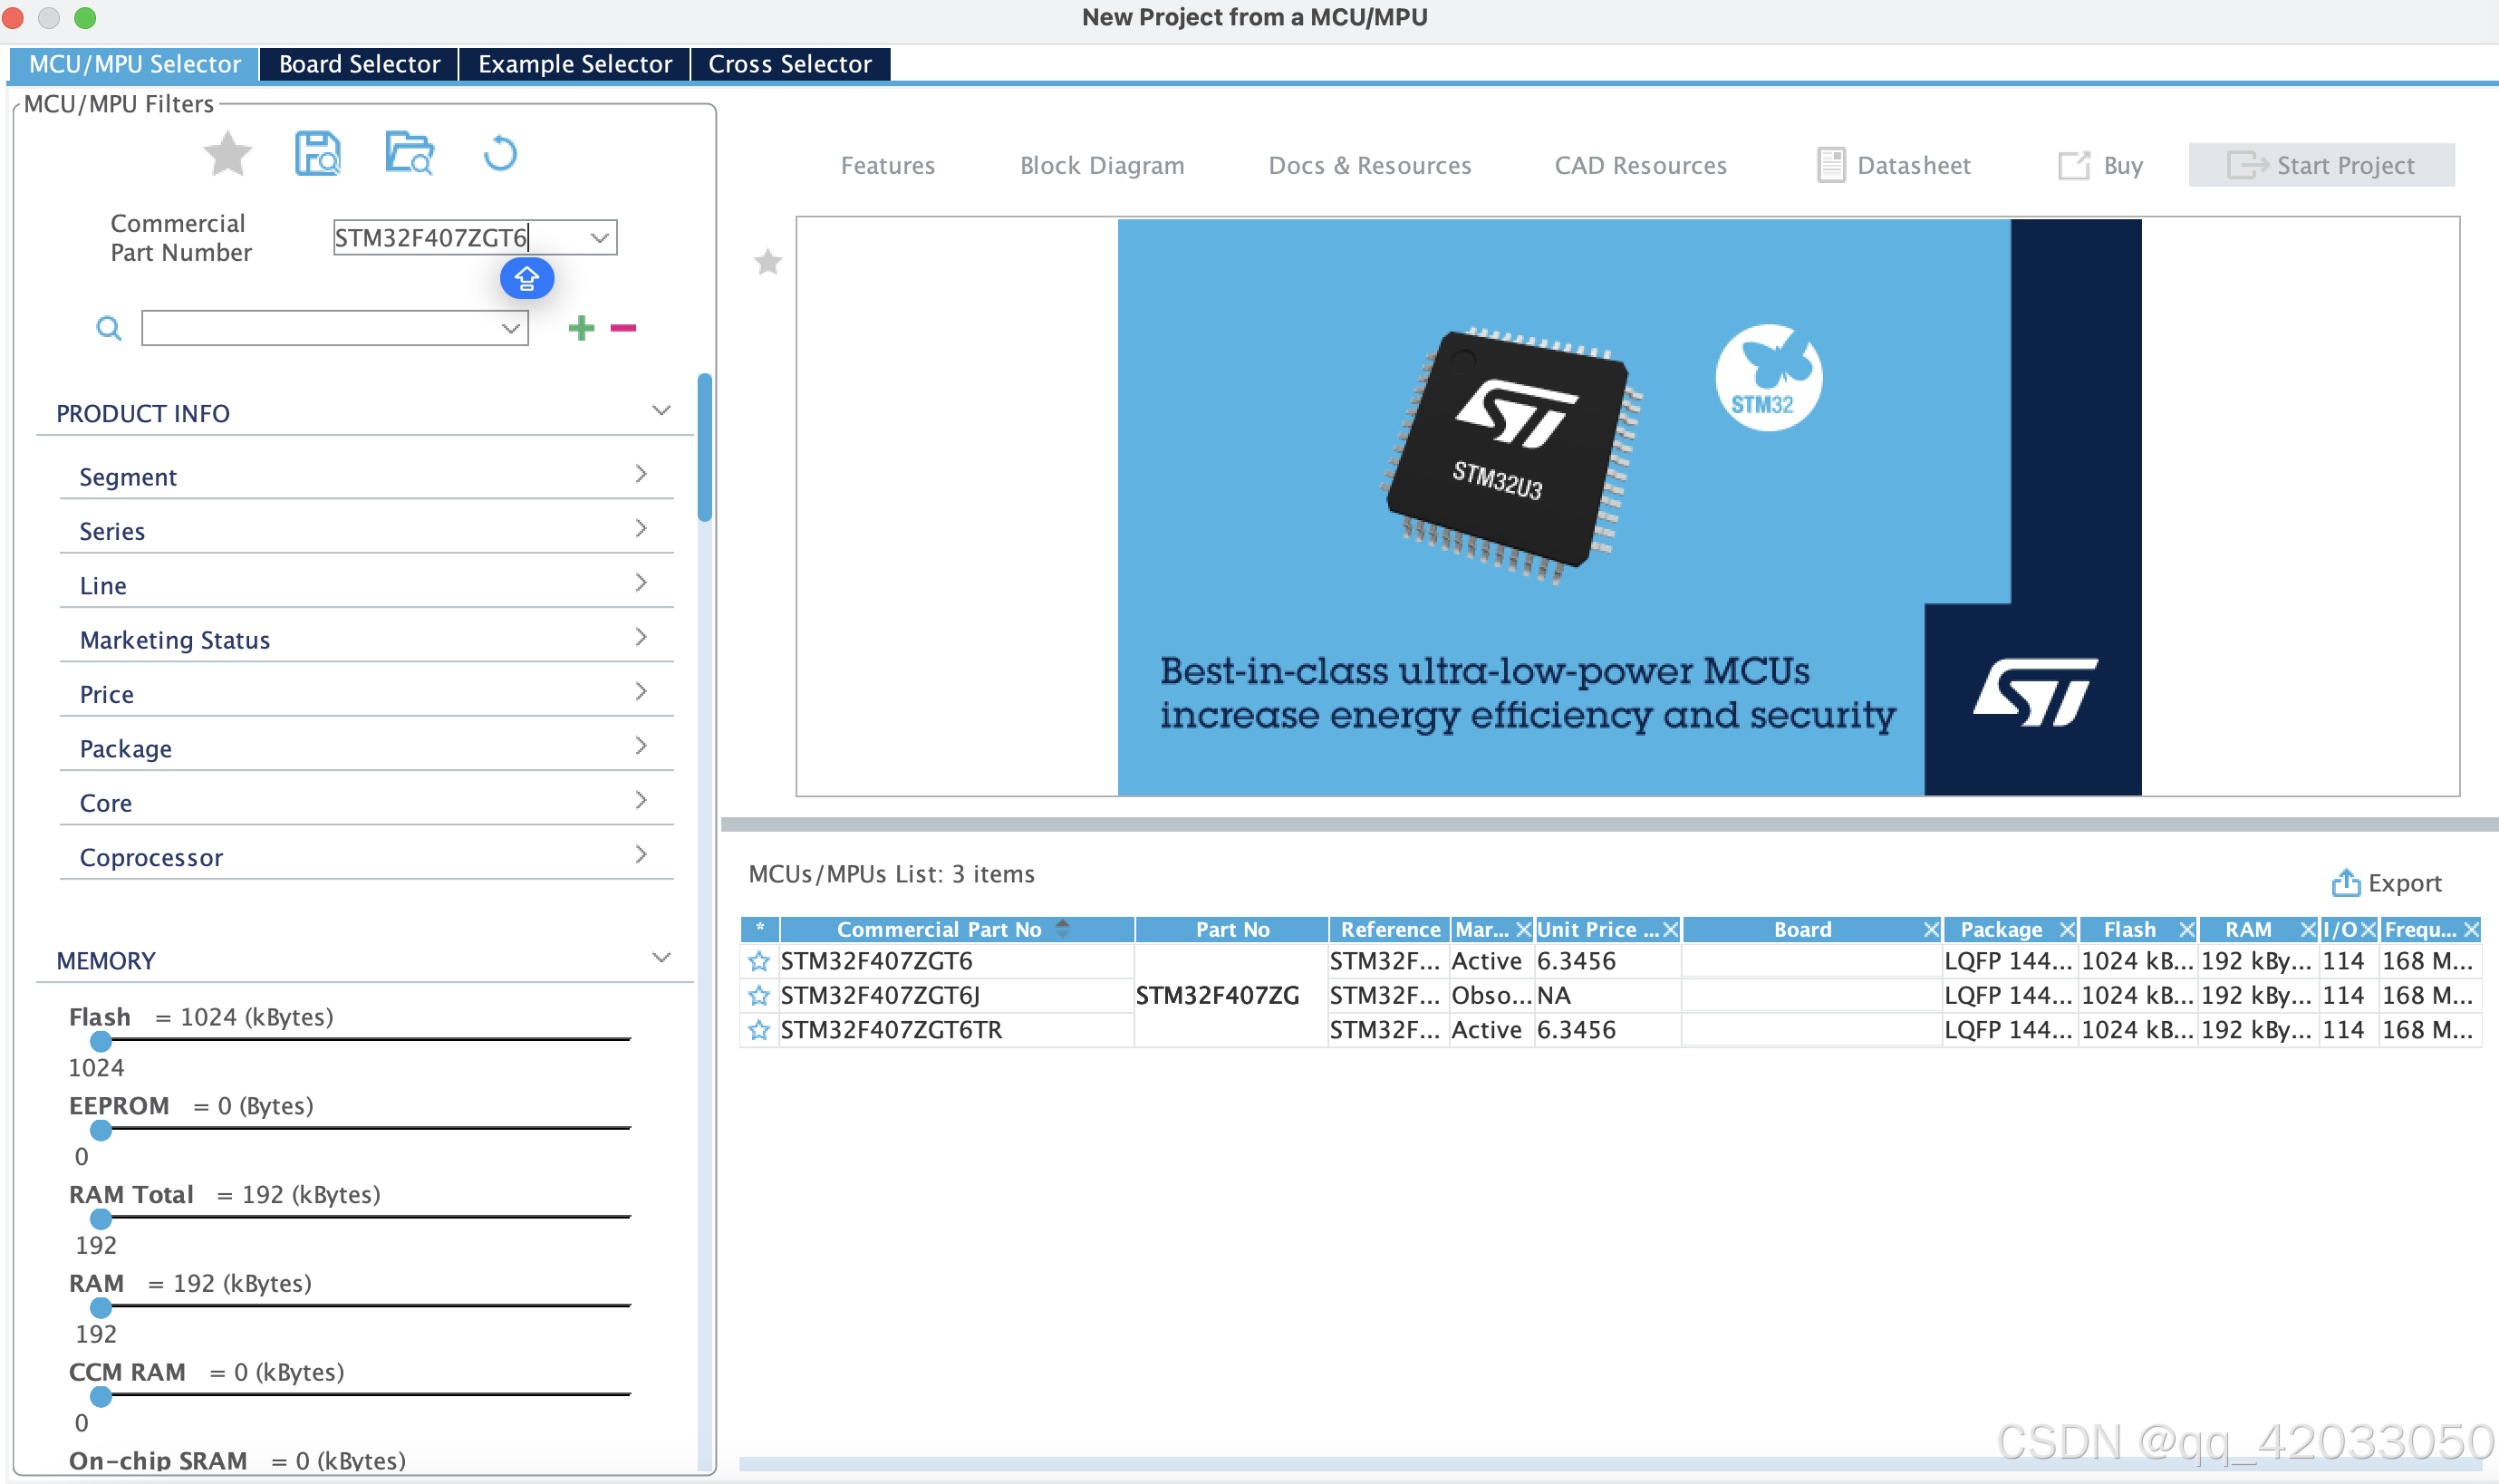
3)使用Stm32CubeMX生成空项目
a) 选择Start My Project From MCU

b) 选择芯片STM32F407ZGT6
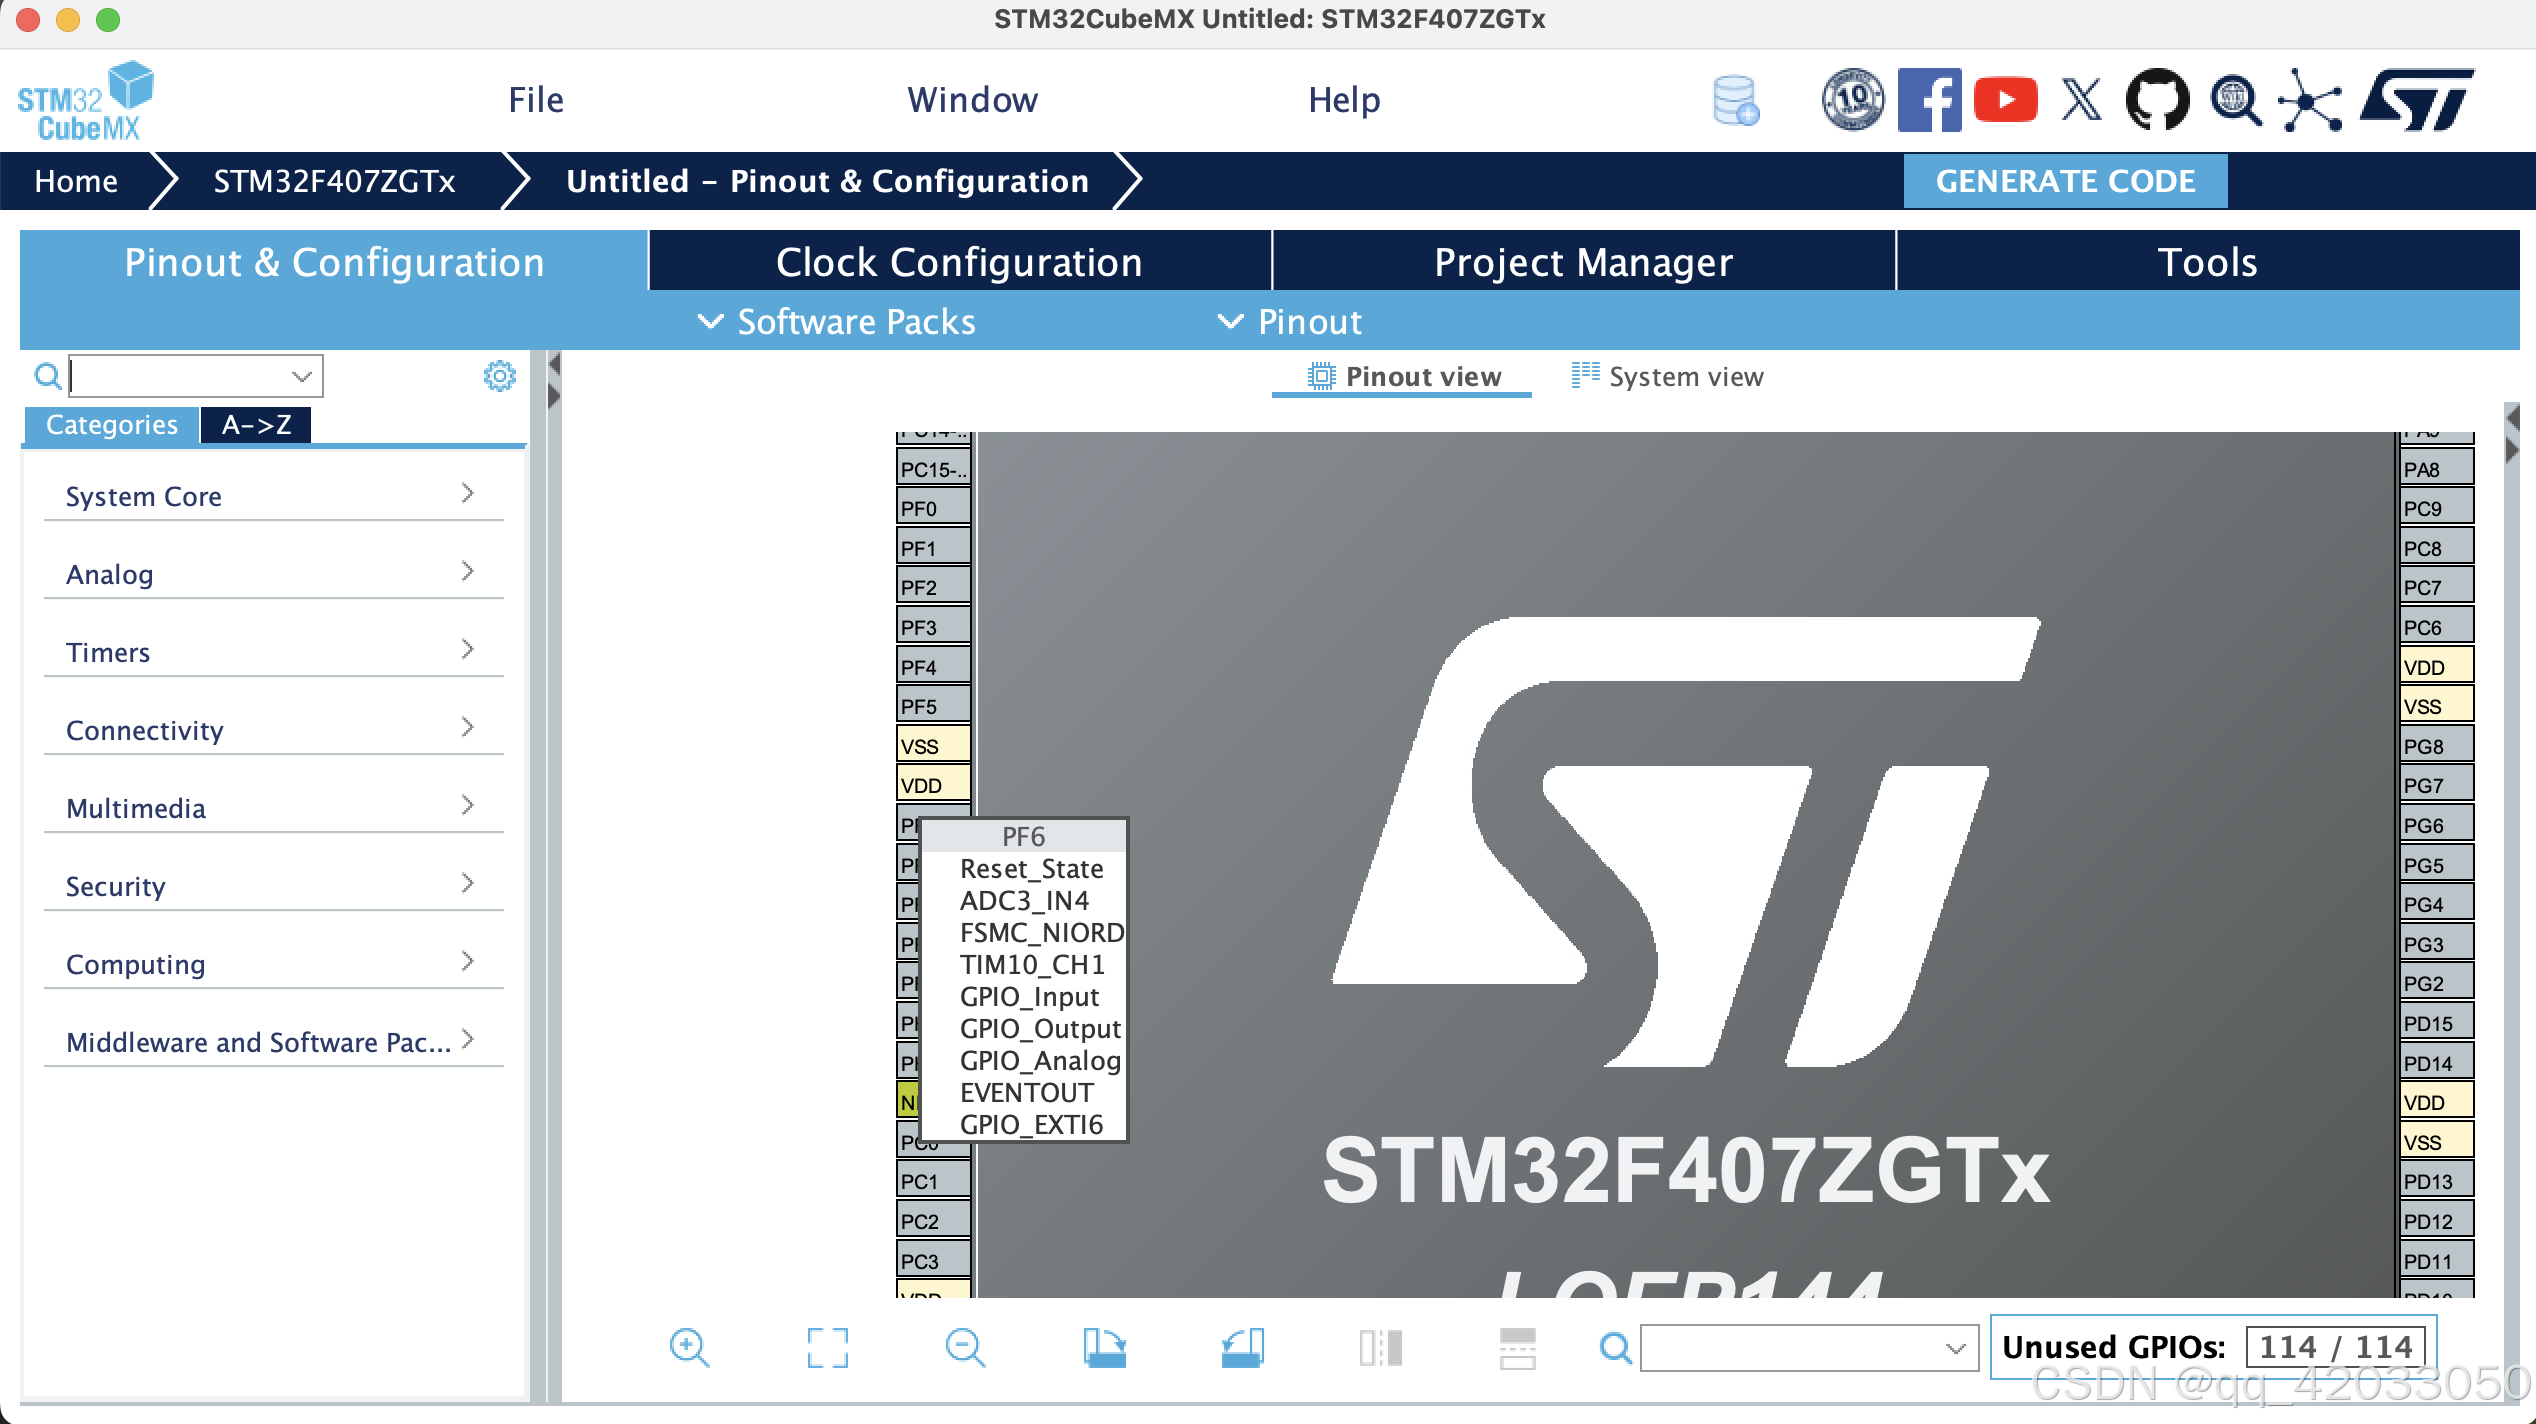
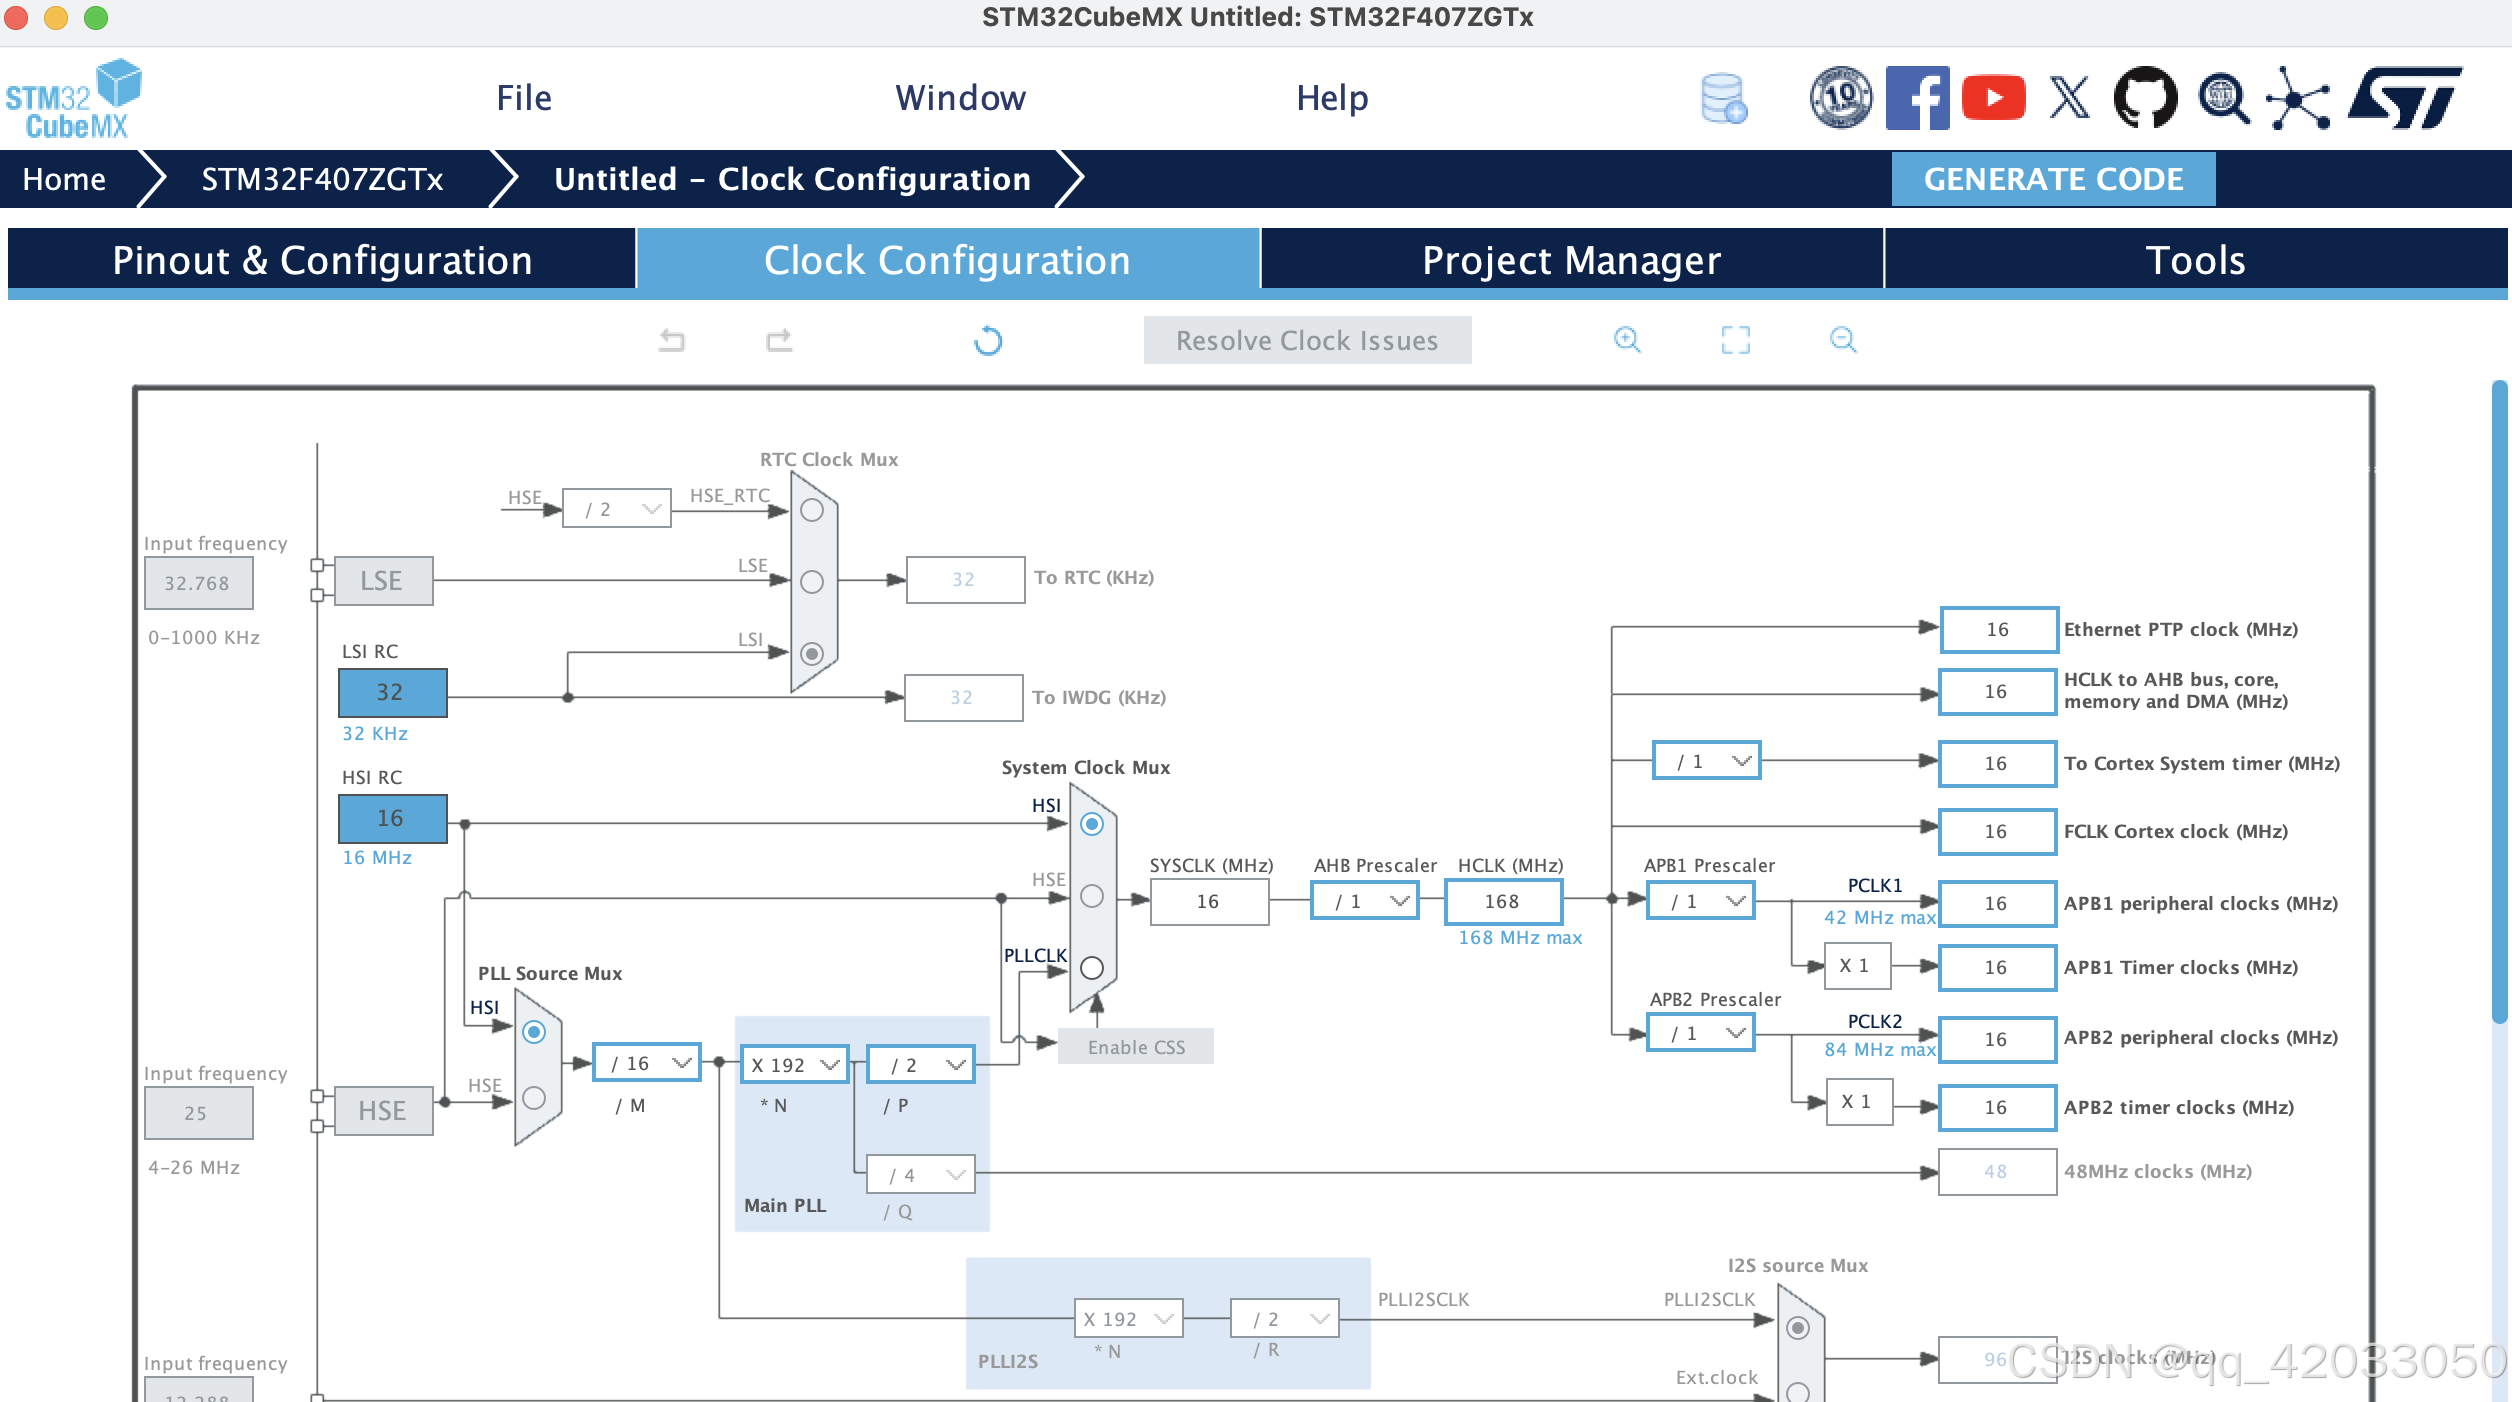
c) 配置引脚、时钟、项目
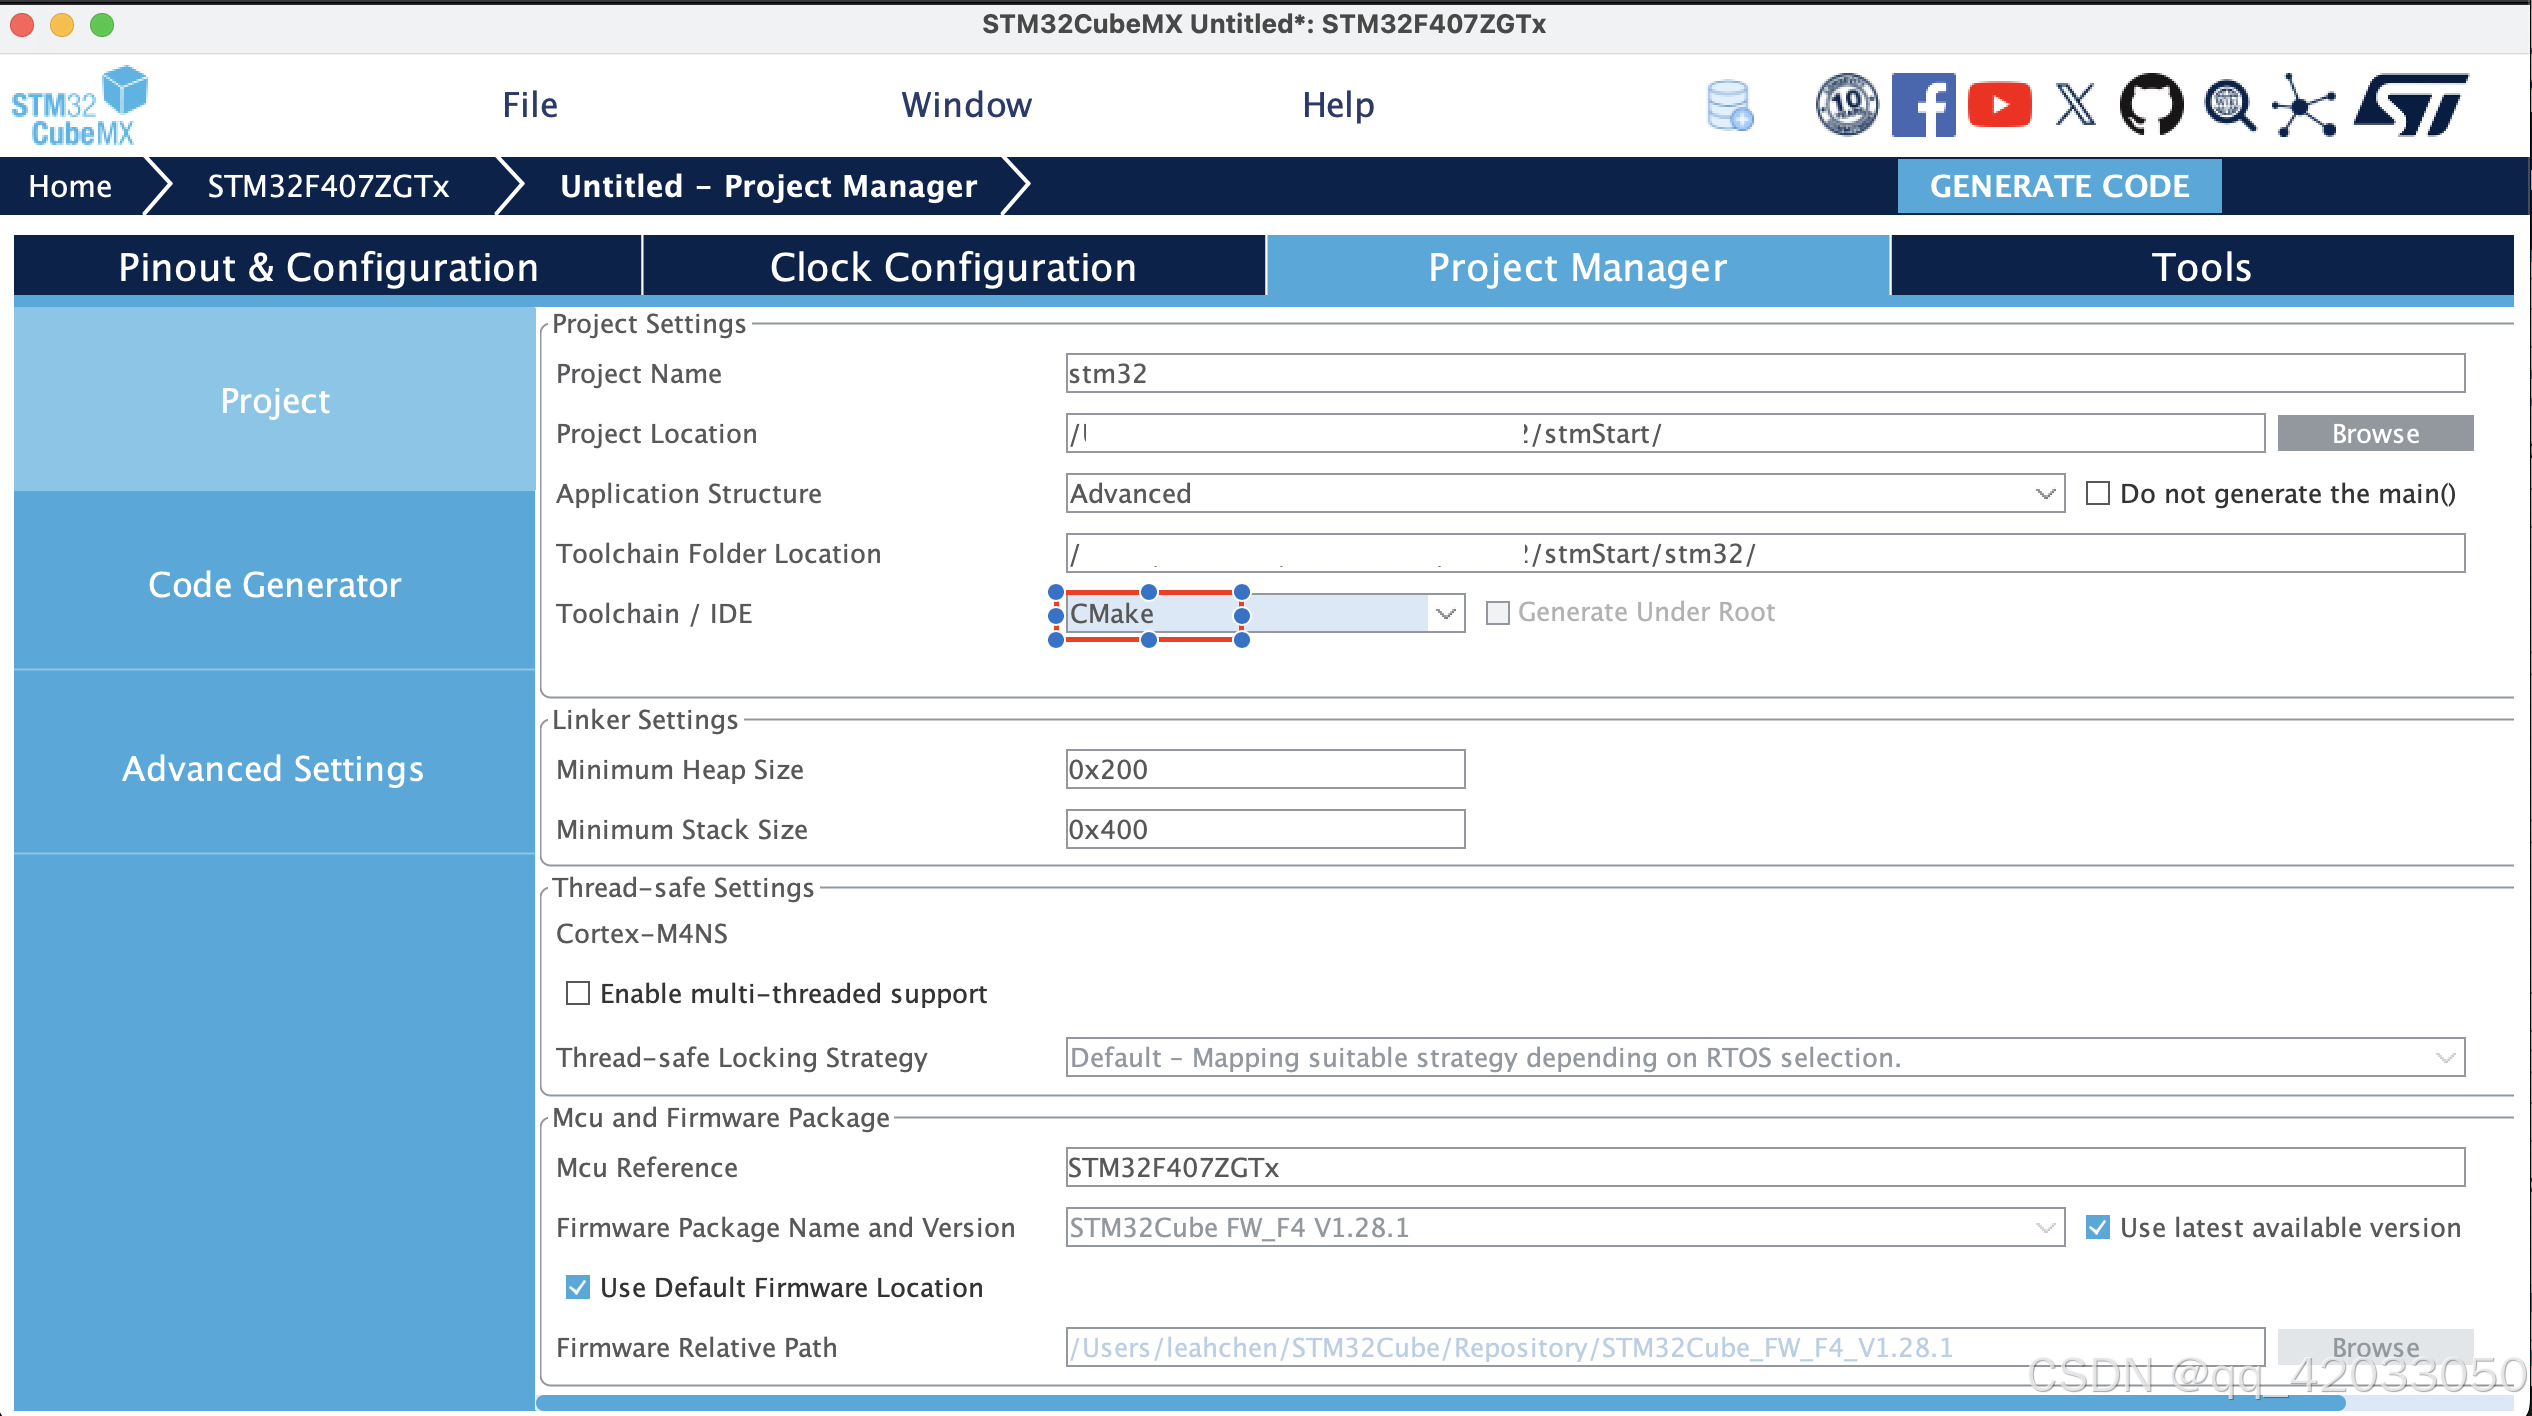
d) 点击右上角 “GENERATE CODE”
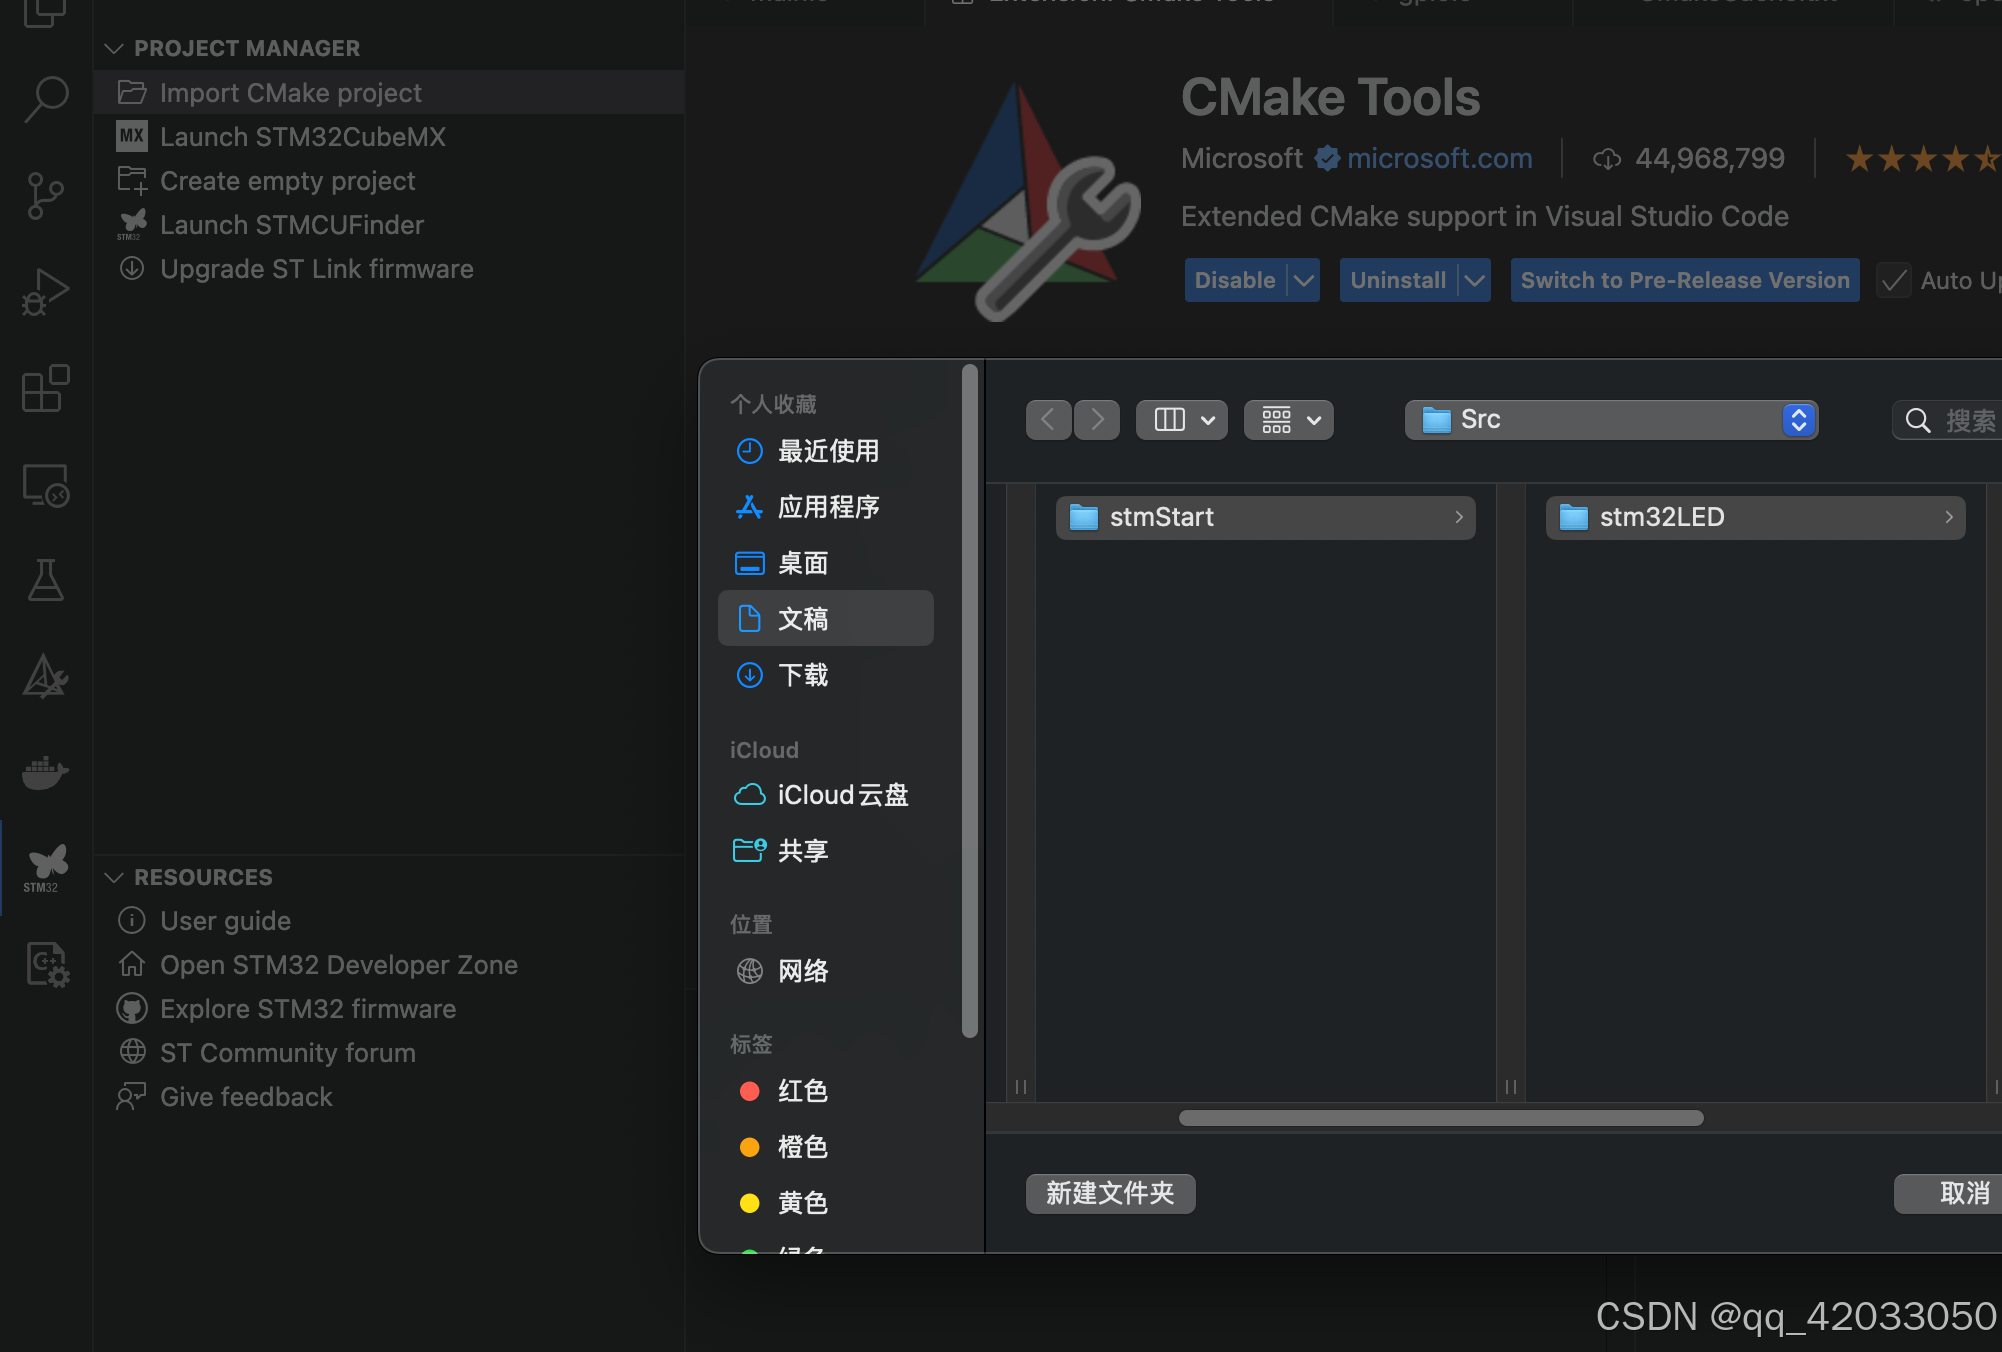
4) VScode导入项目
stm32插件-> Import CmakeProjects,将项目名及路径选择与stm32CubeMX创建的一致,以防vscode自动生成的配置文件对stm32CubeMX的项目无作用。
2. 配置调试环境
1)下载openocd
brew install openocd
通过查看版本,验证下载完成
openocd --version
终端回应
Open On-Chip Debugger 0.12.0
Licensed under GNU GPL v2
For bug reports, read
	http://openocd.org/doc/doxygen/bugs.html
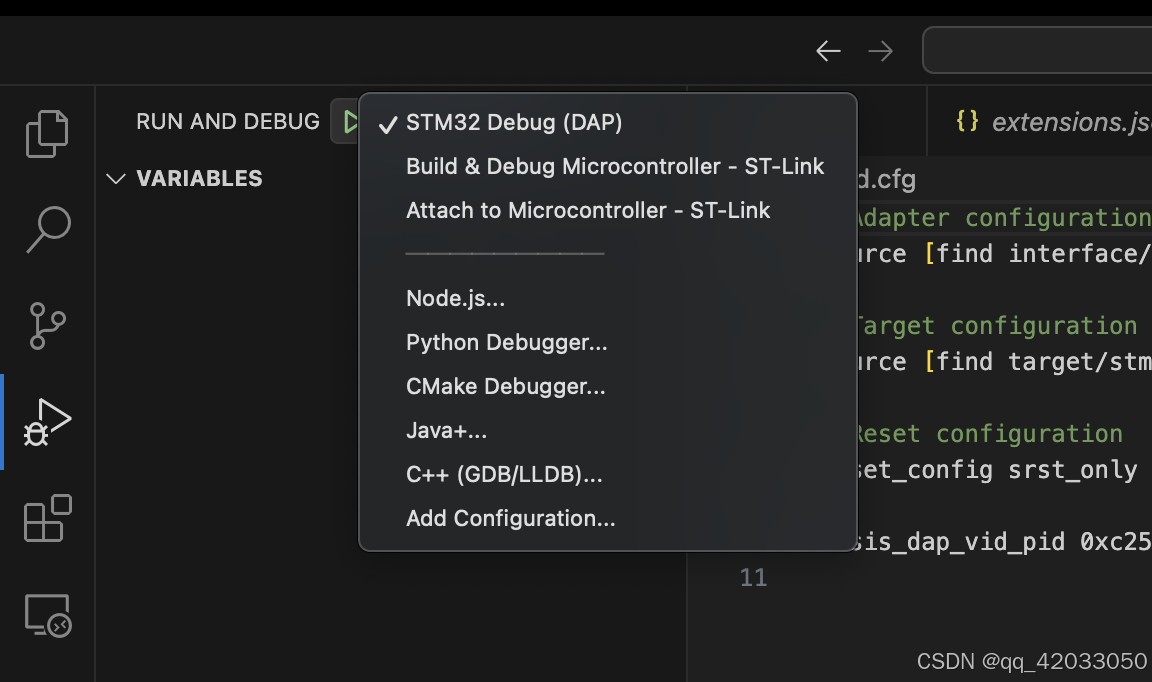
2)修改launch.json
点击“add configuration”,增加DAP的配置
        {
            "name": "STM32 Debug (DAP)",
            "type": "cortex-debug",
            "request": "launch",
            "servertype": "openocd",
            "cwd": "${workspaceFolder}",
            "executable": "${workspaceFolder}/build/Debug/stm32LED.elf",
            "configFiles": [
                "${workspaceFolder}/openocd.cfg"
            ],
            "runToEntryPoint": "main",
            "device": "STM32F407ZGTx", // 根据芯片型号修改
            "svdFile": "${workspaceFolder}/STM32F4.svd" // 可选,提供寄存器视图
        },
3)确定端口信息
检查端口信息,找到包含DAP的
a)通过终端
system_profiler SPUSBDataType
终端回应
  Fire CMSIS-DAP:

    Product ID: 0xf001
    Vendor ID: 0xc251
    Version: 1.00
    Serial Number: FS-00022251
    Speed: Up to 12 Mb/s
    Manufacturer: KeilSoftware
    Location ID: 0x00140000 / 4
    Current Available (mA): 500
    Current Required (mA): 100
    Extra Operating Current (mA): 0
b)通过系统消息
command+space 搜索“系统信息”,查看USB栏信息
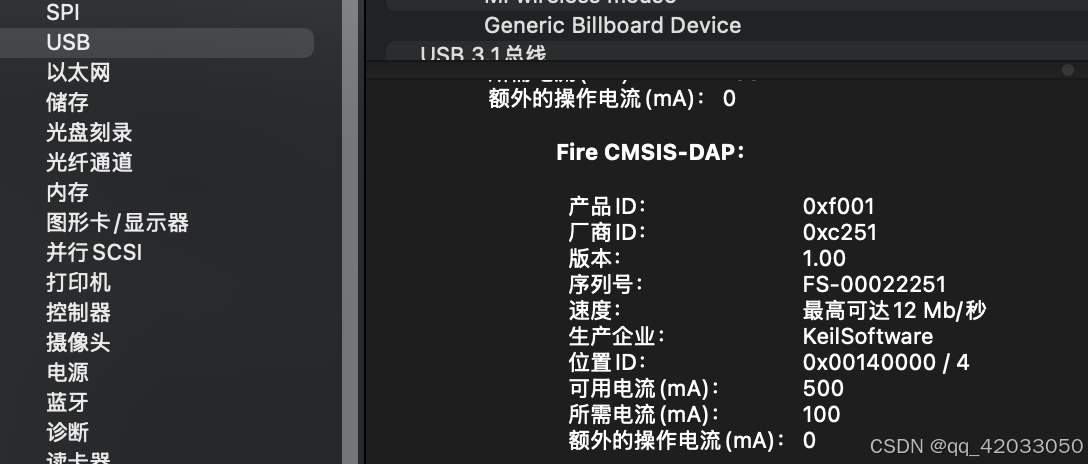
综上可以知道,CMSIS DAP的 PID=0xf001,VID=0xc251
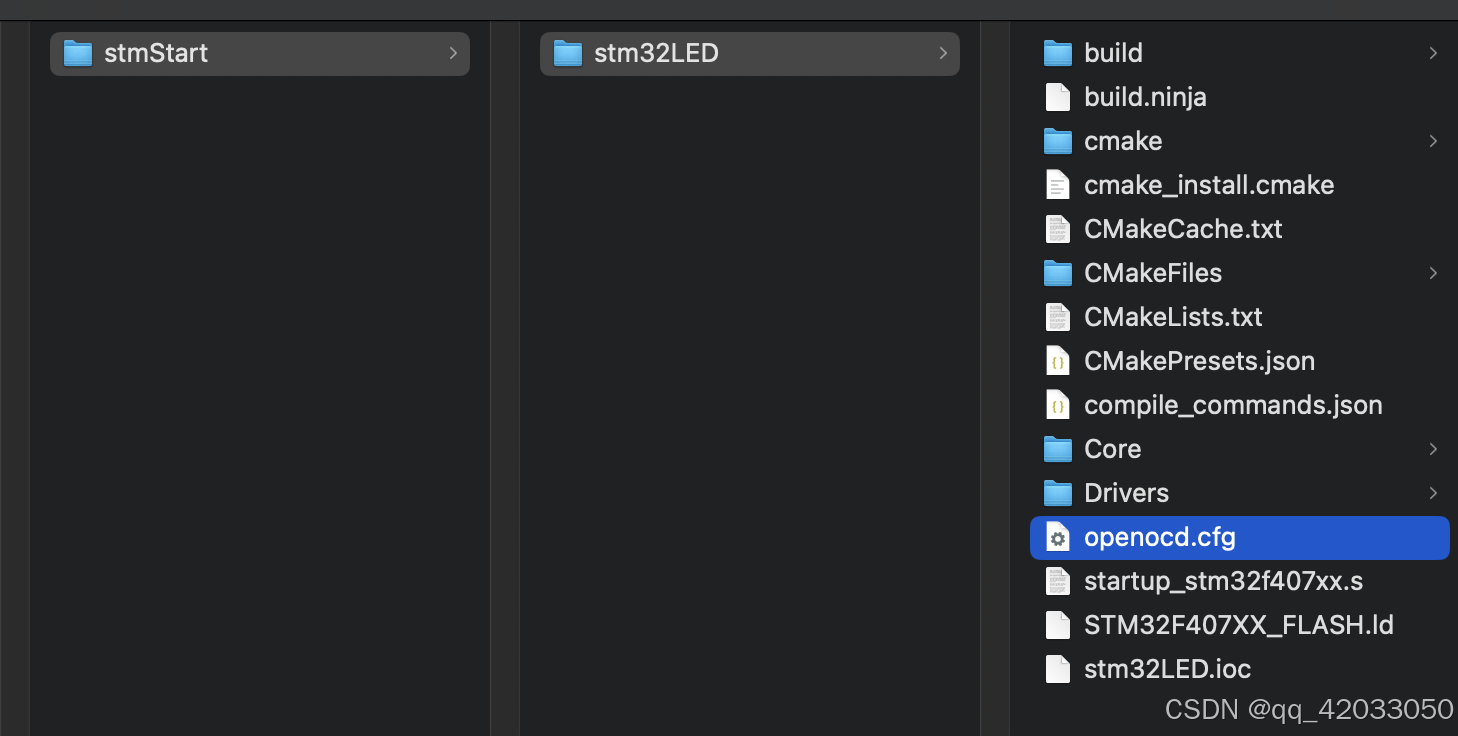
4)创建openocd.cfg
在项目根目录创建openocd.cfg,将调试器、芯片、端口信息配置好
# Adapter configuration (CMSIS-DAP)
source [find interface/cmsis-dap.cfg]

# Target configuration (STM32F4)
source [find target/stm32f4x.cfg]

# Reset configuration
reset_config srst_only srst_nogate

cmsis_dap_vid_pid 0xc251 0xf001
查看编译器是否能比openocd识别
openocd -f ./openocd.cfg
终端回应
Open On-Chip Debugger 0.12.0
Licensed under GNU GPL v2
For bug reports, read
        http://openocd.org/doc/doxygen/bugs.html
Info : auto-selecting first available session transport "swd". To override use 'transport select <transport>'.
Info : Listening on port 6666 for tcl connections
Info : Listening on port 4444 for telnet connections
Info : CMSIS-DAP: SWD supported
Info : CMSIS-DAP: JTAG supported
Info : CMSIS-DAP: FW Version = 1.0
Info : CMSIS-DAP: Interface Initialised (SWD)
Info : SWCLK/TCK = 1 SWDIO/TMS = 1 TDI = 0 TDO = 1 nTRST = 0 nRESET = 1
Info : CMSIS-DAP: Interface ready
Info : clock speed 2000 kHz
Info : SWD DPIDR 0x2ba01477
Info : [stm32f4x.cpu] Cortex-M4 r0p1 processor detected
Info : [stm32f4x.cpu] target has 6 breakpoints, 4 watchpoints
Info : starting gdb server for stm32f4x.cpu on 3333
Info : Listening on port 3333 for gdb connections
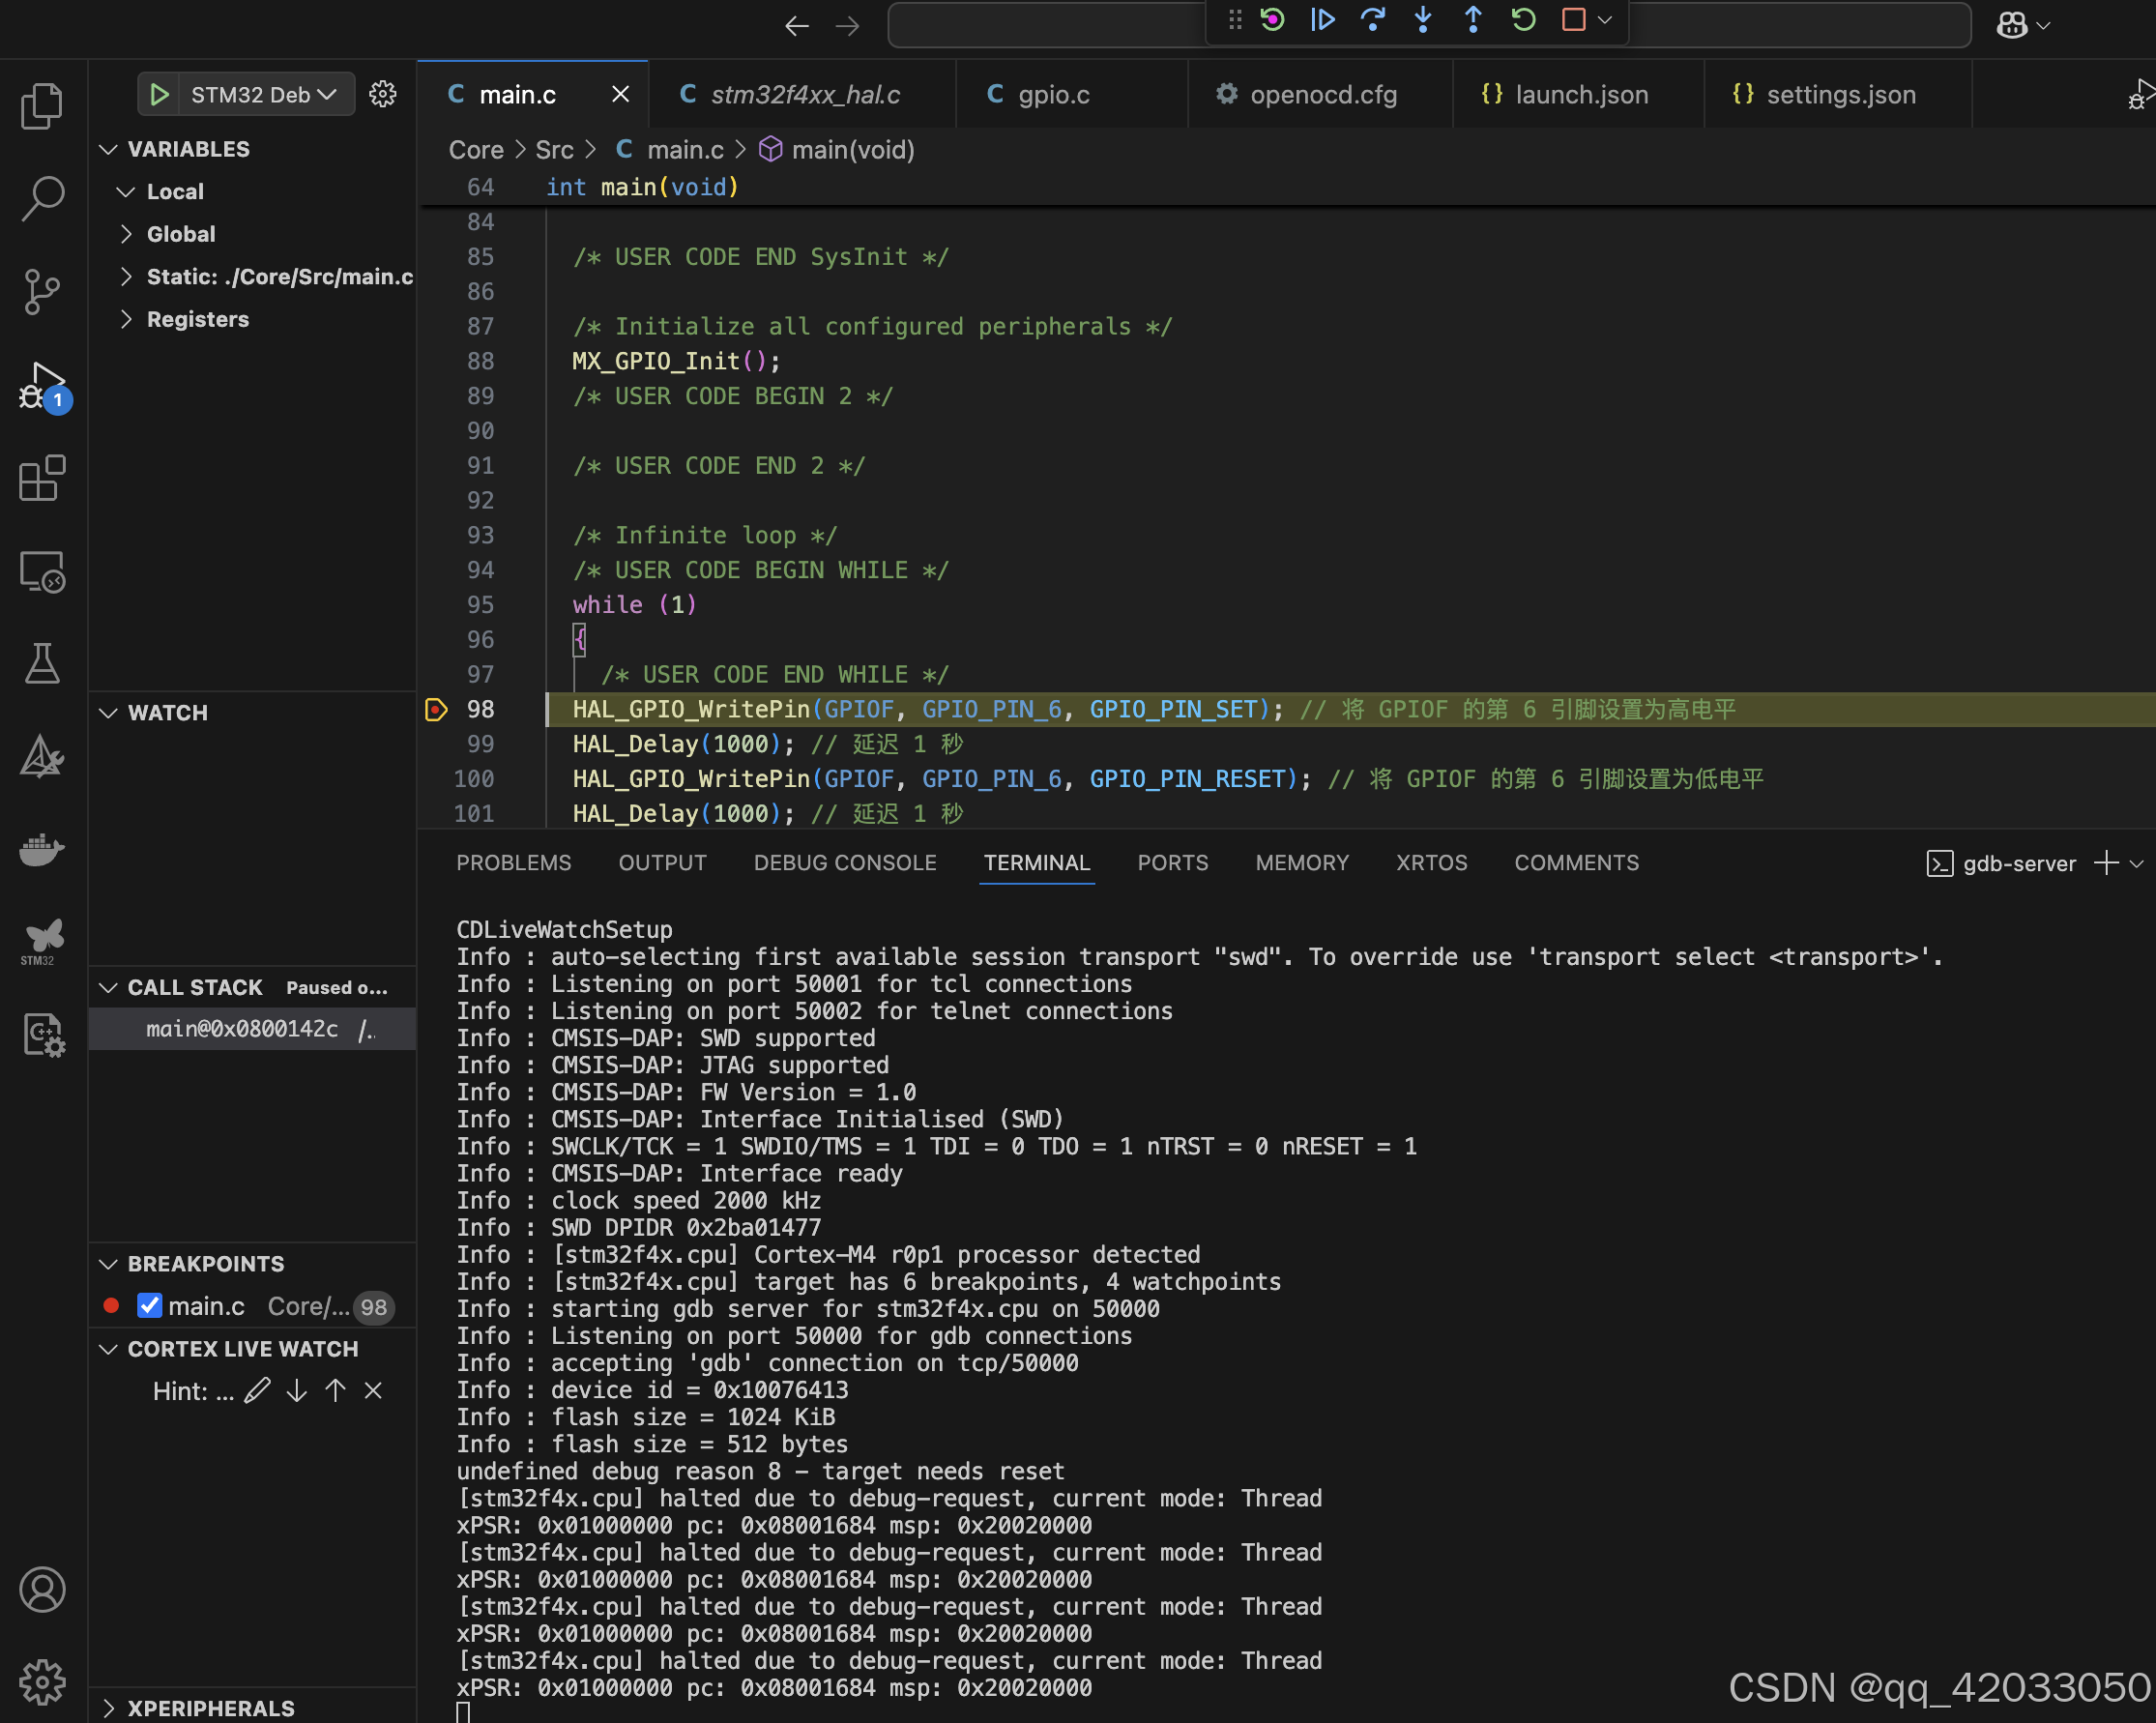
3. 调试
在run and debug下选择调试器为dap,点击左侧绿色三角形按钮开启调试
可以看见内存信息及进行单步调试
完结

由于这句话,我错误的认知dap与stlink是同一种方式实现,死磕stlink,cmake、stlink、openocd都能识别到驱动,但是就是在调试状态下,无法识别到stlink接口,后来意识到hub的问题,但还是往stlink上绑,最后是openocd的gdb调试来实现效果。