本项目基于Google的SigLIP2模型,构建了一个智能xx等级分类系统。通过联合训练策略(对比学习+分类学习),实现了对xx图像的精确等级分类(Grade 2-5),提供AI辅助支持。
一、任务背景
xx等级分类的重要性
xx等级的准确判断对后续方案制定和预后评估至关重要:
- Grade 1:正常情况,目前不纳入分类内容。
- Grade 2:等级2
- Grade 3:等级3
- Grade 4:等级4
- Grade 5:等级5
技术挑战
图像特征复杂,等级边界模糊,传统方法依赖专家经验,主观性强,需要同时理解图像内容和xx描述。
二、数据集构建
- 标注格式:JSONL格式,包含图像路径和文本描述
- 数据分布:多等级xx图像,每张图像配有详细的描述
数据标注
CVAT对图片进行tag标注,自定义标注工具进行jsonl标注文件生成。
{"image_path": "images/36_2650.jpg", "text": "Grade 3: Presence of ANY of the following: description."}
{"image_path": "images/36_2675.jpg", "text": "Grade 3: Presence of ANY of the following: description."}
dataset/
├── images/
│   ├── img001.jpg
│   ├── img002.jpg
├── labels.jsonl
数据预处理
python
# 数据加载和标签提取
def load_data(jsonl_path, image_dir):
    with open(jsonl_path, "r") as f:
        entries = [json.loads(line.strip()) for line in f]
    data = []
    for entry in entries:
        image_path = os.path.join(image_dir, os.path.basename(entry["image_path"]))
        text = entry["text"]
        label = extract_label(text)  # 从文本中提取等级标签
        if label != -1:
            data.append((image_path, text, label))
    return data
 # 标签映射
 id2grade = {0: "Grade 2", 1: "Grade 3", 2: "Grade 4", 3: "Grade 5"}
三、模型架构
核心模型
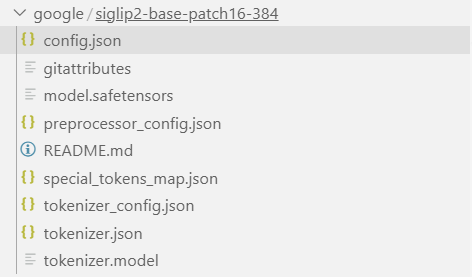
- 基础模型:SigLIP2-Base-Patch16-384
- 输入尺寸:384×384像素
- 预训练权重:Google官方预训练模型,自行到hugging face下载
联合训练架构
python
class SigLIP2WithClassifier(nn.Module):
    def __init__(self, base_model, processor, num_classes=4):
        self.siglip = base_model          # SigLIP2主干网络
        self.classifier = nn.Linear(embed_dim, num_classes)  # 分类头
        self.temperature = 0.07           # 对比学习温度参数
损失函数设计
对比损失(Contrastive Loss)
- 目标:学习图像-文本对应关系
- 公式:
logits_per_image = (image_embeds @ text_embeds.T) / temperature
分类损失(Classification Loss)
- 目标:精确预测烧伤等级
- 公式:
CrossEntropy(classifier(image_embeds), class_labels)
联合损失
- 总损失 = 对比损失 + 分类损失
训练配置
python
# 训练机器:H100服务器
# 训练参数
epochs = 20
learning_rate = 2e-5
batch_size = 16
device = "cuda"  # GPU训练
模型保存
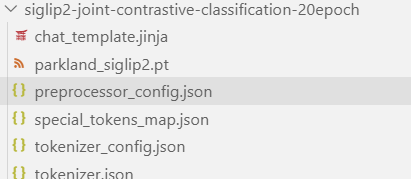
torch.save(model.state_dict(), os.path.join(save_dir, "parkland_siglip2.pt"))
三、推理部署
模型加载
python
# 加载训练好的模型
model = SigLIP2WithClassifier(base_model, processor, num_classes=4)
model.load_state_dict(torch.load("parkland_siglip2.pt"))
model.eval()
推理流程
- 图像预处理:调整尺寸、标准化
- 特征提取:通过SigLIP2获取图像嵌入
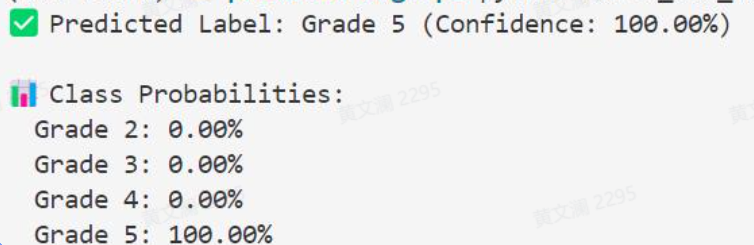
- 分类预测:通过分类头预测烧伤等级
- 结果输出:返回等级概率分布
 # 加载和预处理图像
 image = Image.open(image_path).convert("RGB")
 inputs = processor(images=image, return_tensors="pt").to(device)

 # 推理
 image_features = model.siglip.vision_model(pixel_values=inputs["pixel_values"]).pooler_output
 logits = model.classifier(image_features)
 probs = torch.softmax(logits, dim=-1)
 pred = probs.argmax(dim=-1).item()