感兴趣的朋友可以去我的语雀平台进行查看更多的知识。
https://www.yuque.com/books/share/ffbf2b86-52af-4a4f-b144-507a890fb8dc?# 《木子Teng的计算机知识库》
4. Axios异步通信
4.1 Axios简介
Axios是一个开源的可以用在浏览器端和Node JS的异步通信框架, 它的主要作用就是实现AJAX异步通信,其功能特点如下:
- 从浏览器中创建XMLHttpRequests
- 从node.js创建http请求
- 支持Promise API[JS中链式编程]
- 拦截请求和响应
- 转换请求数据和响应数据
- 取消请求
- 自动转换JSON数据
- 客户端支持防御XSRF(跨站请求伪造)
4.2 测试Axios
先准备伪数据
{
  "name": "木子Teng",
  "url": "https://blog.csdn.net/qq_45408390?spm=1001.2101.3001.5343",
  "page": 1,
  "isNonProfit": true,
  "address": {
    "street": "含光门",
    "city": "河南郑州",
    "country": "中国"
  },
  "links": [
    {
      "name": "bilibili",
      "url": "https://bilibili.com"
    },
    {
      "name": "木子Teng",
      "url": "https://blog.csdn.net/qq_45408390?spm=1001.2101.3001.5343"
    },
    {
      "name": "百度",
      "url": "https://www.baidu.com/"
    }
  ]
}
测试代码
<div id="app" v-cloak>
    <div>地名:{{info.name}}</div>
    <div>地址:{{info.address.country}}--{{info.address.city}}--{{info.address.street}}</div>
    <div>链接:<a v-bind:href="info.url">{{info.url}}</a></div>
</div>
<!--引入js文件-->
<script src="https://cdn.jsdelivr.net/npm/vue@2.5.21/dist/vue.min.js"></script>
<script src="https://unpkg.com/axios/dist/axios.min.js"></script>

<script type="text/javascript">
    var vue = new Vue({
        el: "#app",
        data() {
            return {
                info: {
                    name: null,
                    address: {
                        country: null,
                        city: null,
                        street: null
                    },
                    url: null
                }
            }
        },
        // 钩子函数
        mounted() {
            axois.get('../data.json').then(response => (this.info = response.data));
        }
    });
</script>
说明:
- 在这里使用了v-bind将a:href的属性值与Vue实例中的数据进行绑定
- 使用axios框架的get方法请求AJAX并自动将数据封装进了Vue实例的数据对象中
- 我们在data中的数据结构必须和
Ajax响应回来的数据格式匹配
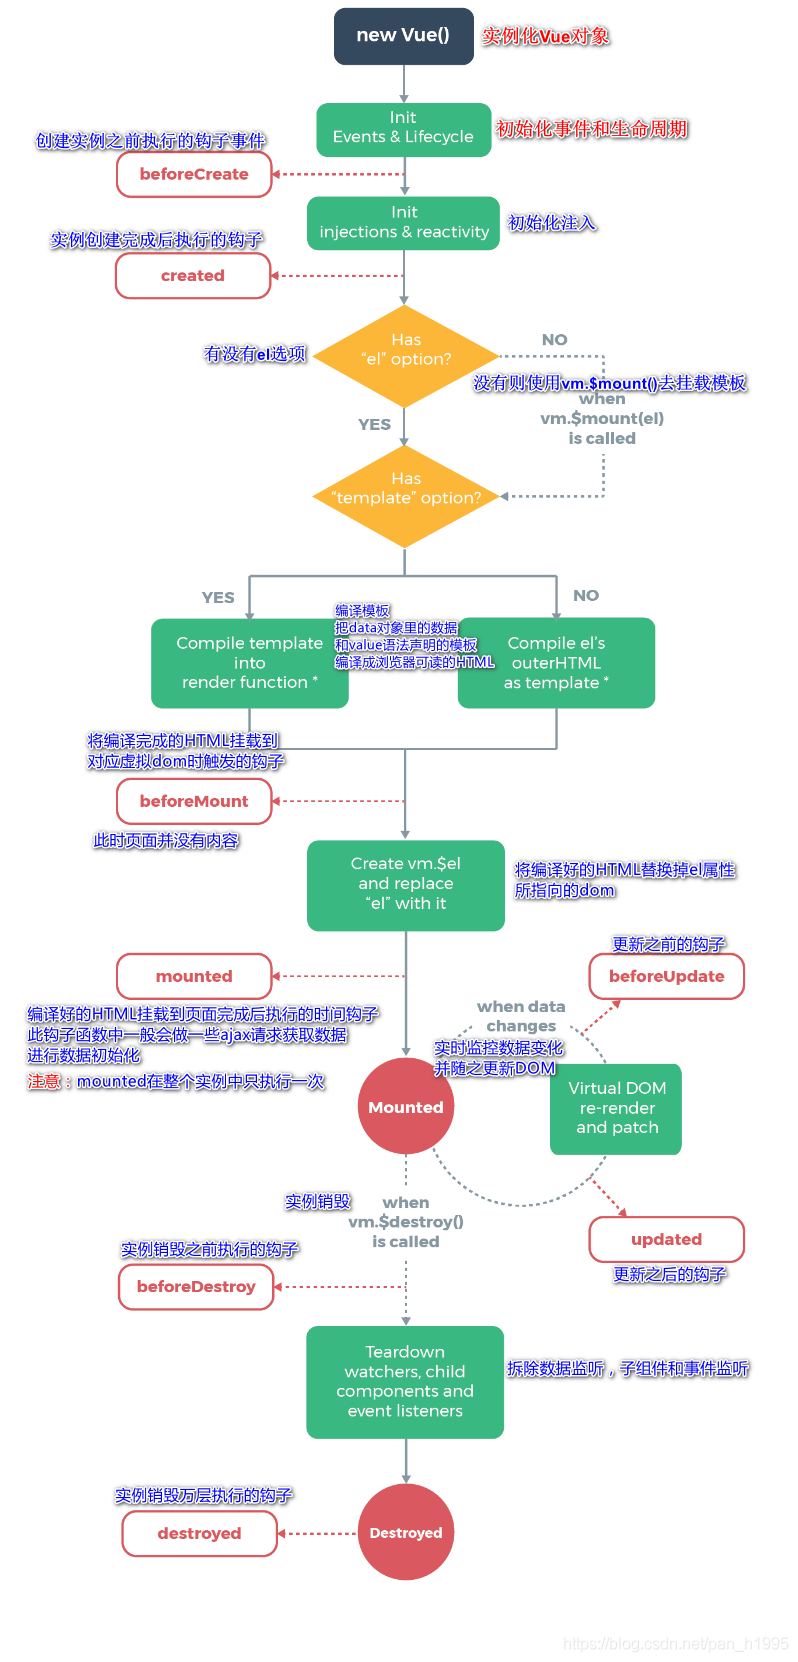
Vue生命周期图
5. Vue 计算属性、内容分发(插槽)、自定义事件
5.1 计算属性
计算属性的重点突出在属性两个字上(属性是名词),首先它是个属性其次这个属性有计算的能力(计算是动词),这里的计算就是个函数:
简单点说,它就是一个能够将计算结果缓存起来的属性(将行为转化成了静态的属性),仅此而已;可以想象为缓存
测试代码
<div id="app">
    <p>currentTime1:{{currentTime1()}}</p>
    <p>currentTime2:{{currentTime2}}</p>
</div>

<script src="https://cdn.jsdelivr.net/npm/vue@2.5.21/dist/vue.min.js"></script>
<script>
    var vue = new Vue({
        el: "#app",
        data: {
            message: '木子Teng'
        },
        methods: {
            currentTime1: function () {
                // 返回一个时间戳
                return new Date.now();
            },
            computed: {
                // 计算属性:methods,computed方法名不能重名,重名之后,只会调用methods的方法
                currentTime2: function () {
                    this.message;
                    return Date.now();
                }
            }
        }
    })
</script>
结果
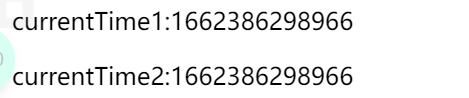
当我们更改message属性后

注意:methods和computed里的东西不能重名,重名之后,只会调用methods的方法
说明:
- methods:定义方法, 调用方法使用currentTime1(), 需要带括号
- computed:定义计算属性, 调用属性使用currentTime2, 不需要带括号 this.message是为了能够让currentTime2观察到数据变化而变化
- 如何在方法中的值发生了变化,则缓存就会刷新!可以在控制台使用vm.message=”cvzhanshi", 改变下数据的值,再次测试观察效果!
总结
调用方法时,每次都需要讲行计算,既然有计算过程则必定产生系统开销,那如果这个结果是不经常变化的呢?此时就可以考虑将这个结
果缓存起来,采用计算属性可以很方便的做到这点,计算属性的主要特性就是为了将不经常变化的计算结果进行缓存,以节约我们的系统
开销;
5.2 内容分发(插槽)
在Vue.js中我们使用元素作为承载分发内容的出口,可以称其为插槽,可以应用在组合组件的场景中
需求:需要把下面的内容,让标题和内容通过插槽插入内容
<p>标题</p>
<ul>
    <li>abcd</li>
    <li>abcd</li>
    <li>abcd</li>
</ul>
定义一个代办事情的组件
 Vue.component('todo',{
        template:'<div>\
                <div>代办事项</div>\
                <ul>\
                    <li>木子Teng study Vue</li>\
                </ul>\
            </div>'
    });
将上面的代码留出一个插槽,即slot
 Vue.component('todo',{
        template:'<div>\
                <slot"></slot>\
                <ul>\
                    <slot"></slot>\
                </ul>\
            </div>'
    });
定义一个名为todo-title的待办标题组件 和 todo-items的待办内容组件
Vue.component('todo-title',{
        props:['title'],
        template:'<div>{{title}}</div>'
    });

//这里的index,就是数组的下标,使用for循环遍历的时候,可以循环出来!
    Vue.component("todo-items",{
        props:["item","index"],
        template:"<li>{{index+1}},{{item}}</li>"
    });
slot通过name和组件绑定
 Vue.component('todo',{
        template:'<div>\
                <slot name="todo-title"></slot>\
                <ul>\
                    <slot name="todo-items"></slot>\
                </ul>\
            </div>'
    });
实例化Vue并初始化数据
 var vue = new Vue({
        el:"#vue",
        data:{
            todoItems:['test1','test2','test3']
        }
    });
将数据通过插槽插入预留出来的位置
<todo>
        <todo-title slot="todo-title" v-bind:title="title"></todo-title>
        <todo-items slot="todo-items" v-for="item in todoItems" :item="item" ></todo-items>
</todo>
说明:slot:是绑定组件用的 :title --> 是v-bind:title的缩写
完整代码
<div id="app">
<todo>
<todo-title slot="todo-title" :title="title"></todo-title>
<todo-items slot="todo-items" v-for="item in todoItems" :item="item"></todo-items>
</todo>
</div>
<script src="https://cdn.jsdelivr.net/npm/vue@2.5.21/dist/vue.min.js"></script>
<script>
// 创建一个组件
Vue.component('todo', {
template: '<div>\
<slot name="todo-title"></slot>\
<ul>\
<slot name="todo-items"></slot>\
</ul>\
</div>'
});
// 为插槽创建组件
Vue.component('todo-title', {
props: ['title'],
template: '<div>{{title}}</div>'
})
//这里的index,就是数组的下标,使用for循环遍历的时候,可以循环出来!
Vue.component('todo-items', {
props: ['item'],
template: '<li>{{item}}</li>'
})
var vue = new Vue({
el: "#app",
data: {
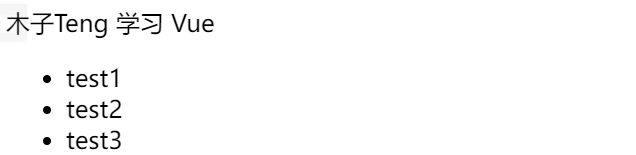
title: "木子Teng 学习 Vue",
todoItems: ['test1', 'test2', 'test3']
}
});
</script>
分析代码

结果
5.3 自定义事件
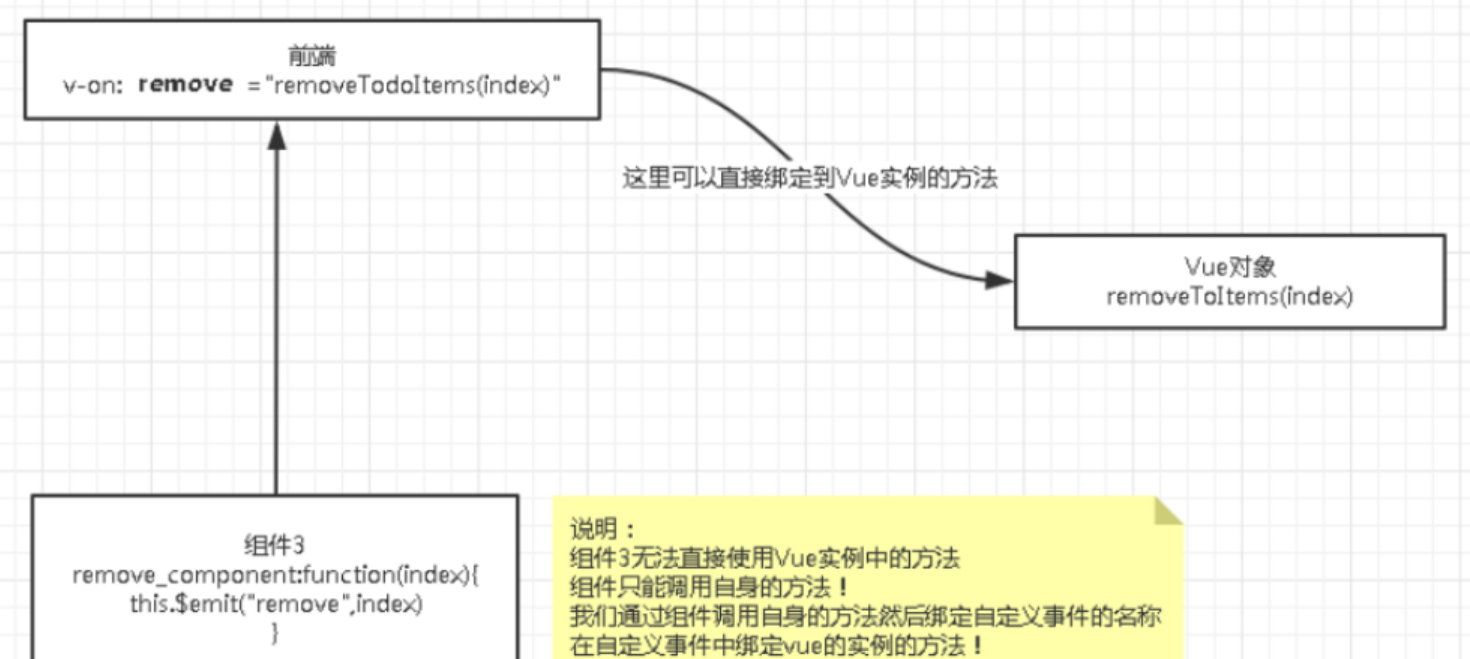
继续上述的代码,当我门需要删除其中一个数据时,我们该如何使用组件进行删除呢
删除按钮是在组件中的,点击删除按钮删除对应的数据。阅读Vue教程可知,此时就涉及到参数传递与事件分发了, Vue为我们提供了自
定义事件的功能很好的帮助我们解决了这个问题; 组件中使用this.$emit(‘自定义事件名’, 参数) ,而在视图层通过自定义事件绑定Vue
中的删除操作的方法
步骤:
- 在Vue实例中定义一个删除操作的方法removeItems()
methods: {
            removeItems: function (index) {
                console.log("删除了" + this.todoItems[index] + "OK");
                // 一次删除一个元素
                this.todoItems.splice(index, 1);
            }
        }
说明splice(index,n)方法是操作index下标开始的n个元素
- 在视图层中自定义事件并绑定Vue实例中的方法
<div id="app">
    <todo>
        <todo-title slot="todo-title" :title="title"></todo-title>
        <todo-items slot="todo-items" v-for="(item,index) in todoItems" :item="item" :index="index"
                    v-on:remove="removeItems(index)"></todo-items>
    </todo>
</div>
自定义事件为remove,通过v-on绑定removeItems方法
- 在相应的组件中绑定自定义事件
Vue.component('todo-items', {
        props: ['item', 'index'],
        template: '<li>{{item}}---{{index}} <button @click="remove">删除</button></li>',
        methods: {
            remove: function (index) {
                this.$emit('remove', index)
            }
        }
    });
完整代码如下
<div id="app">
    <todo>
        <todo-title slot="todo-title" :title="title"></todo-title>
        <todo-items slot="todo-items" v-for="(item,index) in todoItems" :item="item" :index="index"
                    @remove="removeItems(index)"></todo-items>
    </todo>
</div>

<script src="https://cdn.jsdelivr.net/npm/vue@2.5.21/dist/vue.min.js"></script>
<script>
    // 创建一个组件
    Vue.component('todo', {
        template: '<div>\
                    <slot name="todo-title"></slot>\
                    <ul>\
                    <slot name="todo-items"></slot>\
                    </ul>\
                    </div>'
    });
    // 为插槽创建组件
    Vue.component('todo-title', {
        props: ['title'],
        template: '<div>{{title}}</div>'
    })
    //这里的index,就是数组的下标,使用for循环遍历的时候,可以循环出来!
    Vue.component('todo-items', {
        props: ['item', 'index'],
        template: '<li>{{item}}---{{index}} <button @click="remove">删除</button></li>',
        methods: {
            remove: function (index) {
                this.$emit('remove', index)
            }
        }
    });
    var vue = new Vue({
        el: "#app",
        data: {
            title: "木子Teng 学习 Vue",
            todoItems: ['test1', 'test2', 'test3']
        },
        methods: {
            removeItems: function (index) {
                console.log("删除了" + this.todoItems[index] + "OK");
                // 一次删除一个元素
                this.todoItems.splice(index, 1);
            }
        }
    });
</script>
逻辑理解
5.4 Vue入门小结
核心:数据驱动,组件化
优点:借鉴了AngularJS的模块化开发和React的虚拟Dom,虚拟Dom就是把Demo操作放到内存中执行;
常用的属性:
- v-if
- v-else-if
- v-else
- v-for
- v-on绑定事件,简写@
- v-model数据双向绑定
- v-bind给组件绑定参数,简写:
组件化:
- 组合组件slot插槽
- 组件内部绑定事件需要使用到this.$emit(“事件名”,参数);
- 计算属性的特色,缓存计算数据
遵循SoC关注度分离原则,Vue是纯粹的视图框架,并不包含,比如Ajax之类的通信功能,为了解决通信问题,我们需要使用Axios框架做
异步通信
6. Vue脚手架—Vue-cli&Vite
6.1 Vue-cli&Vite简介
vue-cli官方提供的一个脚手架,用于快速生成一个vue的项目模板。预先定义好的目录结构及基础代码,就好比咱们在创建Maven项目时
可以选择创建一个骨架项目,这个估计项目就是脚手架,我们的开发更加的快速。
不过现在Vue官网现在更推荐使用Vite使用构建Vue项目。
项目的功能
- 统一的目录结构
- 本地调试
- 热部署
- 单元测试
- 集成打包上线
Vite这里不再进行介绍,详细可自行去官网查看。
6.2 安装
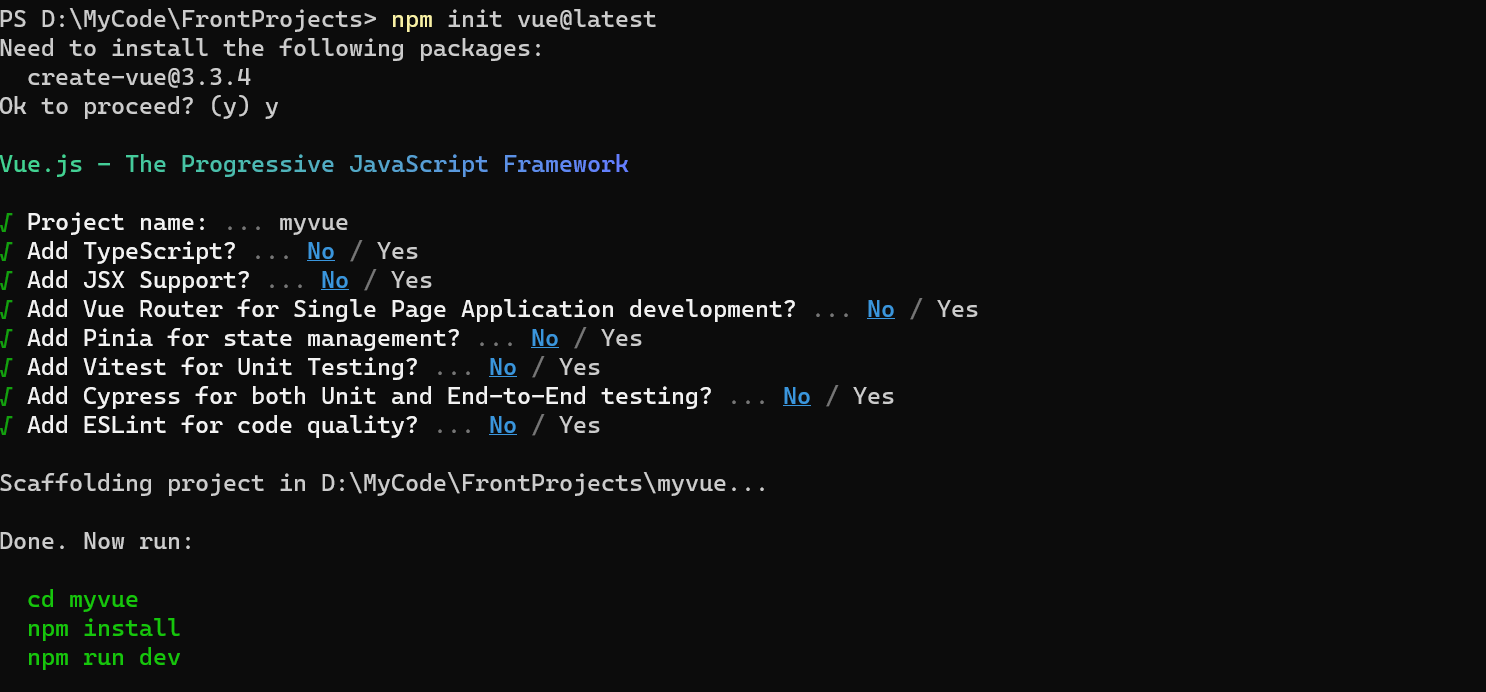
在这之前,确保你的电脑搭建好了Vue的环境,即安装了node.js
这里直接给出官网手册自行搭建项目
Vue-cli:https://cli.vuejs.org/zh/guide/

然后vue create my-vue
后面进行选择Vue3或者Vue2,然后选择使用npm还是使用yarn进行安装。全部工作做完后进行启动。


或者另一种方式
Project name:项目名称,默认回车即可
Project description:项目描述,默认回车即可
Author:项目作者,默认回车即可
Install vue-router:是否安装vue-router,选择n不安装(后期需要再手动添加)
Use ESLint to lint your code:是否使用ESLint做代码检查,选择n不安装(后期需要再手动添加)
Set up unit tests:单元测试相关,选择n不安装(后期需要再手动添加)
Setupe2etests with Nightwatch:单元测试相关,选择n不安装(后期需要再手动添加)
Should we run npm install for you after the,project has been created:创建完成后直接初始化,选择n,我们手动执行;运行结果
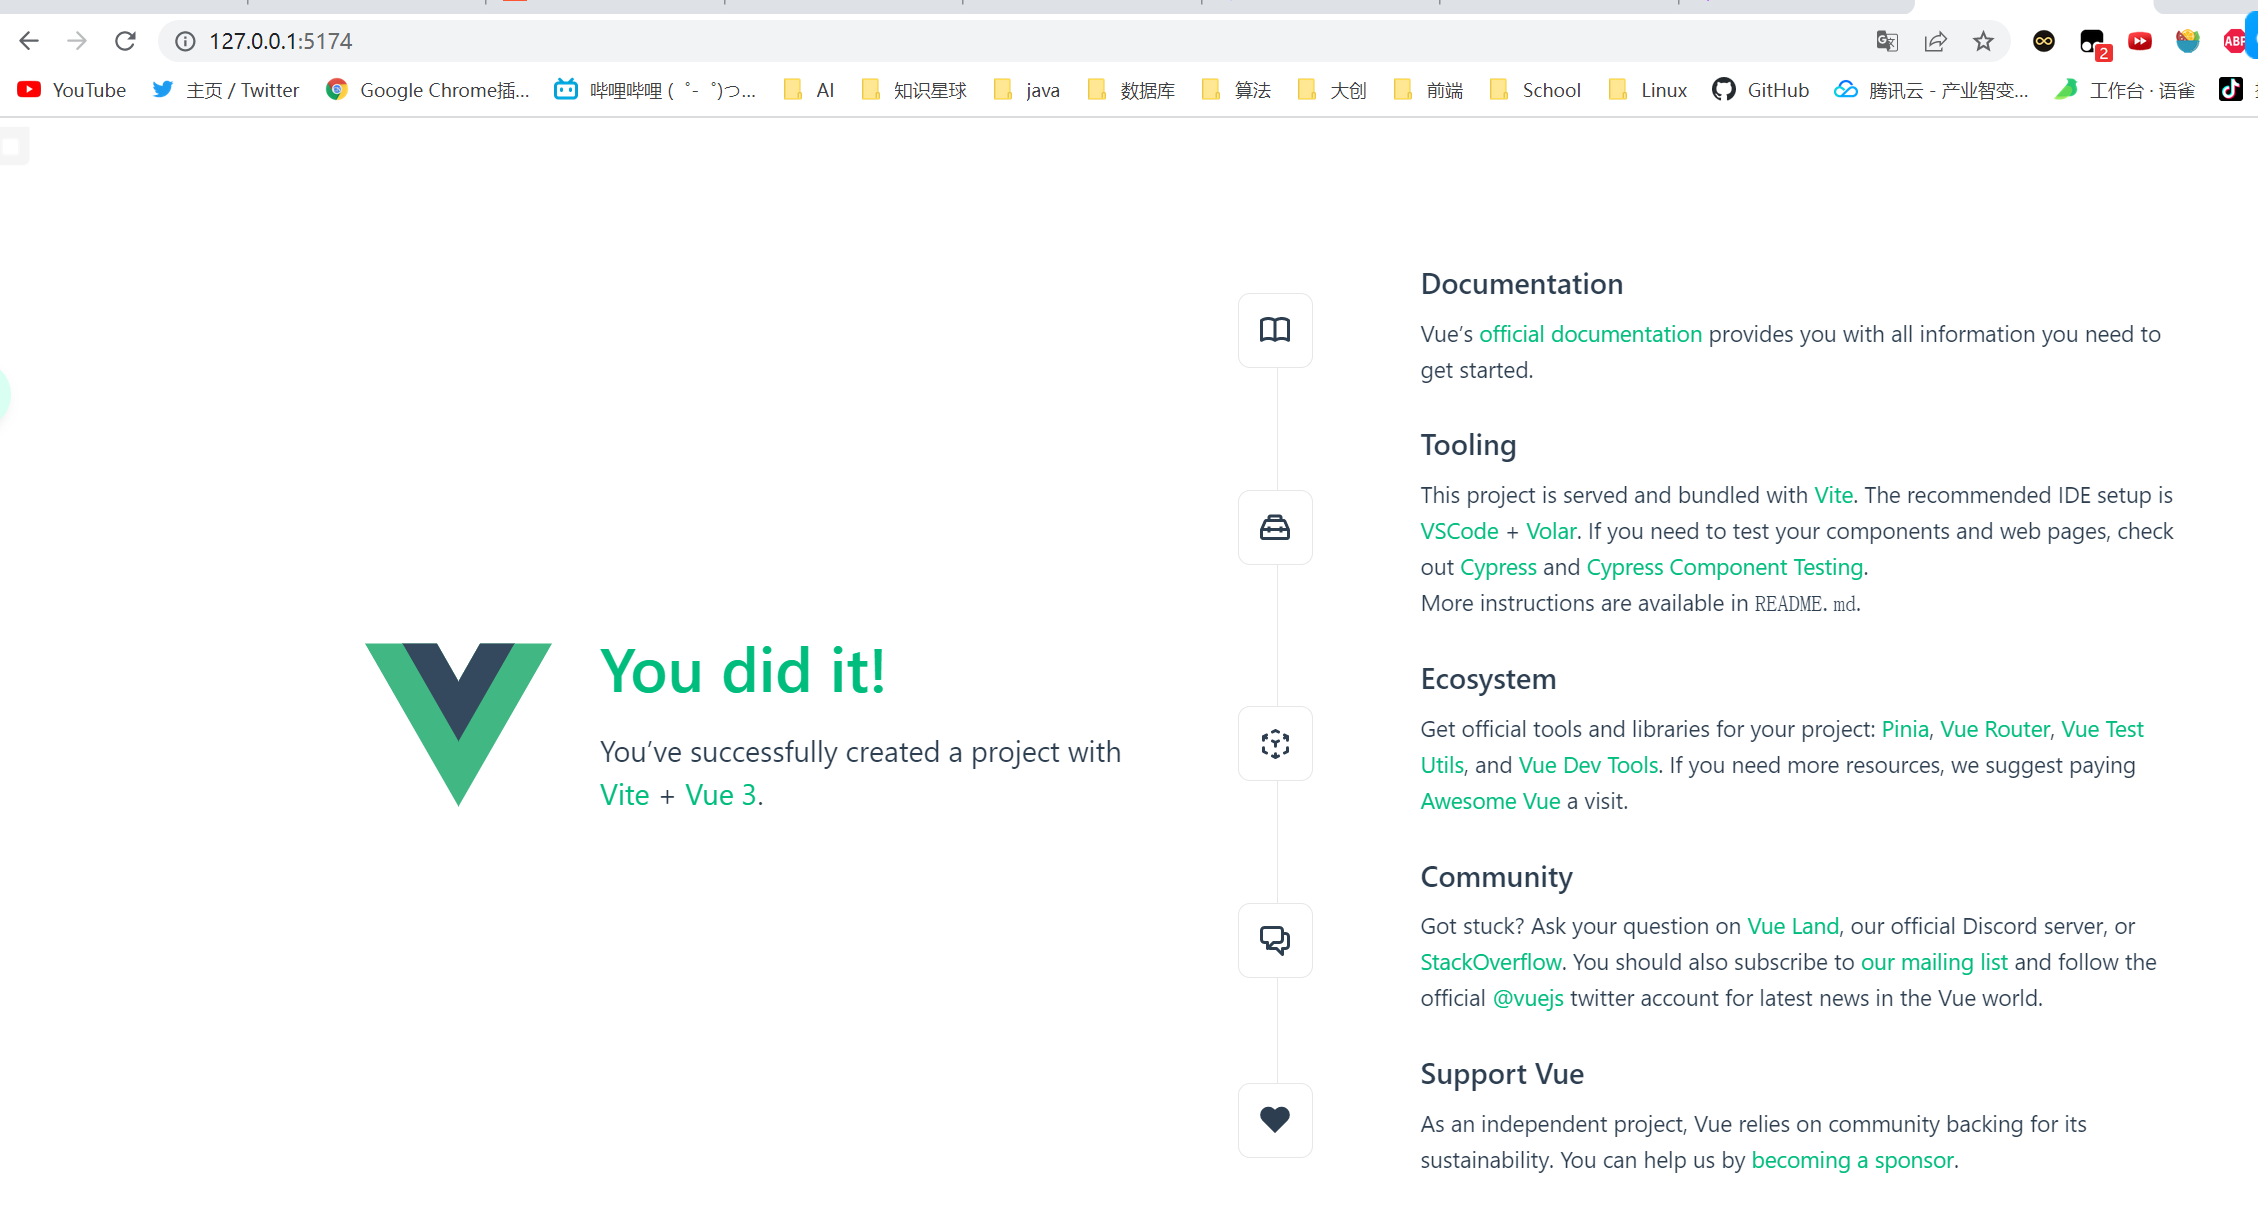

Vite:https://vitejs.cn/
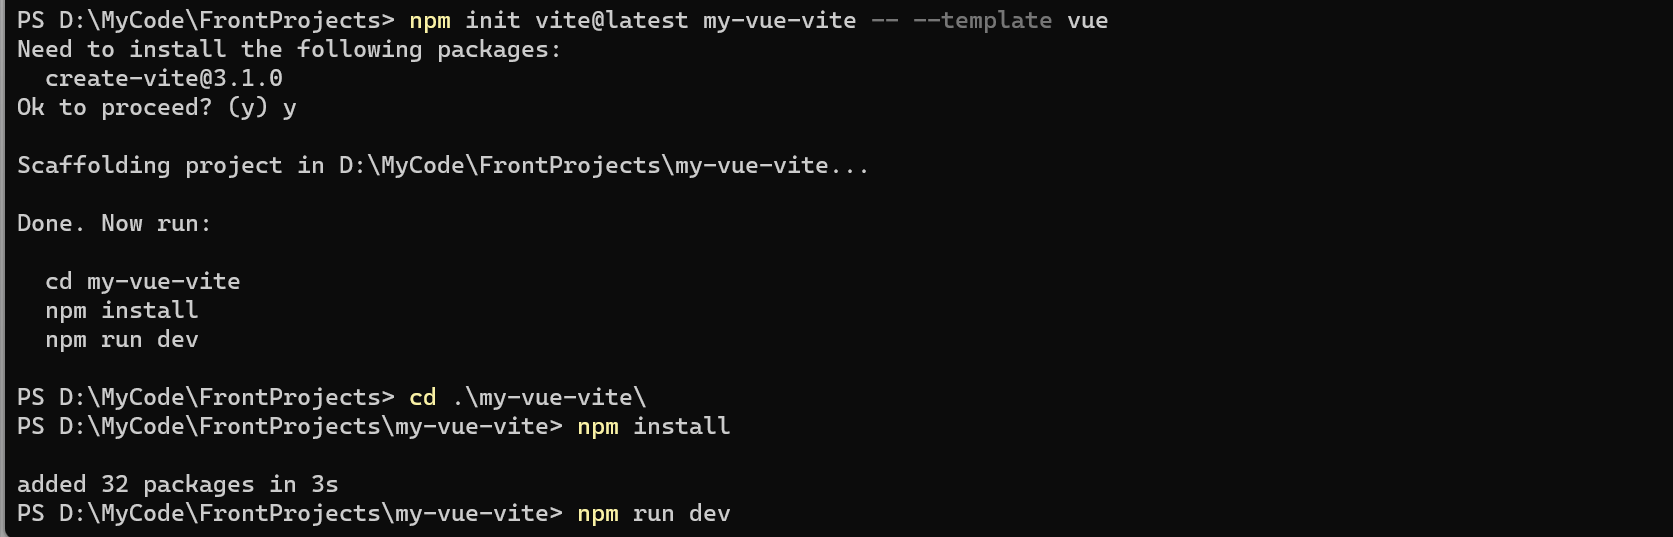

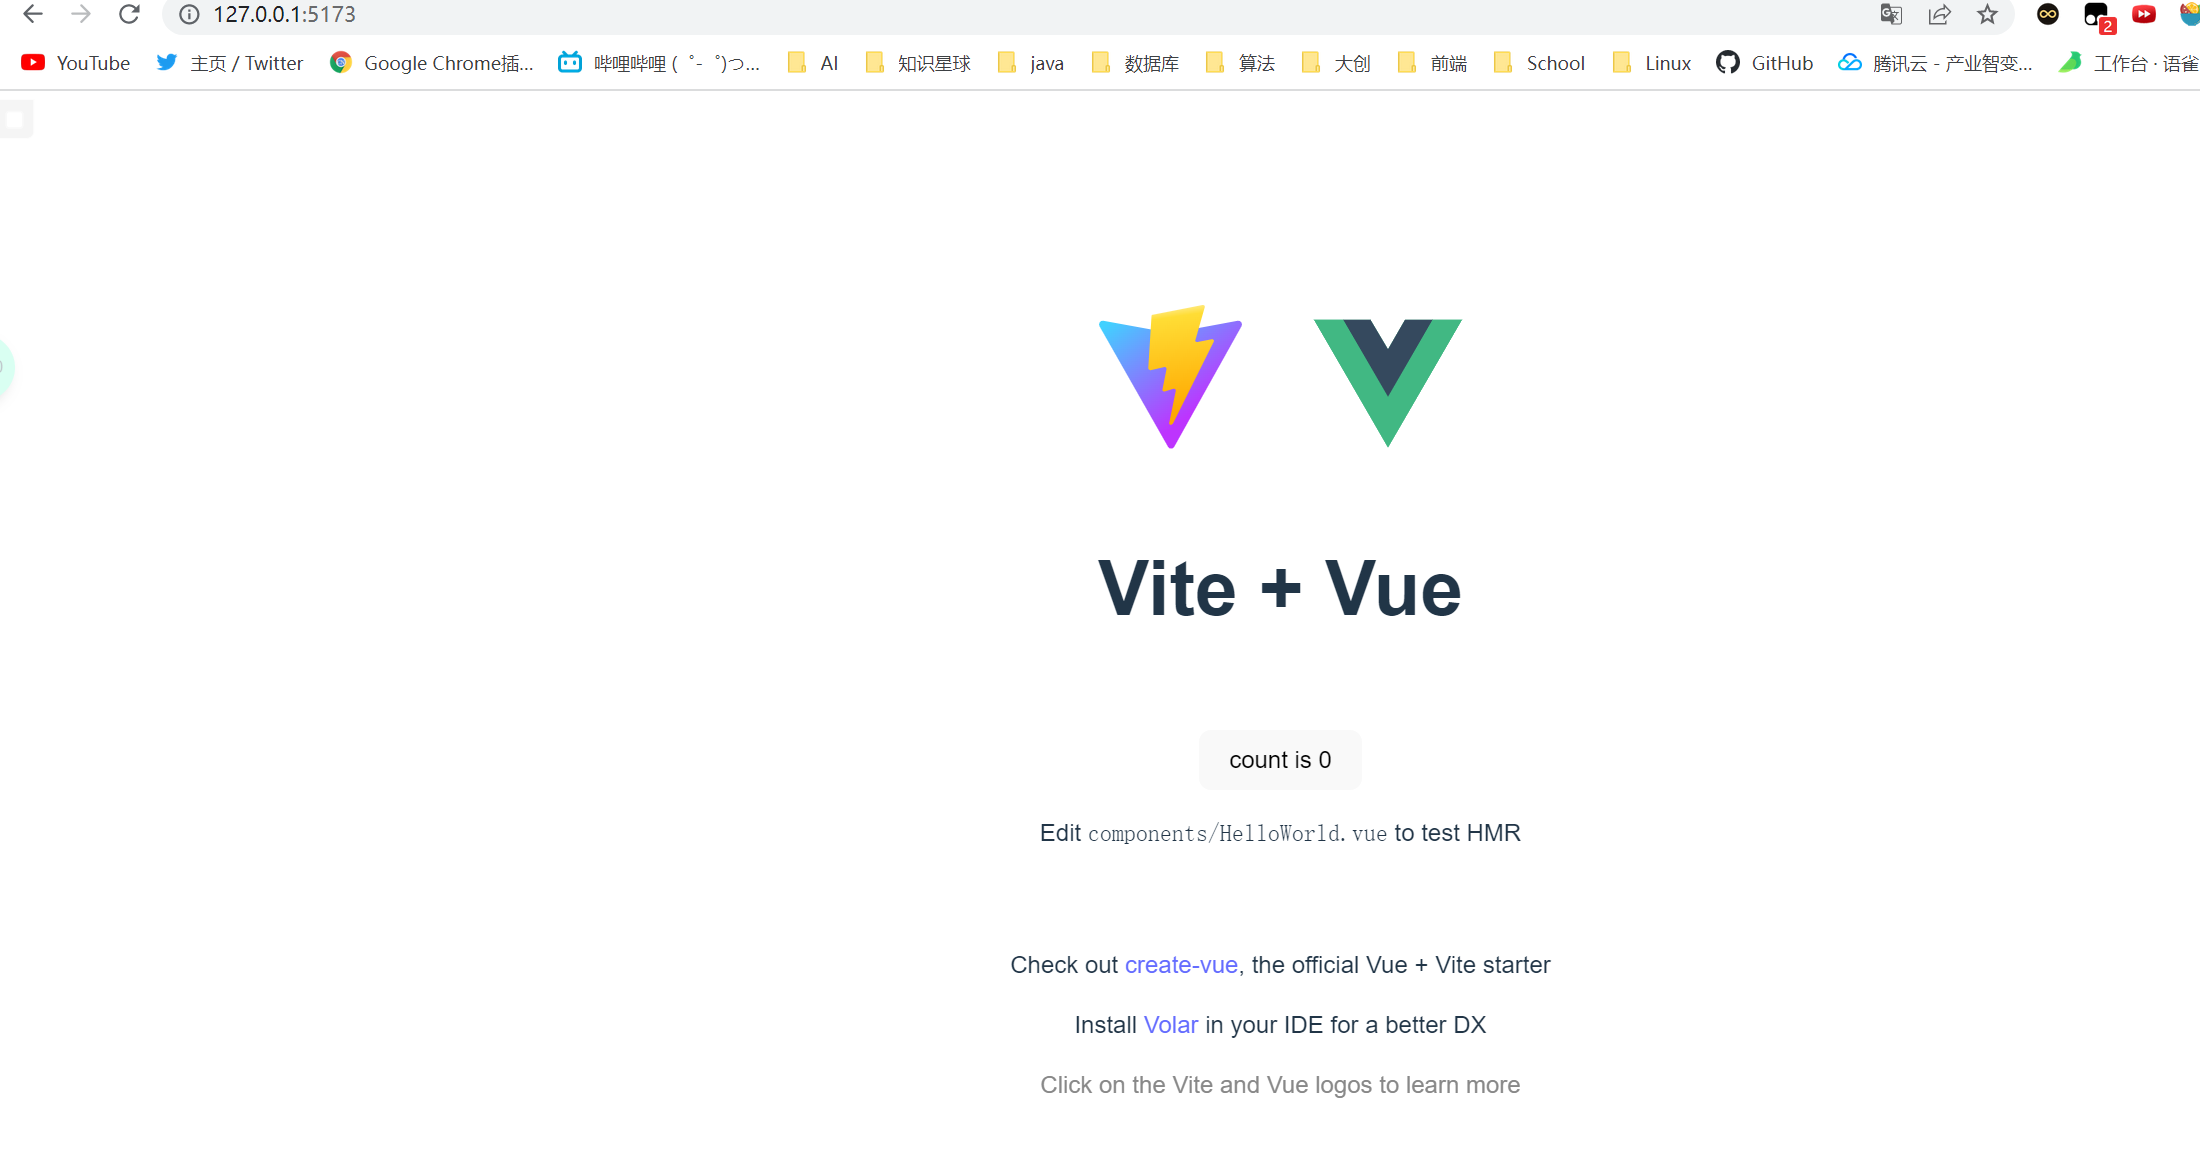

进行项目搭建后你会发现使用Vite搭建的速度是非常快于Vue-cli。
通过上述的三种方式可以比较出,我们更建议使用npm init vue@latest方式进行搭建。