目录
一、环境
VMware下的CentOS 7 ,与xshell 7
CentOS 7下载:
https://blog.csdn.net/Stupid__Angel/article/details/126398032
Xshell 7下载链接:
链接:https://pan.baidu.com/s/1BqCokipPllp5CvrKAuUM6A?pwd=abcd
提取码:abcd
--来自百度网盘超级会员V1的分享
如果仅登录ssh,点击下面的链接:
https://blog.csdn.net/Stupid__Angel/article/details/126436496
二、操作
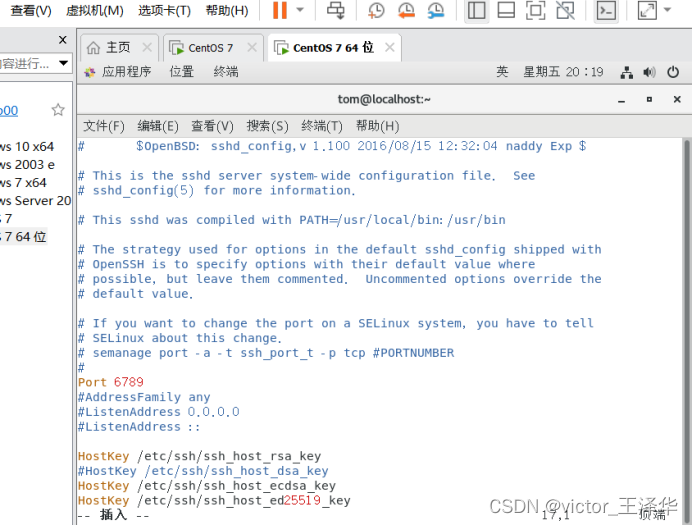
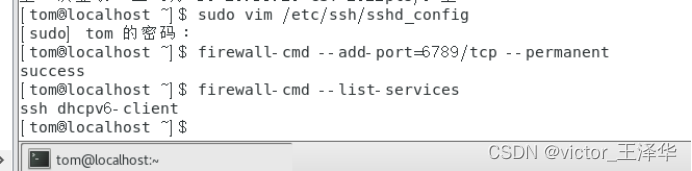
1、修改port为6789
输入 vim /etc/ssh/sshd_config 进入编辑 ,如图:
2、启用RSA认证,开启公钥认证
RSAAuthentication yes # 启用 RSA 认证
PubkeyAuthentication yes # 开启公钥验证

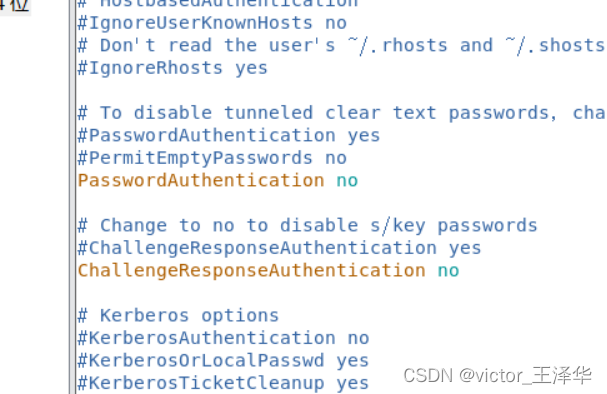
3、 禁止使用密码登录
PasswordAuthentication no
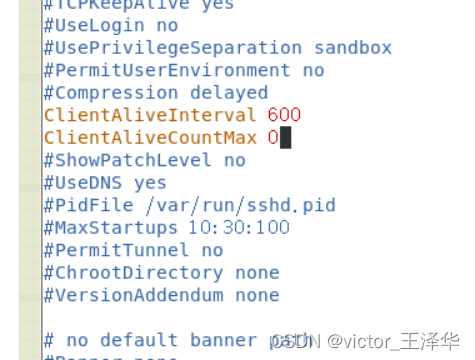
4、ssh在10分钟无操作的情况下自动退出
ClientAliveInterval 600
ClientAliveCountMax 0
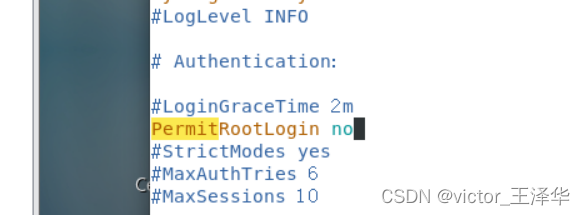
5、禁用root,只有tom用户可以使用秘钥登录
PermitRootLogin no
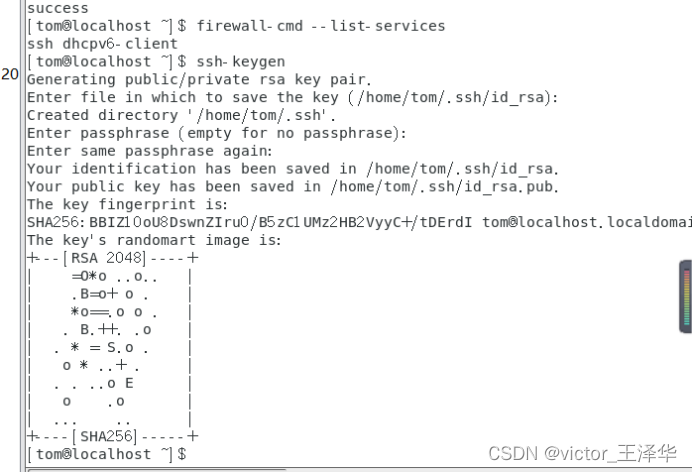
6、 制作密钥对
ssh-keygen <== 建立密钥对
file in which to save the key (/root/.ssh/id_rsa): <== 按 Enter
Enter passphrase (empty for no passphrase): < == 输入密钥锁码,或直接按 Enter 留空
Enter same passphrase again: < == 再输入一遍密钥锁码
Your identification has been saved in /root/.ssh/id_rsa. < == 私钥
Your public key has been saved in /root/.ssh/id_rsa.pub. < == 公钥
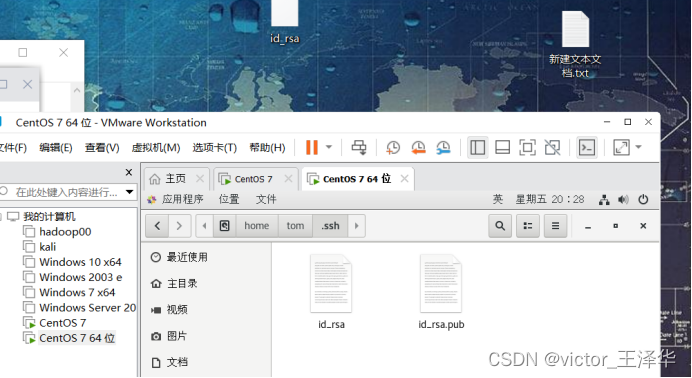
现在,在 tom 用户的家目录中生成了一个 .ssh 的隐藏目录,内含两个密钥文件。 id_rsa 为私钥,
id_rsa.pub 为公钥。
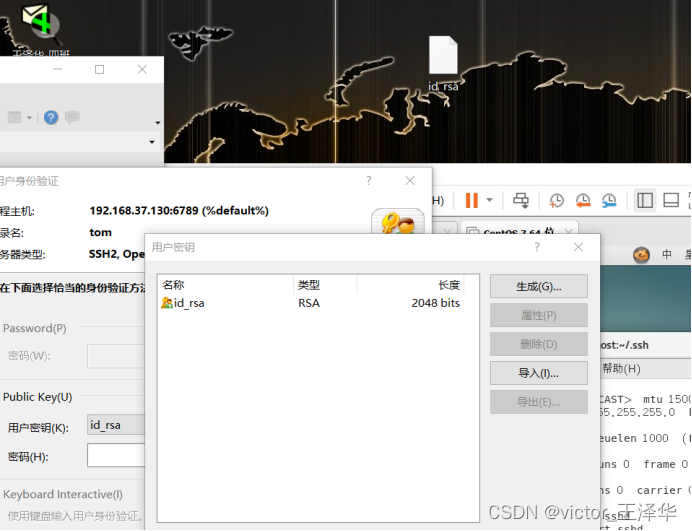
如图,可知私钥位置,把id_rsa 复制到物理机的桌面上
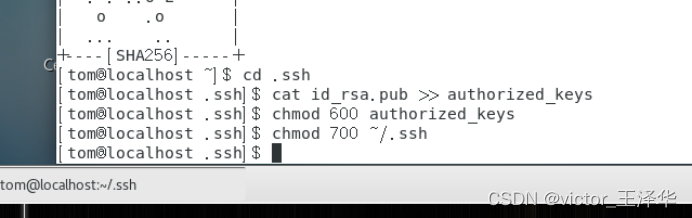
7、 在服务器上安装公钥
键入以下命令,在服务器上安装公钥:
[tom@localhost ~] # cd .ssh
[tom@localhost .ssh] # cat id_rsa.pub >> authorized_keys
如此便完成了公钥的安装。为了确保连接成功,请保证以下文件权限正确:
[tom@localhost .ssh] # chmod 600 authorized_keys
[tom@localhost .ssh] # chmod 700 ~/.ssh
开放端口
输入:firewall-cmd --add-port=6789/tcp --permanent
重启防火墙
输入:firewall-cmd --reload
最后重启 SSH 服务
输入:systemctl restartsshd
如图在Xshell中操作,导入id_rsa 私钥文件:
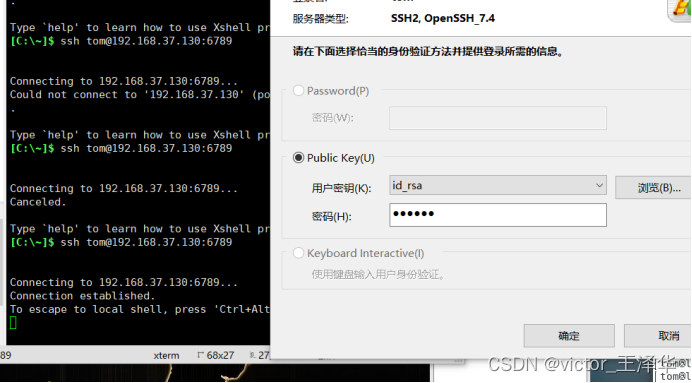
输入ssh tom@主机IP:6789,即可登录: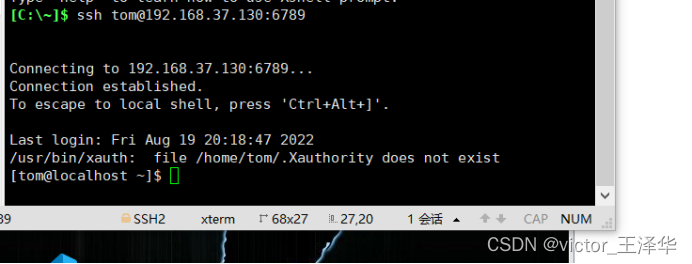
本文含有隐藏内容,请 开通VIP 后查看