前言
本文将通过一系列代码片段,深入探讨如何使用JavaScript来操作DOM元素、控制页面跳转、管理浏览器窗口以及存储用户数据。这些示例涵盖了从基础到进阶的技术点,帮助读者更好地理解JavaScript在实际项目中的应用。
目录
1. 获取和操作DOM元素
代码片段
<!DOCTYPE html>
<html lang="en">
<head>
<meta charset="UTF-8">
<meta http-equiv="X-UA-Compatible" content="IE=edge">
<meta name="viewport" content="width=device-width, initial-scale=1.0">
<title>Document</title>
</head>
<body>
<div id="box">
<p class="hehe">呵呵</p>
<input type="text" name="txt" id="">
<h3>三级标题</h3>
<input type="text" name="txt" id="">
<p class="hehe">呵呵</p>
</div>
<p class="hehe">呵呵</p>
<input type="text" name="" id="">
<p>呵呵</p>
<script>
//1. 获取页面中所有的p标签
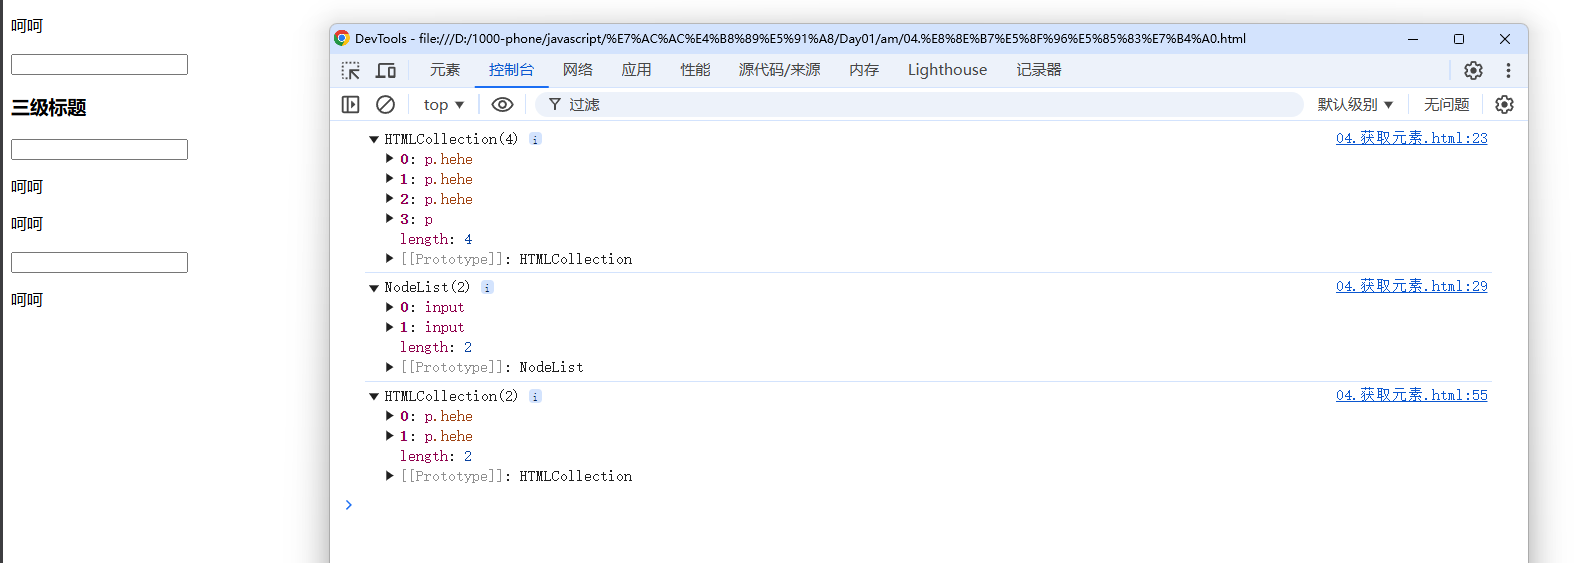
var body_p = document.getElementsByTagName('p');
console.log(body_p);
//2. 获取所有类名是hehe的标签
var p_hehe = document.getElementsByClassName('hehe');
console.log(p_hehe);
//3. 获取所有的name是txt的表单
var input_name = document.getElementsByName('txt');
console.log(input_name);
//4. 获取div#box里面的class=hehe的标签
var box_hehe = document.getElementById('box').getElementsByClassName('hehe');
console.log(box_hehe);
//兼容IE9以下的byClassName
function byClassName(obj, className) {
if (obj.getElementsByClassName) {
return obj.getElementsByClassName(className);
} else {
var arr = [];
var eles = obj.getElementsByTagName('*');
for (var i = 0, len = eles.length; i < len; i++) {
if (eles[i].className === className) {
arr.push(eles[i]);
}
}
return arr;
}
}
var box_hehe_compatible = byClassName(document.getElementById('box'), 'hehe');
console.log(box_hehe_compatible);
let query_hehe = document.querySelectorAll('.hehe');
</script>
</body>
</html>
代码解析
获取所有
<p>标签:var body_p = document.getElementsByTagName('p'); console.log(body_p);使用
getElementsByTagName方法可以获取页面中所有指定标签名的元素。这里我们获取了所有的<p>标签,并将其打印到控制台。获取所有类名为
hehe的标签:var p_hehe = document.getElementsByClassName('hehe'); console.log(p_hehe);getElementsByClassName方法用于获取所有具有指定类名的元素。这里我们获取了所有类名为hehe的元素。获取所有
name属性为txt的表单元素:var input_name = document.getElementsByName('txt'); console.log(input_name);getElementsByName方法用于获取所有具有指定name属性的元素。这里我们获取了所有name属性为txt的表单元素。获取
div#box内部所有类名为hehe的标签:var box_hehe = document.getElementById('box').getElementsByClassName('hehe'); console.log(box_hehe);先通过
getElementById获取div#box元素,然后在其内部使用getElementsByClassName方法获取所有类名为hehe的子元素。兼容IE9以下版本的
getElementsByClassName:function byClassName(obj, className) { if (obj.getElementsByClassName) { return obj.getElementsByClassName(className); } else { var arr = []; var eles = obj.getElementsByTagName('*'); for (var i = 0, len = eles.length; i < len; i++) { if (eles[i].className === className) { arr.push(eles[i]); } } return arr; } } var box_hehe_compatible = byClassName(document.getElementById('box'), 'hehe'); console.log(box_hehe_compatible);为了兼容IE9以下版本,我们编写了一个自定义函数
byClassName,该函数首先检查是否支持getElementsByClassName方法,如果不支持,则手动遍历所有元素并筛选出符合条件的元素。使用
querySelectorAll选择器:let query_hehe = document.querySelectorAll('.hehe');querySelectorAll方法允许我们使用CSS选择器来获取元素,更加灵活和强大。
2. 页面跳转与刷新
代码片段
<!DOCTYPE html>
<html lang="en">
<head>
    <meta charset="UTF-8">
    <meta http-equiv="X-UA-Compatible" content="IE=edge">
    <meta name="viewport" content="width=device-width, initial-scale=1.0">
    <title>Document</title>
</head>
<body>
    <input type="button" value="百度">
    <script>
        document.querySelector('input').onclick = function() {
            location.href = 'http://www.baidu.com';
            window.location = 'http://jd.com';
            location.assign('http://www.taobao.com');
            location.reload(true);  //默认参数为false,从浏览器的缓存中读取数据
            //true : 从远程服务器中加载数据
        }

        console.log(window.location.href);
    </script>
</body>
</html>

代码解析
页面跳转:
location.href = 'http://www.baidu.com';
window.location = 'http://jd.com';
location.assign('http://www.taobao.com');
这三种方式都可以用来跳转页面。
location.href和window.location是等价的,它们会直接替换当前页面的URL。location.assign则会将新URL添加到浏览器的历史记录中。页面刷新:
location.reload(true);location.reload()方法用于刷新当前页面。如果传递参数true,则会强制从服务器重新加载页面,而不是从缓存中读取。获取当前页面URL:
console.log(window.location.href);window.location.href返回当前页面的完整URL。
3. 关闭当前窗口
代码片段
<!DOCTYPE html>
<html lang="en">
<head>
    <meta charset="UTF-8">
    <meta http-equiv="X-UA-Compatible" content="IE=edge">
    <meta name="viewport" content="width=device-width, initial-scale=1.0">
    <title>Document</title>
</head>
<body>
    <input type="button" value="关闭当前窗口">
    <script>
        document.querySelector('input').onclick = function() {
            window.close();
        }
    </script>
</body>
</html>
代码解析
- 关闭当前窗口:
window.close();window.close()方法用于关闭当前窗口。需要注意的是,此方法只能关闭由JavaScript打开的窗口,否则在大多数现代浏览器中会受到限制。
4. 浏览器存储机制
代码片段
<!DOCTYPE html>
<html lang="en">
<head>
<meta charset="UTF-8">
<meta http-equiv="X-UA-Compatible" content="IE=edge">
<meta name="viewport" content="width=device-width, initial-scale=1.0">
<title>Document</title>
</head>
<body>
<script>
//1. 存储数据
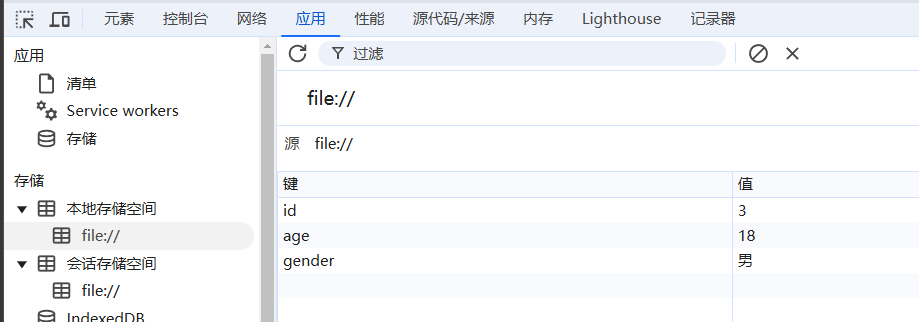
window.localStorage.setItem('id', 3);
window.localStorage.setItem('姓名', '张三');
window.sessionStorage.setItem('姓名', '李四');
window.localStorage.setItem('age', 18);
window.localStorage.setItem('gender', '男');
window.sessionStorage.setItem('age', 18);
window.sessionStorage.setItem('gender', '男');
//2. 获取数据
console.log(window.localStorage.getItem('姓名'));
console.log(window.sessionStorage.getItem('age'));
//3. 删除指定属性
window.localStorage.removeItem('姓名');
window.sessionStorage.removeItem('age');
//4. 删除全部属性
window.localStorage.clear();
window.sessionStorage.clear();
//5. 获取所有属性
for (var i = 0, len = window.localStorage.length; i < len; i++) {
var key = window.localStorage.key(i);
var value = window.localStorage.getItem(key);
console.log(key, value);
}
</script>
</body>
</html>
代码解析
存储数据:
window.localStorage.setItem('id', 3); window.localStorage.setItem('姓名', '张三'); window.sessionStorage.setItem('姓名', '李四');localStorage和sessionStorage是两种不同的存储机制。localStorage的数据持久保存,除非手动清除;而sessionStorage的数据仅在当前会话期间有效,关闭浏览器后数据会被清除。获取数据:
console.log(window.localStorage.getItem('姓名'));
console.log(window.sessionStorage.getItem('age'));
使用
getItem方法可以从localStorage或sessionStorage中获取指定键对应的值。删除指定属性:
window.localStorage.removeItem('姓名'); window.sessionStorage.removeItem('age');removeItem方法用于删除指定键的存储项。删除全部属性:
window.localStorage.clear(); window.sessionStorage.clear();clear方法用于清空所有存储项。获取所有属性:
for (var i = 0, len = window.localStorage.length; i < len; i++) {
    var key = window.localStorage.key(i);
    var value = window.localStorage.getItem(key);
    console.log(key, value);
}
通过
length属性和key方法,我们可以遍历localStorage中的所有键值对。
5. 兼容性处理
代码片段
<!DOCTYPE html>
<html lang="en">
<head>
    <meta charset="UTF-8">
    <meta http-equiv="X-UA-Compatible" content="IE=edge">
    <meta name="viewport" content="width=device-width, initial-scale=1.0">
    <title>Document</title>
</head>
<body>
    <div id="box"></div>
    <script>
        //1. 获取元素
        var o_box = document.querySelector('#box');
        //2. 获取宽度
        function getStyle(obj, attr) {
            return obj.currentStyle ? obj.currentStyle[attr] : getComputedStyle(obj)[attr];
        }
        var width = getStyle(o_box, 'width');
        console.log(width);
    </script>
</body>
</html>
代码解析
- 兼容性处理获取非行内样式:
由于不同浏览器获取非行内样式的API有所不同,function getStyle(obj, attr) { return obj.currentStyle ? obj.currentStyle[attr] : getComputedStyle(obj)[attr]; }currentStyle适用于IE浏览器,而getComputedStyle适用于标准浏览器。通过判断currentStyle是否存在,我们可以实现跨浏览器的兼容性处理。
6. 动态添加样式
代码片段
<!DOCTYPE html>
<html lang="en">
<head>
<meta charset="UTF-8">
<meta http-equiv="X-UA-Compatible" content="IE=edge">
<meta name="viewport" content="width=device-width, initial-scale=1.0">
<title>Document</title>
</head>
<body>
<div id="box"></div>
<script>
//1. 获取元素
var o_box = document.querySelector('#box');
//2. 添加样式
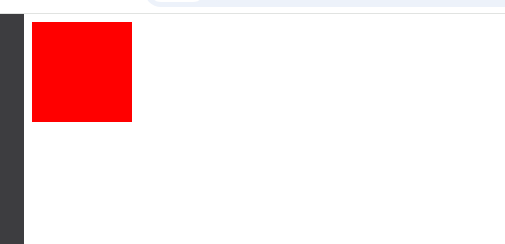
o_box.style.width = '100px';
o_box.style.height = '100px';
o_box.style.background = 'red';
// o_box.style.cssText = 'width:100px;height:100px;background:red';
</script>
</body>
</html>

代码解析
- 动态添加样式:
通过直接设置o_box.style.width = '100px'; o_box.style.height = '100px'; o_box.style.background = 'red';style属性,我们可以动态地为DOM元素添加样式。此外,还可以使用cssText属性一次性设置多个样式。
7. 动画效果:宽度逐渐变小
代码片段
<!DOCTYPE html>
<html lang="en">
<head>
<meta charset="UTF-8">
<meta http-equiv="X-UA-Compatible" content="IE=edge">
<meta name="viewport" content="width=device-width, initial-scale=1.0">
<title>Document</title>
<style>
#box {
width: 100px;
height: 100px;
background: red;
}
</style>
</head>
<body>
<div id="box"></div>
<script>
//1. 获取元素
var o_box = document.querySelector('#box');
//2. 获取宽度
function getStyle(obj, attr) {
    return obj.currentStyle ? obj.currentStyle[attr] : getComputedStyle(obj)[attr];
}
//3. 逐渐变小
setInterval(function() {
o_box.style.height = parseInt(getStyle(o_box, 'height')) - 1 + 'px';
}, 30);
</script>
</body>
</html>
代码解析
获取元素:
var o_box = document.querySelector('#box');获取非行内样式:
function getStyle(obj, attr) { return obj.currentStyle ? obj.currentStyle[attr] : getComputedStyle(obj)[attr]; }逐渐变小:
setInterval(function() {
    o_box.style.height = parseInt(getStyle(o_box, 'height')) - 1 + 'px';
}, 30);
使用
setInterval定时器每30毫秒减少一次高度,从而实现高度逐渐变小的效果。
结尾
通过上述代码片段和技术解析,我们详细介绍了如何使用JavaScript操作DOM元素、控制页面跳转、管理浏览器窗口以及存储用户数据。这些技术点不仅涵盖了基础的DOM操作,还包括了一些常见的兼容性处理和动画效果实现。希望本文能帮助读者更好地理解和掌握JavaScript在Web开发中的应用,为后续的项目开发打下坚实的基础。