本实例主要讲解内容
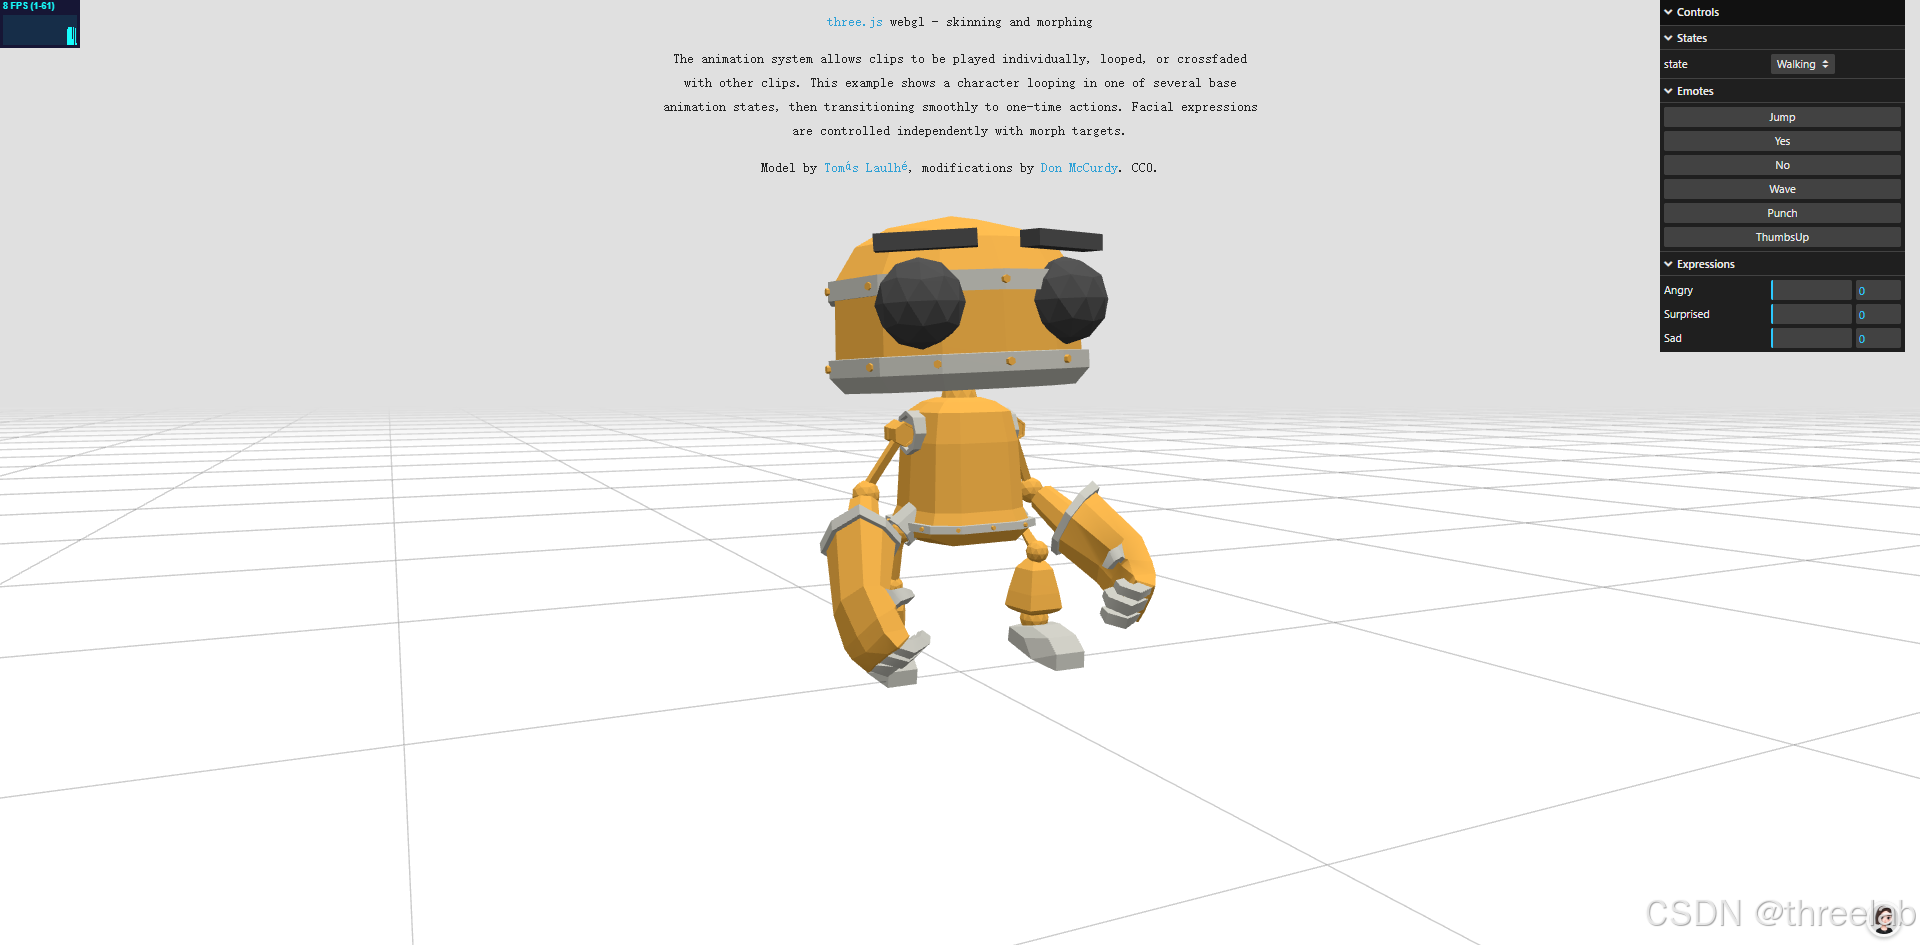
这个Three.js示例展示了**骨骼动画(Skinning)和变形动画(Morphing)**的结合应用。通过加载一个机器人模型,演示了如何同时控制角色的肢体动作和面部表情,实现更加丰富的角色动画效果。
核心技术包括:
- 多动画混合与淡入淡出
- 基础动画状态与一次性动作的切换
- 面部变形目标(Morph Targets)控制
- 动画事件监听与状态恢复
完整代码注释
<!DOCTYPE html>
<html lang="en">
	<head>
		<title>three.js webgl - skinning and morphing</title>
		<meta charset="utf-8">
		<meta name="viewport" content="width=device-width, user-scalable=no, minimum-scale=1.0, maximum-scale=1.0">
		<link type="text/css" rel="stylesheet" href="main.css">
		<style>
			body {
				color: #222;
			}

			a {
				color: #2fa1d6;
			}

			p {
				max-width: 600px;
				margin-left: auto;
				margin-right: auto;
				padding: 0 2em;
			}
		</style>
	</head>

	<body>
		<div id="info">
			<a href="https://threejs.org" target="_blank" rel="noopener">three.js</a> webgl - skinning and morphing<br />
			<p>
				The animation system allows clips to be played individually, looped, or crossfaded with other clips. This example shows a character looping in one of several base animation states, then transitioning smoothly to one-time actions. Facial expressions are controlled independently with morph targets.
			</p>
			Model by
			<a href="https://www.patreon.com/quaternius" target="_blank" rel="noopener">Tomás Laulhé</a>,
			modifications by <a href="https://donmccurdy.com/" target="_blank" rel="noopener">Don McCurdy</a>. CC0.<br />
		</div>

		<script type="importmap">
			{
				"imports": {
					"three": "../build/three.module.js",
					"three/addons/": "./jsm/"
				}
			}
		</script>

		<script type="module">

			import * as THREE from 'three';

			import Stats from 'three/addons/libs/stats.module.js';
			import { GUI } from 'three/addons/libs/lil-gui.module.min.js';

			import { GLTFLoader } from 'three/addons/loaders/GLTFLoader.js';

			let container, stats, clock, gui, mixer, actions, activeAction, previousAction;
			let camera, scene, renderer, model, face;

			const api = { state: 'Walking' };

			init();

			function init() {

				container = document.createElement( 'div' );
				document.body.appendChild( container );

				camera = new THREE.PerspectiveCamera( 45, window.innerWidth / window.innerHeight, 0.25, 100 );
				camera.position.set( - 5, 3, 10 );
				camera.lookAt( 0, 2, 0 );

				scene = new THREE.Scene();
				scene.background = new THREE.Color( 0xe0e0e0 );
				scene.fog = new THREE.Fog( 0xe0e0e0, 20, 100 );

				clock = new THREE.Clock();

				// lights

				const hemiLight = new THREE.HemisphereLight( 0xffffff, 0x8d8d8d, 3 );
				hemiLight.position.set( 0, 20, 0 );
				scene.add( hemiLight );

				const dirLight = new THREE.DirectionalLight( 0xffffff, 3 );
				dirLight.position.set( 0, 20, 10 );
				scene.add( dirLight );

				// ground

				const mesh = new THREE.Mesh( new THREE.PlaneGeometry( 2000, 2000 ), new THREE.MeshPhongMaterial( { color: 0xcbcbcb, depthWrite: false } ) );
				mesh.rotation.x = - Math.PI / 2;
				scene.add( mesh );

				const grid = new THREE.GridHelper( 200, 40, 0x000000, 0x000000 );
				grid.material.opacity = 0.2;
				grid.material.transparent = true;
				scene.add( grid );

				// model

				const loader = new GLTFLoader();
				loader.load( 'models/gltf/RobotExpressive/RobotExpressive.glb', function ( gltf ) {

					model = gltf.scene;
					scene.add( model );

					createGUI( model, gltf.animations );

				}, undefined, function ( e ) {

					console.error( e );

				} );

				renderer = new THREE.WebGLRenderer( { antialias: true } );
				renderer.setPixelRatio( window.devicePixelRatio );
				renderer.setSize( window.innerWidth, window.innerHeight );
				renderer.setAnimationLoop( animate );
				container.appendChild( renderer.domElement );

				window.addEventListener( 'resize', onWindowResize );

				// stats
				stats = new Stats();
				container.appendChild( stats.dom );

			}

			function createGUI( model, animations ) {

				// 定义不同类型的动画状态
				const states = [ 'Idle', 'Walking', 'Running', 'Dance', 'Death', 'Sitting', 'Standing' ];
				const emotes = [ 'Jump', 'Yes', 'No', 'Wave', 'Punch', 'ThumbsUp' ];

				gui = new GUI();

				mixer = new THREE.AnimationMixer( model ); // 创建动画混合器

				actions = {};

				// 初始化所有动画动作
				for ( let i = 0; i < animations.length; i ++ ) {

					const clip = animations[ i ];
					const action = mixer.clipAction( clip );
					actions[ clip.name ] = action;

					// 设置一次性动画的属性
					if ( emotes.indexOf( clip.name ) >= 0 || states.indexOf( clip.name ) >= 4 ) {
						action.clampWhenFinished = true; // 动画结束后保持最后一帧
						action.loop = THREE.LoopOnce; // 只播放一次
					}

				}

				// 创建状态控制面板
				const statesFolder = gui.addFolder( 'States' );

				// 添加状态选择下拉菜单
				const clipCtrl = statesFolder.add( api, 'state' ).options( states );

				// 状态变化时的回调函数
				clipCtrl.onChange( function () {
					fadeToAction( api.state, 0.5 ); // 淡入淡出到新状态
				} );

				statesFolder.open();

				// 创建表情控制面板
				const emoteFolder = gui.addFolder( 'Emotes' );

				// 为每个表情创建回调函数
				function createEmoteCallback( name ) {

					api[ name ] = function () {

						fadeToAction( name, 0.2 ); // 淡入表情动画

						// 添加动画完成事件监听,完成后恢复基础状态
						mixer.addEventListener( 'finished', restoreState );

					};

					emoteFolder.add( api, name );

				}

				// 恢复基础状态的函数
				function restoreState() {

					mixer.removeEventListener( 'finished', restoreState );

					fadeToAction( api.state, 0.2 );

				}

				// 为每个表情创建控制面板项
				for ( let i = 0; i < emotes.length; i ++ ) {
					createEmoteCallback( emotes[ i ] );
				}

				emoteFolder.open();

				// 面部表情控制
				face = model.getObjectByName( 'Head_4' );

				// 获取所有面部变形目标
				const expressions = Object.keys( face.morphTargetDictionary );
				const expressionFolder = gui.addFolder( 'Expressions' );

				// 为每个面部表情创建滑块控制
				for ( let i = 0; i < expressions.length; i ++ ) {
					expressionFolder.add( face.morphTargetInfluences, i, 0, 1, 0.01 ).name( expressions[ i ] );
				}

				// 设置初始活动动画
				activeAction = actions[ 'Walking' ];
				activeAction.play();

				expressionFolder.open();

			}

			// 动画淡入淡出函数
			function fadeToAction( name, duration ) {

				previousAction = activeAction;
				activeAction = actions[ name ];

				if ( previousAction !== activeAction ) {
					previousAction.fadeOut( duration ); // 淡出当前动画
				}

				// 重置并播放新动画
				activeAction
					.reset()
					.setEffectiveTimeScale( 1 )
					.setEffectiveWeight( 1 )
					.fadeIn( duration )
					.play();

			}

			// 窗口大小变化处理函数
			function onWindowResize() {

				camera.aspect = window.innerWidth / window.innerHeight;
				camera.updateProjectionMatrix();

				renderer.setSize( window.innerWidth, window.innerHeight );

			}

			// 动画循环函数
			function animate() {

				const dt = clock.getDelta();

				if ( mixer ) mixer.update( dt ); // 更新动画混合器

				renderer.render( scene, camera ); // 渲染场景

				stats.update(); // 更新性能统计

			}

		</script>

	</body>
</html>
骨骼动画与变形动画详解
骨骼动画(Skinning)
骨骼动画是通过建立骨骼层级结构并绑定到网格顶点来实现的动画技术。主要特点:
- 骨骼层级:骨骼按照父子关系组织成树状结构
- 蒙皮权重:每个顶点关联到一个或多个骨骼,并有权重值决定受骨骼影响的程度
- 正向运动学:父骨骼的运动会影响子骨骼
- 反向运动学:通过设定末端骨骼位置,计算整个骨骼链的姿态
在本示例中,机器人的肢体动作(如行走、跑步、跳舞)就是通过骨骼动画实现的。
变形动画(Morphing)
变形动画(也称为顶点动画)是通过直接修改网格顶点位置来实现的动画技术。主要特点:
- 基础网格:定义模型的默认形状
- 变形目标:定义从基础网格到目标形状的顶点偏移
- 影响权重:控制每个变形目标对最终形状的影响程度
- 多目标混合:可以同时应用多个变形目标并调整权重
在本示例中,机器人的面部表情(如微笑、惊讶、生气)就是通过变形动画实现的。
动画混合与状态管理
Three.js提供了强大的动画混合系统,可以实现:
- 动画淡入淡出:通过
fadeIn()和fadeOut()方法实现平滑过渡 - 动画权重控制:调整多个动画的混合比例
- 动画状态管理:组织不同的动画状态并管理它们之间的转换
- 动画事件监听:监听动画开始、结束等事件
在本示例中,我们可以看到:
- 基础状态(如行走、跑步)是循环播放的
- 表情动画(如跳跃、挥手)是一次性的,播放后会自动恢复到基础状态
- 面部表情可以独立于肢体动作进行控制
实际应用场景
骨骼动画和变形动画结合的技术在以下场景中特别有用:
- 游戏角色动画:控制角色的移动、战斗和表情
- 虚拟主播:实时捕捉面部表情和肢体动作
- 动画制作:简化复杂角色动画的制作流程
- 虚拟现实:创建更加生动和交互性强的虚拟角色
这种技术组合可以让角色表现更加丰富和自然,大大提升用户体验。