文章目录
Elasticsearch最新入门教程
Elasticsearch 是一个基于 Apache Lucene 构建的分布式搜索和分析引擎、可扩展数据存储和矢量数据库。它针对生产规模工作负载的速度和相关性进行了优化。使用 Elasticsearch 近乎实时地搜索、索引、存储和分析各种形状和大小的数据。Kibana 是 Elasticsearch 的图形用户界面。它是可视化和分析数据以及管理和监控弹性堆栈的强大工具。
踩坑记录(补):建议大家下载7.6.2版本的 ElasticSearch 和 Kibana,兼容 JDK1.8,并且低版本安装和启动的时候不需要进行配置。博主一开始鼓捣了半天最新版的下载,有很多的坑点,最后数据导入的时候,代码逻辑没有问题但是死活导入失败,后面查阅了一些资料才发现是高版本的 ElasticSearch 和 Kibana 不兼容 JDK1.8 版本。
- Elasticsearch 和 JVM 的版本对应关系:https://www.elastic.co/cn/support/matrix#matrix_jvm
- Spring Boot,Spring Data Elasticsearch 和 Elasticsearch 版本对应关系:https://docs.spring.io/spring-data/elasticsearch/reference/elasticsearch/versions.html
以后遇到那种奇奇怪怪的问题,代码思路是对的,那么请考虑版本问题!!!
1.Elasticsearch安装
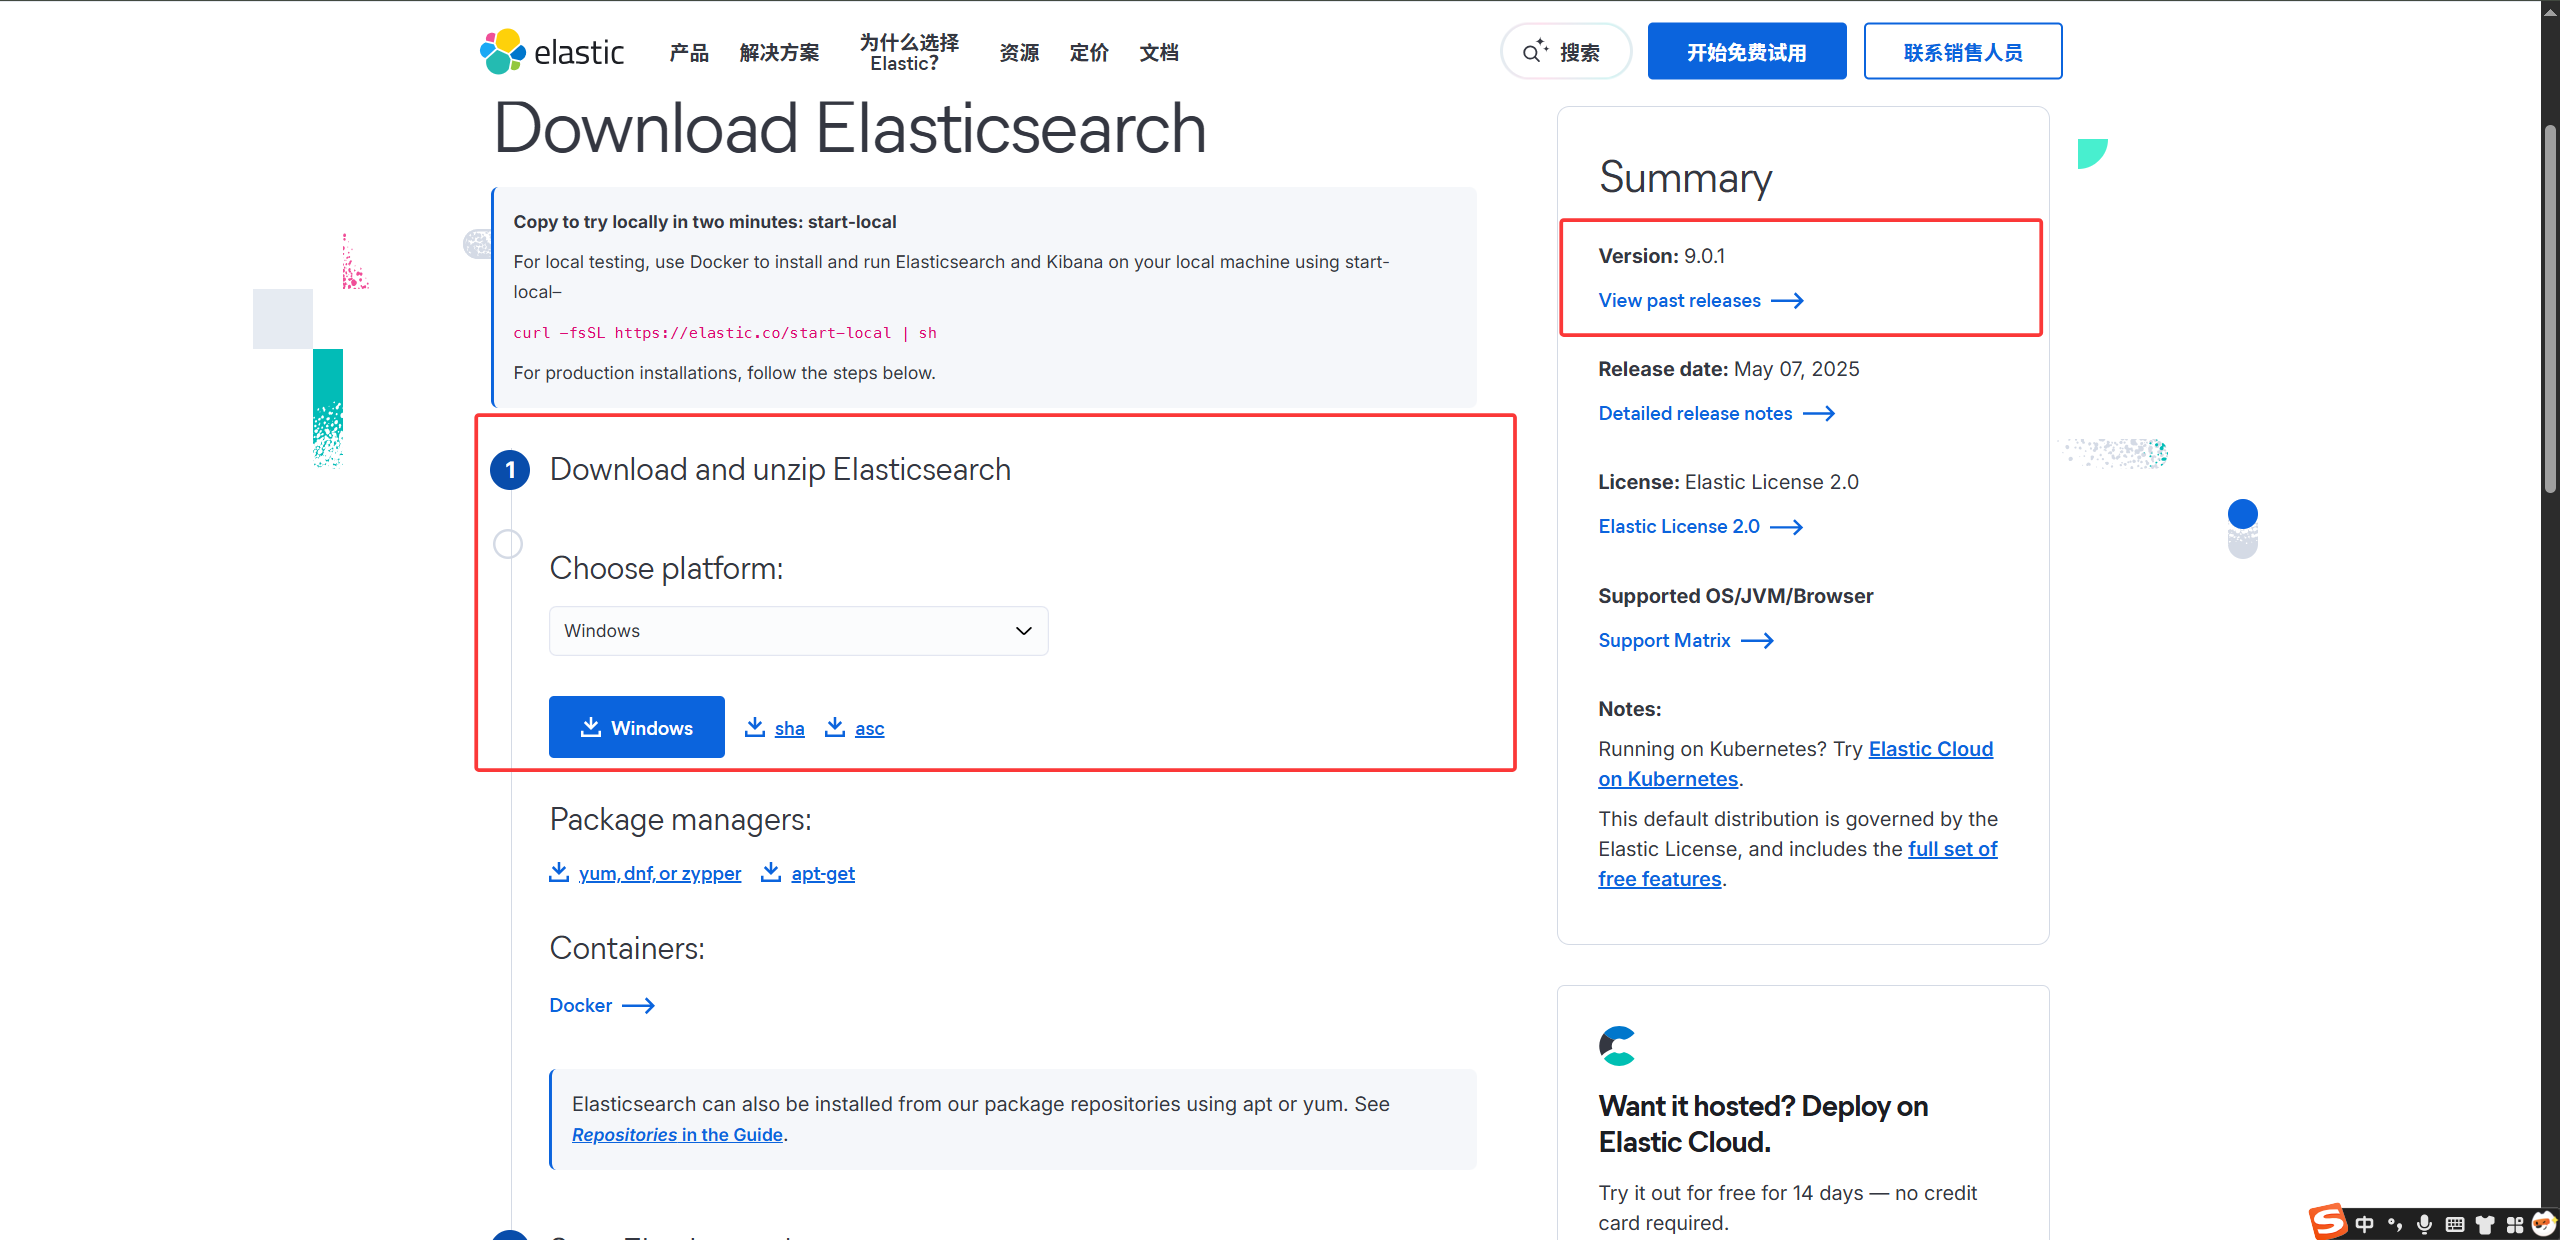
下载 Elasticsearch,并解压。
双击 bin 目录下的
elasticsearch.bat文件启动 Elasticsearch 服务。发现有“started”字样就说明启动成功了。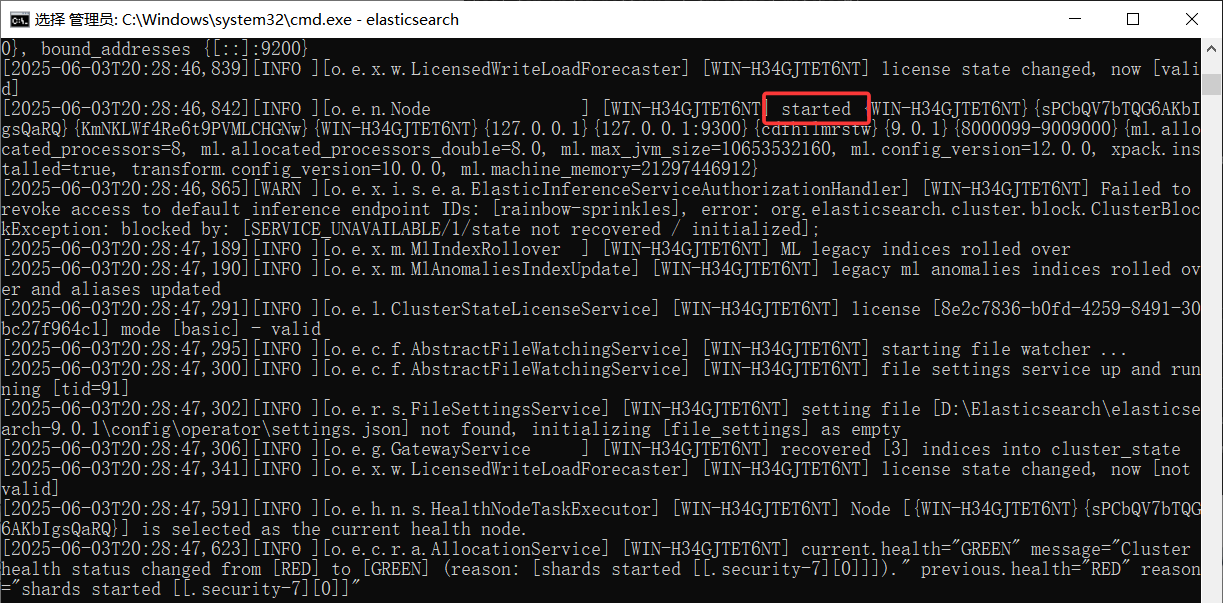
启动完成后访问
localhost:9200,出现 elasticsearch 的信息则表示安装成功。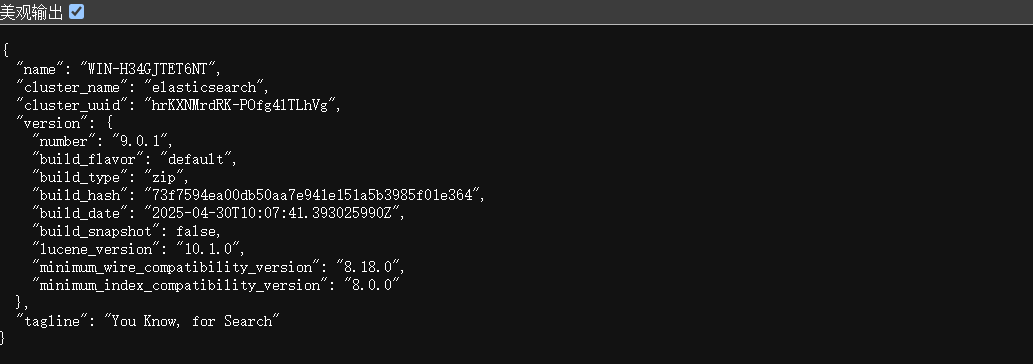
遇到问题:在浏览器输入
localhost:9200后,Elasticsearch 报错:received plaintext http traffic on an https channel, closing connection netty4httpchannel{localaddress=/[0:0:0:0:0:0:0:1]:9200, remoteaddress=/[0:0:0:0:0:0:0:1]:52388}报错原因:Elasticsearch 在 Windows 下开启了安全认证,虽然 started 成功,但访问http://localhost:9200/失败。
解决办法:打开
config/目录下面的elasticsearch.yml配置文件,将下面两处改为false即可。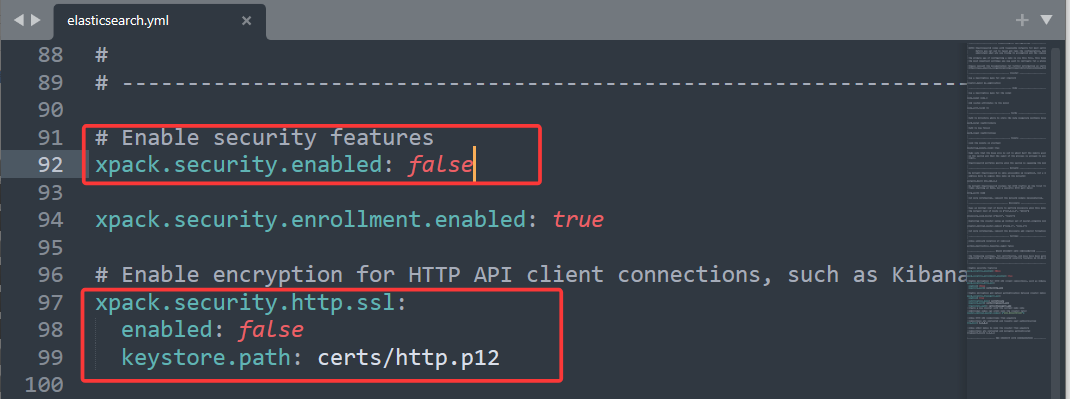
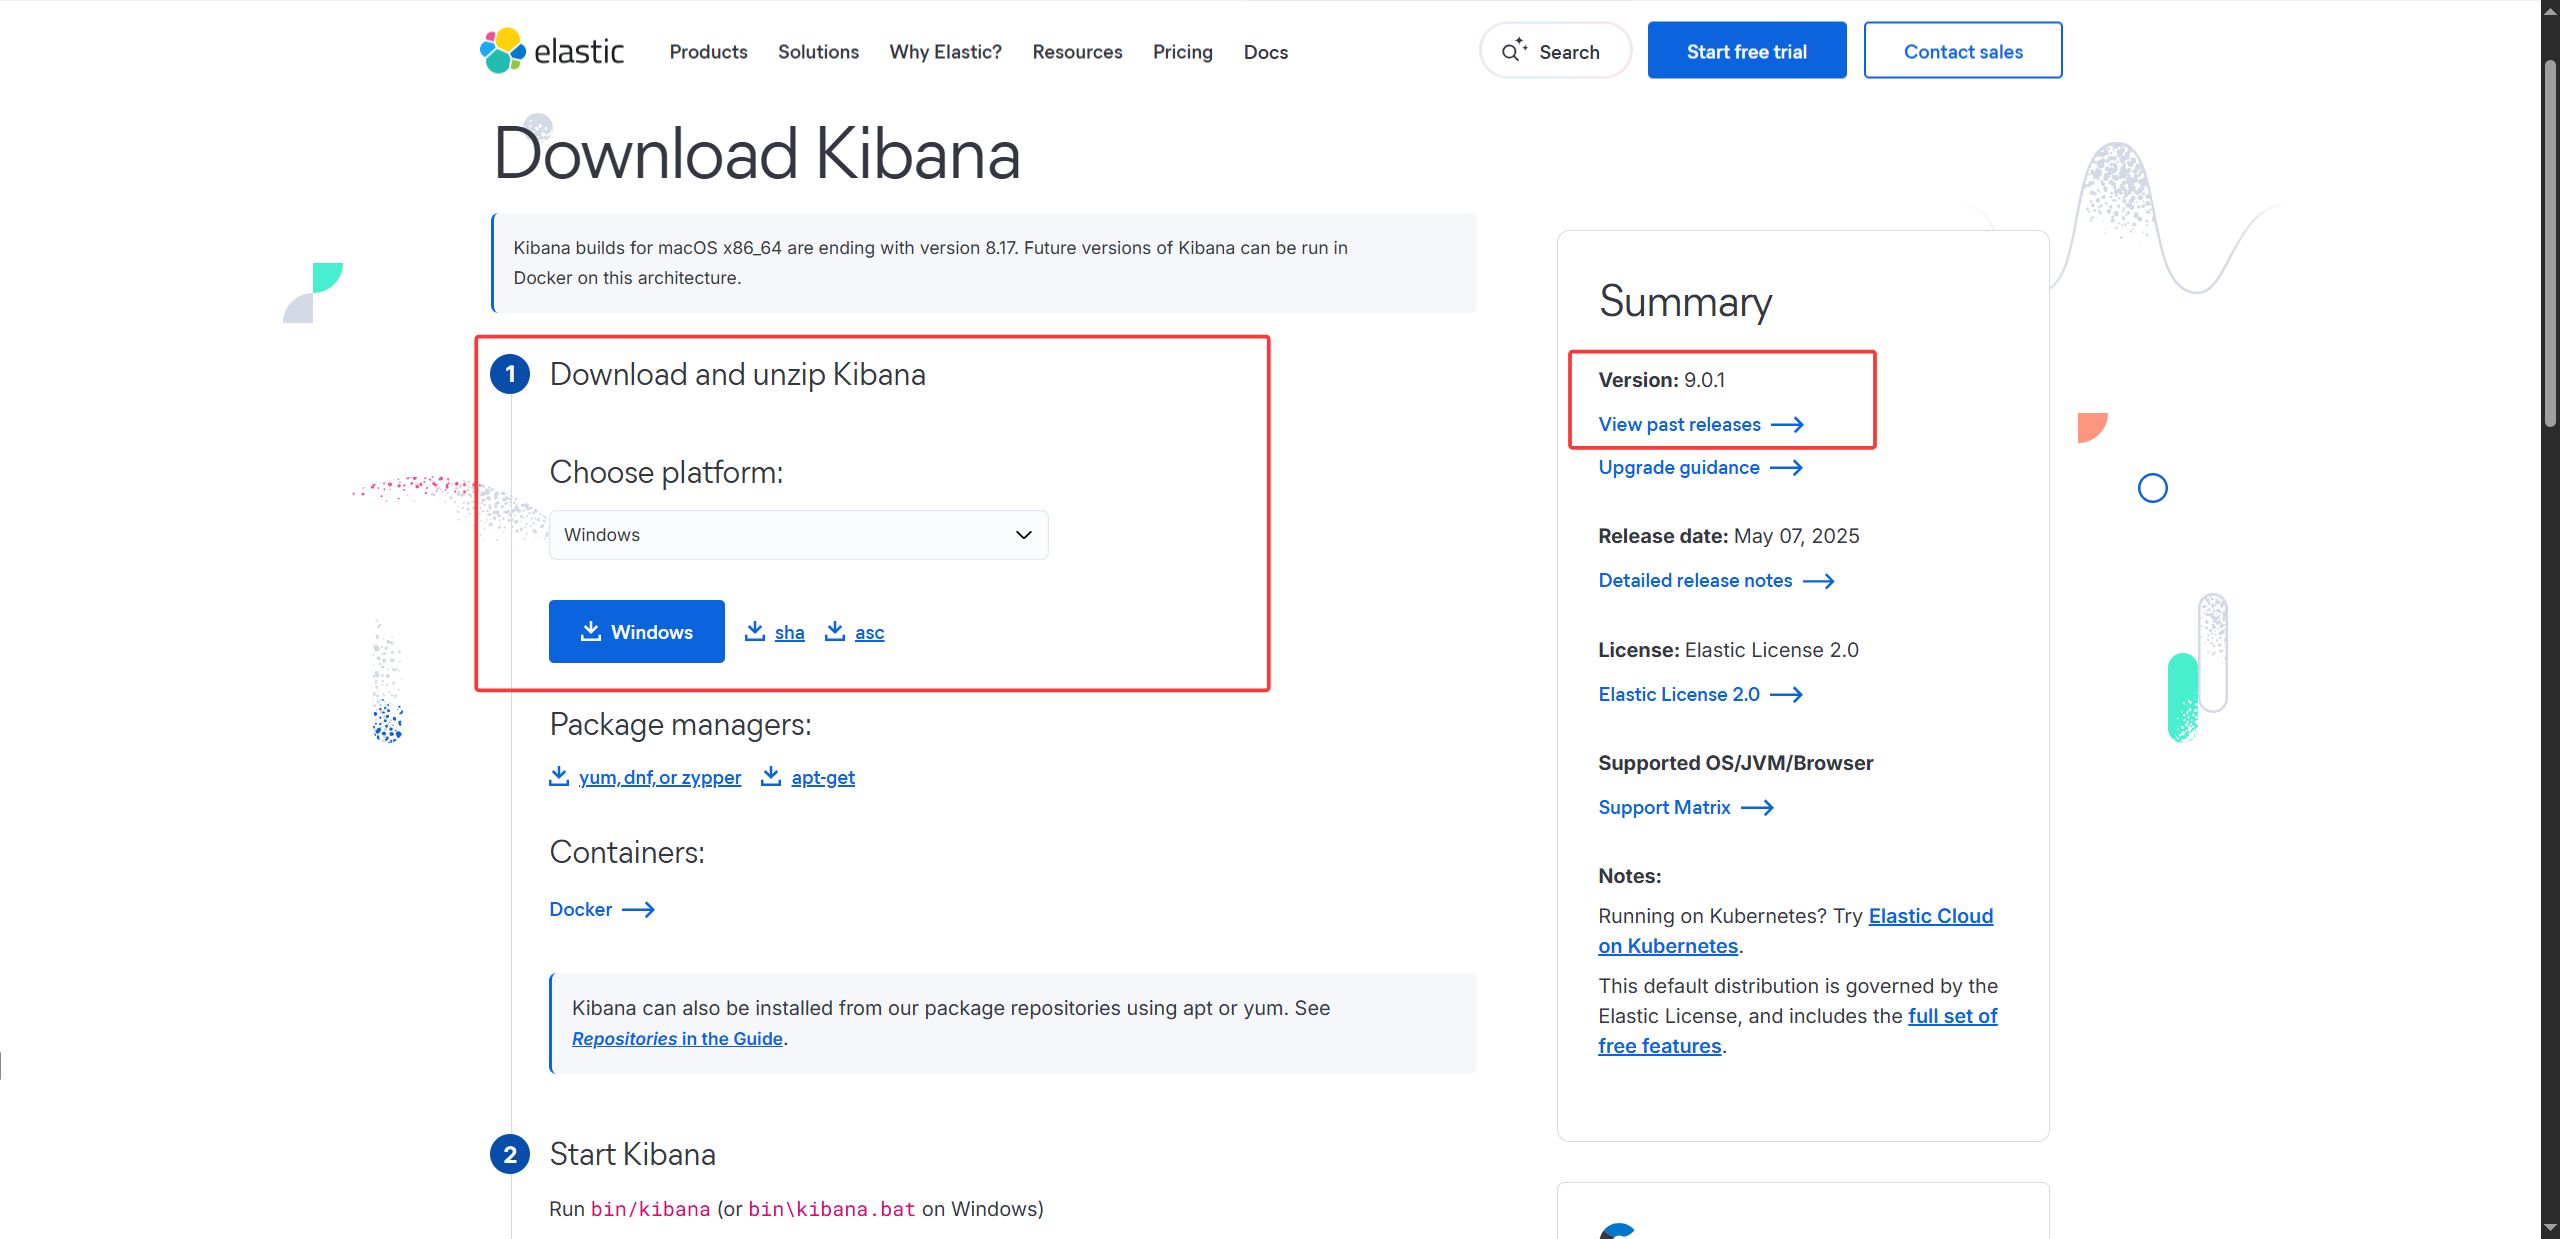
2.Kibana安装
下载 Kibana,并解压。
修改 Kibana 的配置文件(
config/kibaba.yml),将以下内容取消注释。server.port: 5601 server.host: "localhost" server.name: "your-hostname" elasticsearch.hosts: ["http://localhost:9200"] i18n.locale: "zh-CN"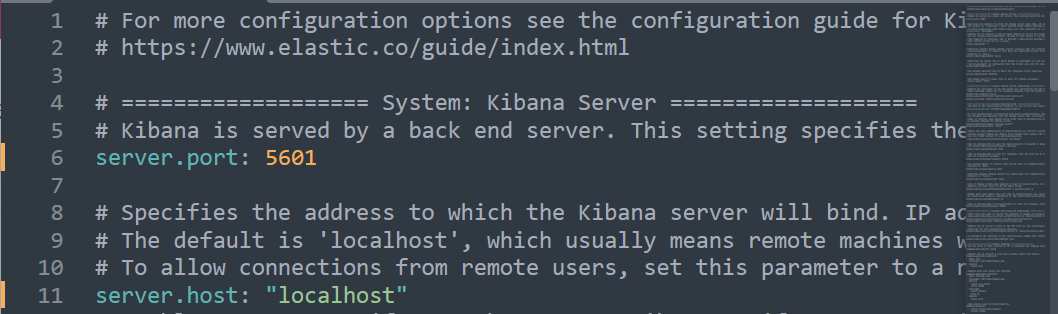
双击 bin 目录下的
kibana.bat文件启动 Kibana。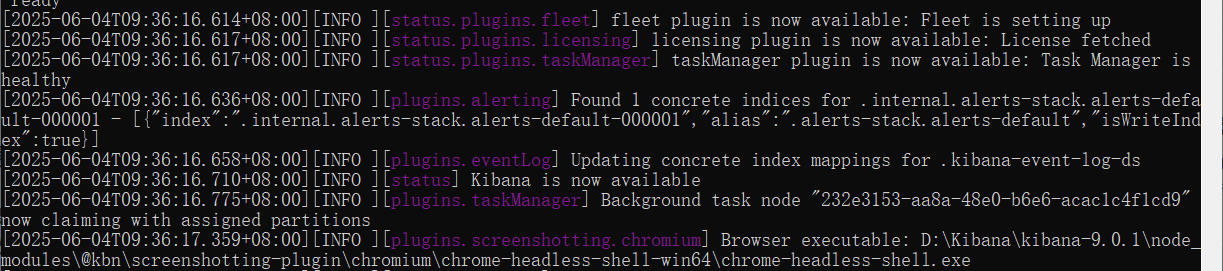
启动完成后访问
localhost:5601,出现图形化界面则表示安装成功。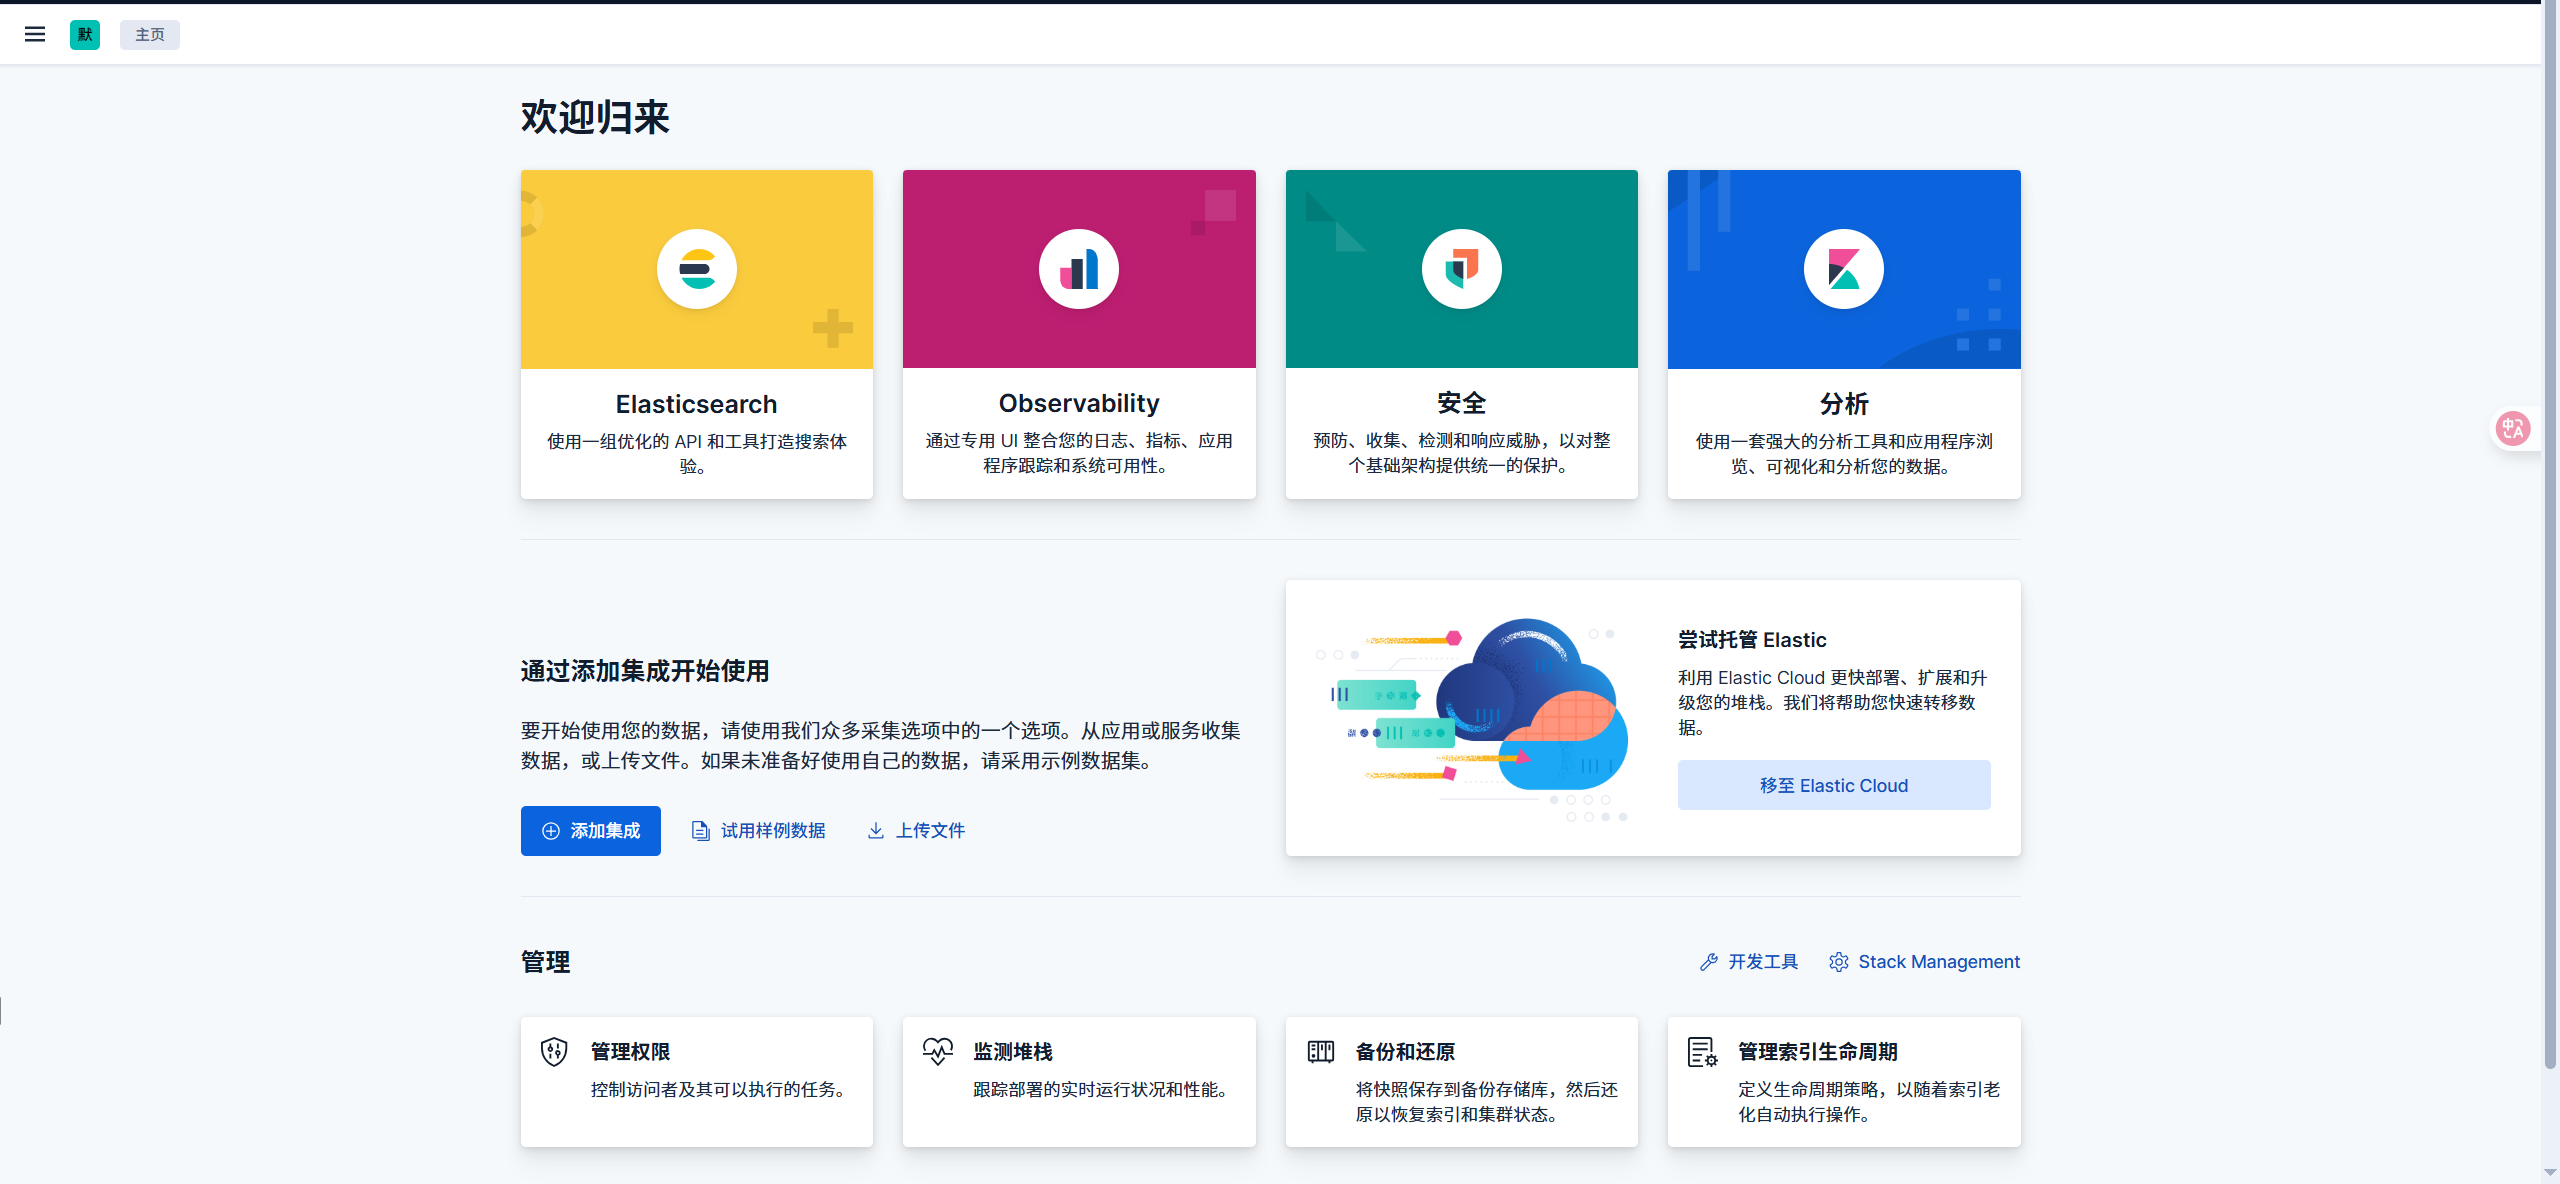
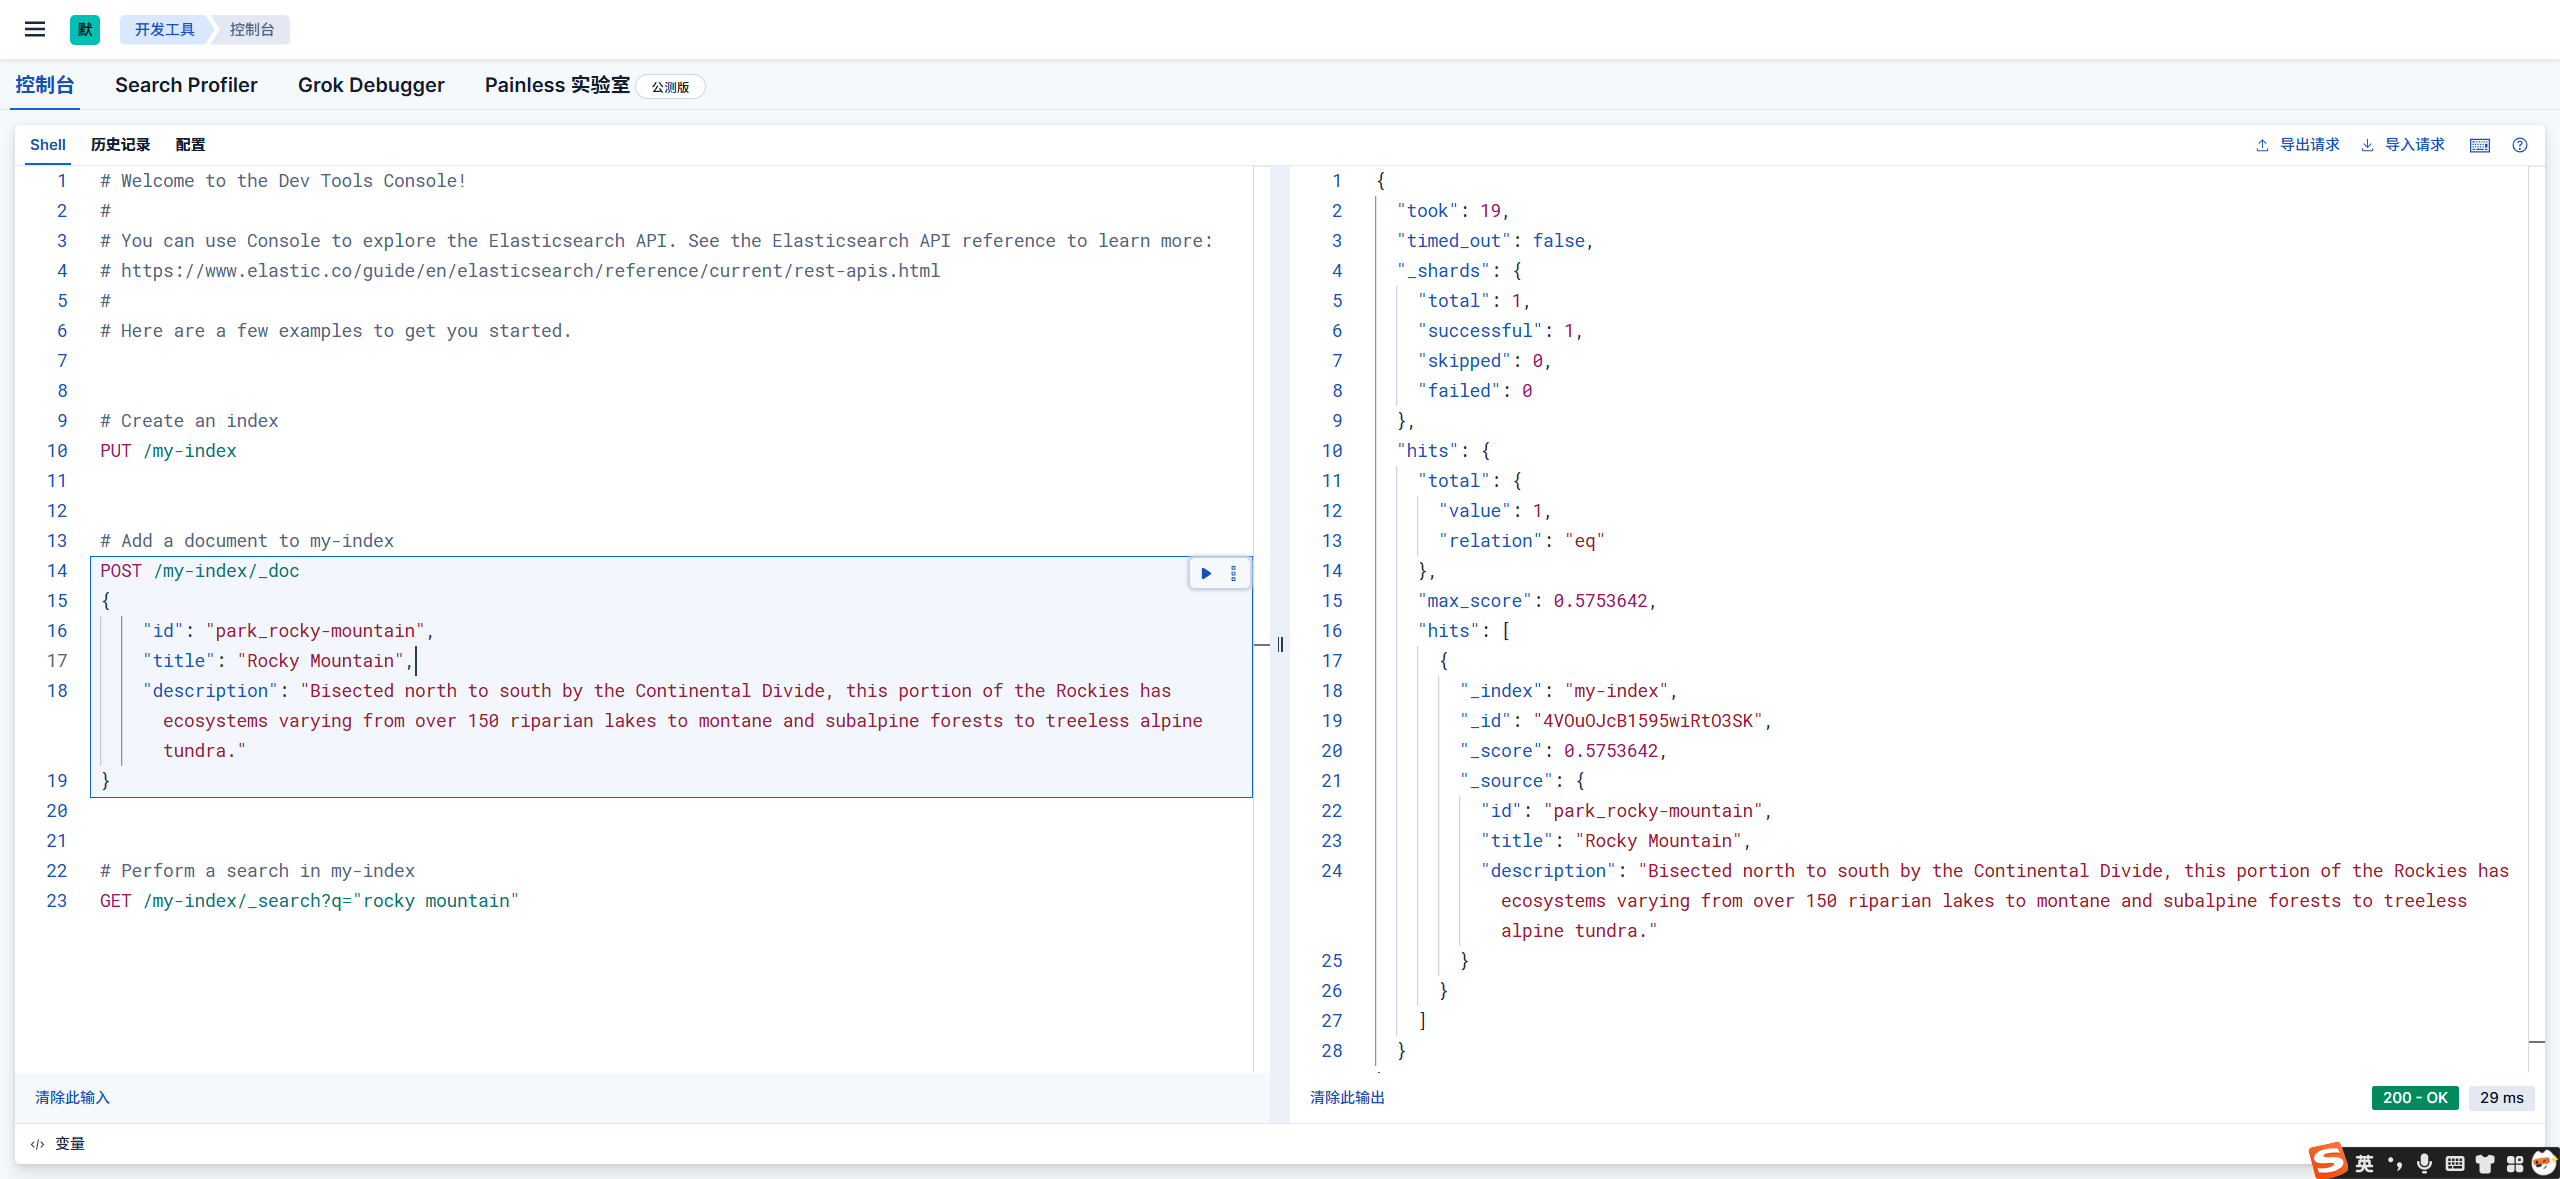
在 Kibana 里面,我们可以在「导航栏」->「Management」->「开发工具」下,写我们的 DSL。
3.Elasticsearch关键概念
Elasticsearch 既然是一个数据引擎,那么和 MySQL 就有一定的关系,如下表所示:
| MySQL | Elasticsearch |
|---|---|
| Database(数据库) | Index(索引) |
| Table(表) | Type(类型) |
| Row(行) | Document(文档) |
| Column(列) | Field(字段) |
| Schema(方案) | Mapping(映射) |
| Index(索引) | Everything Indexed by default(所有字段均被索引) |
| SQL(结构化查询语言) | DSL(查询专用语言) |
向 Elasticsearch 中存储数据,其实就是向 Elasticsearch 中的 index 下面的 type 中存储 JSON 类型的数据。
4.SpringBoot整合Elasticsearch
4.1 导入Elasticsearch数据
拉取下面的项目,然后根据 README 将数据库 elastic 导入到 ElasticSearch 中。
🔗 项目地址:https://gitee.com/FHTT-Tian/elasticsearch-data-initialization.git
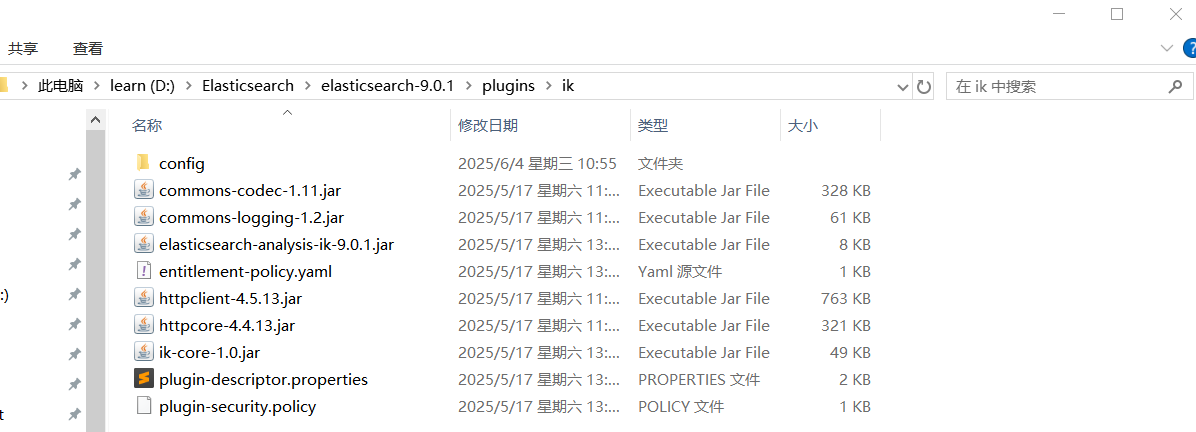
note:需要给 ElasticSearch 配置 ik分词器插件。
下载地址:https://release.infinilabs.com/analysis-ik/stable/
下载后将其解压到 ElasticSearch 的 plugins 目录下。(需要新建一个 ik 文件夹来存放解压后的文件,地址示例:
D:\Elasticsearch\elasticsearch-9.0.1\plugins\ik)
4.2 创建SpringBoot项目

4.3 修改pom.xml文件
<?xml version="1.0" encoding="UTF-8"?>
<project xmlns="http://maven.apache.org/POM/4.0.0" xmlns:xsi="http://www.w3.org/2001/XMLSchema-instance"
         xsi:schemaLocation="http://maven.apache.org/POM/4.0.0 https://maven.apache.org/xsd/maven-4.0.0.xsd">
    <modelVersion>4.0.0</modelVersion>

    <parent>
        <groupId>org.springframework.boot</groupId>
        <artifactId>spring-boot-starter-parent</artifactId>
        <version>2.3.4.RELEASE</version>
        <relativePath />
    </parent>

    <groupId>cn.edu.sgu.www</groupId>
    <artifactId>springboot-elasticsearch</artifactId>
    <version>0.0.1-SNAPSHOT</version>
    <name>springboot-elasticsearch</name>
    <description>Spring Boot整合Elastic search案例项目</description>

    <properties>
        <java.version>1.8</java.version>
    </properties>

    <dependencies>
        <dependency>
            <groupId>org.springframework.boot</groupId>
            <artifactId>spring-boot-starter-web</artifactId>
        </dependency>

        <dependency>
            <groupId>org.springframework.boot</groupId>
            <artifactId>spring-boot-starter-test</artifactId>
            <scope>test</scope>
        </dependency>

        <dependency>
            <groupId>org.projectlombok</groupId>
            <artifactId>lombok</artifactId>
            <version>1.18.22</version>
        </dependency>

        <dependency>
            <groupId>org.springframework.boot</groupId>
            <artifactId>spring-boot-starter-data-elasticsearch</artifactId>
        </dependency>
    </dependencies>

    <build>
        <plugins>
            <plugin>
                <groupId>org.springframework.boot</groupId>
                <artifactId>spring-boot-maven-plugin</artifactId>
            </plugin>
        </plugins>
    </build>
</project>
4.4 创建es实体类
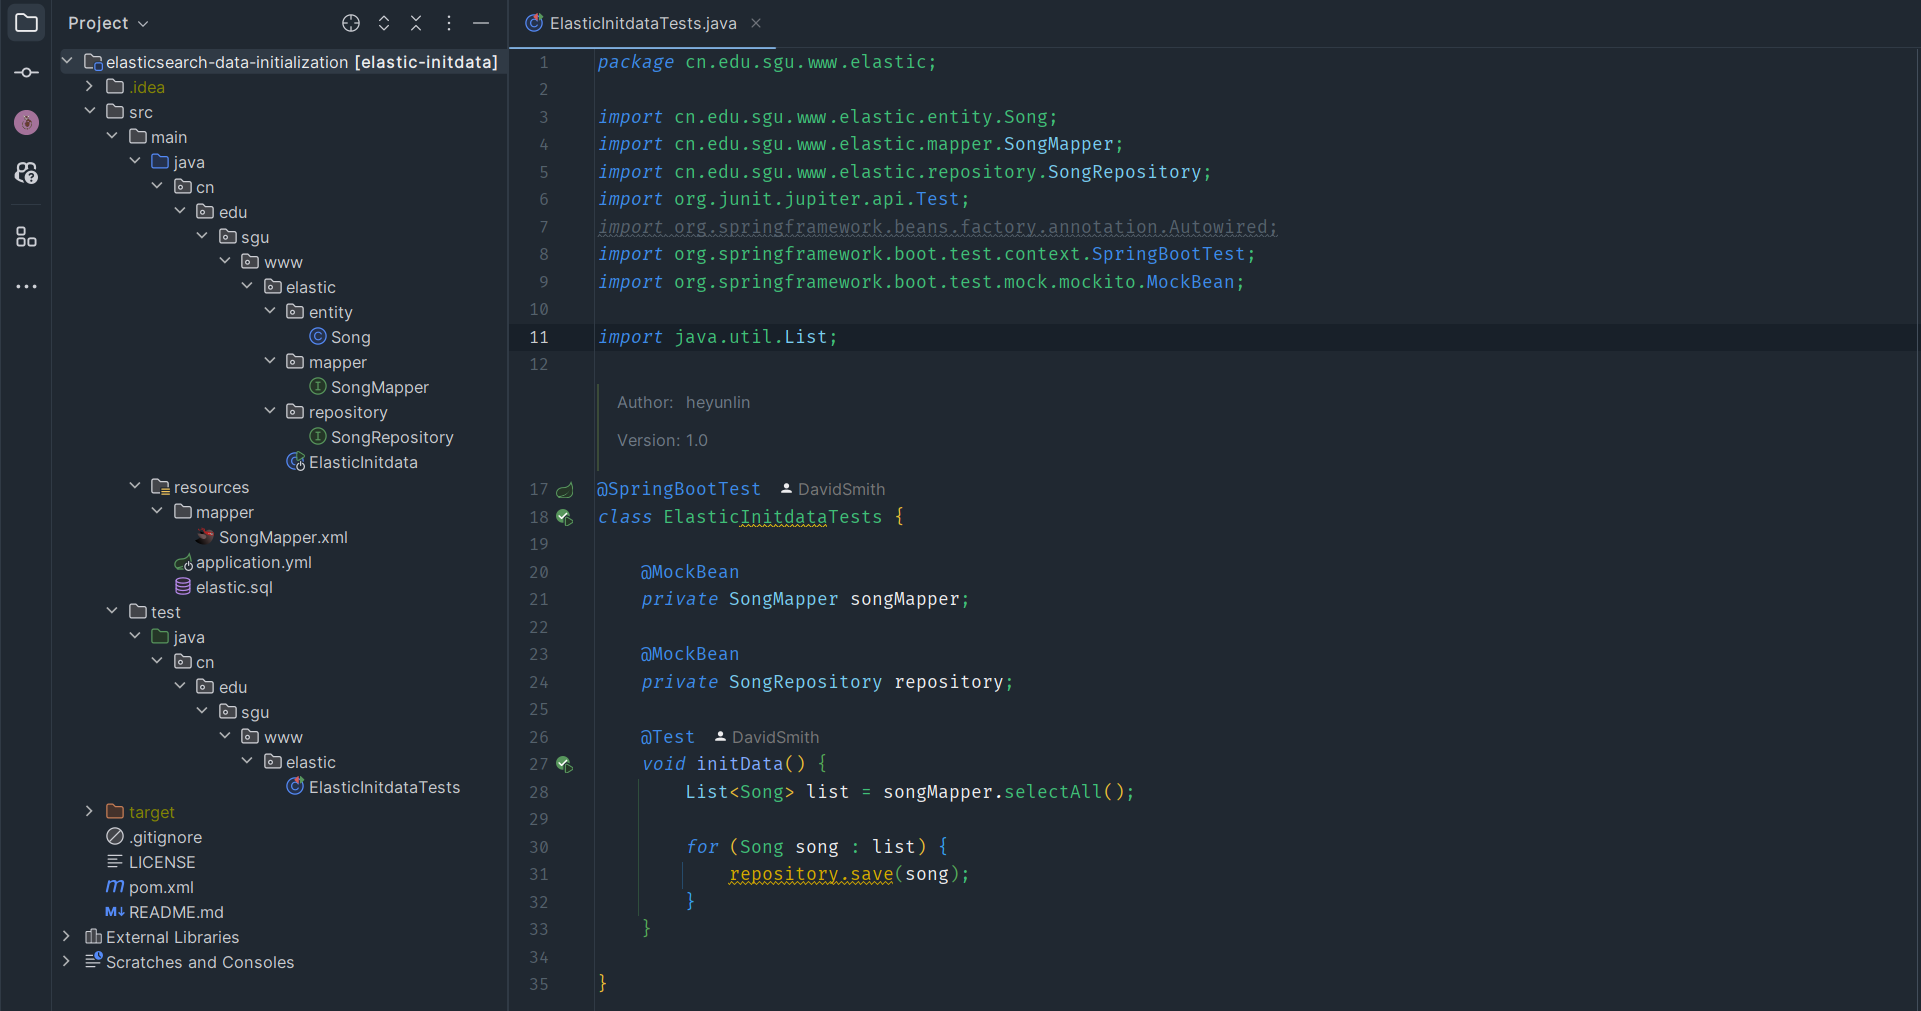
创建 entity 包,然后创建 Song.java。
@Document(indexName = "songs")注解指定索引名为 songs。@Field注解配置字段的类型,只有 text 类型的字段会被分词。@Id注解用于标识实体类中的主键字段。在 Spring Data Elasticsearch 中,它告诉框架哪个字段作为文档的唯一标识符。通常,主键字段用于区分不同的文档,并且该字段值应是唯一的。
package com.example.es.entity;

import lombok.Data;
import org.springframework.data.annotation.Id;
import org.springframework.data.elasticsearch.annotations.Document;
import org.springframework.data.elasticsearch.annotations.Field;
import org.springframework.data.elasticsearch.annotations.FieldType;

import java.io.Serializable;

@Data
@Document(indexName = "songs")
public class Song implements Serializable {
    private static final long serialVersionUID = 42L;

    @Id
    @Field(type= FieldType.Keyword)
    private String id;

    /**
     * 歌曲名
     */
    @Field(type= FieldType.Text, analyzer = "ik_max_word")
    private String name;

    /**
     * 描述信息
     */
    @Field(type= FieldType.Text, analyzer = "ik_max_word")
    private String note;

    /**
     * 歌手
     */
    @Field(type= FieldType.Text, analyzer = "ik_max_word")
    private String singer;
}
4.5 创建es的查询接口
创建 repository 包,然后创建 SongRepository.java 接口。
创建一个接口继承 ElasticsearchRepository<E, T> 接口,该接口的第一个参数类型为实体类型,二个参数类型是实体类的ID属性的数据类型。
package com.example.es.repository;

import com.example.es.entity.Song;
import org.springframework.data.elasticsearch.repository.ElasticsearchRepository;
import org.springframework.stereotype.Repository;

@Repository
public interface SongRepository extends ElasticsearchRepository<Song, String> {
}
5.DSL语句
DSL的格式:index_name指的是Elasticsearch中的索引名,我们歌曲对应的索引名通过
@Document注解指定为了songsGET /index_name/_search {json请求体数据}
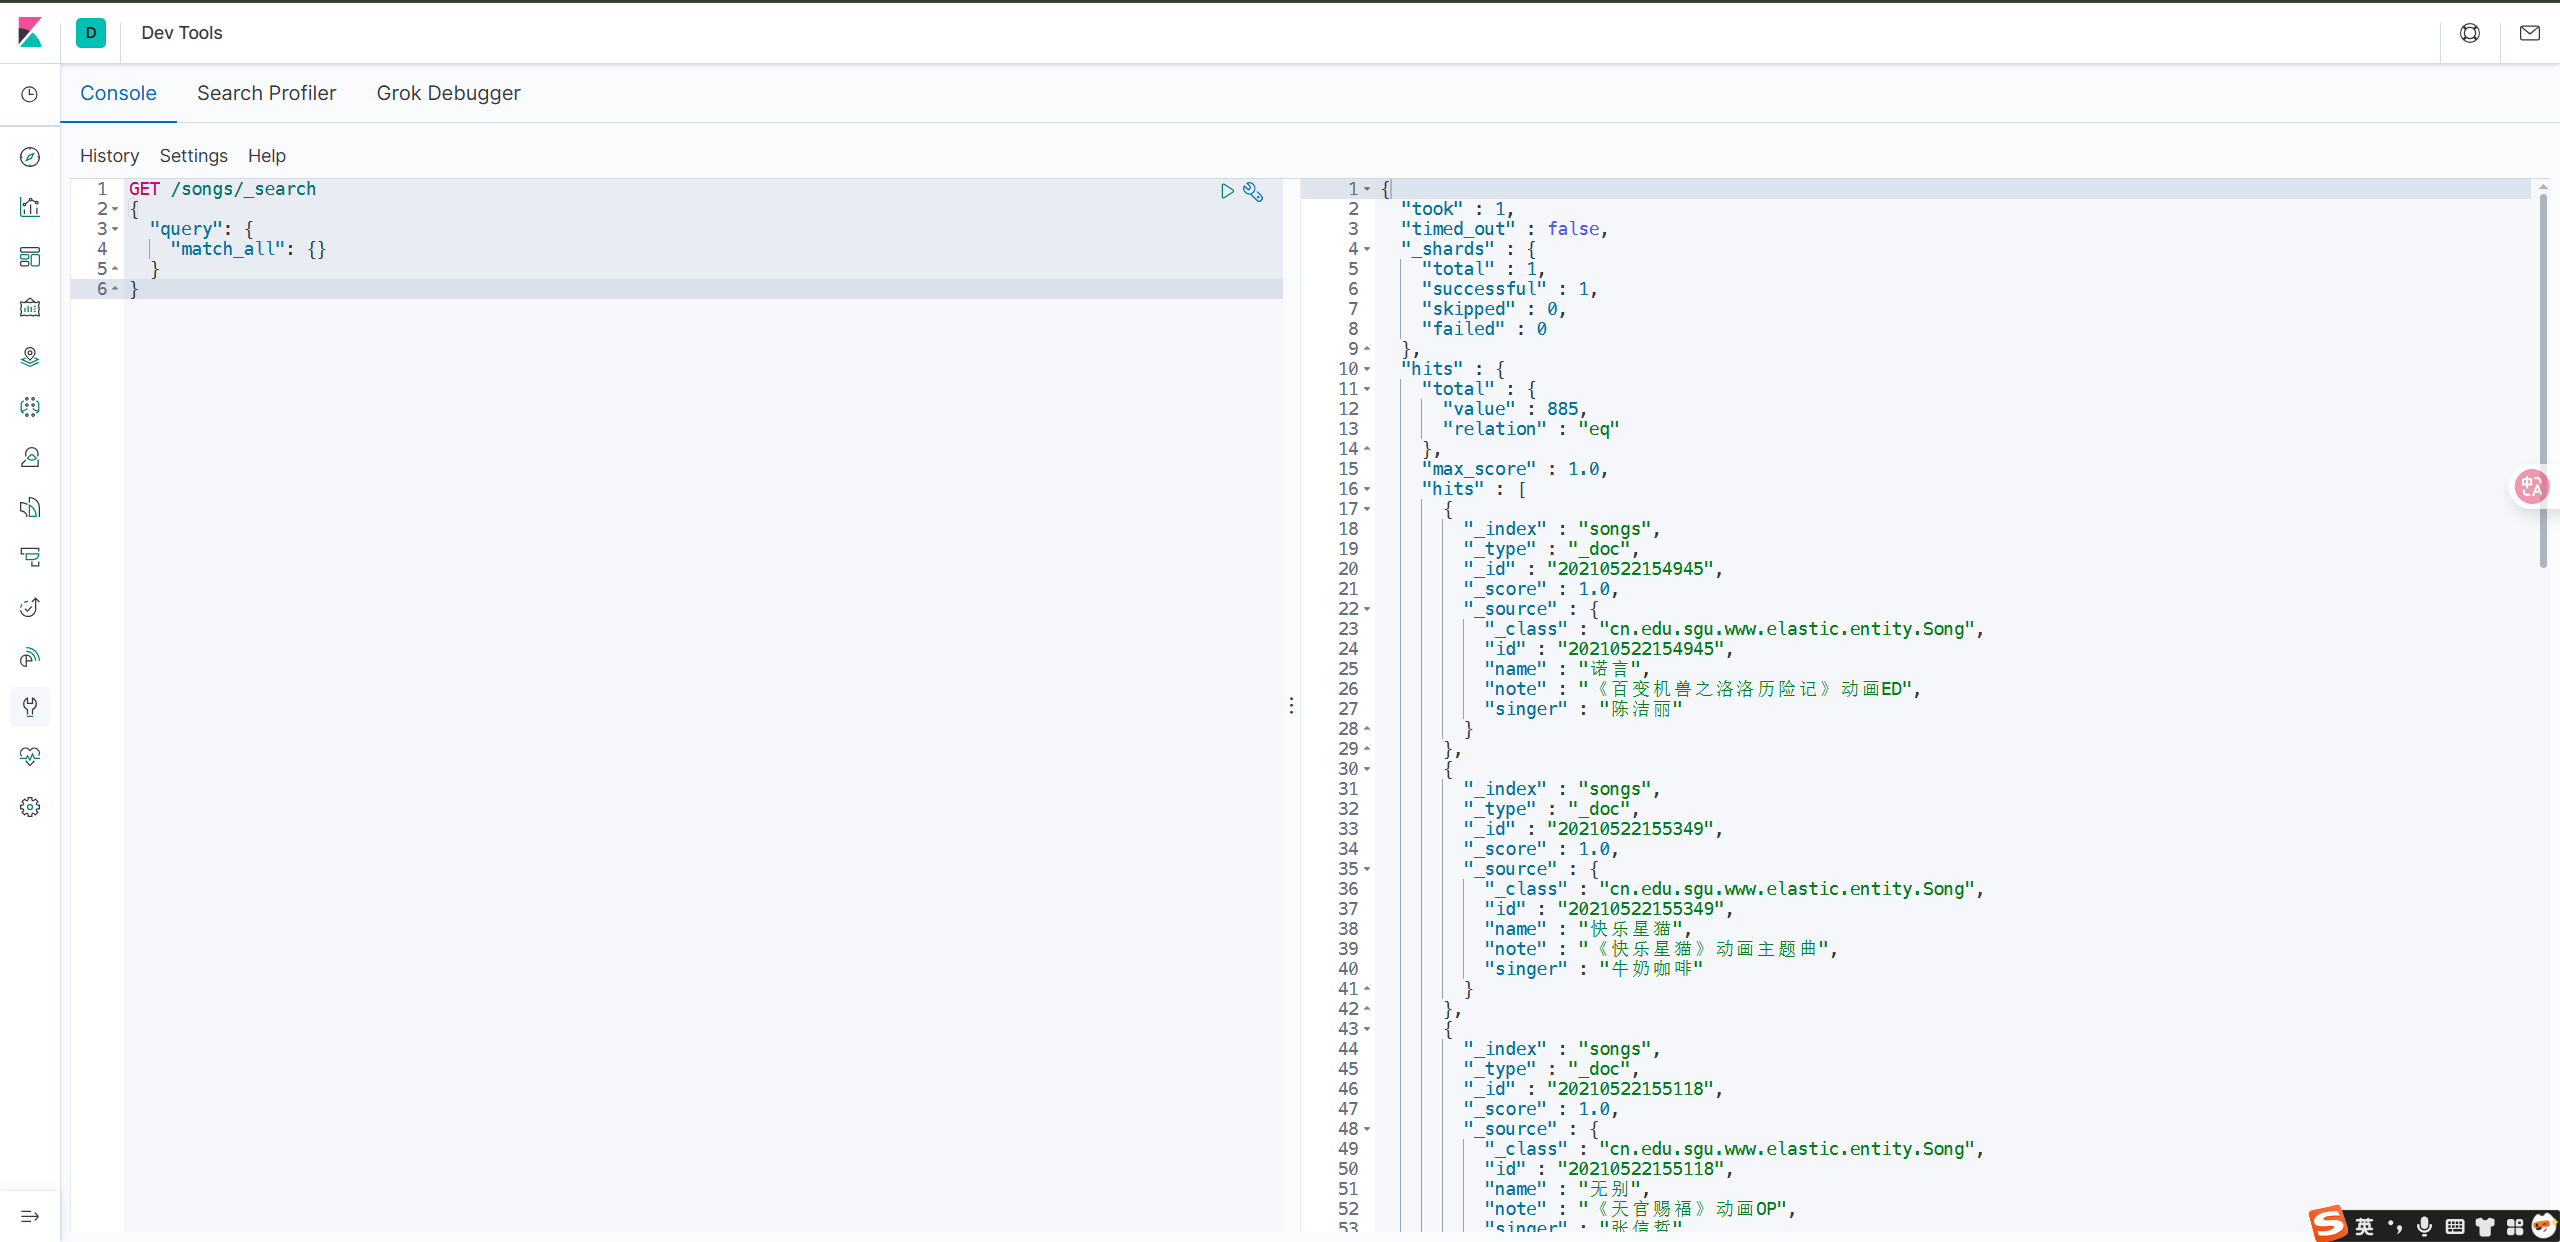
5.1 无条件查询
GET /songs/_search
{
  "query": {
    "match_all": {}
  }
}
无条件查询,默认返回10条数据。hits里是查询结果信息,hits.total.value表示符合查询条件的总记录数,hits.hits表示的是返回的数据,_source里是具体的数据。
5.2 指定返回的数据条数
通过 size 指定需要返回的结果数。
GET /songs/_search
{
  "query": {
    "match_all": {}
  },
  "size": 20
}
5.3 指定查询字段
_source是一个数组,指定需要返回哪些字段,设置为false则不会返回数据。
GET /songs/_search
{
  "query": {
    "match_all": {}
  },
  "size": 5,
  "_source": ["name", "singer", "note"]
}
5.4 分页查询
通过from+size实现分页查询,下面查询了第6-10条记录,相当于mysql中的limit 5, 5(和mysql类似,from默认为0)
GET /songs/_search
{
  "query": {
    "match_all": {}
  },
  "from": 5,
  "size": 5
}
5.5 查询指定ID的数据
GET /songs/_doc/20210522155349
5.6 删除索引
DELETE /songs
5.7 条件查询
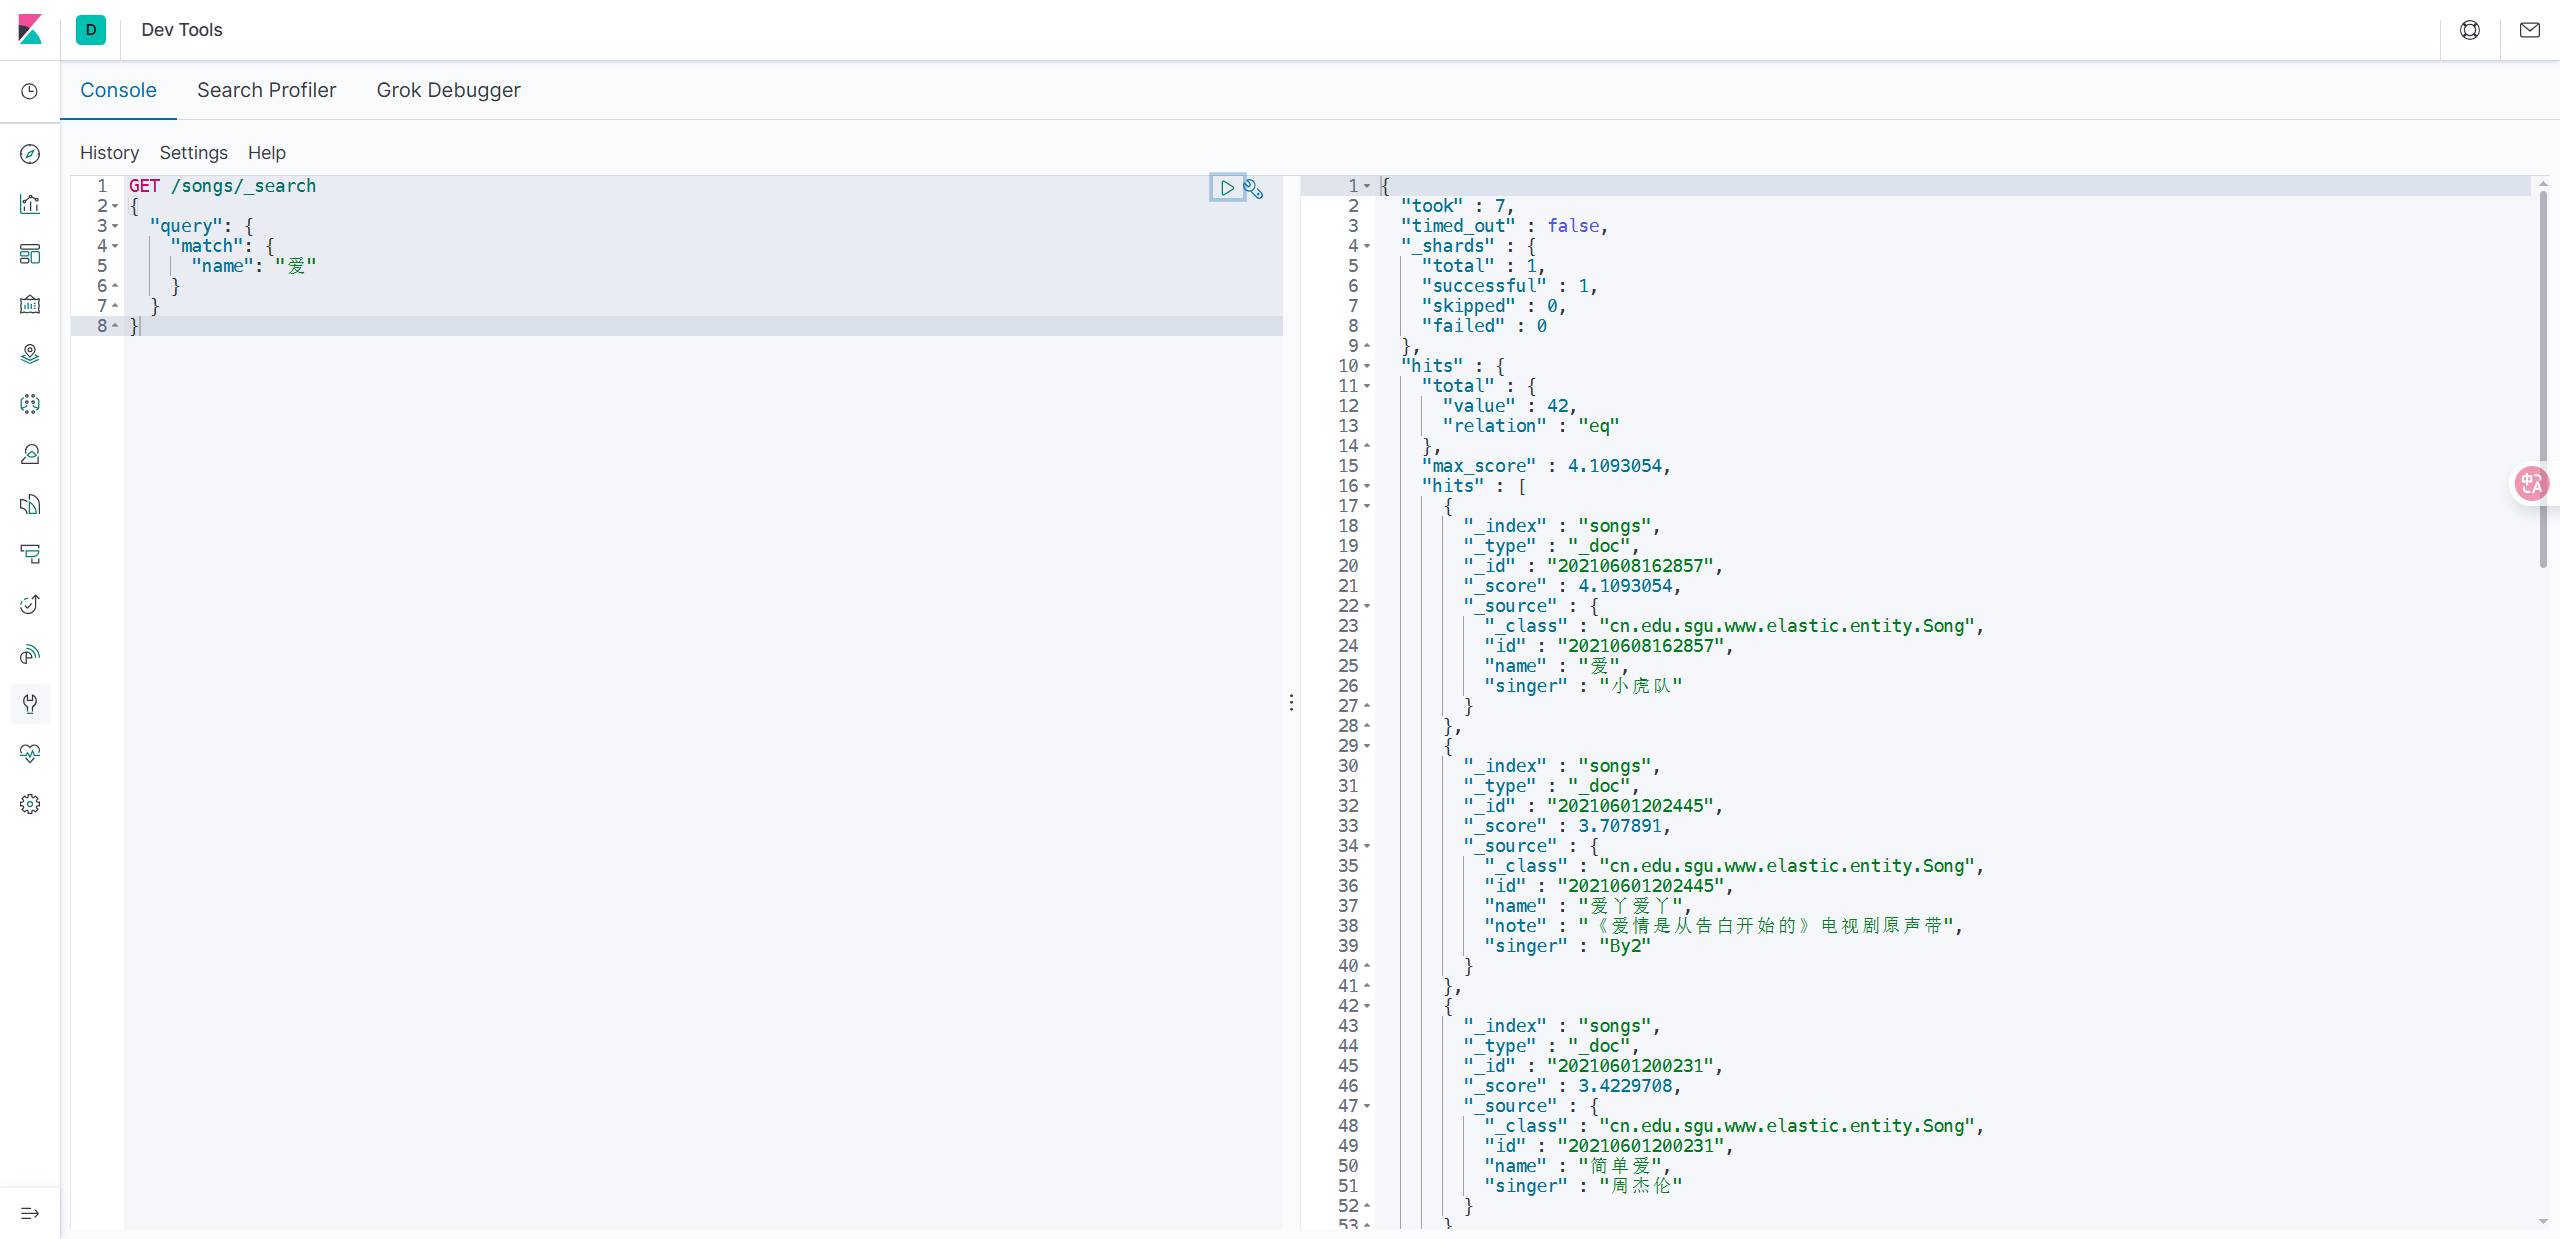
以下是查询歌曲名中包含“爱”字的歌曲,不指定返回的结果数则默认返回前10条。
GET /songs/_search
{
  "query": {
    "match": {
      "name": "爱"
    }
  }
}
🤗🤗🤗