前言:
3 月份买的腾讯云的这台 VPS,刚发现现在退款,只能返回 0 元。测试应用已经迁移到JD,清除内容太麻烦,重装更简单。
因为配合政策,国内的云主机都有两个 IP 地址,一个内网,一个外网,中心有防火墙来监控数据安全。各个云供应商,也会有自己的预安装的服务,用来监控主机以配合ZF的监控制度。
环境:
OS:Ubuntu 24
主机:公/私网各一个IP
防火墙:云提供
FQDN: bjt.daven.us
配置过程:
1.更换 apt 源
# 备份当前的
rm /etc/apt/sources.list.d/ubuntu.sources

# 替换

tee /etc/apt/sources.list.d/ubuntu.sources > /dev/null <<EOF
Types: deb
URIs: https://mirrors.tuna.tsinghua.edu.cn/ubuntu/
Suites: noble noble-updates noble-backports
Components: main restricted universe multiverse
Signed-By: /usr/share/keyrings/ubuntu-archive-keyring.gpg

Types: deb
URIs: https://mirrors.tuna.tsinghua.edu.cn/ubuntu/
Suites: noble-security
Components: main restricted universe multiverse
Signed-By: /usr/share/keyrings/ubuntu-archive-keyring.gpg
EOF

# 清缓存
rm -rf /var/lib/apt/lists/*
rm -rf /var/lib/swcatalog/yaml/*

# 更新列表
apt update
2.清理无用的预安装软件
apt remove --purge qcloud-*
rm -rf /usr/local/qcloud/
apt remove --purge modemmanager
apt remove --purge udisks2
apt remove --purge policykit-1
apt remove --purge multipath-tools
systemctl disable networkd-dispatcher
apt remove --purge networkd-dispatcher
systemctl disable unattended-upgrades
apt remove --purge unattended-upgrades
systemctl disable fwupd.service
systemctl disable packagekit.service
systemctl disable polkit.service
systemctl disable upower.service
apt remove --purge fwupd packagekit policykit-1 upower
sudo apt autoremove
sudo apt autoclean
腾讯云部分
sudo rm -f /etc/cron.d/yunjing
sudo rm -f /var/lib/apt/lists/mirrors.tencentyun.com_*
sudo rm -f /var/lib/swcatalog/yaml/mirrors.tencentyun.com_*
3.添加主机名
vi /etc/hostnamebjt
vi /etc/hosts127.0.1.1 bjt.daven.us bjt
127.0.0.1 localhost bjt::1 ip6-localhost ip6-loopback
fe00::0 ip6-localnet
ff00::0 ip6-mcastprefix
ff02::1 ip6-allnodes
ff02::2 ip6-allrouters
ff02::3 ip6-allhosts
4.升级软件包,OS
apt update
apt upgrade
apt purge
apt install update-manager-core
sudo do-release-upgrade5.SSH 配置
vi /etc/ssh/sshd_configPort 9922
Protocol 2
AddressFamily any
HostKey /etc/ssh/ssh_host_rsa_key
HostKey /etc/ssh/ssh_host_ecdsa_key
HostKey /etc/ssh/ssh_host_ed25519_key
SyslogFacility AUTH
LogLevel INFO
PermitRootLogin yes
PubkeyAuthentication yes
AuthorizedKeysFile .ssh/authorized_keys
PasswordAuthentication no
PermitEmptyPasswords no
ChallengeResponseAuthentication no
UsePAM yes
X11Forwarding no
PrintMotd no
ClientAliveInterval 300
ClientAliveCountMax 2
MaxAuthTries 3
MaxSessions 3
PermitUserEnvironment no
StrictModes yes
IgnoreRhosts yes
HostbasedAuthentication no
GSSAPIAuthentication yes
GSSAPICleanupCredentials yes
AcceptEnv LANG LC_*
Subsystem sftp /usr/lib/openssh/sftp-server
systemctl daemon-reload
systemctl restart ssh
6. 替换主机密钥 Host Keys
rm /etc/ssh/ssh_host_*_key*

ssh-keygen -t rsa -b 4096 -f /etc/ssh/ssh_host_rsa_key
ssh-keygen -t ecdsa -b 521 -f /etc/ssh/ssh_host_ecdsa_key
ssh-keygen -t ed25519 -f /etc/ssh/ssh_host_ed25519_key
ssh-keygen -t dsa -b 1024 -f /etc/ssh/ssh_host_dsa_key

ll /etc/ssh/
7.设置主机时区
timedatectl set-timezone Asia/Shanghai重启主机,注意 SSH: 22 -> 9922
8. ACMC 申请 SSL
1) 安装 nignx
apt install nginx git uuid-runtime2) ACMC 获取 SSL
git clone https://gitee.com/neilpang/acme.sh.git
cd acme.sh
source ~/.bashrc
~/.acme.sh/acme.sh --register-account -m dave@daven.us
~/.acme.sh/acme.sh --set-default-ca --server letsencrypt
# 已经存在
#~/.acme.sh/acme.sh --renew -d bjt.daven.us --yes-I-know-dns-manual-mode-enough-go-ahead-please
# 新域名
~/.acme.sh/acme.sh --issue -d bjt.daven.us --dns --yes-I-know-dns-manual-mode-enough-go-ahead-please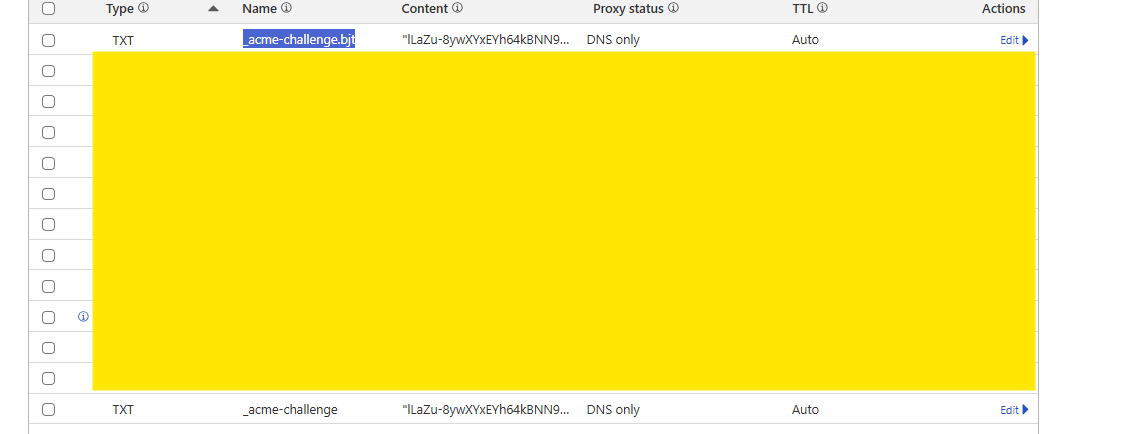
修改 TXT 记录,再运行上面命令 并添加 --renew
~/.acme.sh/acme.sh --issue -d bjt.daven.us --dns --yes-I-know-dns-manual-mode-enough-go-ahead-please --renew9.配置 nginx 来使用 SSL
vi /etc/nginx/sites-available/bjt.daven.usserver {
listen 7033 ssl http2;
listen [::]:7033 ssl http2;
server_name bjt.daven.us;# 更新为acme.sh安装的证书路径
ssl_certificate /etc/letsencrypt/cert/bjt.daven.us/fullchain.pem;
ssl_certificate_key /etc/letsencrypt/cert/bjt.daven.us/privkey.pem;# 添加SSL安全配置
ssl_protocols TLSv1.2 TLSv1.3;
ssl_ciphers ECDHE-RSA-AES128-GCM-SHA256:ECDHE-RSA-AES256-GCM-SHA384;
ssl_prefer_server_ciphers off;
ssl_session_cache shared:SSL:10m;
ssl_session_timeout 10m;location /ray {
proxy_redirect off;
proxy_pass http://127.0.0.1:10000;
proxy_http_version 1.1;
proxy_set_header Upgrade $http_upgrade;
proxy_set_header Connection "upgrade";
proxy_set_header Host $host;
proxy_set_header X-Real-IP $remote_addr;
proxy_set_header X-Forwarded-For $proxy_add_x_forwarded_for;
}
}# 可选:如果需要HTTP重定向到HTTPS
#server {
# listen 80;
# listen [::]:80;
# server_name bjt.daven.us;
# return 301 https://$host:6033$request_uri;
#}
10. ufw 配置
systemctl enable ufw
sudo ufw enable
ufw allow 9922/tcp
ufw allow 9017/udp
ufw allow 443/tcp
ufw allow 80/tcp
ufw allow 9090/tcp
ufw allow 7033/tcp
vi /etc/default/ufw# 找到,并把 DROP 改为 ACCEPT
DEFAULT_FORWARD_POLICY="ACCEPT"sudo ufw reload