本章我们来讲解一下 Vue 3 中组件的部分相关的知识,剩下的内容我们将在下一章进行讲解。
目录
组件化开发&根组件
组件化开发
界面可以拆分为多个独立组件,每个组件包含自身结构、样式和交互逻辑。这种模块化设计不仅便于维护,还能提高代码复用率,从而显著的提升开发效率。
以我之前大学时候随手写的一个项目为例,因为当时我没写接口所以说图片都是网上的:
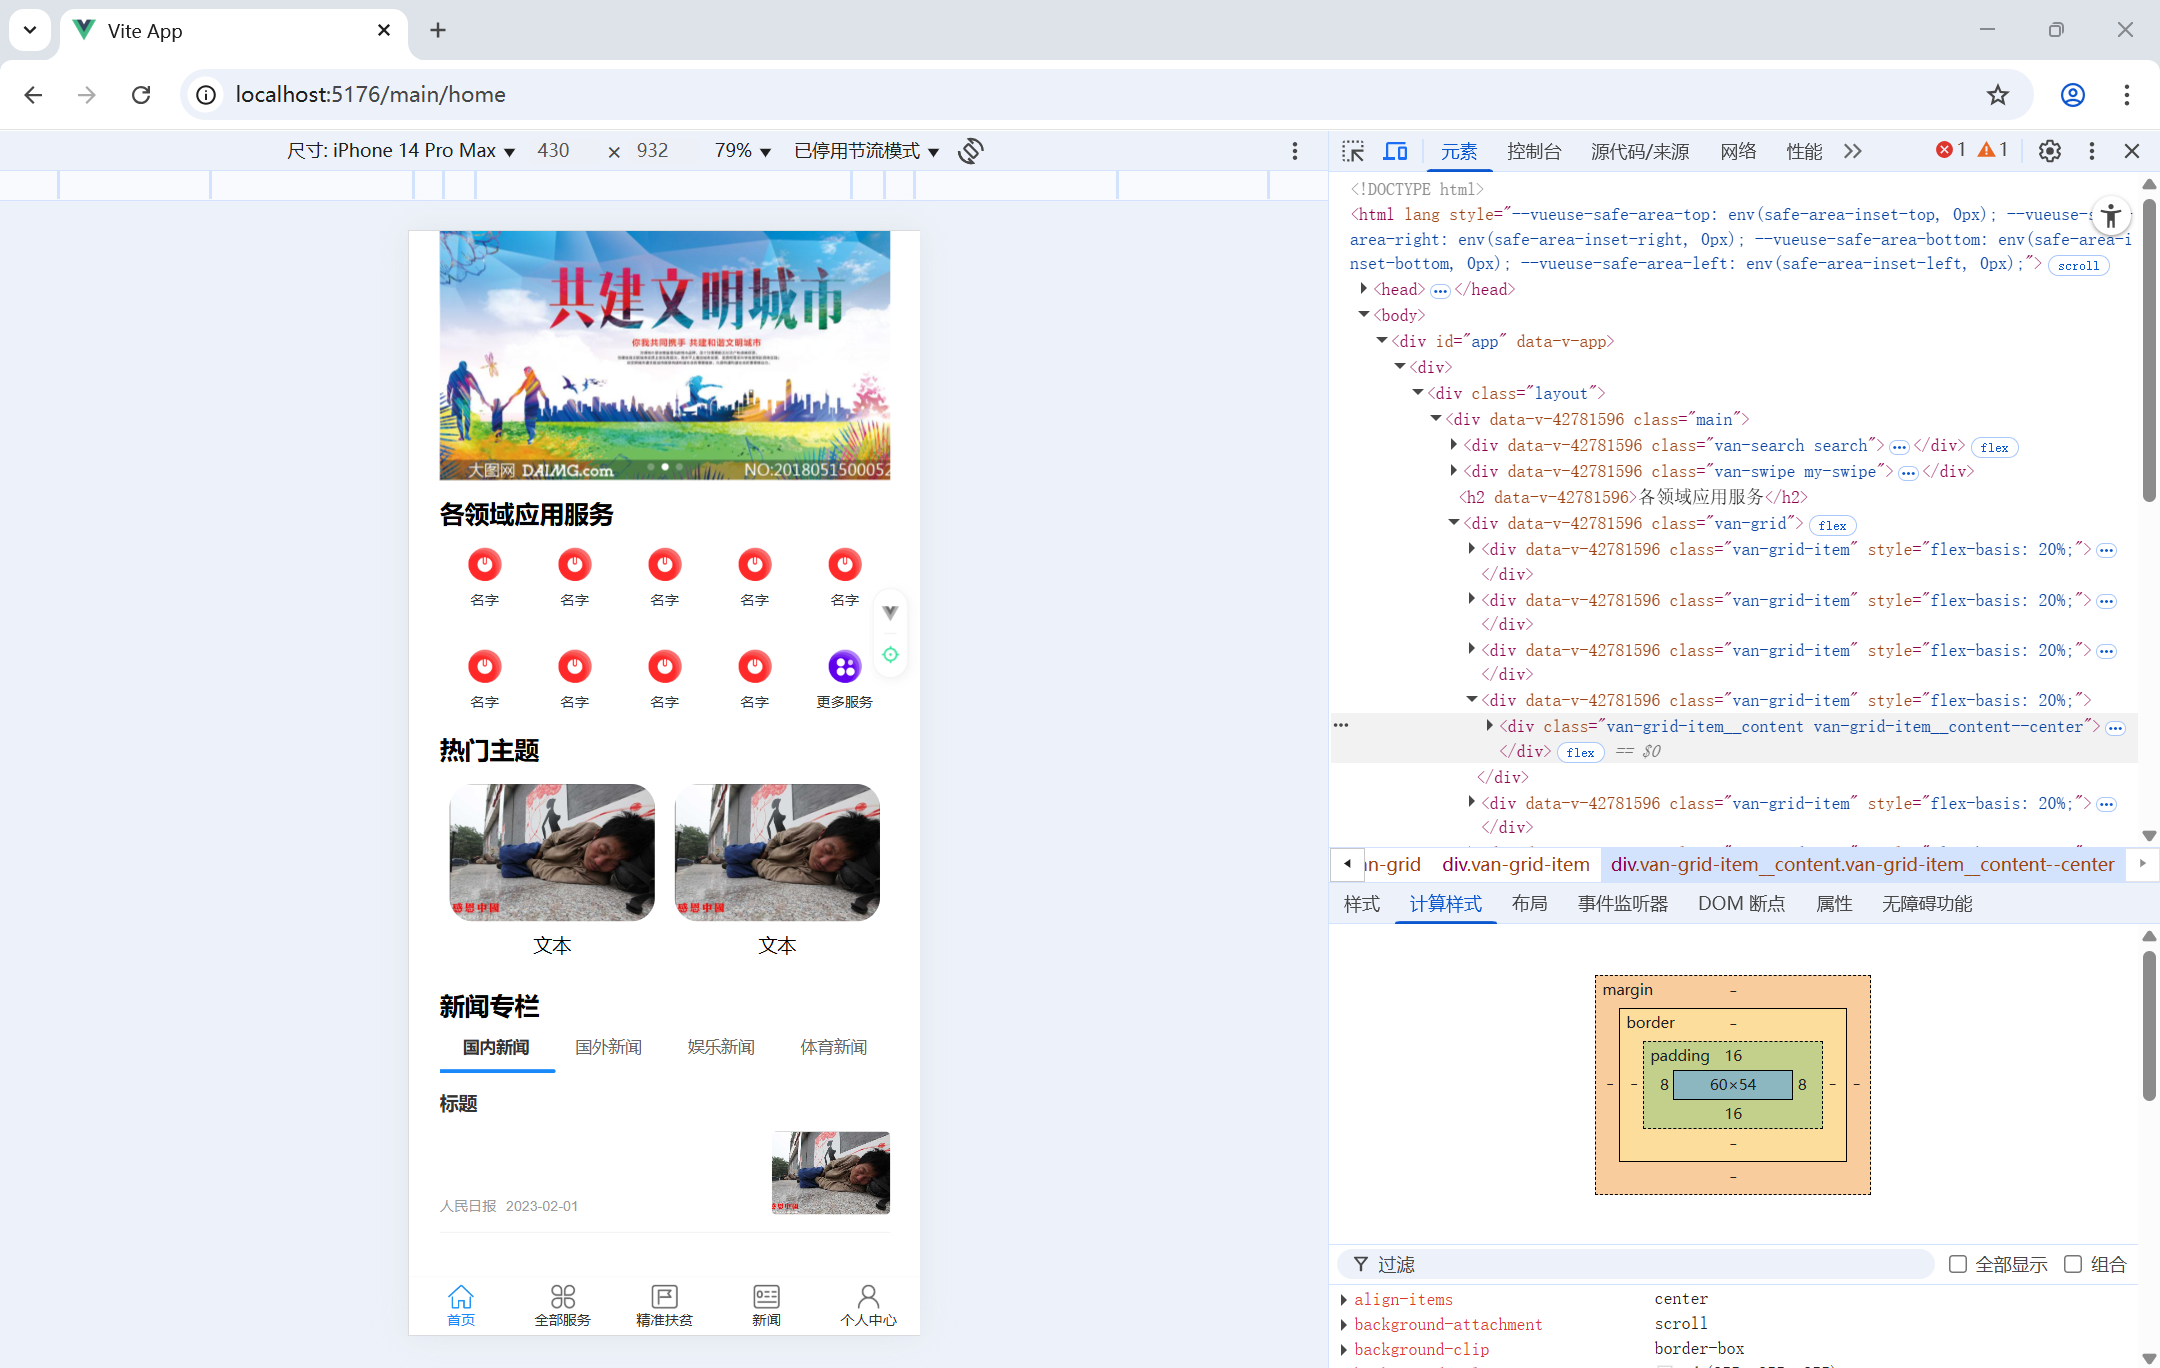
我们可以把搜索框、轮播图、底部导航栏等写成组件然后调用这些组件,当然这里我用的Vant 4这个轻量级的移动端组件库。
根组件
App.vue 是整个应用的最顶层组件,负责承载所有子组件。
组件的组成部分
template 结构 不再要求唯一根组件
script js/ts逻辑 推荐使用组合式API
style样式 (支持less,需要装包)
npm install less less-loader --save-dev<style lang="less">
.box1{
width:200px;
height:200px;
background:red;
.box2{
width:100px;
height:100px;
background:blue;
}
}
</style>组件注册
局部注册
只能在注册的逐渐内使用
1.创建.vue文件(大驼峰命名法,如HomePage.vue)
2.在使用的组件内使用并注册
import 组件对象 from '.vue文件路径'通常情况下写完组件对象(名称与vue文件名一致)直接回车就可以
要使用,直接在template标签输入组件对象然后按tab就可以
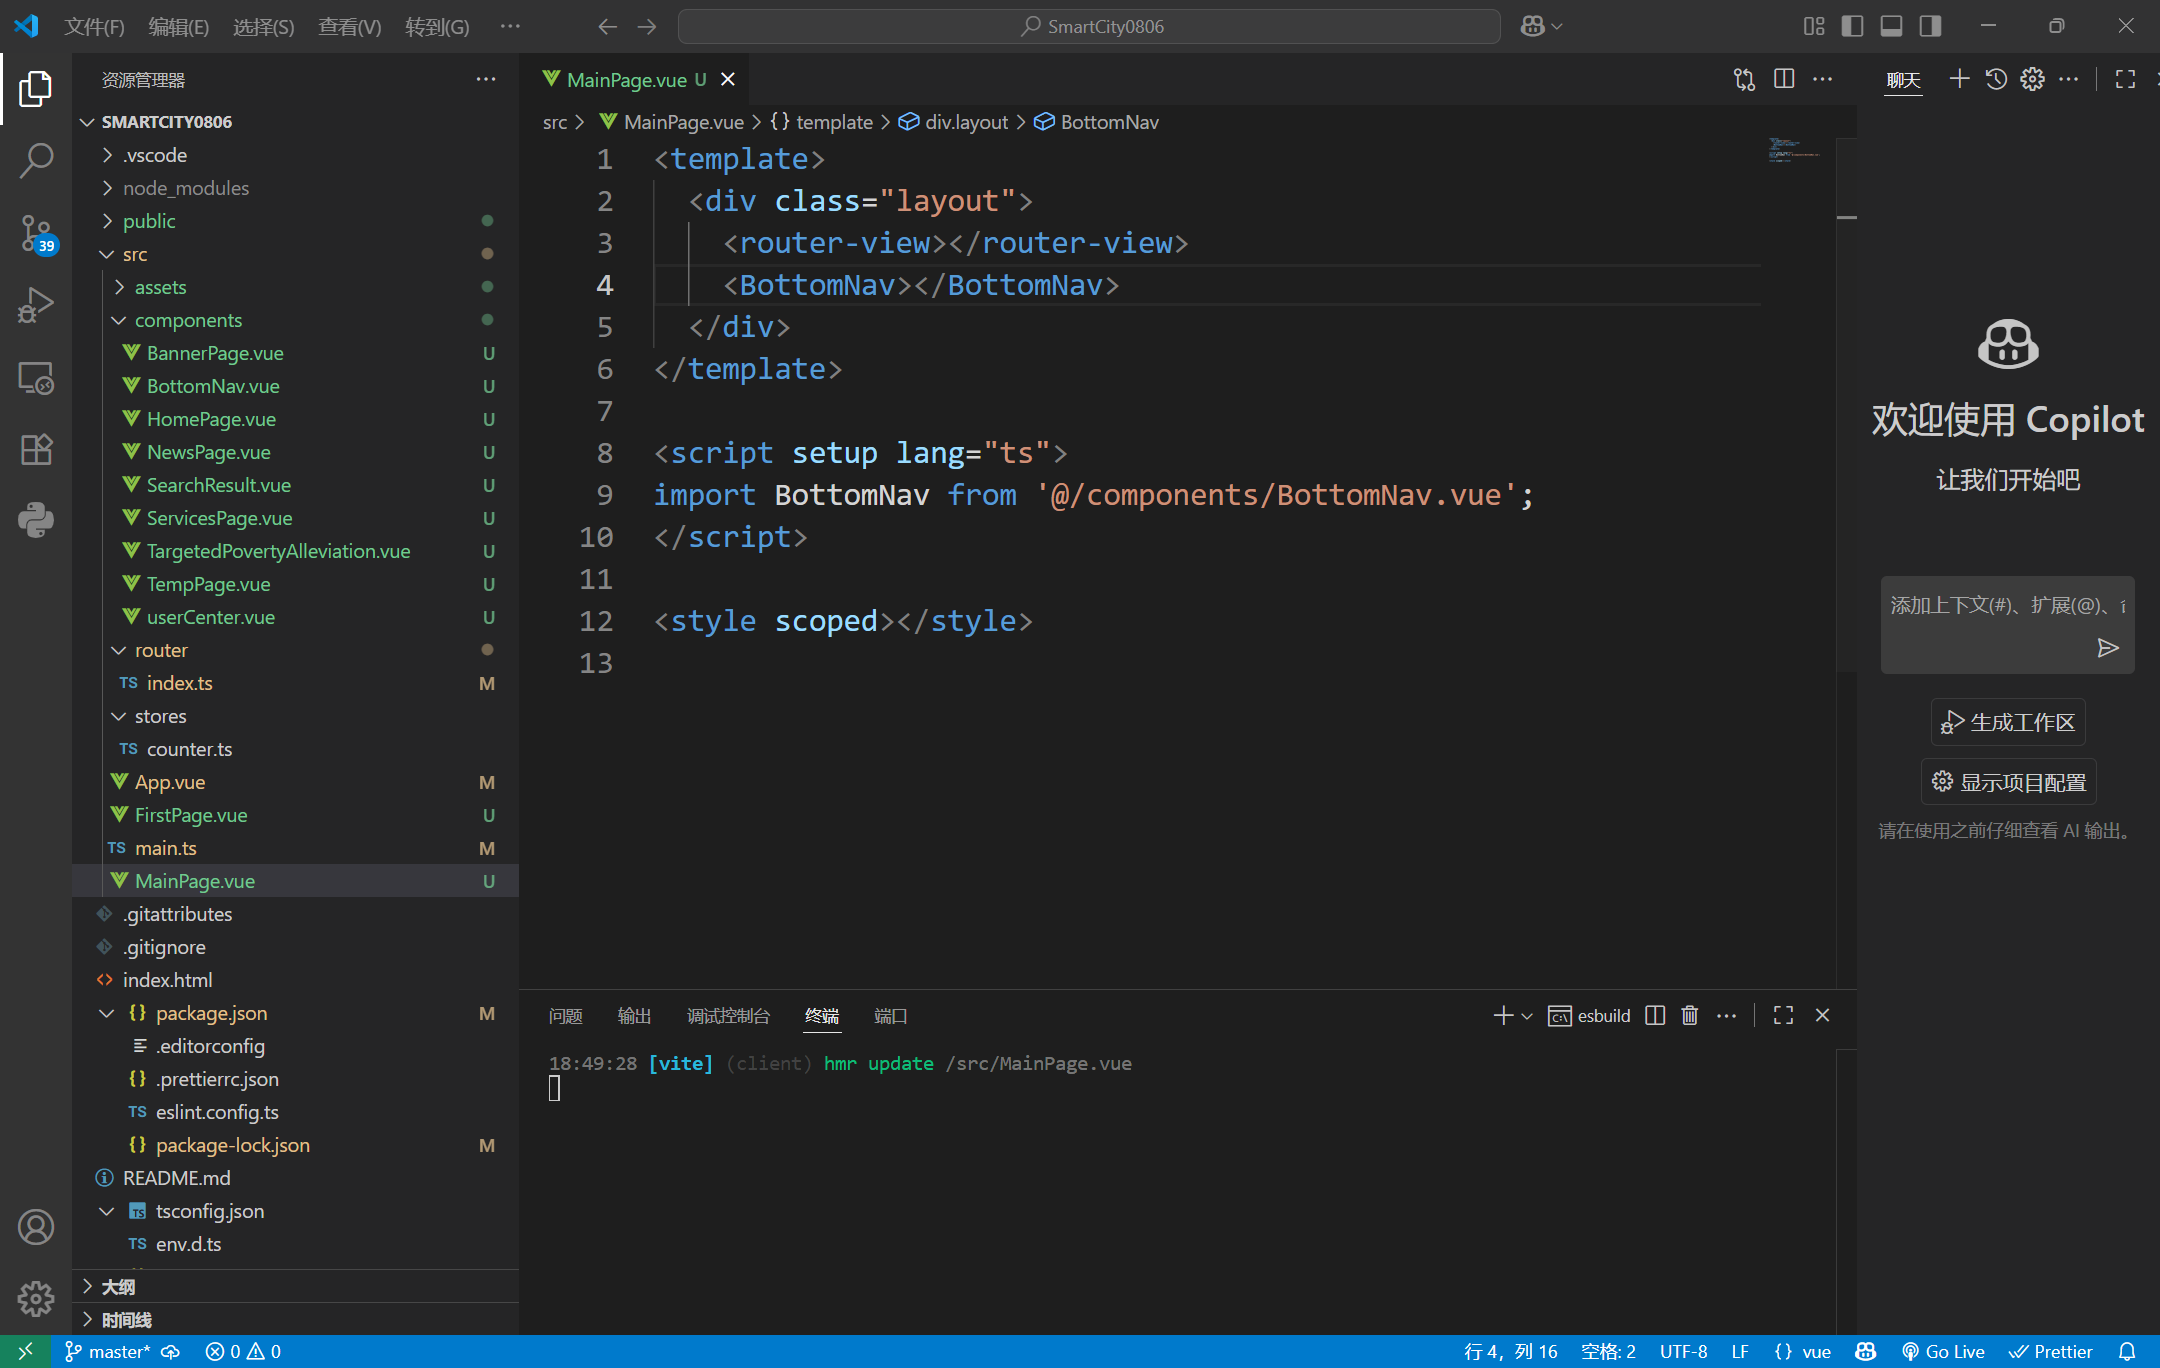
如果BottomNav按tab出不来,需要配置VSCode:
设置(快捷键Ctrl+,)->搜索trigger on tab->勾选
全局注册
所有组件内部都可以使用
1.创建.vue文件
2.main.js中进行全局注册
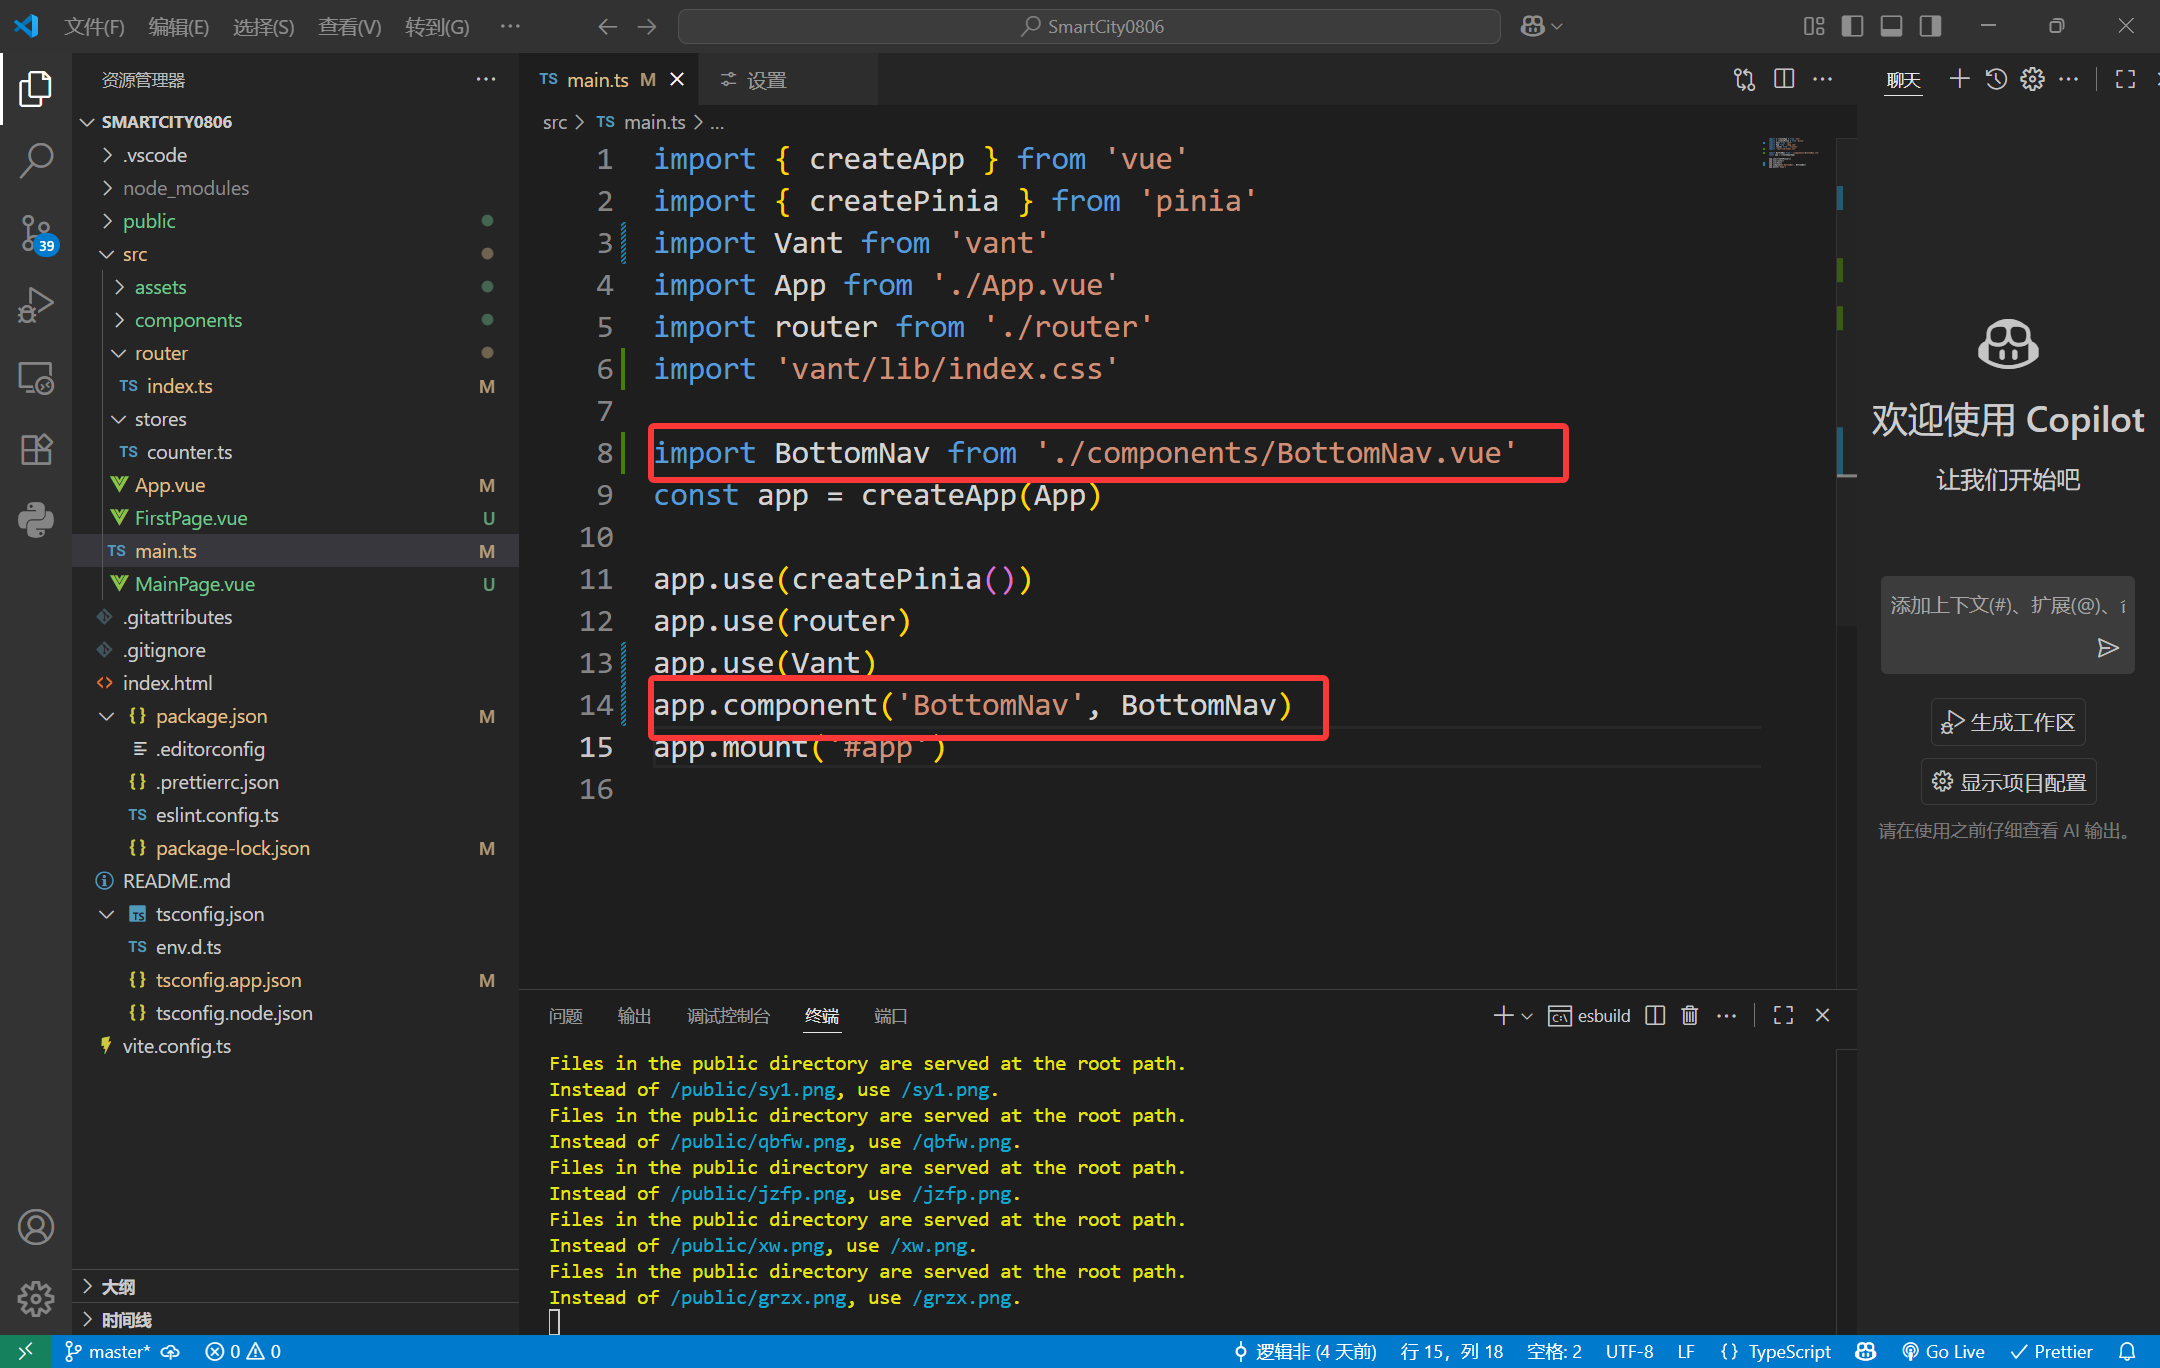
import 组件对象 from '.vue文件路径'
app.copment('组件名',组件对象)
scoped样式冲突
默认情况
写在组件中的样式会全局生效,因此很容易造成多个组件之间的样式冲突问题。
scoped
当我们在style加上scoped样式,可以让样式只作用于当前组件
原理:
当前组件模块的所有元素,都会加上一个自定义属性:data-v-hash值,如data-v-42781596
css选择器后面,被自动处理,添加上了属性选择器.main[data-v-42781596]
因此设置的样式只对当前组件起作用
组件通信
父子通信
父传子:
父组件通过props将数据传给子组件
<!-- 父组件 -->
<template>
  <div>
    <Son :num="count"></Son>
  </div>
</template>

<script setup lang="ts">
import { ref } from 'vue';
import Son from './components/Son.vue';
const count = ref(0);
</script>
<!-- 子组件 -->
<script setup lang="ts">
const props = defineProps({
num: Number,
})
console.log(props.num)
</script>子传父:
基本思想:
父组件中给子组件标签通过@绑定事件
子组件内通过emit方法触发事件
<!-- 父组件 -->
<template>
  <div>
    <h1 class="title">新闻列表</h1>
    <NewsItem @get-title="myTitle"></NewsItem>
  </div>
</template>

<script setup lang="ts">
import NewsItem from './NewsItem.vue';

const myTitle = (title: string) => {
  console.log(title)
}

</script>
<!-- 子组件 -->
<template>
<div v-for="(item) in list" :key="item.id" class="news-item">
<!-- 点击标题发送标题到父组件 -->
<h3 class="news-title" @click="sendTitle(item.title)">{{ item.title }}</h3>
<div class="news-content-wrapper">
<!-- 左下角 - 来源和时间 -->
<div class="news-meta">
<span class="news-source">{{ item.source }}</span>
<span class="news-time">{{ item.time }}</span>
</div>
<!-- 右侧 - 图片 -->
<div class="news-image-wrapper">
<img :src="item.img" :alt="item.title" class="news-image">
</div>
</div>
</div>
</template>
<script setup lang="ts">
import axios from 'axios';
import { onMounted, ref } from 'vue';
interface RootObject {
id: number;
title: string;
source: string;
cmtcount: number;
img: string;
time: string;
}
const list = ref<RootObject[]>([]);
//请求地址:http://hmajax.itheima.net/api/news
onMounted(async () => {
try {
const res = await axios.get('http://hmajax.itheima.net/api/news');
list.value = res.data.data;
} catch (error) {
console.error('请求失败:', error);
}
})
//子传父
const emit = defineEmits(['get-title'])
const sendTitle = (title: string) => {
emit('get-title', title)
}
</script>接口源自黑马程序员
模板引用:
通过ref标识获取真实的dom对象或者组件示例对象(必须渲染完成后才能拿到,我们需要用到生命周期钩子里面的onMounted)
使用:
1.调用一个ref函数生成一个ref对象
2.通过ref标识绑定ref对象到标签
<template>
  <div>
    <input type="text" ref="inp">
    <button @click="clickFn">点击获取输入框焦点</button>
  </div>
</template>

<script setup lang="ts">
import { ref } from 'vue';

const inp = ref<HTMLInputElement | null>(null)
// onMounted(() => {
//   console.log(inp.value)
//   inp.value?.focus()
// })
const clickFn = () => {
  inp.value?.focus()
}

</script>
模板引用也可以实现组件数据的子传父(不推荐):
<!-- 父组件 -->
<template>
  <div>
    <MyTest ref="test"></MyTest>
  </div>
</template>

<script setup lang="ts">
import { onMounted, ref } from 'vue';
import MyTest from './components/MyTest.vue';

interface TestExposed {
  flag: boolean
}

const test = ref<TestExposed | null>(null)


onMounted(() => {
  console.log(test.value?.flag)
})
</script>

<style scoped></style>
<!-- 子组件 -->
<template>
  <div>
    <p>flag:{{ flag }}</p>
  </div>
</template>

<script setup lang="ts">
import { ref } from 'vue'
const flag = ref(true)
// 声明向外暴露的数据
defineExpose({
  flag
})
</script>

<style scoped></style>
跨层级传递数据
1.顶层组件通过provide函数提供数据
2.底层组件通过inject函数获取数据
顶层组件
provide('key',顶层组件中的数据)底层组件
const msg = inject('key')底层组件无法直接修改顶层组件的数据,需要父组件把修改数值的函数传过去
// 普通数据
provide('name','Ana')
const name = inject('name')

// 响应式数据
const num = ref(0)
setTimeout(()=>{
    num.value = 500
},2000)
provide('num',num)
const num = inject('num')

// 修改函数
provide('setNum',(newNum)=>{
    num.value = newNum
})
const setNum = inject('setNum')
setNum(3000)
未完待续……