目录

1 前言
在图像处理领域,边缘检测是一项基础且重要的技术,它能够帮助我们识别图像中的物体边界,为后续的图像分析和处理提供关键信息。今天,我将为大家介绍一个基于 HTML、CSS 和 JavaScript 实现的智能图像边缘检测系统,该系统可以让你轻松上传图像并获取其边缘检测结果。
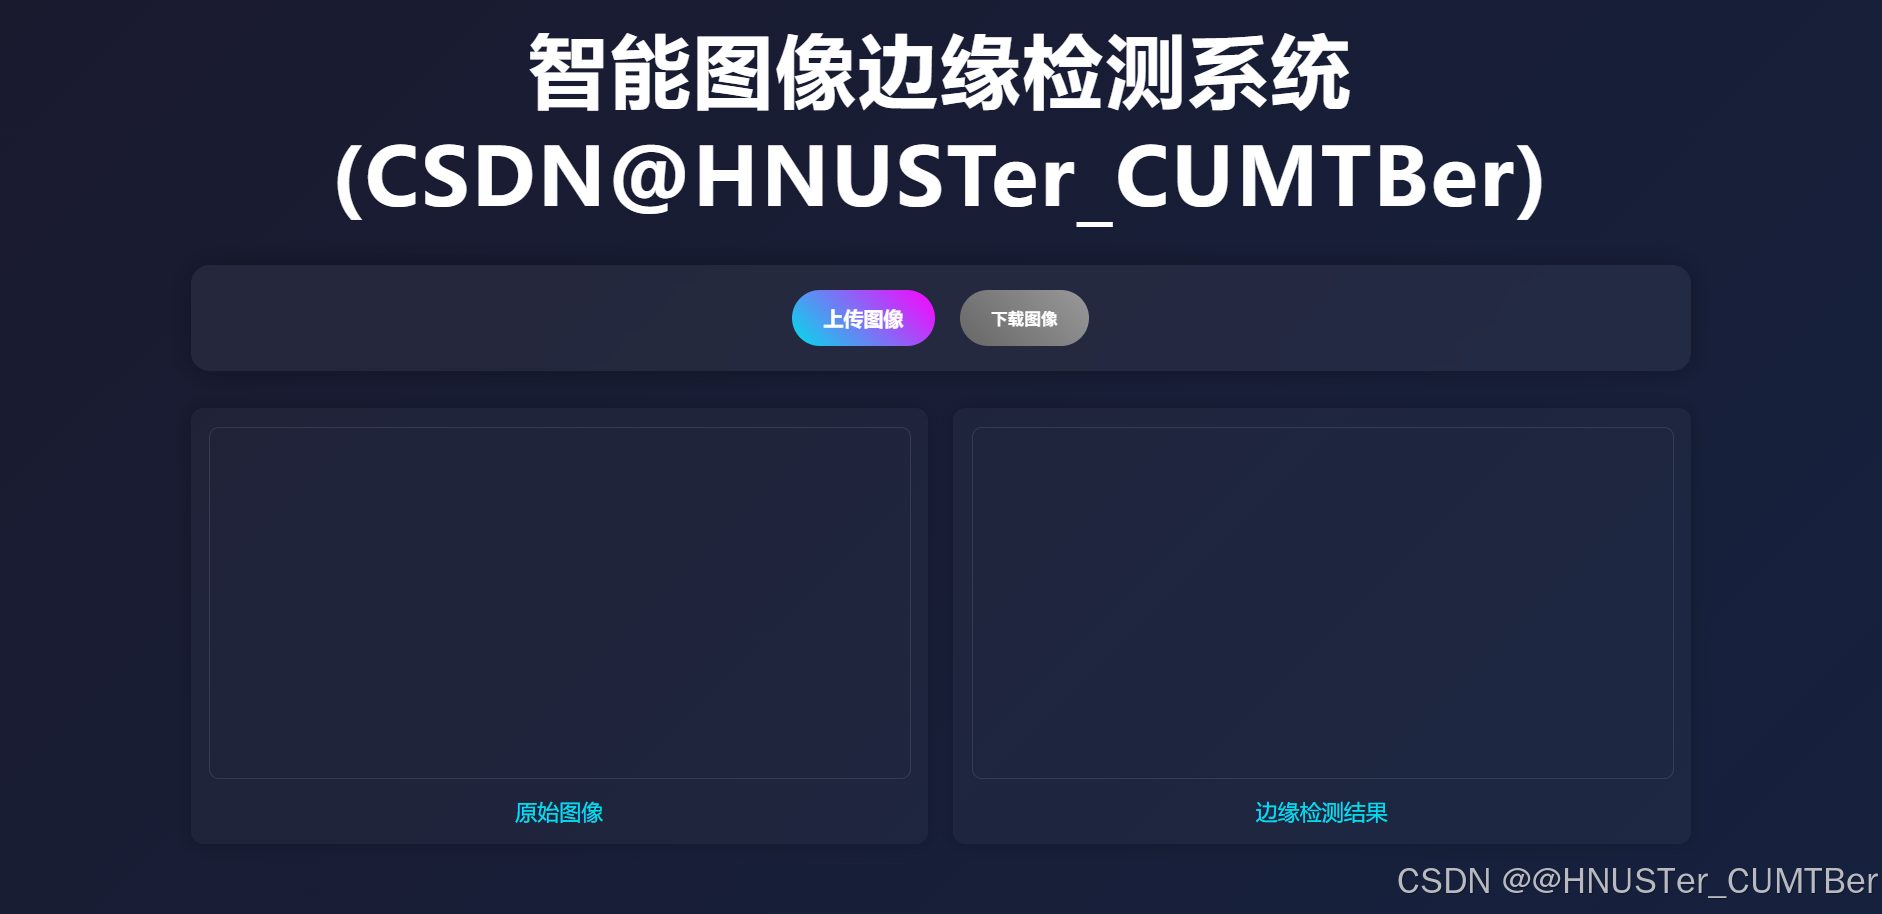
系统功能概述
- 简洁易用的界面:采用了时尚的设计风格,背景采用渐变效果,给人一种科技感十足的视觉体验。用户只需点击 “上传图像” 按钮,选择要处理的图像,系统即可自动完成边缘检测并显示结果。
- 实时边缘检测:使用 JavaScript 的
canvas元素和 Sobel 算子,实现了实时的图像边缘检测功能。上传图像后,系统会立即对图像进行处理,并在右侧的画布上显示边缘检测结果。 - 高清图像下载:处理完成后,用户可以点击 “下载图像” 按钮,将边缘检测结果以 PNG 格式下载到本地,方便后续使用。
2 技术实现
2.1 HTML 结构
<!DOCTYPE html>
<html>
<head>
    <title>智能图像边缘检测系统</title>
    <!-- 样式部分 -->
    <style>
        /* 样式规则 */
    </style>
</head>
<body>
    <div class="container">
        <h2 class="title">智能图像边缘检测系统(CSDN@HNUSTer_CUMTBer)</h2>
        <div class="control-panel">
            <label for="imageInput" class="custom-file-upload">上传图像</label>
            <input type="file" id="imageInput" accept="image/*">
            <button class="download-button" id="downloadBtn" disabled>下载图像</button>
        </div>

        <div class="canvas-container">
            <div class="canvas-wrapper">
                <canvas id="originalCanvas"></canvas>
                <div class="canvas-label">原始图像</div>
            </div>
            <div class="canvas-wrapper">
                <canvas id="edgeCanvas"></canvas>
                <div class="canvas-label">边缘检测结果</div>
            </div>
        </div>
    </div>
    <!-- JavaScript 部分 -->
    <script>
        // JavaScript 代码
    </script>
</body>
</html>- 文档类型声明与 HTML 标签:
<!DOCTYPE html>声明文档类型为 HTML5,<html>标签是整个 HTML 文档的根标签。 <head>部分:<title>标签设置了网页标题,显示在浏览器的标签栏上。<style>标签内定义了网页的样式,包括背景、字体、布局等。
<body>部分:.container类的<div>作为整个页面内容的容器。.title类的<h2>标签显示网页的标题。.control-panel类的<div>包含一个自定义的文件上传按钮和一个下载按钮。.canvas-container类的<div>包含两个.canvas-wrapper类的<div>,每个<div>中包含一个<canvas>元素,分别用于显示原始图像和边缘检测结果图像。<script>标签内是实现图像上传、边缘检测和下载功能的 JavaScript 代码。
2.2 CSS 样式
body {
    margin: 0;
    padding: 0;
    background: linear-gradient(135deg, #1a1a2e, #16213e);
    min-height: 100vh;
    font-family: 'Microsoft YaHei', '微软雅黑', sans-serif;
    color: #ffffff;
}

.container {
    max-width: 1200px;
    margin: 40px auto;
    padding: 20px;
}

.title {
    text-align: center;
    font-size: clamp(2em, 5vw, 4em);
    margin-bottom: 30px;
    color: #ffffff;
    letter-spacing: 2px;
}

.control-panel {
    background: rgba(255, 255, 255, 0.05);
    padding: 20px;
    border-radius: 15px;
    box-shadow: 0 0 20px rgba(0, 0, 0, 0.3);
    margin-bottom: 30px;
    text-align: center;
    backdrop-filter: blur(10px);
    display: flex;
    justify-content: center;
    gap: 20px;
}

.custom-file-upload, .download-button {
    display: inline-block;
    padding: 12px 25px;
    background: linear-gradient(45deg, #00ddeb, #ff00ff);
    border: none;
    border-radius: 25px;
    cursor: pointer;
    transition: transform 0.3s ease;
    color: white;
    font-weight: bold;
    text-decoration: none;
}

.download-button:disabled {
    background: linear-gradient(45deg, #666, #999);
    cursor: not-allowed;
}

.custom-file-upload:hover, .download-button:hover:not(:disabled) {
    transform: scale(1.05);
    box-shadow: 0 0 15px rgba(0, 221, 235, 0.5);
}

input[type="file"] {
    display: none;
}

.canvas-container {
    display: flex;
    justify-content: space-between;
    gap: 20px;
}

.canvas-wrapper {
    flex: 1;
    background: rgba(255, 255, 255, 0.03);
    padding: 15px;
    border-radius: 10px;
    box-shadow: 0 0 15px rgba(0, 0, 0, 0.2);
    transition: transform 0.3s ease;
}

.canvas-wrapper:hover {
    transform: translateY(-5px);
}

canvas {
    width: 100%;
    height: auto;
    border-radius: 8px;
    border: 1px solid rgba(255, 255, 255, 0.1);
}

.canvas-label {
    text-align: center;
    margin-top: 10px;
    font-size: 1.1em;
    color: #00ddeb;
}- 全局样式:
body标签设置了背景渐变、字体和文字颜色。.container类设置了页面内容的最大宽度、居中显示和内边距。
- 标题样式:
.title类设置了标题的居中显示、自适应字体大小和字母间距。 - 控制面板样式:
.control-panel类设置了背景、圆角、阴影和布局。 - 按钮样式:
.custom-file-upload和.download-button类设置了按钮的背景、圆角、鼠标指针样式和过渡效果。 - 画布样式:
.canvas-container和.canvas-wrapper类设置了画布的布局和样式,<canvas>标签设置了宽度、高度、圆角和边框。
2.3 JavaScript 交互
const imageInput = document.getElementById('imageInput');
const originalCanvas = document.getElementById('originalCanvas');
const edgeCanvas = document.getElementById('edgeCanvas');
const downloadBtn = document.getElementById('downloadBtn');
const originalCtx = originalCanvas.getContext('2d');
const edgeCtx = edgeCanvas.getContext('2d');

let edgeImageData = null;

imageInput.addEventListener('change', function(e) {
    const file = e.target.files[0];
    const reader = new FileReader();

    reader.onload = function(event) {
        const img = new Image();
        img.onload = function() {
            originalCanvas.width = img.width;
            originalCanvas.height = img.height;
            edgeCanvas.width = img.width;
            edgeCanvas.height = img.height;

            originalCtx.drawImage(img, 0, 0);
            detectEdges(img);
        }
        img.src = event.target.result;
    }
    reader.readAsDataURL(file);
});

function detectEdges(img) {
    originalCtx.drawImage(img, 0, 0);
    const imageData = originalCtx.getImageData(0, 0, img.width, img.height);
    const data = imageData.data;
    const width = img.width;
    const height = img.height;

    const outputData = new Uint8ClampedArray(data.length);

    const sobelX = [
        [-1, 0, 1],
        [-2, 0, 2],
        [-1, 0, 1]
    ];
    const sobelY = [
        [-1, -2, -1],
        [0,  0,  0],
        [1,  2,  1]
    ];

    for (let y = 1; y < height - 1; y++) {
        for (let x = 1; x < width - 1; x++) {
            let pixelX = 0;
            let pixelY = 0;

            for (let ky = -1; ky <= 1; ky++) {
                for (let kx = -1; kx <= 1; kx++) {
                    const idx = ((y + ky) * width + (x + kx)) * 4;
                    const r = data[idx];
                    const g = data[idx + 1];
                    const b = data[idx + 2];
                    const gray = 0.2989 * r + 0.5870 * g + 0.1140 * b;

                    pixelX += gray * sobelX[ky + 1][kx + 1];
                    pixelY += gray * sobelY[ky + 1][kx + 1];
                }
            }

            const magnitude = Math.sqrt(pixelX * pixelX + pixelY * pixelY);
            const index = (y * width + x) * 4;
            const value = Math.min(magnitude, 255);
            outputData[index] = value;
            outputData[index + 1] = value;
            outputData[index + 2] = value;
            outputData[index + 3] = 255;
        }
    }

    edgeImageData = new ImageData(outputData, width, height);
    edgeCtx.putImageData(edgeImageData, 0, 0);

    // 启用下载按钮
    downloadBtn.disabled = false;
}

downloadBtn.addEventListener('click', function() {
    if (!edgeImageData) return;

    // 创建一个临时的canvas用于生成高清图像
    const tempCanvas = document.createElement('canvas');
    tempCanvas.width = edgeCanvas.width;
    tempCanvas.height = edgeCanvas.height;
    const tempCtx = tempCanvas.getContext('2d');
    tempCtx.putImageData(edgeImageData, 0, 0);

    // 将canvas转换为图片并触发下载
    const link = document.createElement('a');
    link.download = '边缘检测结果.png';
    link.href = tempCanvas.toDataURL('image/png', 1.0); // 1.0表示最高质量
    link.click();
});- 变量声明:获取 HTML 元素的引用,包括文件输入框、画布和下载按钮,并获取画布的 2D 上下文。
- 文件上传事件处理:当用户选择文件时,使用
FileReader读取文件内容,并将其显示在原始画布上,然后调用detectEdges函数进行边缘检测。 - 边缘检测函数
detectEdges:- 使用 Sobel 算子进行边缘检测,Sobel 算子是一种常用的图像边缘检测算法,通过计算图像在水平和垂直方向上的梯度来检测边缘。
- 遍历图像的每个像素,计算其在水平和垂直方向上的梯度,然后计算梯度的幅值。
- 将梯度幅值作为灰度值,存储在
outputData数组中。 - 将处理后的图像数据显示在边缘检测结果画布上,并启用下载按钮。
- 下载按钮事件处理:当用户点击下载按钮时,创建一个临时的
<canvas>元素,将边缘检测结果图像数据绘制到临时画布上,然后将临时画布转换为 PNG 格式的图片,并触发下载。
3 代码解析
3.1 HTML 结构
系统的 HTML 结构非常清晰,主要包括标题、控制面板和两个画布。标题显示系统名称,控制面板包含上传图像和下载图像的按钮,两个画布分别用于显示原始图像和边缘检测结果。
3.2 CSS 样式
CSS 样式为系统提供了美观的外观。通过渐变背景、圆角边框、阴影效果和过渡动画,使系统界面更加吸引人。同时,使用 flexbox 布局实现了响应式设计,确保在不同设备上都能有良好的显示效果。
3.3 JavaScript 功能
JavaScript 部分是系统的核心,主要实现了图像上传、边缘检测和下载功能。
- 图像上传:使用
FileReader对象读取用户选择的图像文件,并将其显示在原始画布上。 - 边缘检测:使用 Sobel 算子对图像进行边缘检测。Sobel 算子通过计算图像在水平和垂直方向上的梯度,来检测图像中的边缘。具体实现时,遍历图像的每个像素,计算其在水平和垂直方向上的梯度幅值,然后将幅值作为灰度值显示在边缘检测结果画布上。
- 图像下载:将边缘检测结果转换为 PNG 格式的图片,并触发下载操作。
4 完整代码
<!DOCTYPE html>
<html>
<head>
<title>智能图像边缘检测系统</title>
<style>
body {
margin: 0;
padding: 0;
background: linear-gradient(135deg, #1a1a2e, #16213e);
min-height: 100vh;
font-family: 'Microsoft YaHei', '微软雅黑', sans-serif;
color: #ffffff;
}
.container {
max-width: 1200px;
margin: 40px auto;
padding: 20px;
}
.title {
text-align: center;
font-size: clamp(2em, 5vw, 4em); /* 自适应字体大小,最小2em,最大4em,随视口宽度变化 */
margin-bottom: 30px;
color: #ffffff; /* 纯白色文字,无发光 */
letter-spacing: 2px;
}
.control-panel {
background: rgba(255, 255, 255, 0.05);
padding: 20px;
border-radius: 15px;
box-shadow: 0 0 20px rgba(0, 0, 0, 0.3);
margin-bottom: 30px;
text-align: center;
backdrop-filter: blur(10px);
display: flex;
justify-content: center;
gap: 20px;
}
.custom-file-upload, .download-button {
display: inline-block;
padding: 12px 25px;
background: linear-gradient(45deg, #00ddeb, #ff00ff);
border: none;
border-radius: 25px;
cursor: pointer;
transition: transform 0.3s ease;
color: white;
font-weight: bold;
text-decoration: none;
}
.download-button:disabled {
background: linear-gradient(45deg, #666, #999);
cursor: not-allowed;
}
.custom-file-upload:hover, .download-button:hover:not(:disabled) {
transform: scale(1.05);
box-shadow: 0 0 15px rgba(0, 221, 235, 0.5);
}
input[type="file"] {
display: none;
}
.canvas-container {
display: flex;
justify-content: space-between;
gap: 20px;
}
.canvas-wrapper {
flex: 1;
background: rgba(255, 255, 255, 0.03);
padding: 15px;
border-radius: 10px;
box-shadow: 0 0 15px rgba(0, 0, 0, 0.2);
transition: transform 0.3s ease;
}
.canvas-wrapper:hover {
transform: translateY(-5px);
}
canvas {
width: 100%;
height: auto;
border-radius: 8px;
border: 1px solid rgba(255, 255, 255, 0.1);
}
.canvas-label {
text-align: center;
margin-top: 10px;
font-size: 1.1em;
color: #00ddeb;
}
</style>
</head>
<body>
<div class="container">
<h2 class="title">智能图像边缘检测系统(CSDN@HNUSTer_CUMTBer)</h2>
<div class="control-panel">
<label for="imageInput" class="custom-file-upload">上传图像</label>
<input type="file" id="imageInput" accept="image/*">
<button class="download-button" id="downloadBtn" disabled>下载图像</button>
</div>
<div class="canvas-container">
<div class="canvas-wrapper">
<canvas id="originalCanvas"></canvas>
<div class="canvas-label">原始图像</div>
</div>
<div class="canvas-wrapper">
<canvas id="edgeCanvas"></canvas>
<div class="canvas-label">边缘检测结果</div>
</div>
</div>
</div>
<script>
const imageInput = document.getElementById('imageInput');
const originalCanvas = document.getElementById('originalCanvas');
const edgeCanvas = document.getElementById('edgeCanvas');
const downloadBtn = document.getElementById('downloadBtn');
const originalCtx = originalCanvas.getContext('2d');
const edgeCtx = edgeCanvas.getContext('2d');
let edgeImageData = null;
imageInput.addEventListener('change', function(e) {
const file = e.target.files[0];
const reader = new FileReader();
reader.onload = function(event) {
const img = new Image();
img.onload = function() {
originalCanvas.width = img.width;
originalCanvas.height = img.height;
edgeCanvas.width = img.width;
edgeCanvas.height = img.height;
originalCtx.drawImage(img, 0, 0);
detectEdges(img);
}
img.src = event.target.result;
}
reader.readAsDataURL(file);
});
function detectEdges(img) {
originalCtx.drawImage(img, 0, 0);
const imageData = originalCtx.getImageData(0, 0, img.width, img.height);
const data = imageData.data;
const width = img.width;
const height = img.height;
const outputData = new Uint8ClampedArray(data.length);
const sobelX = [
[-1, 0, 1],
[-2, 0, 2],
[-1, 0, 1]
];
const sobelY = [
[-1, -2, -1],
[0, 0, 0],
[1, 2, 1]
];
for (let y = 1; y < height - 1; y++) {
for (let x = 1; x < width - 1; x++) {
let pixelX = 0;
let pixelY = 0;
for (let ky = -1; ky <= 1; ky++) {
for (let kx = -1; kx <= 1; kx++) {
const idx = ((y + ky) * width + (x + kx)) * 4;
const r = data[idx];
const g = data[idx + 1];
const b = data[idx + 2];
const gray = 0.2989 * r + 0.5870 * g + 0.1140 * b;
pixelX += gray * sobelX[ky + 1][kx + 1];
pixelY += gray * sobelY[ky + 1][kx + 1];
}
}
const magnitude = Math.sqrt(pixelX * pixelX + pixelY * pixelY);
const index = (y * width + x) * 4;
const value = Math.min(magnitude, 255);
outputData[index] = value;
outputData[index + 1] = value;
outputData[index + 2] = value;
outputData[index + 3] = 255;
}
}
edgeImageData = new ImageData(outputData, width, height);
edgeCtx.putImageData(edgeImageData, 0, 0);
// 启用下载按钮
downloadBtn.disabled = false;
}
downloadBtn.addEventListener('click', function() {
if (!edgeImageData) return;
// 创建一个临时的canvas用于生成高清图像
const tempCanvas = document.createElement('canvas');
tempCanvas.width = edgeCanvas.width;
tempCanvas.height = edgeCanvas.height;
const tempCtx = tempCanvas.getContext('2d');
tempCtx.putImageData(edgeImageData, 0, 0);
// 将canvas转换为图片并触发下载
const link = document.createElement('a');
link.download = '边缘检测结果.png';
link.href = tempCanvas.toDataURL('image/png', 1.0); // 1.0表示最高质量
link.click();
});
</script>
</body>
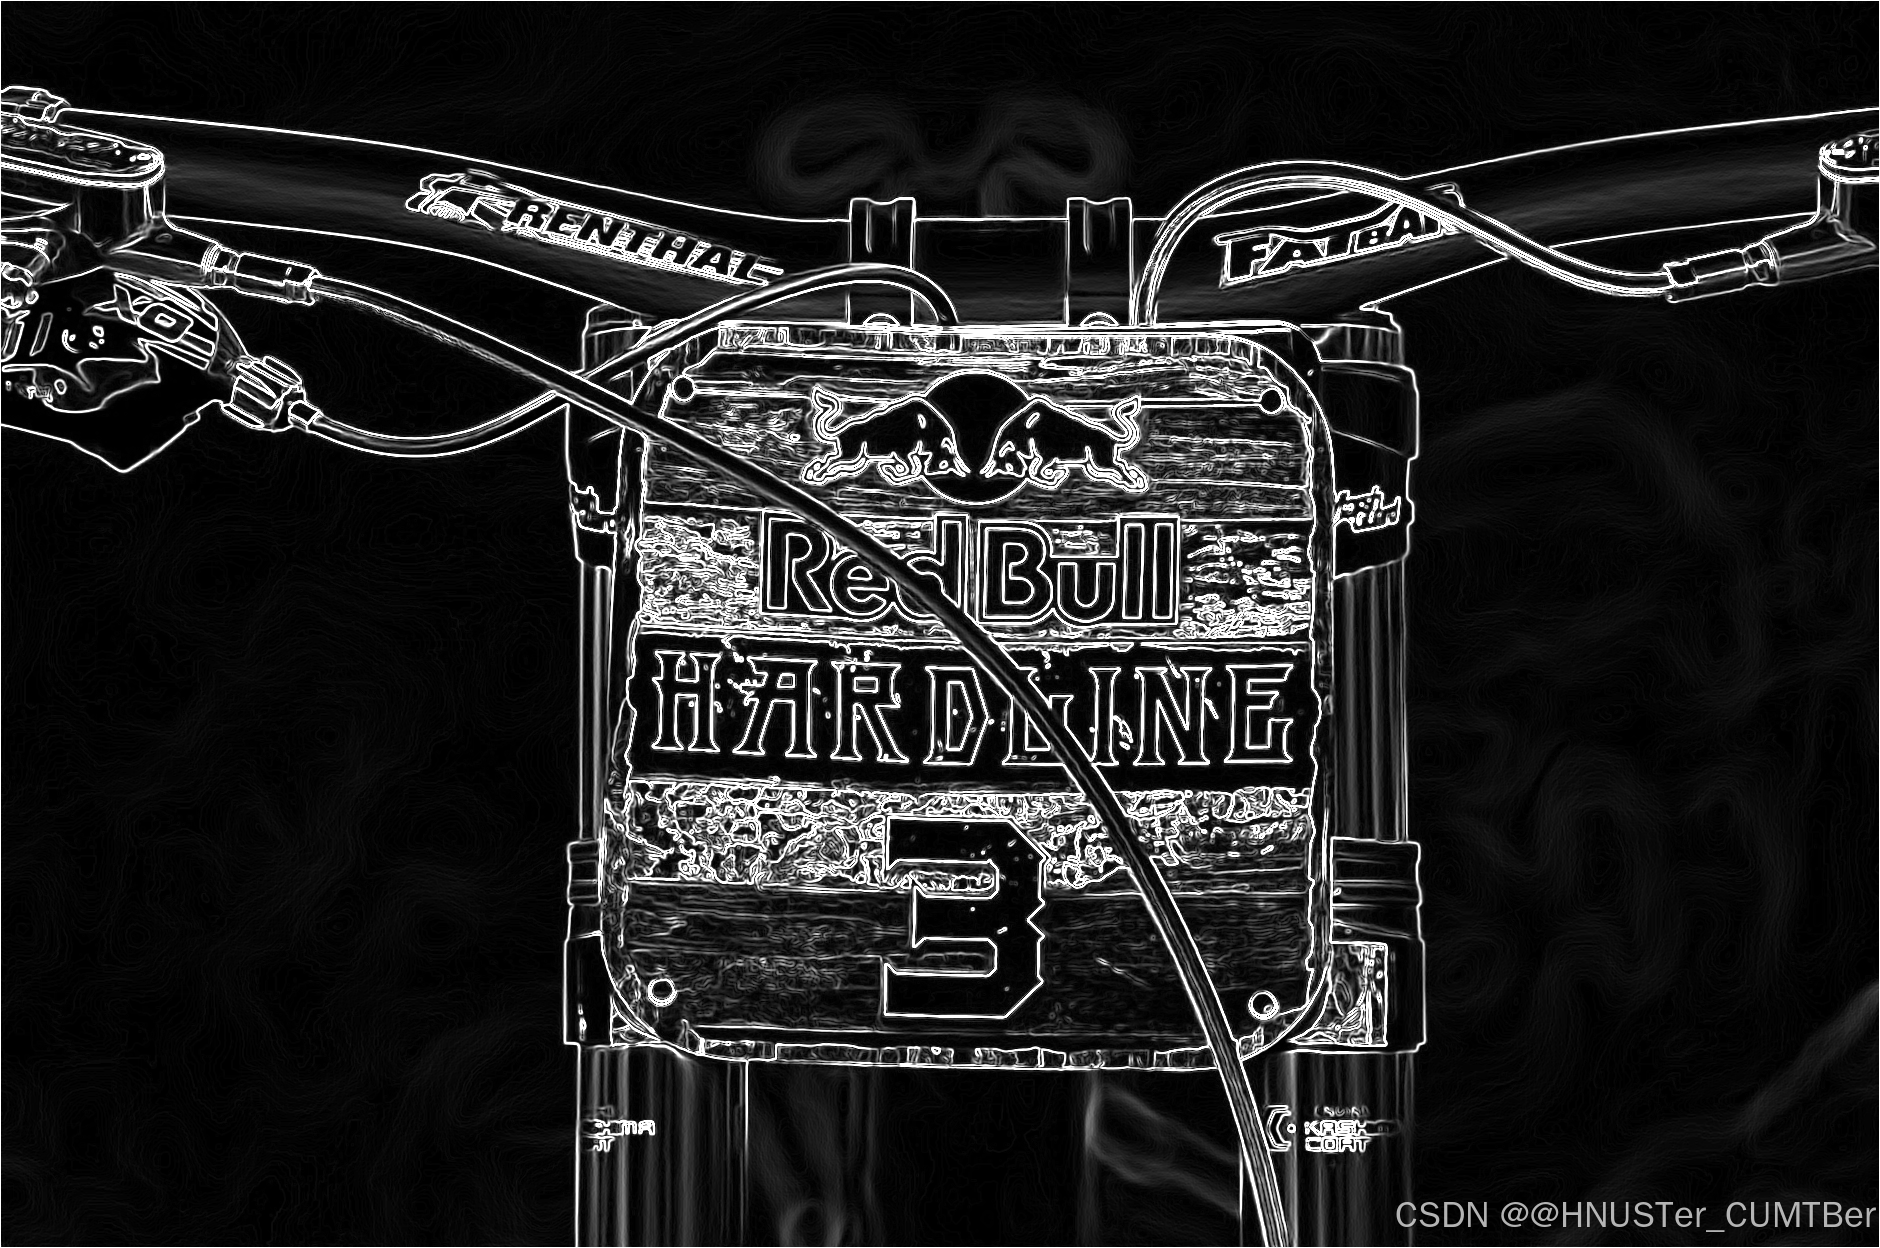
</html>5 运行结果

6 总结
这个智能图像边缘检测系统是一个简单而实用的图像处理工具,通过 HTML、CSS 和 JavaScript 的结合,实现了图像上传、边缘检测和下载的功能。它不仅展示了前端技术在图像处理领域的应用,还为开发者提供了一个学习和参考的示例。如果你对图像处理和前端开发感兴趣,不妨尝试一下这个系统,相信你会从中获得不少收获。