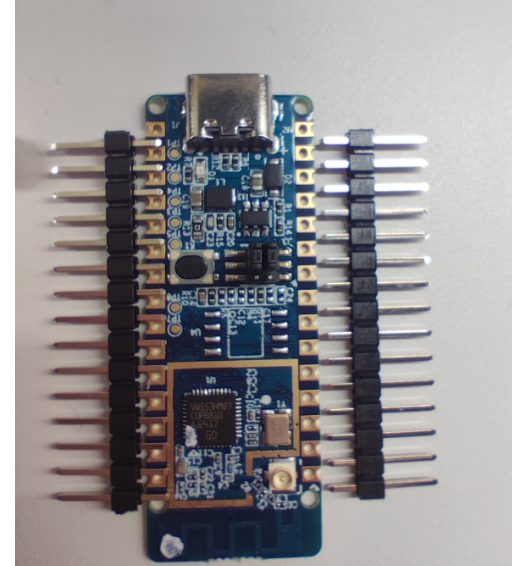
想玩openharmony系统已经很久了,但是苦于手上没有合适的开发板可以玩,只能作罢,偶然刷b站的时候,有看到ICEasy商城在搞开发板免费申请的活动,过段进行了申请,然后顺利的拿到了开发板,开发板全貌图如下所示
具体产品介绍可以浏览地址 https://www.iceasy.com/product/1874659379209633793,这里只做简单介绍,具体如下:
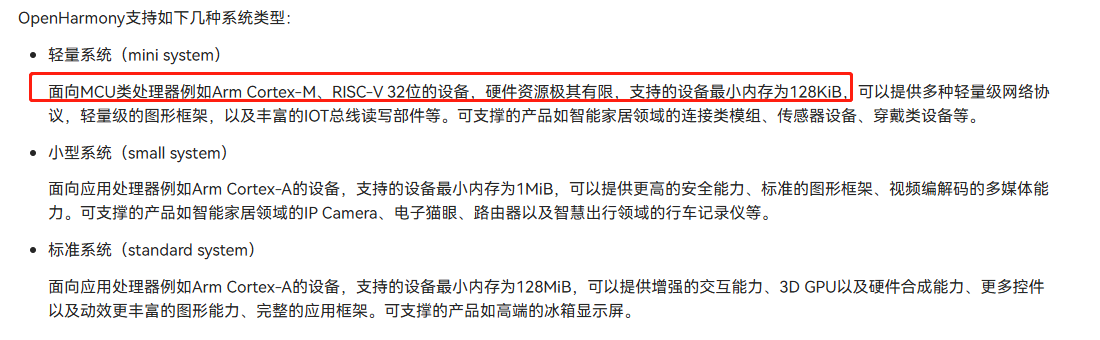
320KB RAM + 4MB Flash,支持2.4Ghzwifi6+蓝牙5.2功能,根据openharmony官网的介绍,跑轻量系统的最小配置为128KIB的ram,我们这个开发板那是绰绰有余了。
基于此,我们便开始了我们GD32Vw553-IOT开发板的openharmony的适配之路。
适配步骤开始之前,肯定是先下载ohos相关源码,这里我选用的5.0+的系统,适配多是结合网上案例或者官网亦或者源码进行的,如有错误还望帮忙指正,废话不多说,开始进入正题。
首先我们在ohos的源码vendor目录下创建xingyun/gd32vw553目录,最终全路径则为vendor/xingyun/gd32vw553,接着在这里添加我们需要的文件,我这里直接复制了vendor/hisilicon/hispark_pegasus_mini_system下的config.json文件,然后需要修改对应的文件内容
如下
{
    "product_name": "gd32vw553",
    "type": "mini",
    "version": "3.0",
    "ohos_version": "OpenHarmony 3.1",
    "device_company": "xingyun",
    "device_build_path": "device/board/xingyun/gd32vw553_iot",
    "inherit":["productdefine/common/base/mini_system.json"],
    "board": "gd32vw553_iot",
    "kernel_type": "liteos_m",
    "kernel_is_prebuilt": true,
    "kernel_version": "",
    "subsystems": [
      {
        "subsystem": "hiviewdfx",
        "components": [
          { "component": "hilog_lite" },
          { "component": "hievent_lite" },
          { "component": "hiview_lite" }
        ]
      },
      {
        "subsystem": "startup",
        "components": [
          { "component": "bootstrap_lite" },
          { "component": "init", "features":
            [
              "init_feature_begetctl_liteos = true"
            ]
          }
        ]
      },
      {
        "subsystem": "communication",
        "components": [
          { "component": "dsoftbus" }
        ]
      },
      {
        "subsystem": "systemabilitymgr",
        "components": [
          { "component": "samgr_lite" }
        ]
      },
      {
        "subsystem": "security",
        "components": [
          { "component": "device_auth" },
          { "component": "huks", "features":
            [
              "huks_use_lite_storage = true",
              "huks_config_file = \"hks_config_lite.h\""
            ]
          }
        ]
      },
 {
        "subsystem": "commonlibrary",
        "components": [
          { "component": "utils_lite",
            "features":[ "utils_lite_feature_kal_timer = true" ]
          }
        ]
      },
      {
        "subsystem": "updater",
        "components": [
          { "component": "sys_installer_lite" }
        ]
      }
    ],
    "third_party_dir": "//device/soc/hisilicon/hi3861v100/sdk_liteos/third_party",
    "product_adapter_dir": "//vendor/hisilicon/hispark_pegasus/hals"
  }
从上面可以看出,我们需要在ohos的根目录下添加device/board/xingyun/gd32vw553_iot目录,这目录里面需要添加目录liteos_m,然后再在目录中添加config.gni文件,这里可以先复制device/board/hisilicon/hispark_pegasus/liteos_m的文件使用添加好后,我们再从我们可以使用hb set命令测试我们添加的效果
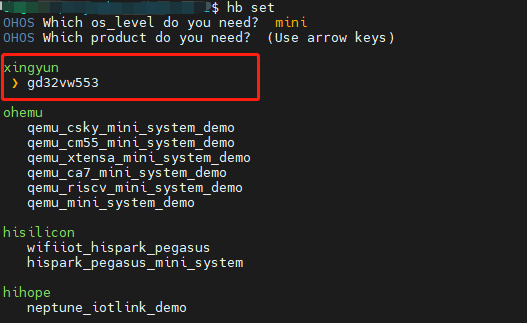
如上图,已经可以看到我们添加的产品了,我们选中回车即可。这个时候我们已经可以使用hb build -f来尝试进行编译了,这个时候进行编译无疑是会报错的,因为我们还没有完成适配工作。我这里直接就报错了如下图

这里是因为我们缺少文件导致,我们需要在vendor/xingyun/gd32vw553目录下添加bundle.json文件,文件内容如下:
{
    "name": "@ohos/product_gd32vw553",
    "description": "gd32 ohos",
    "version": "3.1",
    "license": "Apache License 2.0",
    "publishAs": "code-segment",
    "dirs": {},
    "scripts": {},
    "component": {
        "name": "product_gd32vw553",
        "subsystem": "product_gd32vw553",
        "syscap": [],
        "features": [],
        "adapted_system_type": [
            "mini",
            "small"
        ],
        "rom": "",
        "ram": "",
        "deps": {
            "components": [],
            "third_party": []
        },
        "build": {
            "sub_component": [
            ],
            "inner_kits": [],
            "test": []
        }
    }
}
接着我们尝试再次编译查看错误是否更新,可以看到错误已经更新如下图。

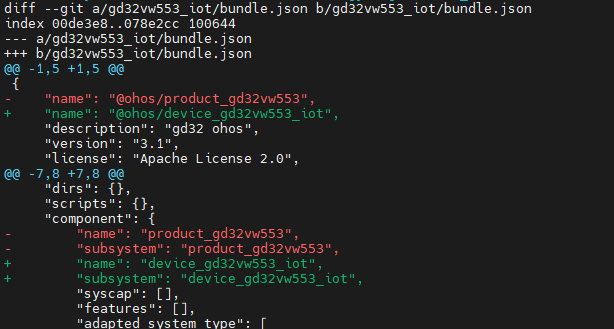
这里重复上面的步骤,将vendor/xingyun/gd32vw553中的bundle.json复制到device/board/xingyun/gd32vw553_iot目录中,然后修改bundle.json文件,改动如下图所示
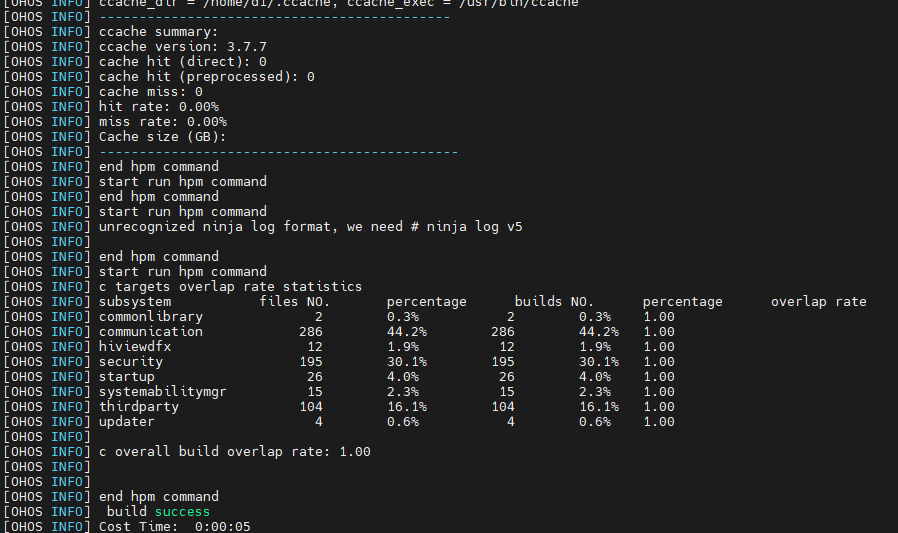
改好后我们再次进行编译,就可以看到如下图的成功截图了。
添加开发板到编译框架就算完成了,如果有报错可以参考 https://docs.openharmony.cn/pages/v5.0/zh-cn/device-dev/quick-start/quickstart-pkg-3861-tool.md 地址查看下是否有相关工具没有安装