介绍应用层如何控制 GPIO ,譬如控制 GPIO 输出高电平、或输出低电平
应用层如何操控 GPIO
与 LED 设备一样, GPIO 同样也是通过 sysfs 方式进行操控,进入到 /sys/class/gpio 目录下

⚫ gpiochipX : 当前 SoC 所包含的 GPIO 控制器,我们知道 I.MX6UL/I.MX6ULL 一共包含了 5 个 GPIO 控制器,分别为 GPIO1 、GPIO2、GPIO3、GPIO4、GPIO5 ,在这里分别对应 gpiochip0、gpiochip32、gpiochip64、gpiochip96、gpiochip128 这 5 个文件夹,每一个 gpiochipX 文件夹用来管理一组 GPIO 。 随便进入到其中某个目录下,可以看到这些目录下包含了如下文件:
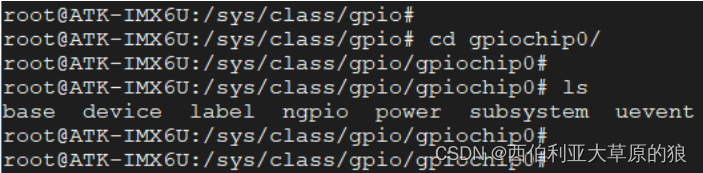
在这个目录我们主要关注的是 base、label、ngpio 这三个属性文件,这三个属性文件均是只读、不可写。
base : 与 gpiochipX 中的 X 相同,表示该控制器所管理的这组 GPIO 引脚中最小的编号。每一个 GPIO 引脚都会有一个对应的编号,Linux 下通过这个编号来操控对应的 GPIO 引脚。

label:该组 GPIO 对应的标签,也就是名字。

ngpio:该控制器所管理的 GPIO 引脚的数量(所以引脚编号范围是:base ~ base+ngpio-1)

具体计算过程:
对于给定的一个 GPIO 引脚,如何计算它在 sysfs 中对应的编号呢?其实非常简单,譬如给定一个 GPIO 引脚为 GPIO4_IO16 ,那它对应的编号是多少呢?首先我们要确定 GPIO4 对应于 gpiochip96 ,该组 GPIO 引 脚的最小编号是 96 (对应于 GPIO4_IO0 ),所以 GPIO4_IO16 对应的编号自然是 96 + 16 = 112 ;同理 GPIO3_IO20 对应的编号是 64 + 20 = 84。
export : 用于将指定编号的 GPIO 引脚导出。在使用 GPIO 引脚之前,需要将其导出,导出成功之后才能使用它。注意 export 文件是只写文件,不能读取,将一个指定的编号写入到 export 文件中即可将对应的 GPIO 引脚导出,譬如:
echo 0 > export # 导出编号为 0 的 GPIO 引脚(对于 I.MX6UL/I.MX6ULL 来说,也就是 GPIO1_IO0)

导出成功之后会发现在/sys/class/gpio 目录下生成了一个名为 gpio0 的文件夹(gpioX,X 表示对应的编号),这个文件夹就是导出来的 GPIO 引脚对应的文件夹,用于管理、控制该 GPIO 引脚,

unexport : 将导出的 GPIO 引脚删除。当使用完 GPIO 引脚之后,我们需要将导出的引脚删除,同样该文件也是只写文件、不可读
echo 0 > unexport # 删除导出的编号为 0 的 GPIO 引脚
删除成功之后,之前生成的 gpio0 文件夹就会消失!

gpioX
将指定的编号写入到 export 文件中,可以导出指定编号的 GPIO 引脚,导出成功之后会在 /sys/class/gpio 目录下生成对应的 gpioX ( X 表示 GPIO 的编号)文件夹,以前面所生成的 gpio0 为例,进入到 gpio0 目录, 该目录下的文件如下所示:

我们主要关心的文件是 active_low、direction、edge 以及 value 这四个属性文件,接下来分别介绍这四个属性文件的作用
⚫ direction:配置 GPIO 引脚为输入或输出模式。该文件可读、可写,读表示查看 GPIO 当前是输入还是输出模式,写表示将 GPIO 配置为输入或输出模式;读取或写入操作可取的值为"out"(输出模式)和"in"(输入模式)
⚫ value:在 GPIO 配置为输出模式下,向 value 文件写入"0"控制 GPIO 引脚输出低电平,写入"1"则控制 GPIO 引脚输出高电平。在输入模式下,读取 value 文件获取 GPIO 引脚当前的输入电平状态。 譬如:
# 获取 GPIO 引脚的输入电平状态echo "in" > directioncat value# 控制 GPIO 引脚输出高电平echo "out" > directionecho "1" > value
⚫ active_low:这个属性文件用于控制极性,可读可写,默认情况下为 0,譬如:
# active_low 等于 0 时echo "0" > active_lowecho "out" > directionecho "1" > value #输出高echo "0" > value #输出低# active_low 等于 1 时$ echo "1" > active_low$ echo "out" > direction$ echo "1" > value #输出低$ echo "0" > value #输出高
⚫ edge : 控制中断的触发模式,该文件可读可写。在配置 GPIO 引脚的中断触发模式之前,需将其设置为输入模式:
非中断引脚: echo "none" > edge
上升沿触发: echo "rising" > edge
下降沿触发: echo "falling" > edge
边沿触发: echo "both" > edge
当引脚被配置为中断后可以使用 poll() 函数监听引脚的电平状态变化
GPIO 应用编程之输出
编写一个简单地测试程序,控制开发板上的某一个 GPIO 输出高、低不同的电平状态
执行程序时需要传入两个参数,argv[1] 指定 GPIO 的编号、argv[2] 指定输出电平状态(0 表示低电平、 1 表示高电平)。
(代码解析)代码中首先使用 access()函数判断指定编号的 GPIO 引脚是否已经导出,也就是判断相应的 gpioX 目录是否存在,如果不存在则表示未导出,则通过"/sys/class/gpio/export" 文件将其导出;导出之后先配置了 GPIO 引脚为输出模式,也就是向 direction 文件中写入 "out" ;接着再配置极性,通过向 active_low 文件中写入"0" (不用配置也可以);最后再控制 GPIO 引脚输出相应的电平状态,通过对 value 属性文件写入 "1" 或 "0"来使其输出高电平或低电平。
#include <stdio.h>
#include <stdlib.h>
#include <sys/types.h>
#include <sys/stat.h>
#include <fcntl.h>
#include <unistd.h>
#include <string.h>
static char gpio_path[100];
static int gpio_config(const char *attr, const char *val)
{
 char file_path[100];
 int len;
 int fd;

 sprintf(file_path, "%s/%s", gpio_path, attr);
 if (0 > (fd = open(file_path, O_WRONLY))) {
 perror("open error");
 return fd;
 }

 len = strlen(val);
 if (len != write(fd, val, len)) {
 perror("write error");
 close(fd);
 return -1;
 }

 close(fd); //关闭文件
 return 0;

}
int main(int argc, char *argv[])
{
 /* 校验传参 */
 if (3 != argc) {
 fprintf(stderr, "usage: %s <gpio> <value>\n", argv[0]);
 exit(-1);
 }

 /* 判断指定编号的 GPIO 是否导出 */
 sprintf(gpio_path, "/sys/class/gpio/gpio%s", argv[1]);
 if (access(gpio_path, F_OK)) {//如果目录不存在 则需要导出
 int fd;
 int len;
 if (0 > (fd = open("/sys/class/gpio/export", O_WRONLY))) {
 perror("open error");
 exit(-1);
 }
 len = strlen(argv[1]);
 if (len != write(fd, argv[1], len)) {//导出 gpio
 perror("write error");
 close(fd);
 exit(-1);
 }
 close(fd); //关闭文件
 }
 /* 配置为输出模式 */
 if (gpio_config("direction", "out"))
 exit(-1);

 /* 极性设置 */
 if (gpio_config("active_low", "0"))
 exit(-1);

 /* 控制 GPIO 输出高低电平 */
 if (gpio_config("value", argv[2]))
 exit(-1);

 /* 退出程序 */
 exit(0);
}
GPIO 应用编程之输入
编写一个读取 GPIO 电平状态的测试程序
执行程序时需要传入一个参数,argv[1] 指定要读取电平状态的 GPIO 对应的编号。
(代码分析)上述代码中首先使用 access() 函数判断指定编号的 GPIO 引脚是否已经导出,若未导出,则通过 "/sys/class/gpio/export"文件将其导出;导出之后先配置了 GPIO 引脚为输入模式,也就是向 direction 文件中 写入"in" ;接着再配置极性、设置 GPIO 引脚为非中断模式(向 edge 属性文件中写入 "none" )。
#include <stdio.h>
#include <stdlib.h>
#include <sys/types.h>
#include <sys/stat.h>
#include <fcntl.h>
#include <unistd.h>
#include <string.h>
static char gpio_path[100];
static int gpio_config(const char *attr, const char *val)
{
 char file_path[100];
 int len;
 int fd;
 sprintf(file_path, "%s/%s", gpio_path, attr);
 if (0 > (fd = open(file_path, O_WRONLY))) {
 perror("open error");
 return fd;
 }
 len = strlen(val);
 if (len != write(fd, val, len)) {
 perror("write error");
 close(fd);
 return -1;

 }
 close(fd); //关闭文件
 return 0;
}
int main(int argc, char *argv[])
{
 char file_path[100];
 char val;
 int fd;
 /* 校验传参 */
 if (2 != argc) {
 fprintf(stderr, "usage: %s <gpio>\n", argv[0]);
 exit(-1);
 }
 /* 判断指定编号的 GPIO 是否导出 */
 sprintf(gpio_path, "/sys/class/gpio/gpio%s", argv[1]);
 if (access(gpio_path, F_OK)) {//如果目录不存在 则需要导出
 int len;
 if (0 > (fd = open("/sys/class/gpio/export", O_WRONLY))) {
 perror("open error");
 exit(-1);
 }
 len = strlen(argv[1]);
 if (len != write(fd, argv[1], len)) {//导出 gpio
 perror("write error");
 close(fd);
 exit(-1);
 }
 close(fd); //关闭文件
 }
 /* 配置为输入模式 */
 if (gpio_config("direction", "in"))

 /* 极性设置 */
 if (gpio_config("active_low", "0"))
 exit(-1);
 /* 配置为非中断方式 */
 if (gpio_config("edge", "none"))
 exit(-1);
 /* 读取 GPIO 电平状态 */
 sprintf(file_path, "%s/%s", gpio_path, "value");
 if (0 > (fd = open(file_path, O_RDONLY))) {
 perror("open error");
 exit(-1);
 }
 if (0 > read(fd, &val, 1)) {
 perror("read error");
 close(fd);
 exit(-1);
 }
 printf("value: %c\n", val);
 /* 退出程序 */
 close(fd);
 exit(0);
}
GPIO 应用编程之中断
在应用层可以将 GPIO 配置为中断触发模式,譬如将 GPIO 配置为上升沿触发、下降沿触发或者边沿触发,编写一个测试程序,将 GPIO 配置为边沿触发模式并监测中断触发状态
执行程序时需要传入一个参数,argv[1] 指定要读取电平状态的 GPIO 对应的编号。
上述代码中首先使用 access() 函数判断指定编号的 GPIO 引脚是否已经导出,若未导出,则通过 "/sys/class/gpio/export"文件将其导出。 对 GPIO 进行配置:配置为输入模式、配置极性、将触发方式配置为边沿触发。
#include <stdio.h>
#include <stdlib.h>
#include <sys/types.h>
#include <sys/stat.h>
#include <fcntl.h>
#include <unistd.h>
#include <string.h>
#include <poll.h>
static char gpio_path[100];
static int gpio_config(const char *attr, const char *val)
{
 char file_path[100];
 int len;
 int fd;

 sprintf(file_path, "%s/%s", gpio_path, attr);
 if (0 > (fd = open(file_path, O_WRONLY))) {
 perror("open error");
 return fd;
 }
 len = strlen(val);
 if (len != write(fd, val, len)) {
 perror("write error");
 return -1;
 }
 close(fd); //关闭文件
 return 0;
}
int main(int argc, char *argv[])
{
 struct pollfd pfd;

 char file_path[100];
 int ret;
 char val;

 /* 校验传参 */
 if (2 != argc) {
 fprintf(stderr, "usage: %s <gpio>\n", argv[0]);
 exit(-1);
 }

 /* 判断指定编号的 GPIO 是否导出 */
 sprintf(gpio_path, "/sys/class/gpio/gpio%s", argv[1]);
 if (access(gpio_path, F_OK)) {//如果目录不存在 则需要导出
 int len;
 int fd;
 if (0 > (fd = open("/sys/class/gpio/export", O_WRONLY))) {
 perror("open error");
 exit(-1);
 }
 len = strlen(argv[1]);
 if (len != write(fd, argv[1], len)) {//导出 gpio
 perror("write error");
 exit(-1);
 }
 close(fd); //关闭文件
 }

 /* 配置为输入模式 */
 if (gpio_config("direction", "in"))
 exit(-1);

 /* 极性设置 */
 if (gpio_config("active_low", "0"))
 exit(-1);

 /* 配置中断触发方式: 上升沿和下降沿 */
 if (gpio_config("edge", "both"))
 exit(-1);

 /* 打开 value 属性文件 */
 sprintf(file_path, "%s/%s", gpio_path, "value");
 if (0 > (pfd.fd = open(file_path, O_RDONLY))) {
 perror("open error");
 exit(-1);
 }

 /* 调用 poll */
 pfd.events = POLLPRI; //只关心高优先级数据可读(中断)
 read(pfd.fd, &val, 1);//先读取一次清除状态
 for ( ; ; ) {
 ret = poll(&pfd, 1, -1); //调用 poll
 if (0 > ret) {
 perror("poll error");
 exit(-1);
 }
 else if (0 == ret) {
 fprintf(stderr, "poll timeout.\n");
 continue;
 }

 /* 校验高优先级数据是否可读 */
 if(pfd.revents & POLLPRI) {
 if (0 > lseek(pfd.fd, 0, SEEK_SET)) {//将读位置移动到头部
 perror("lseek error");
 exit(-1);
 }
 if (0 > read(pfd.fd, &val, 1)) {
 perror("read error");
 exit(-1);
 }
 printf("GPIO 中断触发<value=%c>\n", val);
 }
 }

 /* 退出程序 */
 exit(0);

}
本文含有隐藏内容,请 开通VIP 后查看