1、SpringBoot是什么
Spring Boot是基于Spring开发的全新框架,相当于对Spring做了又一层封装。
最大特点:起步依赖、自动配置
依靠父项目中的版本锁定和starter机制让我们能更轻松的实现对依赖的管理,也解决了依赖冲突的问题。
官网:https://spring.io/projects/spring-boot
2、快速入门
2.1 Maven配置
	#配置阿里云镜像
  <mirrors>
    <mirror>
      <id>aliyunmaven</id>
      <mirrorOf>central</mirrorOf>
      <name>aliyun maven</name>
      <url>https://maven.aliyun.com/repository/public </url>
    </mirror>
  </mirrors>
	#指定jdk版本
  <profiles>
    <profile>
      <id>jdk-1.8</id>
      <activation>
        <activeByDefault>true</activeByDefault>
        <jdk>1.8</jdk>
      </activation>
      <properties>
        <maven.compiler.source>1.8</maven.compiler.source>
        <maven.compiler.target>1.8</maven.compiler.target>
        <maven.compiler.compilerVersion>1.8</maven.compiler.compilerVersion>
      </properties>
    </profile>
  </profiles>
#创建一个bat文件,然后复制上述脚本进去,修改其中maven本地仓库的地址,保存后双击执行即可。
@echo off
rem create by NettQun

rem 这里写你的仓库路径
set REPOSITORY_PATH=E:\Develop\maven_rep
rem 正在搜索...
for /f "delims=" %%i in ('dir /b /s "%REPOSITORY_PATH%\*lastUpdated*"') do (
    echo %%i
    del /s /q "%%i"
)
rem 搜索完毕
pause
2.2 Hello World
①继承父工程
在pom.xml中添加一下配置,继承spring-boot-starter-parent这个父工程
    <parent>
        <groupId>org.springframework.boot</groupId>
        <artifactId>spring-boot-starter-parent</artifactId>
        <version>2.5.0</version>
    </parent>
②添加依赖
   <dependencies>
        <dependency>
            <groupId>org.springframework.boot</groupId>
            <artifactId>spring-boot-starter-web</artifactId>
        </dependency>
        <dependency>
            <groupId>org.projectlombok</groupId>
            <artifactId>lombok</artifactId>
            <optional>true</optional>
        </dependency>
        <dependency>
            <groupId>org.springframework.boot</groupId>
            <artifactId>spring-boot-starter-test</artifactId>
            <scope>test</scope>
        </dependency>
    </dependencies>
③创建启动类
创建一个类在其实加上@SpringBootApplication注解标识为启动类。
#注意启动类不放在包下面会报错
@SpringBootApplication
public class HelloApplication {

    public static void main(String[] args) {
        SpringApplication.run(HelloApplication.class, args);
    }
}
④定义Controller
创建Controller,主要Controller要放在启动类所在包或者其子包下。
# @RestController 等价于 @Controller + @ResponseBody注解
@RestController
public class HelloController {
    @RequestMapping("/hello")
    public String hello(){
        return "hello";
    }
}
⑤运行测试
直接运行启动类的main方法即可。
2.3 打包运行
我们可以把springboot的项目打成jar包直接去运行。
①添加maven插件
    <build>
        <plugins>
            <!--springboot打包插件-->
            <plugin>
                <groupId>org.springframework.boot</groupId>
                <artifactId>spring-boot-maven-plugin</artifactId>
            </plugin>
        </plugins>
    </build>
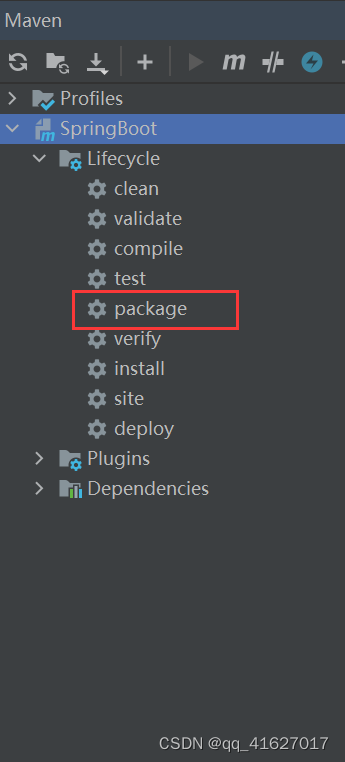
②maven打包
③运行jar包
在jar包所在目录执行命令
java -jar jar包名称
即可运行。
2.4 快速构建
3、热部署
SpringBoot为我们提供了一个方便我们开发测试的工具dev-tools。使用后可以实现热部署的效果。当我们运行了程序后对程序进行了修改,程序会自动重启。
原理是使用了两个ClassLoder,一个ClassLoader加载哪些不会改变的类(第三方jar包),另一个ClassLoader加载会更改的类.称之为Restart ClassLoader,这样在有代码更改的时候,原来的Restart Classloader被丢弃,重新创建一个Restart ClassLoader,由于需要加载的类相比较少,所以实现了较快的重启。
3.1 准备工作
①设置IDEA自动编译
在idea中的setting做下面配置

②设置允许程序运行时自动启动
ctrl + shift + alt + / 这组快捷键后会有一个小弹窗,点击Registry 就会进入下面的界面,找到下面的配置项并勾选,勾选后直接点close (用idea2021.3.3的同学 Settings->Advanced Settings->勾选 Allow auto-make to start even if developed application is currently running)

3.2 使用
①添加依赖
        <dependency>
            <groupId>org.springframework.boot</groupId>
            <artifactId>spring-boot-devtools</artifactId>
            <optional>true</optional>
        </dependency>
②触发热部署
当我们在修改完代码或者静态资源后可以切换到其它软件,让IDEA自动进行编译,自动编译后就会触发热部署。
或者使用Ctrl+F9手动触发重新编译。
4、单元测试
我们可以使用SpringBoot整合Junit进行单元测试。
Spring Boot 2.2.0 版本开始引入 JUnit 5 作为单元测试默认库。
4.1 使用
①添加依赖
        <dependency>
            <groupId>org.springframework.boot</groupId>
            <artifactId>spring-boot-starter-test</artifactId>
        </dependency>
②编写测试类
package com.springboot;

import org.junit.jupiter.api.Test;
import org.springframework.boot.test.context.SpringBootTest;

@SpringBootTest
public class ApplicationTest {
    @Test
    public void testJunit() {
        for (int i = 1; i <= 10; i++) {
            System.out.println(i);
        }
    }
}
注意:测试类所在的包需要和启动类是在同一个包下。否则就要使用如下写法指定启动类。
import com.springboot.HelloApplication;
import org.junit.jupiter.api.Test;
import org.springframework.boot.test.context.SpringBootTest;

@SpringBootTest(classes = HelloApplication.class)
public class ApplicationTest {
    @Test
    public void testJunit() {
        for (int i = 1; i <= 10; i++) {
            System.out.println(i);
        }
    }
}
4.2 兼容老版本
SpringBoot 2.4 以上版本对应的spring-boot-starter-test移除了默认对 **Vintage 的依赖。**所以当我们仅仅依赖spring-boot-starter-test时会发现之前我们使用的@Test注解和@RunWith注解都不能使用了。
我们可以单独在依赖vintage来进行兼容。
        <dependency>
            <groupId>org.junit.vintage</groupId>
            <artifactId>junit-vintage-engine</artifactId>
            <scope>test</scope>
        </dependency>
注意:
org.junit.Test对应的是Junit4的版本,就搭配@RunWith注解来使用。
SpringBoot2.2.0之前版本的写法
package com.springboot;
import org.junit.Test;
import org.junit.runner.RunWith;
import org.springframework.test.context.junit4.SpringRunner;

@RunWith(SpringRunner.class)
public class ApplicationTest {
    @Test
    public void testJunit() {
        for (int i = 1; i <= 10; i++) {
            System.out.println(i);
        }
    }
}