由于自己的业务逻辑想要单独放到一个model中,所以这里讲讲在芋道中如何新建自定义Model。芋道官网的教程其实已经很详细了,这里讲一下社区版的Idea如何创建,同时针对一些细节做一下说明。
一、创建对应的业务模块
1)创建对应的model
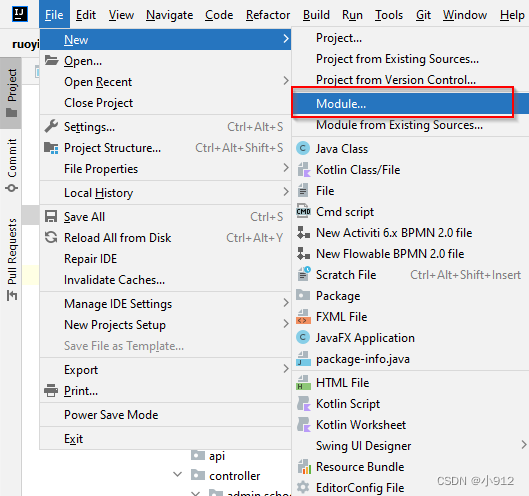
这里创建model名称,如图所示:
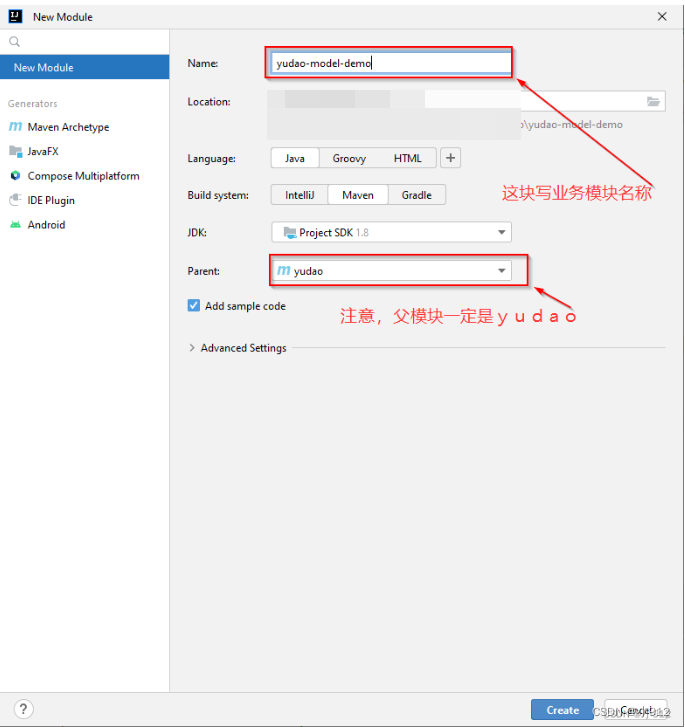
这里最好还是叫yudao-module-xxx,后面的xxx是你想要设置的业务名称,因为如果前面也变了的话,需要在启动类里面重新配置,麻烦一些,这里官网有提到。
2)删除掉对应的src文件
点完create后,我们可以看到生成了对应的文件夹,这个时候我们需要删除掉对应的src文件,如图所示:
这里因为芋道有着自己的结构,一般每个模块包含两个 Maven Module,分别是:
yudao-module-xxx-api 和 yudao-module-xxx-biz。其中,yudao-module-xxx-api是提供给其他模块的API定义,就是说别的模块想要用到你的模块的话,他需要引入你的yudao-module-xxx-api。 而yudao-module-xxx-biz 则是模块功能的具体实现。
3)修改pom.xml文件
<?xml version="1.0" encoding="UTF-8"?>
<project xmlns="http://maven.apache.org/POM/4.0.0"
         xmlns:xsi="http://www.w3.org/2001/XMLSchema-instance"
         xsi:schemaLocation="http://maven.apache.org/POM/4.0.0 http://maven.apache.org/xsd/maven-4.0.0.xsd">
    <parent>
        <artifactId>yudao</artifactId>
        <groupId>cn.iocoder.boot</groupId>
        <version>${revision}</version> <!-- 1. 修改 version 为 ${revision} -->
    </parent>
    <modelVersion>4.0.0</modelVersion>

    <artifactId>yudao-module-demo</artifactId>
    <packaging>pom</packaging> <!-- 2. 新增 packaging 为 pom -->

    <name>${project.artifactId}</name> <!-- 3. 新增 name 为 ${project.artifactId} -->
    <description> <!-- 4. 新增 description 为该模块的描述 -->
        demo 模块,主要实现 XXX、YYY、ZZZ 等功能。
    </description>

</project>
yudao-module-demo 这里要换成你的模块名称
二、新建yudao-module-xxx-api模块
1)创建对应的model
如图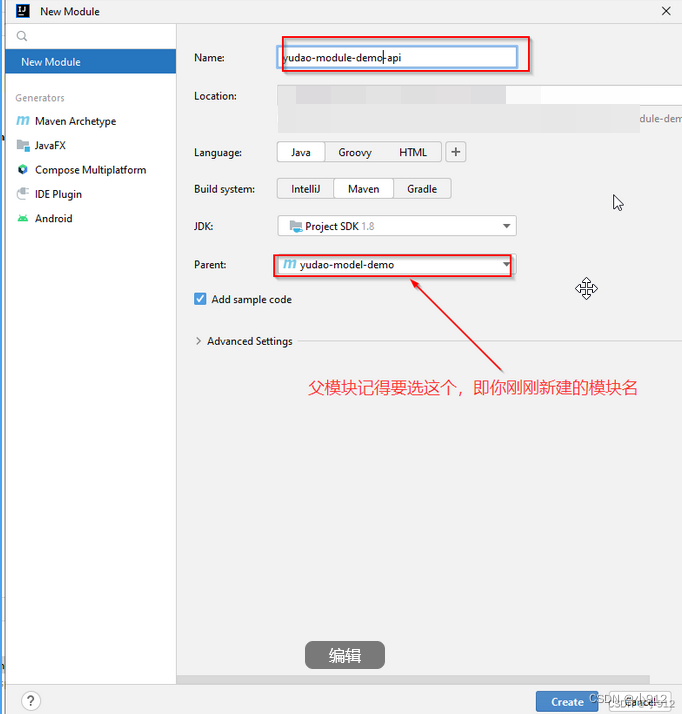
2)修改pom文件
<?xml version="1.0" encoding="UTF-8"?>
<project xmlns="http://maven.apache.org/POM/4.0.0"
         xmlns:xsi="http://www.w3.org/2001/XMLSchema-instance"
         xsi:schemaLocation="http://maven.apache.org/POM/4.0.0 http://maven.apache.org/xsd/maven-4.0.0.xsd">
    <parent>
        <artifactId>yudao-module-demo</artifactId>
        <groupId>cn.iocoder.boot</groupId>
        <version>${revision}</version> <!-- 1. 修改 version 为 ${revision} -->
    </parent>
    <modelVersion>4.0.0</modelVersion>
    <artifactId>yudao-module-demo-api</artifactId>
    <packaging>jar</packaging> <!-- 2. 新增 packaging 为 jar -->

    <name>${project.artifactId}</name> <!-- 3. 新增 name 为 ${project.artifactId} -->
    <description> <!-- 4. 新增 description 为该模块的描述 -->
        demo 模块 API,暴露给其它模块调用
    </description>

    <dependencies>  <!-- 5. 新增 yudao-common 依赖 -->
        <dependency>
            <groupId>cn.iocoder.boot</groupId>
            <artifactId>yudao-common</artifactId>
        </dependency>
    </dependencies>

</project>
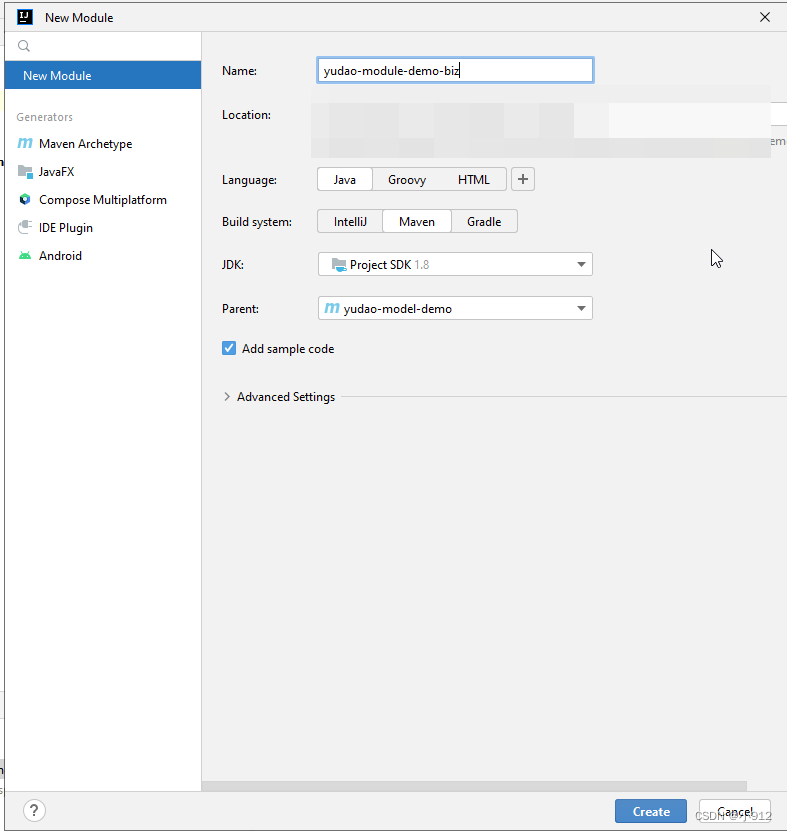
三、新建yudao-module-demo-biz 子模块
1)创建对应的model
同理
2)修改pom.xml文件
<?xml version="1.0" encoding="UTF-8"?>
<project xmlns="http://maven.apache.org/POM/4.0.0"
         xmlns:xsi="http://www.w3.org/2001/XMLSchema-instance"
         xsi:schemaLocation="http://maven.apache.org/POM/4.0.0 http://maven.apache.org/xsd/maven-4.0.0.xsd">
    <parent>
        <artifactId>yudao-module-demo</artifactId>
        <groupId>cn.iocoder.boot</groupId>
        <version>${revision}</version> <!-- 1. 修改 version 为 ${revision} -->
    </parent>
    <modelVersion>4.0.0</modelVersion>
    <packaging>jar</packaging> <!-- 2. 新增 packaging 为 jar -->

    <artifactId>yudao-module-demo-biz</artifactId>

    <name>${project.artifactId}</name> <!-- 3. 新增 name 为 ${project.artifactId} -->
    <description> <!-- 4. 新增 description 为该模块的描述 -->
        demo 模块,主要实现 XXX、YYY、ZZZ 等功能。
    </description>

    <dependencies>  <!-- 5. 新增依赖,这里引入的都是比较常用的业务组件、技术组件 -->
        <dependency>
            <groupId>cn.iocoder.boot</groupId>
            <artifactId>yudao-module-demo-api</artifactId>
            <version>${revision}</version>
        </dependency>

        <!-- 业务组件 -->
        <dependency>
            <groupId>cn.iocoder.boot</groupId>
            <artifactId>yudao-spring-boot-starter-biz-operatelog</artifactId>
        </dependency>

        <!-- Web 相关 -->
        <dependency>
            <groupId>cn.iocoder.boot</groupId>
            <artifactId>yudao-spring-boot-starter-web</artifactId>
        </dependency>

        <dependency>
            <groupId>cn.iocoder.boot</groupId>
            <artifactId>yudao-spring-boot-starter-security</artifactId>
        </dependency>

        <!-- DB 相关 -->
        <dependency>
            <groupId>cn.iocoder.boot</groupId>
            <artifactId>yudao-spring-boot-starter-mybatis</artifactId>
        </dependency>

        <!-- Test 测试相关 -->
        <dependency>
            <groupId>cn.iocoder.boot</groupId>
            <artifactId>yudao-spring-boot-starter-test</artifactId>
        </dependency>
    </dependencies>

</project>
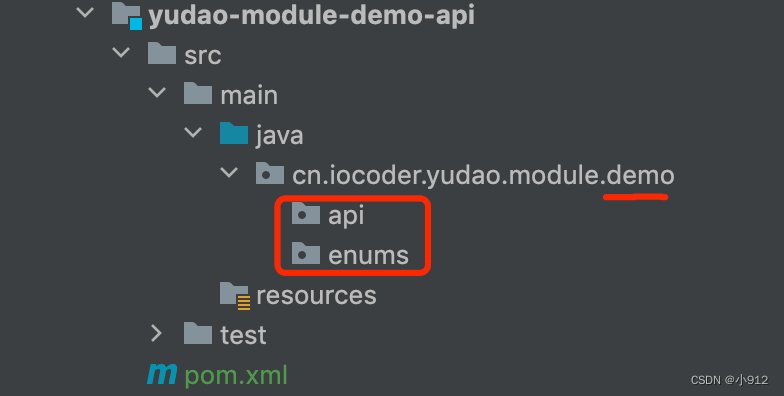
四、新建基础包
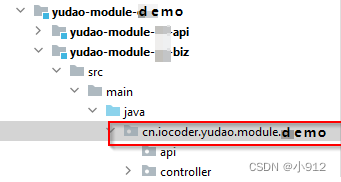
为这两个文件 新建 cn.iocoder.yudao.module.demo 基础包,demo换成你的业务名即可,具体层级如下:
api:
biz:
这样就可以了。
本文含有隐藏内容,请 开通VIP 后查看