文章目录
1.pytest安装
pip install pytest
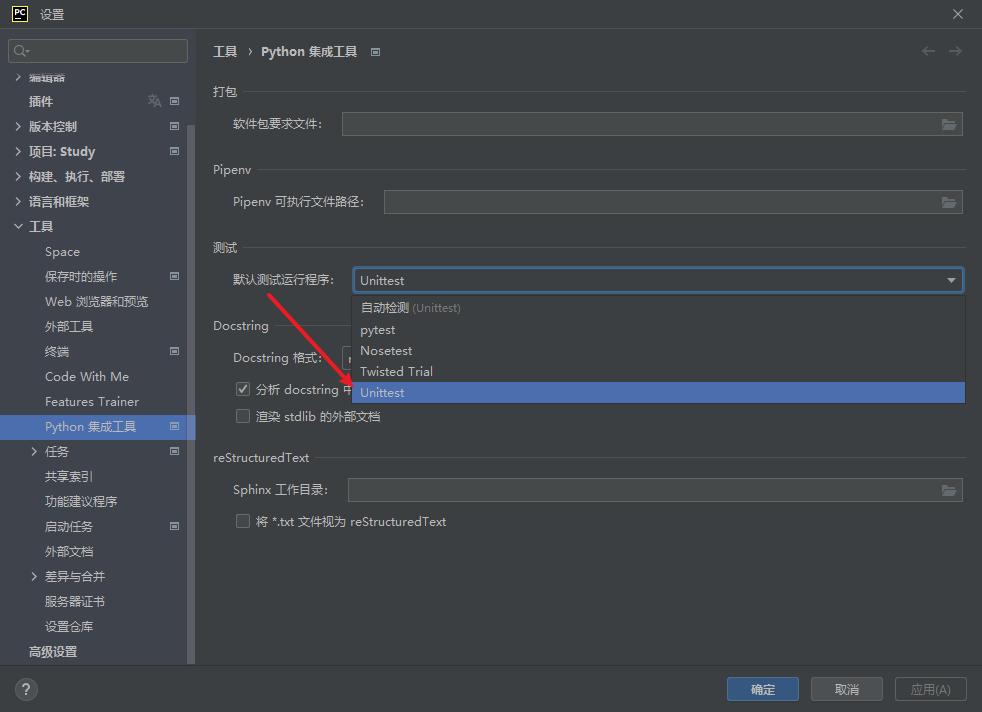
环境配置:需要设置项目的默认运行方式为unittest
2.用例运行规则
- pytest将在当前目录及其子目录中运行所有格式为
test_*.py开头或*_test.py结尾的文件 - 测试方法/测试函数 默认必须是test开头
- 测试类必须是Test开头
- 测试类不能有构造方法
__init__
示例:
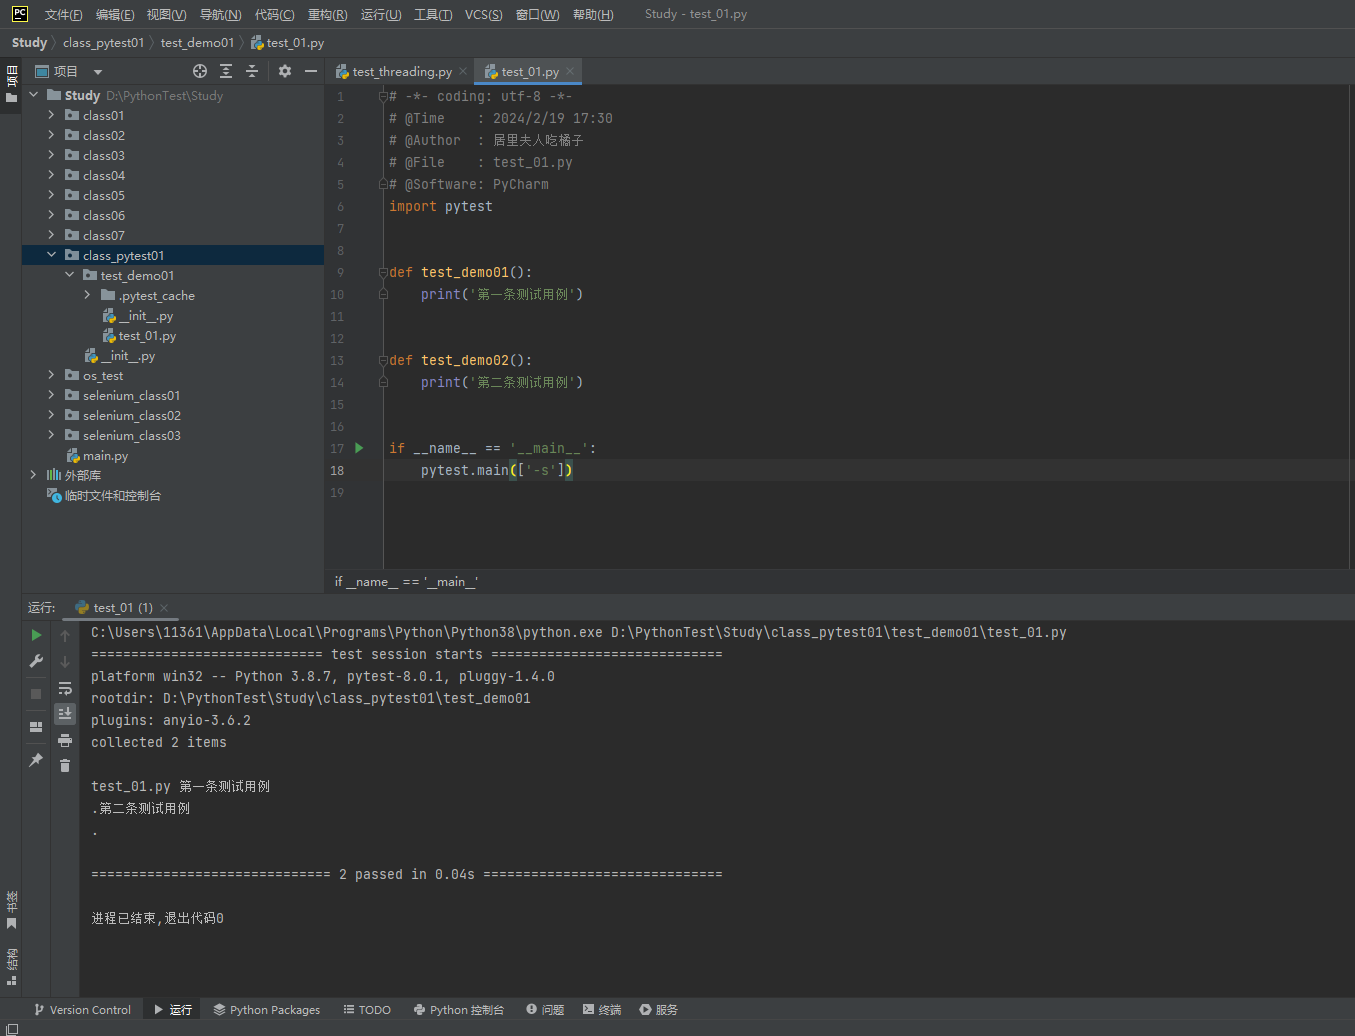
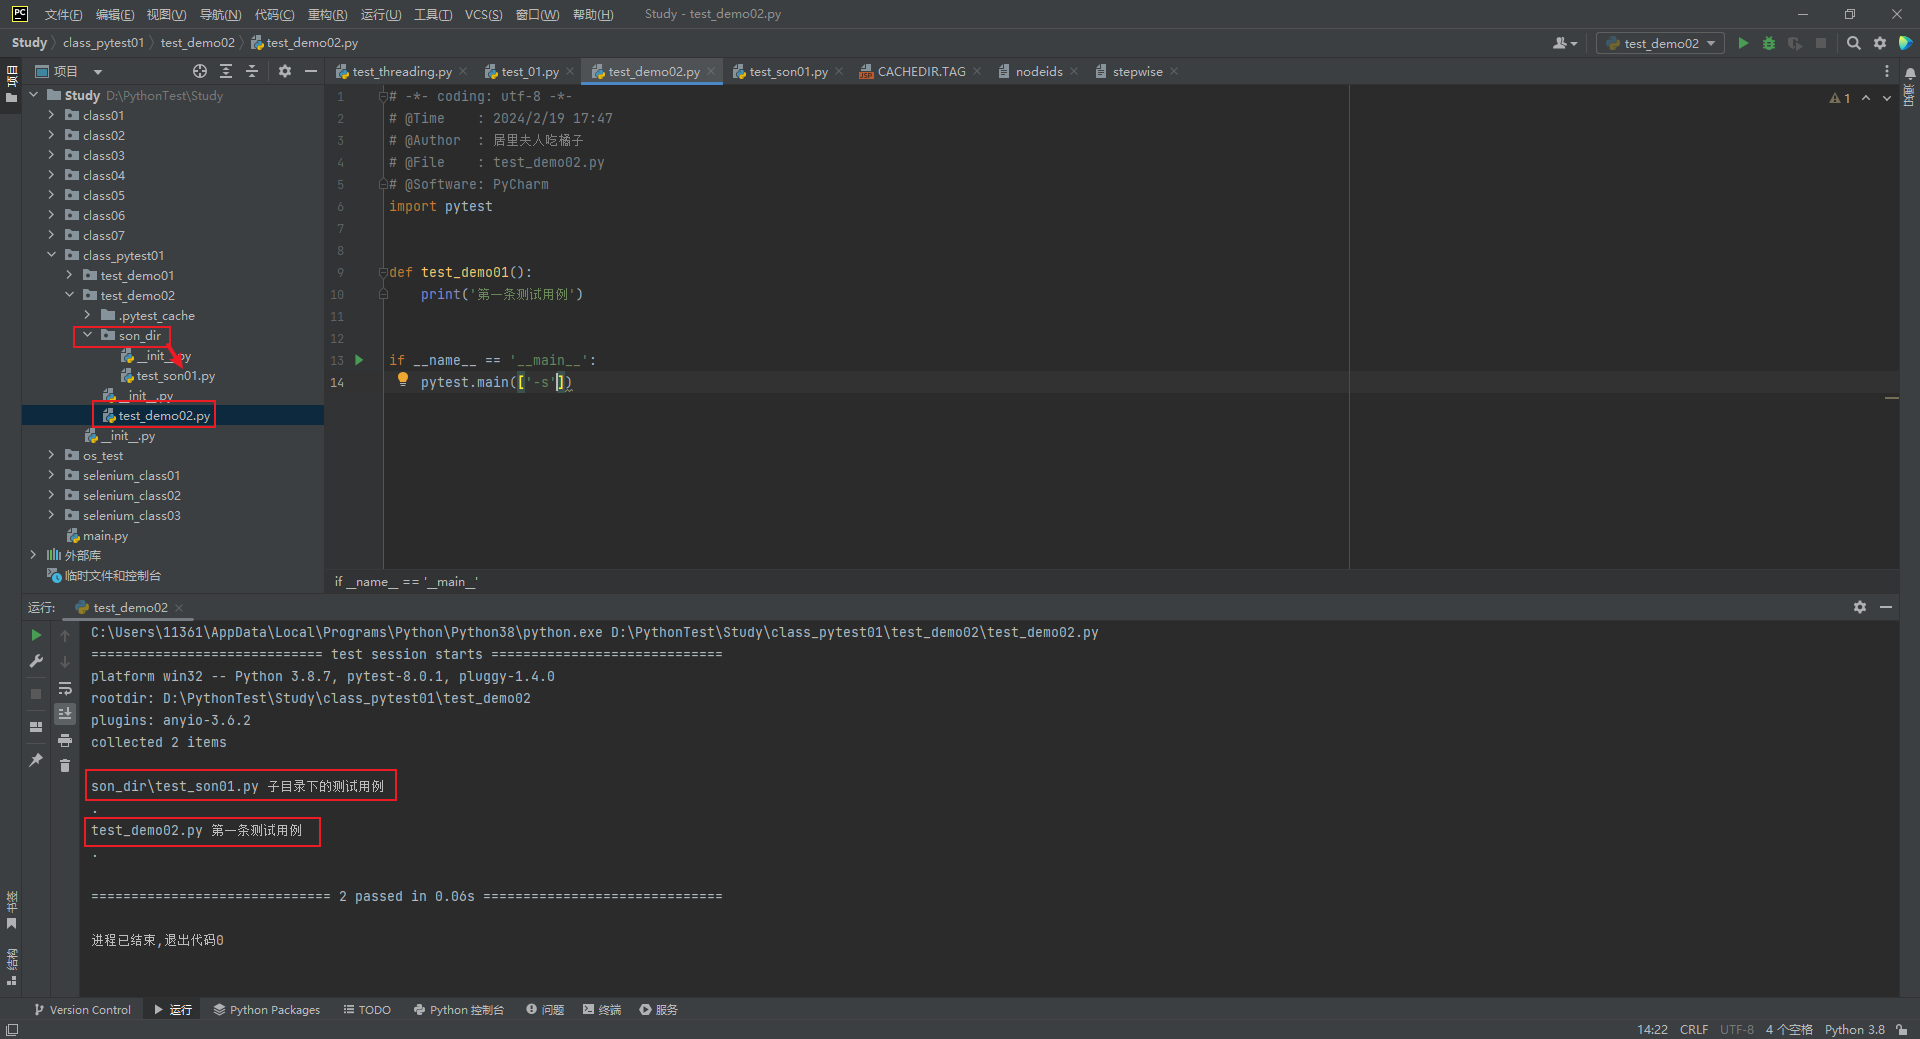
运行时可以扫描到当前目录和当前子目录下的用例:
3.常用参数
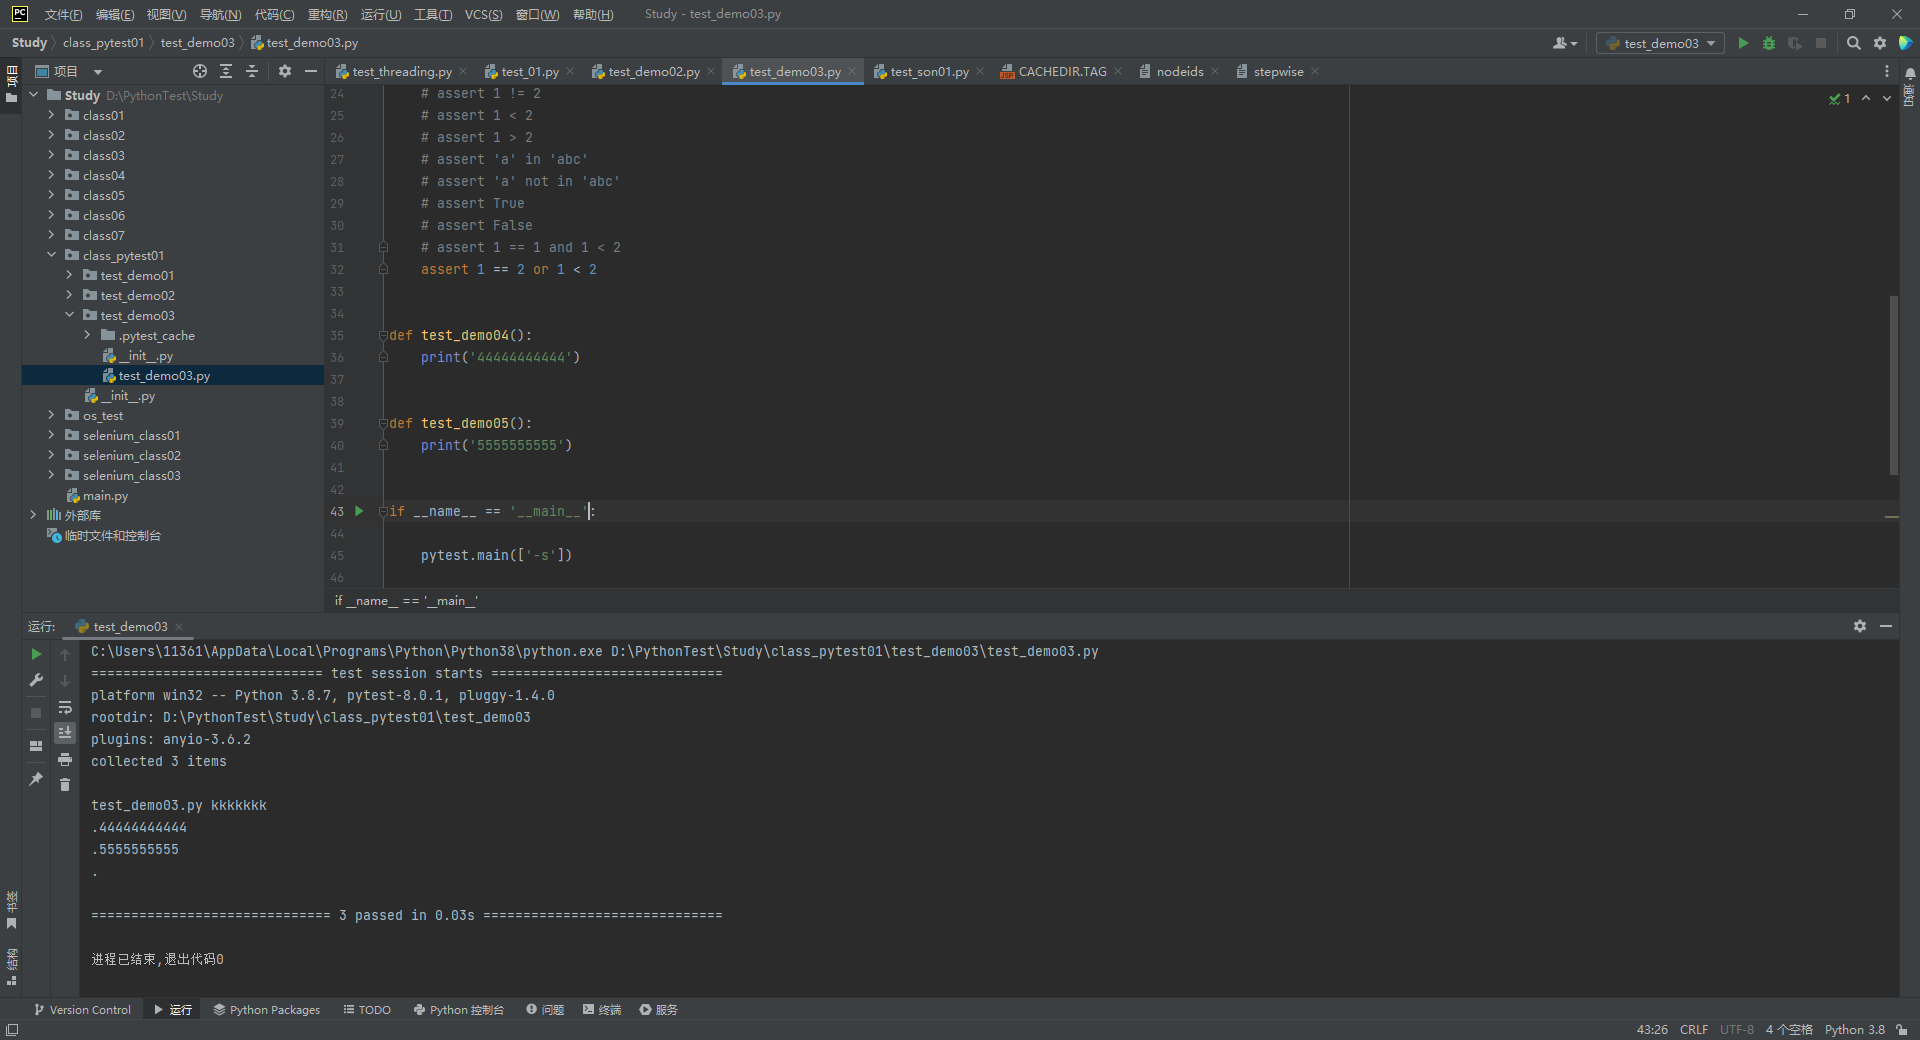
断言
断言借助Python中的运算符号和assert关键字实现;
# -*- coding: utf-8 -*-
# @Time : 2024/2/19 17:56
# @Author : 居里夫人吃橘子
# @File : test_demo03.py
# @Software: PyCharm
import pytest
"""
测试不相等 !=
<=
>=
测试包含 in
测试不包含 not in
判断是否为true: is True
判断是否不为true: is not True/is False
and
or
"""
def test_demo03():
print('kkkkkkk')
# assert 1 == 1
# assert 1 != 2
# assert 1 < 2
# assert 1 > 2
# assert 'a' in 'abc'
# assert 'a' not in 'abc'
# assert True
# assert False
# assert 1 == 1 and 1 < 2
assert 1 == 2 or 1 < 2
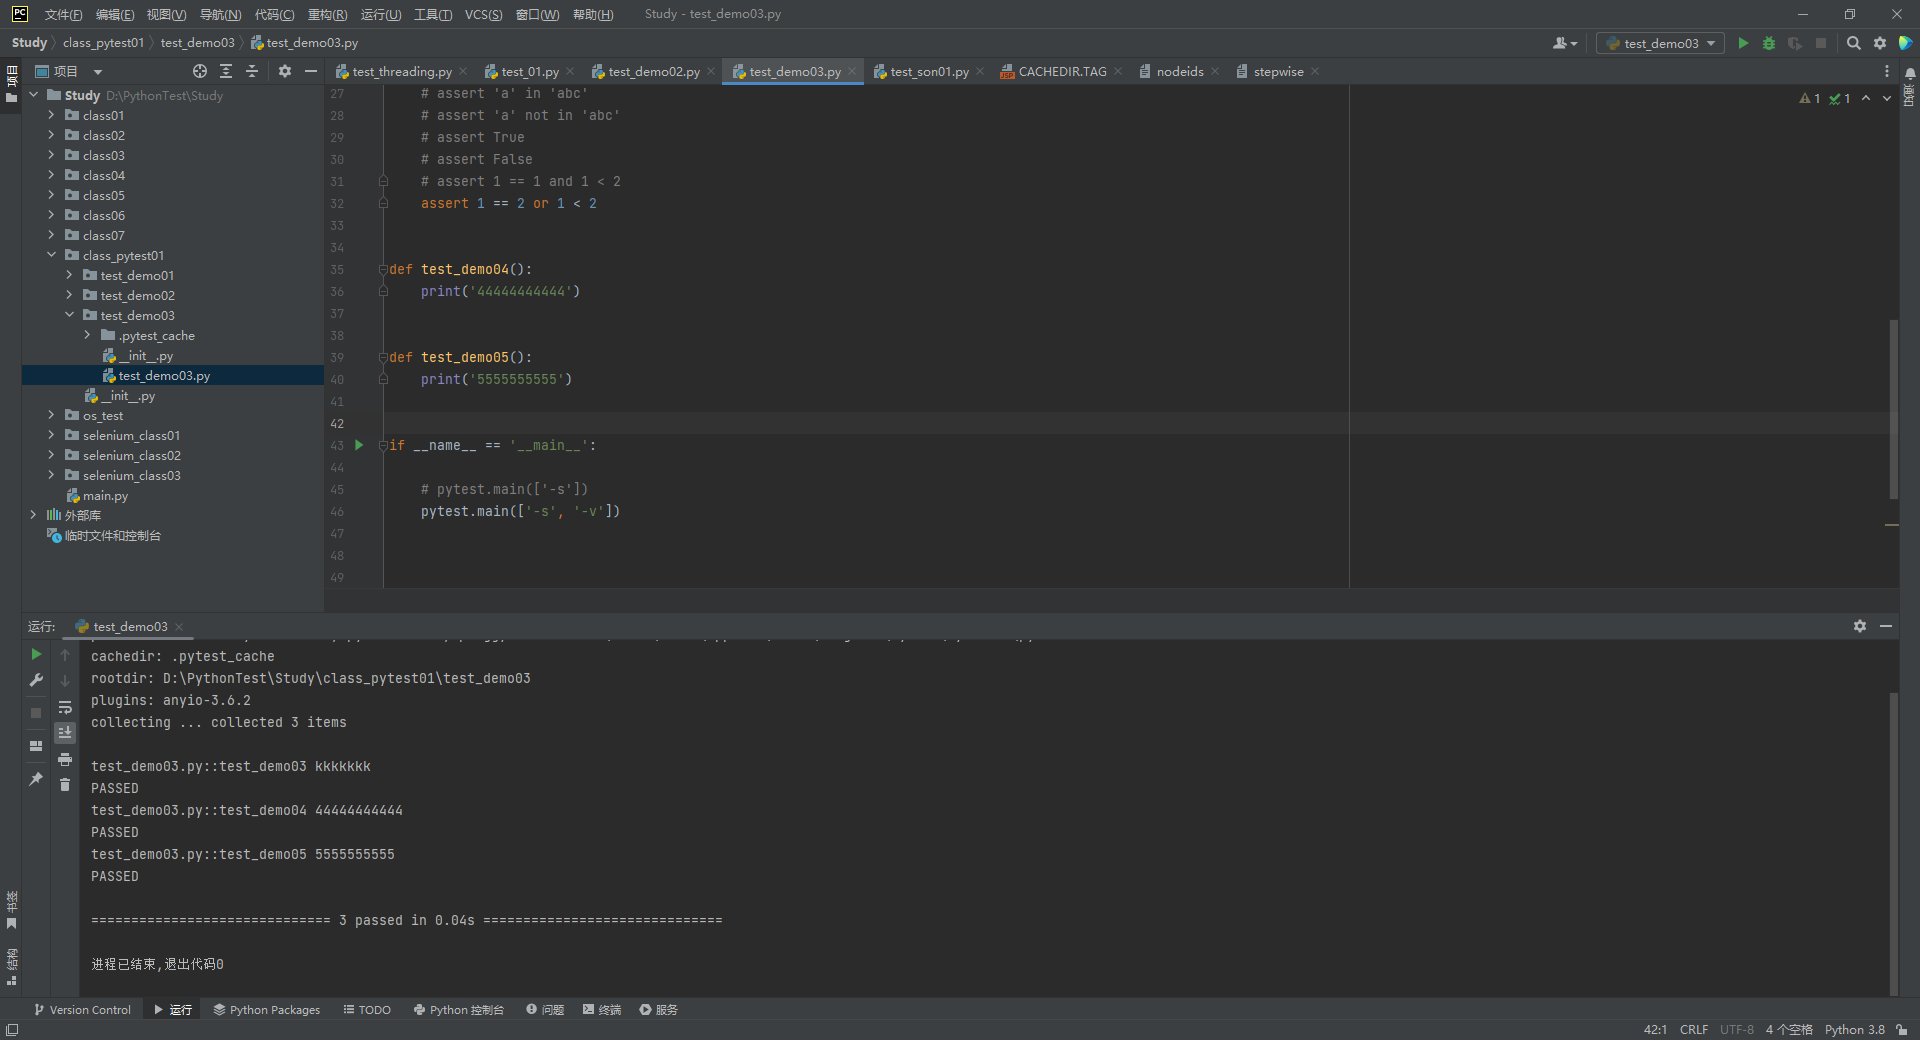
if __name__ == '__main__':
pytest.main(['-s'])
运行参数
“-s” 参数 用于关闭捕捉,从而输出打印信息到控制台
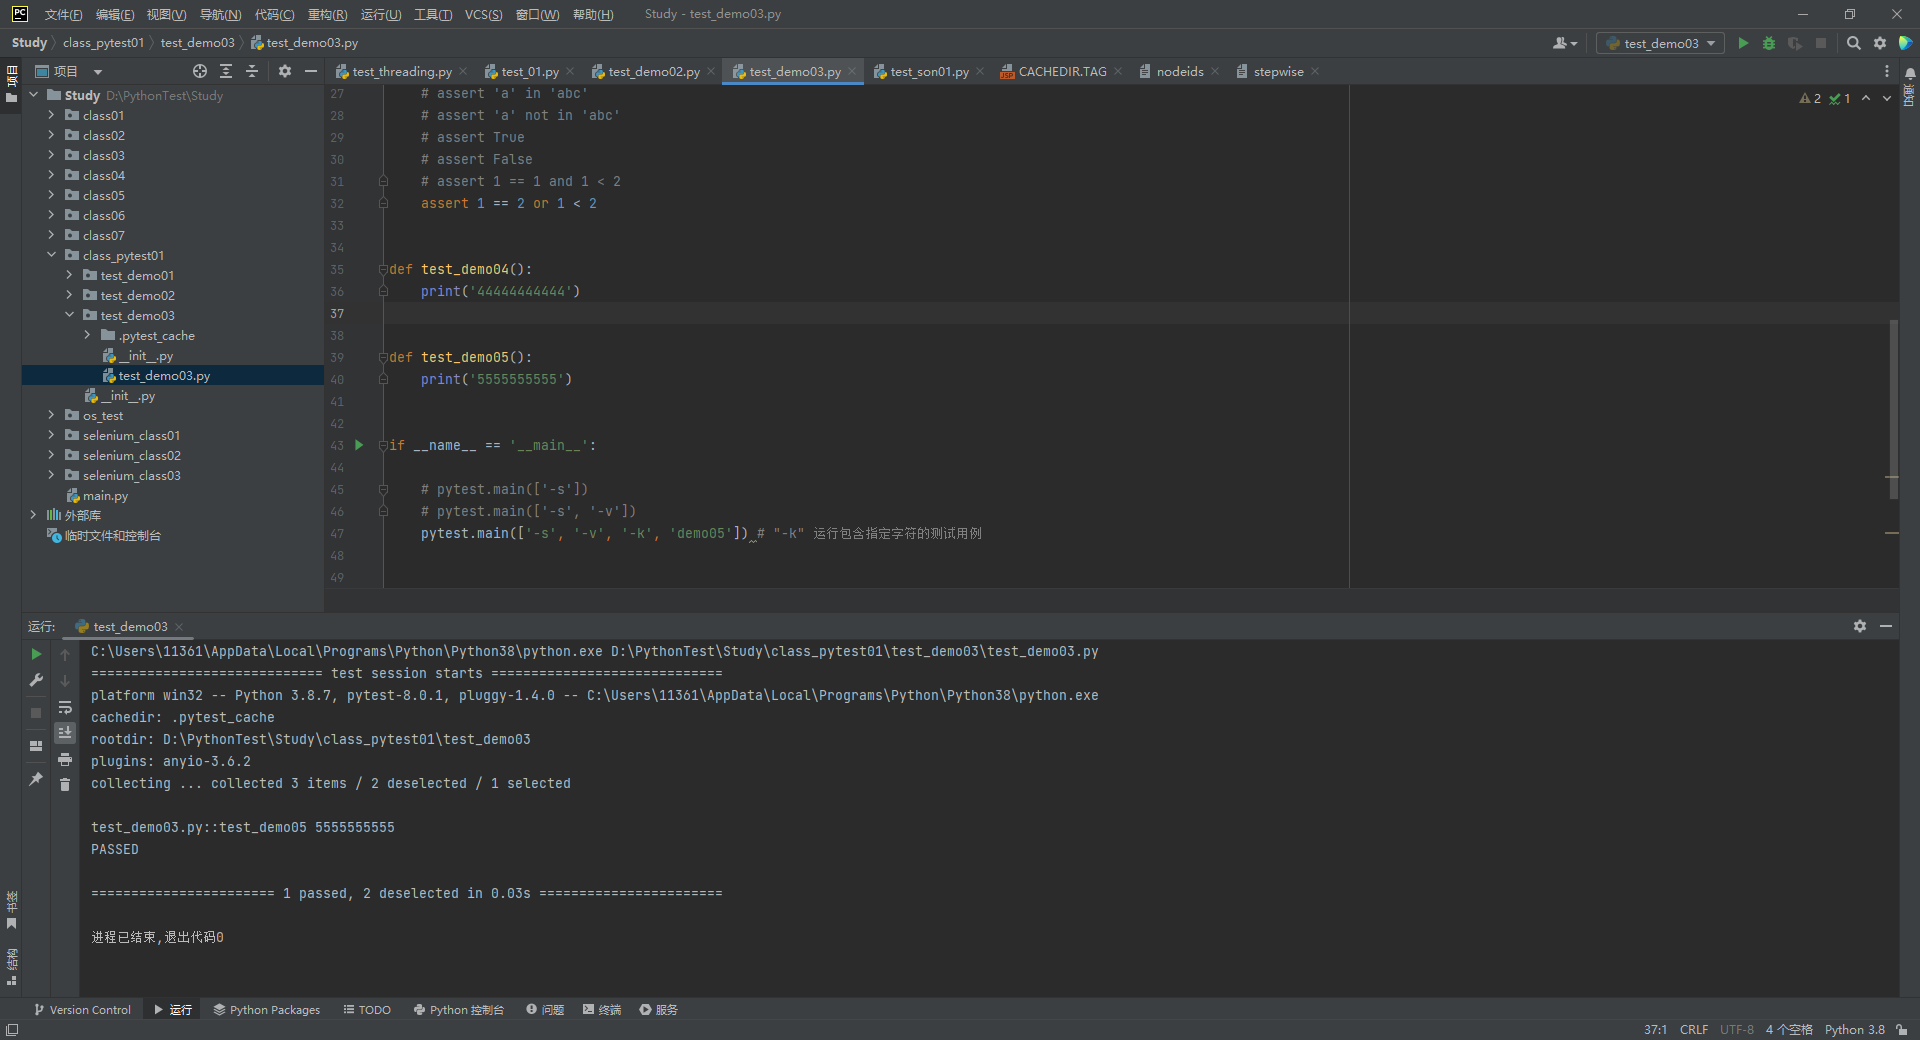
“-v” 参数 用于显示具体的用例执行信息‘
“-k” 运行名称中包含某字符串的测试用例,类似于模糊查找
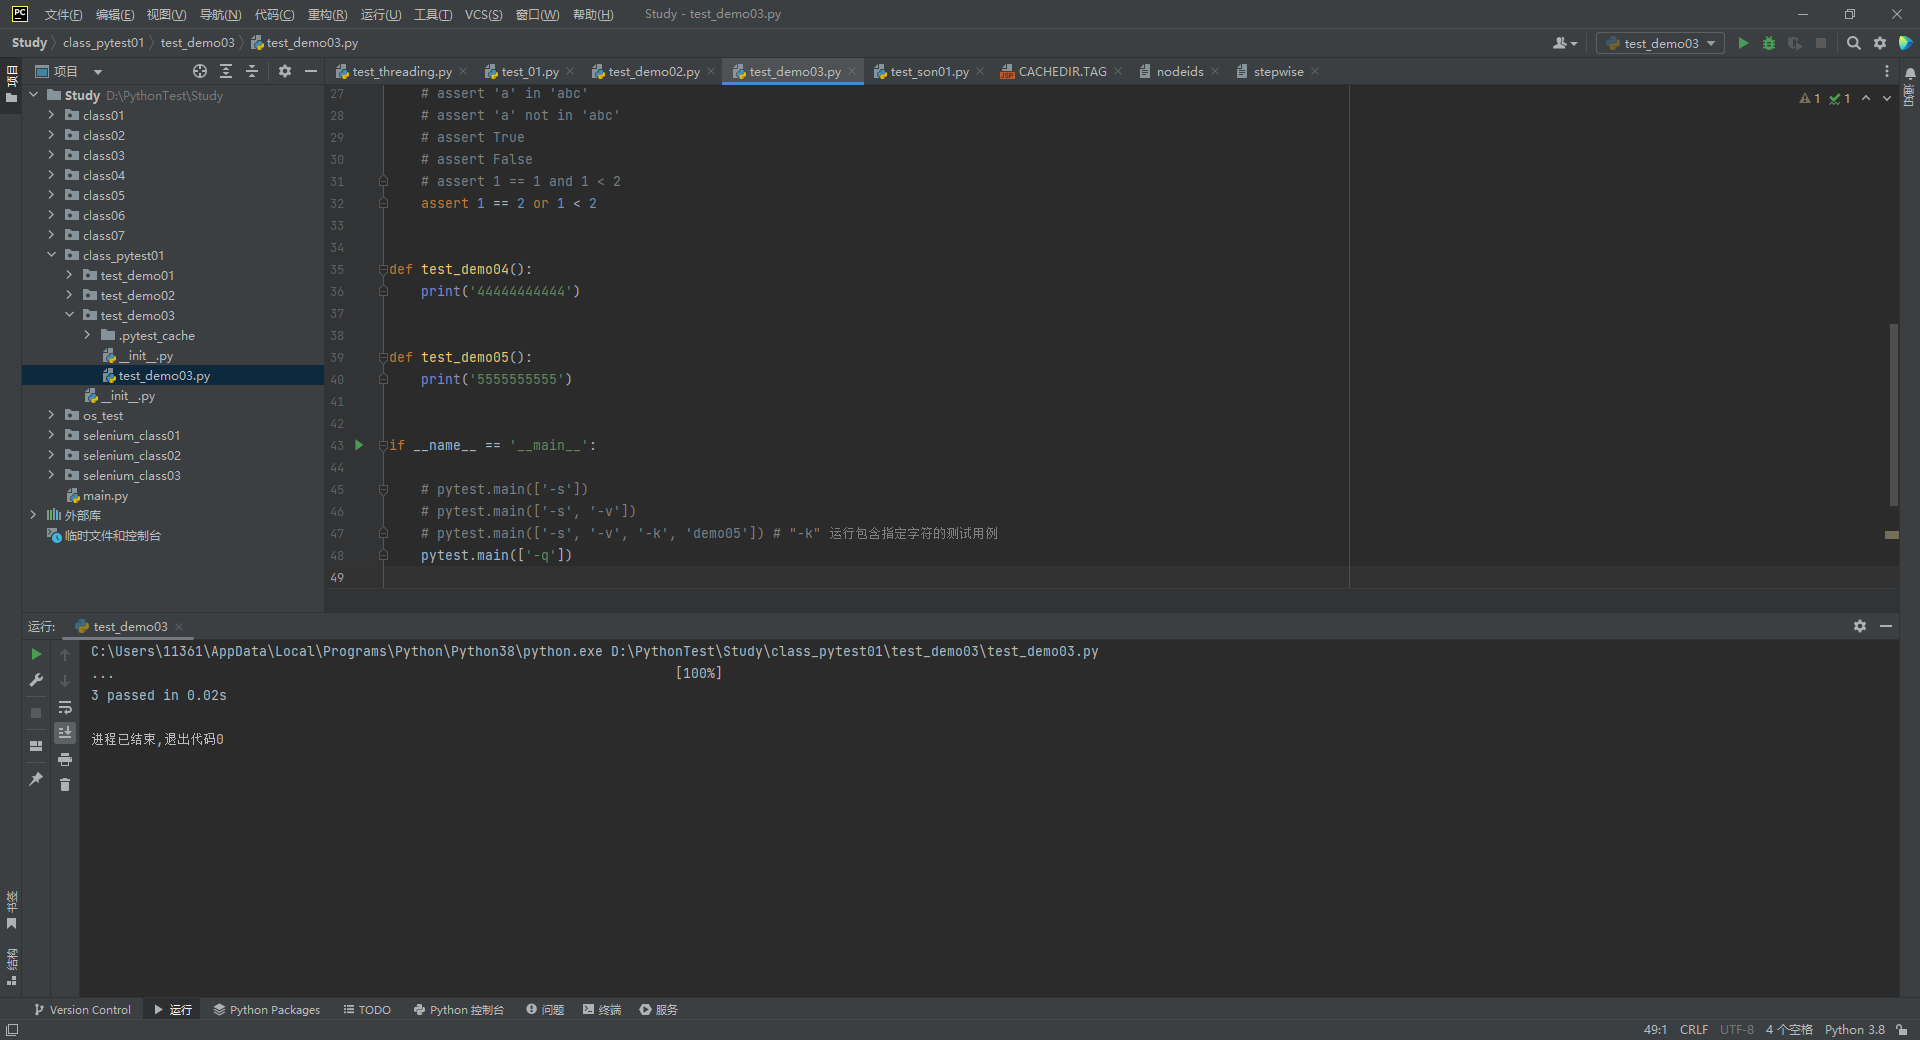
‘-q’ 简化输出信息
‘-x’ 如果出现一条测试用例失败,则退出测试

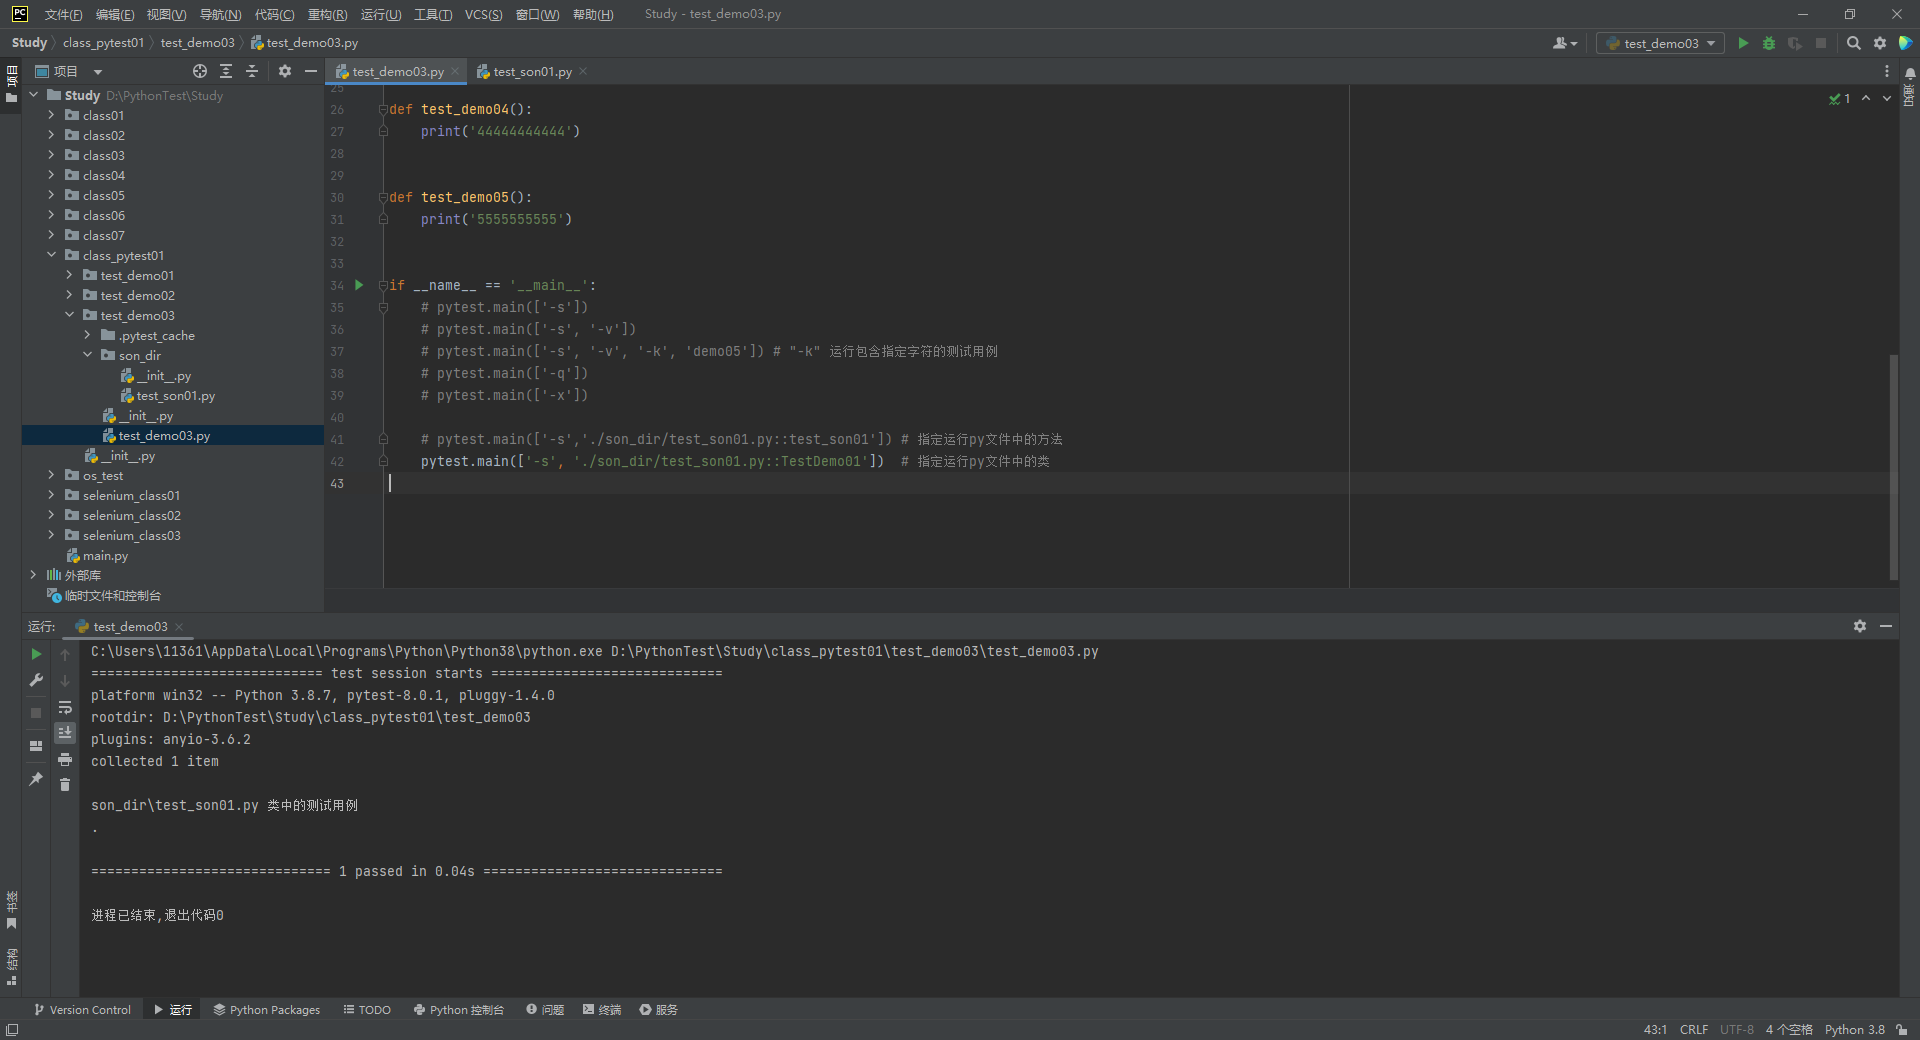
指定运行测试文件中的方法或特定的类
pytest.main([‘-s’, ‘./son_dir/test_son01.py::TestDemo01’])
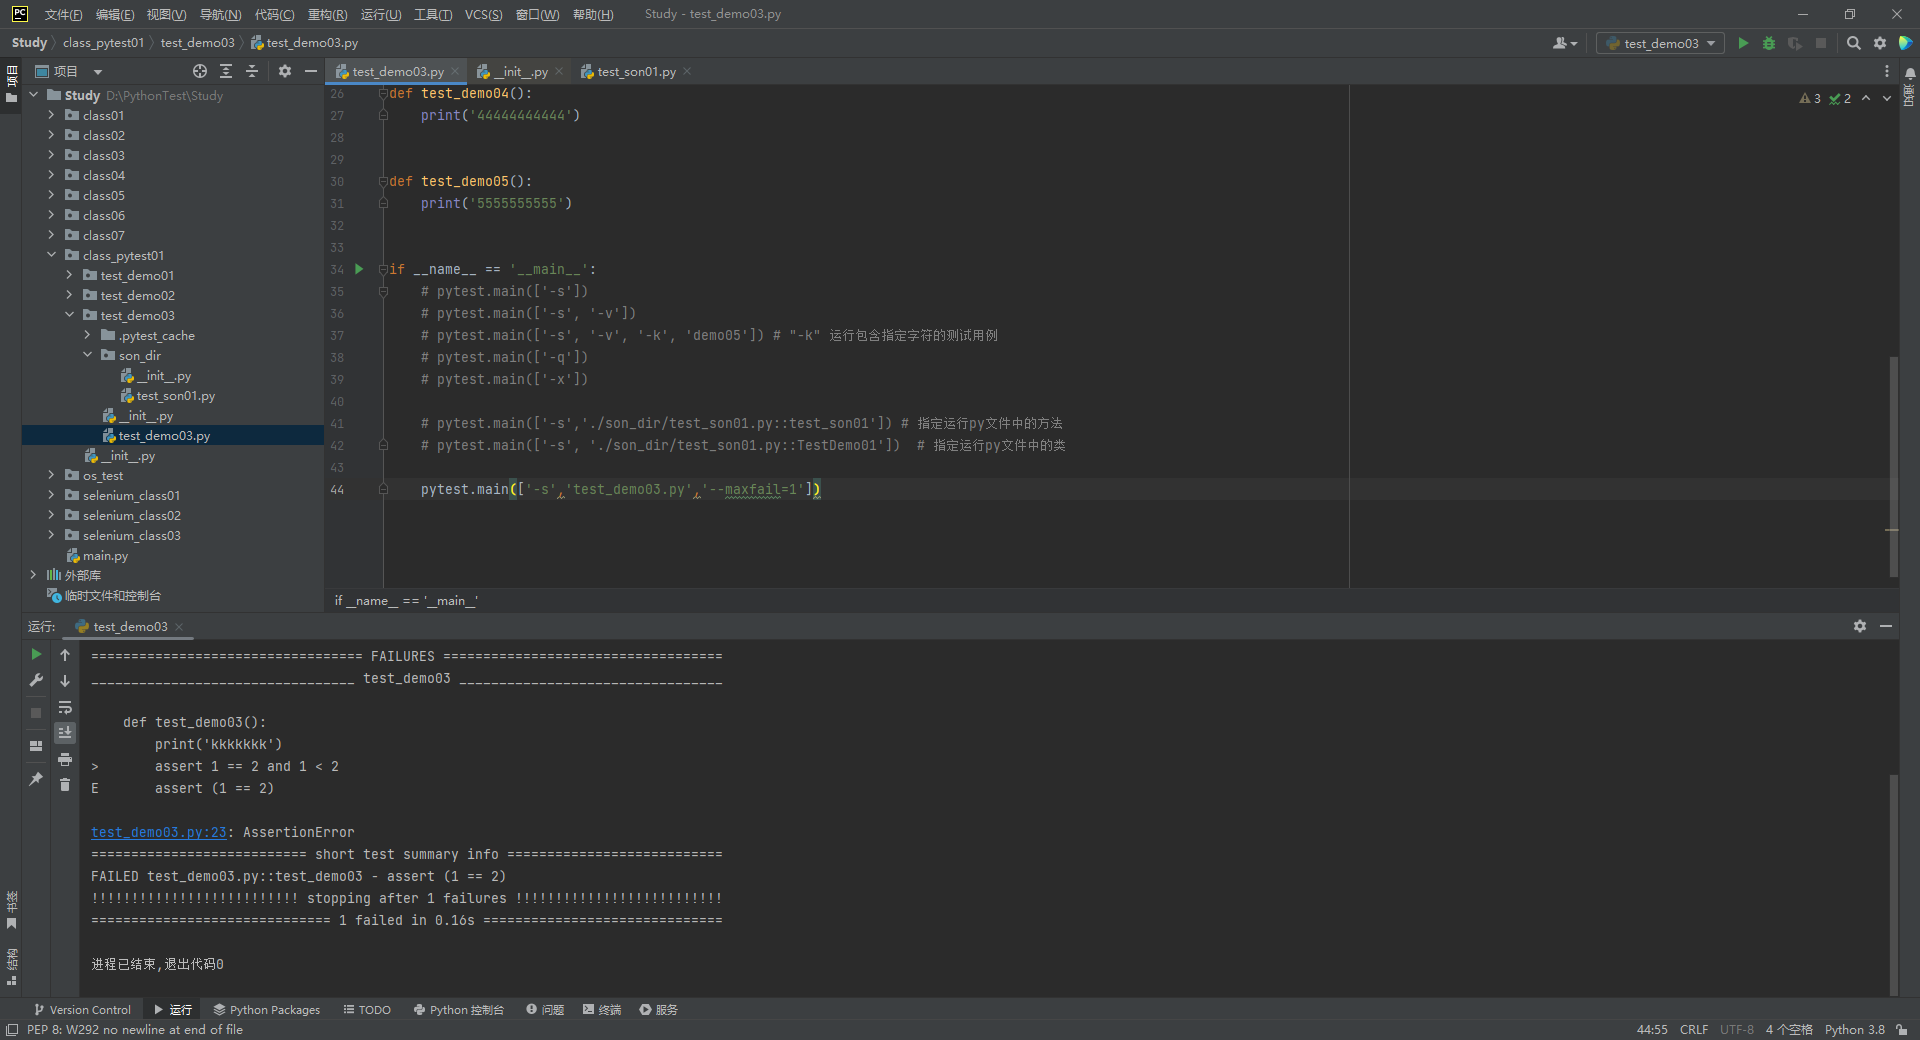
用例控制
- 在第N个用例失败后,结束测试;
pytest.main(['-s','test_demo03.py','--maxfail=1'])
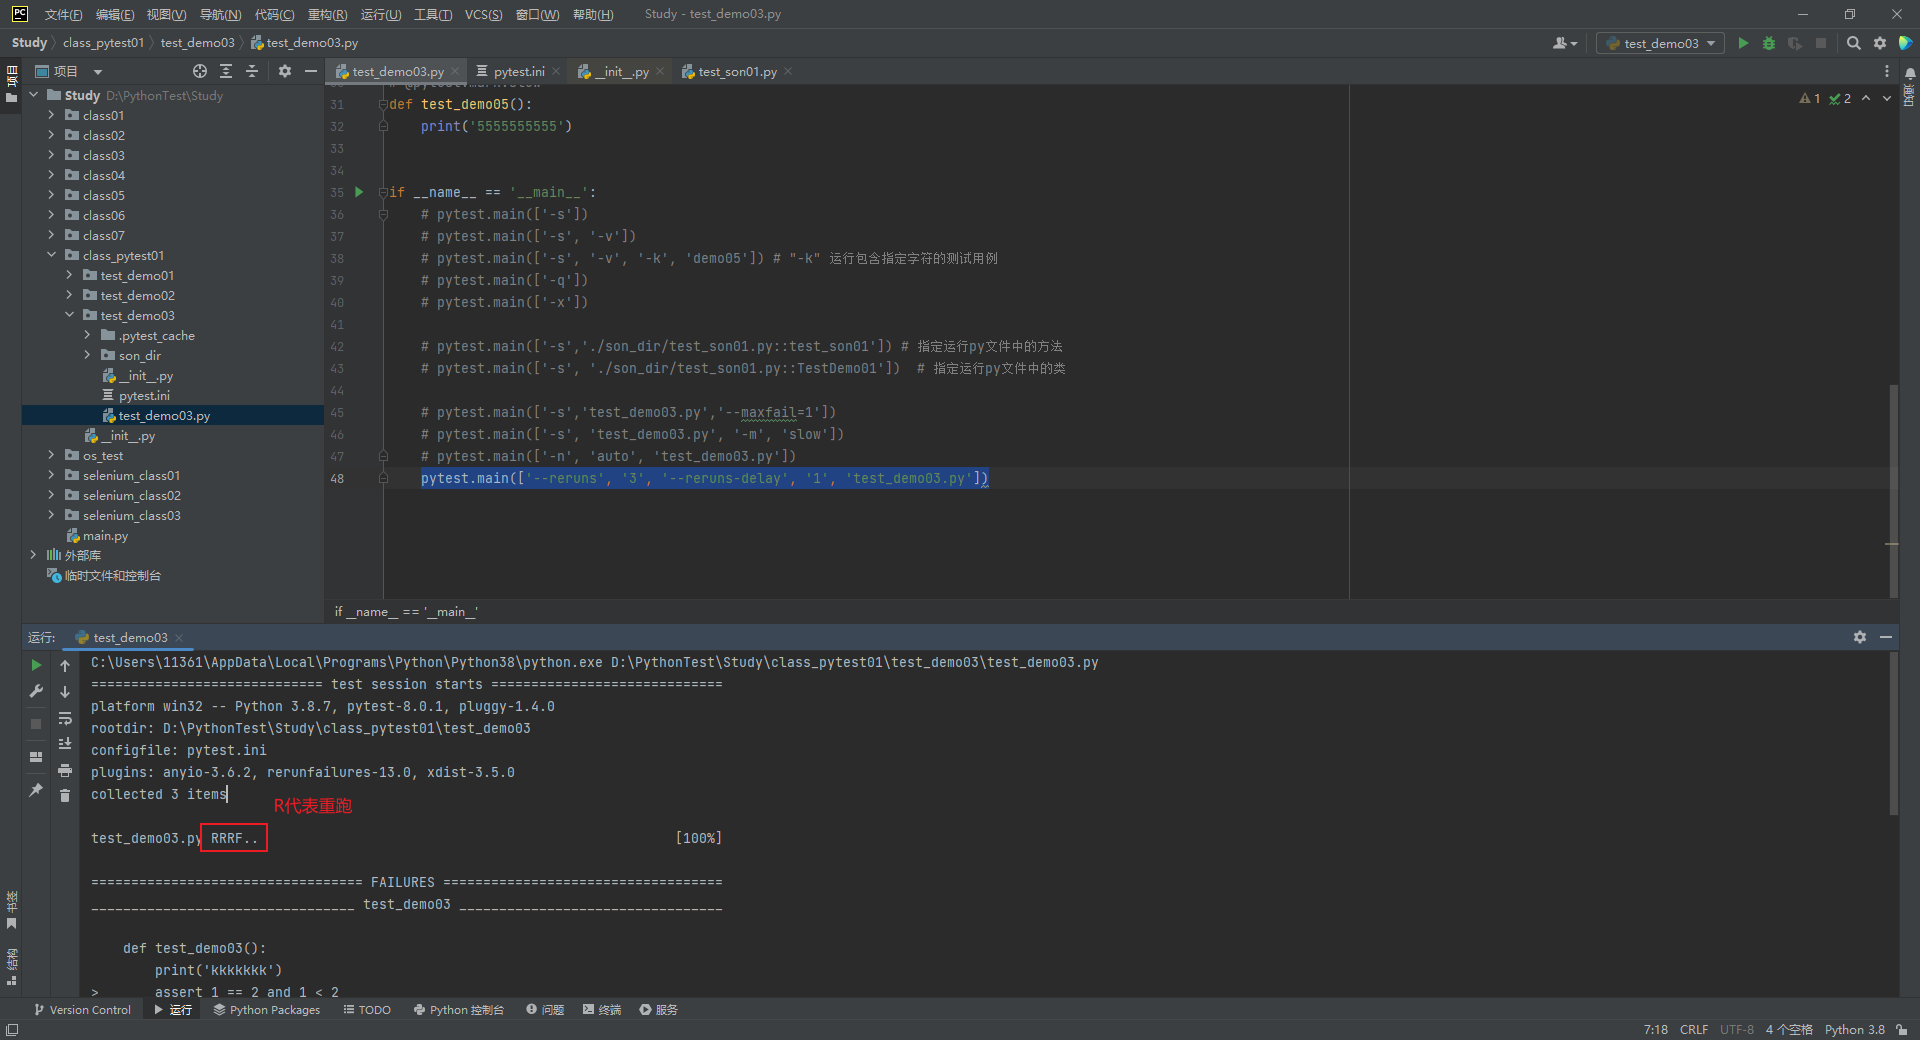
- 失败用例重跑
安装插件pytest-rerunfailures,注意Python版本需要>3.5;pytest>5.0
pip install pytest-rerunfailures
# '--reruns'表示重跑次数;'--reruns-delay'表示失败后间隔几秒
pytest.main(['--reruns', '3', '--reruns-delay', '1', 'test_demo03.py'])
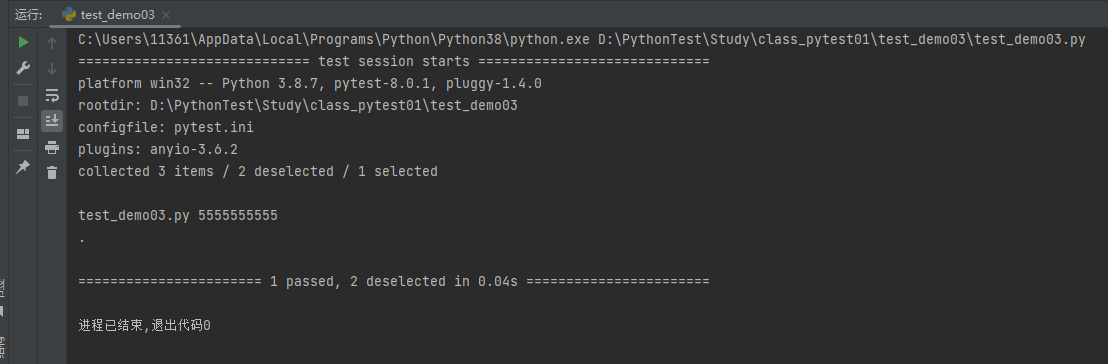
- 通过标记表达式执行指定的用例
通过@pytest.mark.标记名装饰器标记指定的测试用例,使用pytest.main(['-m', '标记名'])执行;
注:标记名需要提前注册,创建pytest.ini文件;标记名称冒号后面的为注释,最好使用英文;
[pytest]
markers =
    ma: marks tests as smoke
    slow: slow testcase
@pytest.mark.slow
def test_demo05():
    print('5555555555')

if __name__ == '__main__':

    pytest.main(['-s', 'test_demo03.py', '-m', 'slow'])
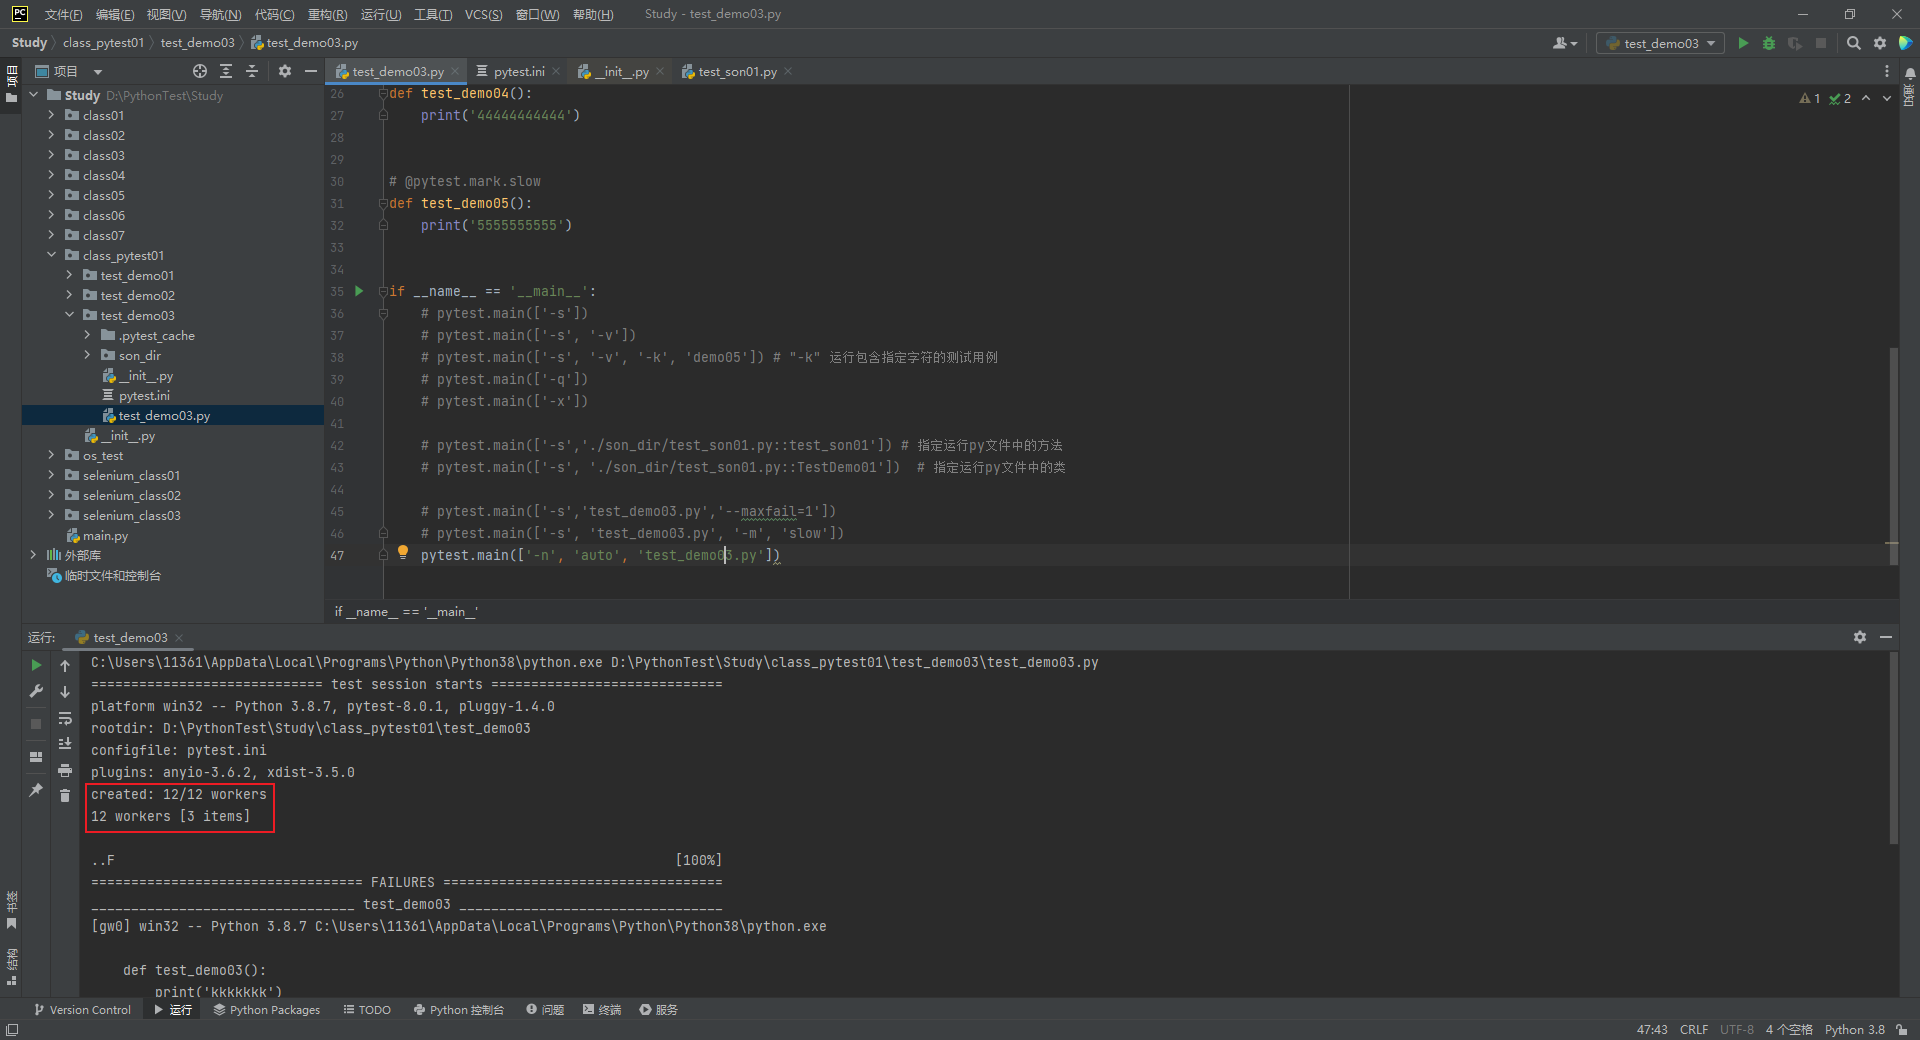
- 多进程执行测试用例
安装插件pytest-xdist;
pip install pytest-xdist
pytest.main(['-n', 'auto', 'test_demo03.py']) #auto为自动分配与计算机相匹配的进程;也可以指定数字
setup和teardown
- 不含有类的用例前置和后置
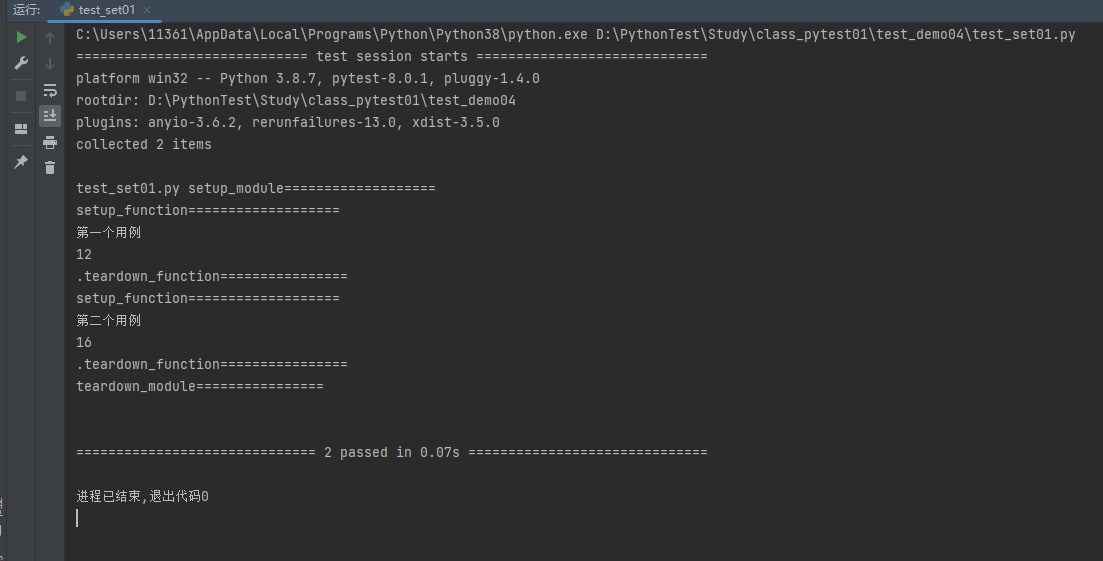
1.setup_module/teardown_module: 在当前文件中,在所有测试用例执行之前与之后执行
2.setup_function/teardown_function:在每个测试函数之前与之后执行
# -*- coding: utf-8 -*-
# @Time    : 2024/2/20 10:49
# @Author  : 居里夫人吃橘子
# @File    : test_set01.py
# @Software: PyCharm


# 功能函数,相乘
import pytest


def multiply(a, b):
    return a * b


"""
    不含有类的用例预置和后置函数
    第一批次:setup_module/teardown_module: 在当前文件中,在所有测试用例执行之前与之后执行
    第二批次:setup_function/teardown_function:在每个测试函数之前与之后执行,不能在类中使用
    ps:执行的顺序按优先级来的,改变方法位置结果也一样
"""


# 在当前文件前置后置
def setup_module(module):
    print("setup_module===================")


def teardown_module(module):
    print("teardown_module================")


# 每个用例前置后置
def setup_function(function):
    print("setup_function===================")


def teardown_function(function):
    print("teardown_function================")


# ========测试用例=========
def test01():
    print("第一个用例")
    print(multiply(3, 4))


def test02():
    print("第二个用例")
    print(multiply(4, 4))


if __name__ == '__main__':
    pytest.main(['-s', 'test_set01.py'])
- 含有类的用例前置和后置
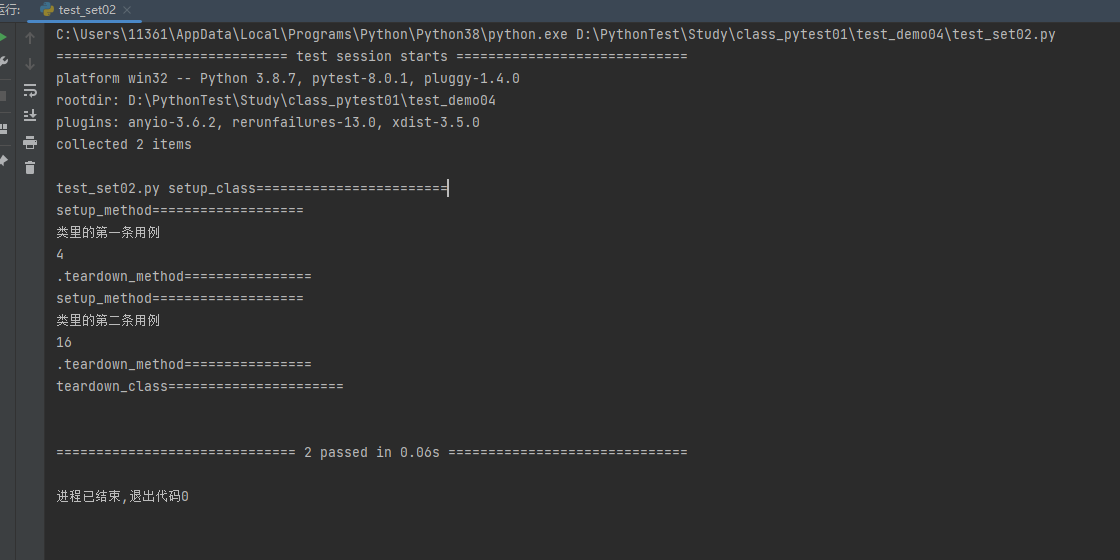
1.setup_class/teardown_class:在当前的测试类的开始和结束时执行
2.setup_method/teardown_method:在每个测试方法开始与结束时执行
ps:执行的顺序按优先级来的,改变方法位置结果也一样
# -*- coding: utf-8 -*-
# @Time    : 2024/2/20 14:23
# @Author  : 居里夫人吃橘子
# @File    : test_set02.py
# @Software: PyCharm

# 功能函数
import pytest


def multiply(a, b):
    return a * b


class TestCase:
    """
        第一批次:setup_class/teardown_class:在当前的测试类的开始和结束时执行
        第二批次:setup_method/teardown_method:在每个测试方法开始与结束时执行
        ps:执行的顺序按优先级来的,改变方法位置结果也一样
    """

    # 每个测试类前置后置
    @classmethod
    def setup_class(cls):
        print("setup_class========================")

    @classmethod
    def teardown_class(cls):
        print("teardown_class======================")

    # 每个测试方法前置后置
    def setup_method(self, method):
        print("setup_method===================")

    def teardown_method(self, method):
        print("teardown_method================")


    # ============测试用例============
    def test01(self):
        print("类里的第一条用例")
        print(multiply(2, 2))

    def test02(self):
        print("类里的第二条用例")
        print(multiply(4, 4))


if __name__ == '__main__':
    pytest.main(['-s', 'test_set02.py'])
ini配置文件
- ini配置文件可以配置一次后运行文件默认生效,注意文件名必须为
pytest.ini
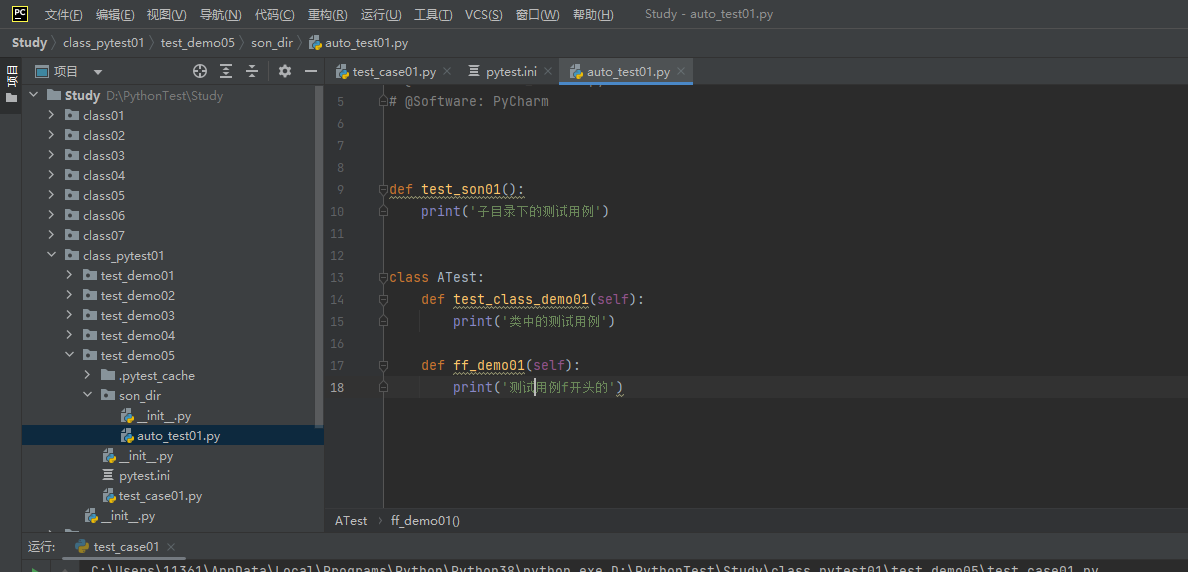
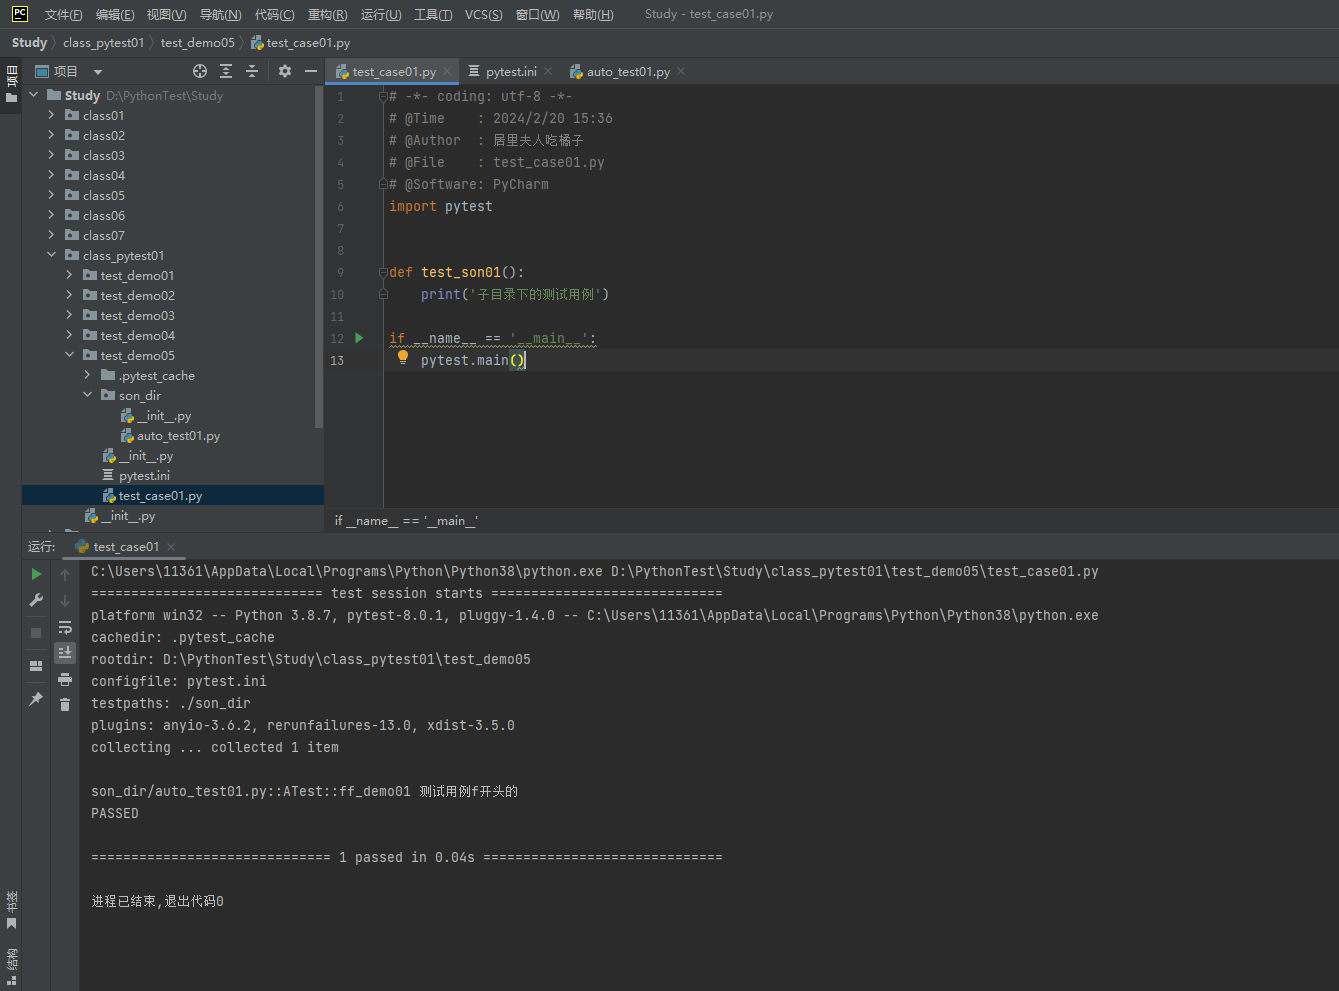
pytest.ini
[pytest]
# 01 命令行参数,默认加到执行过程中
addopts = -s -v
# 02 指定要运行的测试目录
testpaths = ./son_dir
# 03 指定要运行的测试文件规则
python_files = auto_*.py
# 04 指定要运行的类名规则
python_classes = A* B*
# 05 指定要运行的测试用例方法/函数名
python_functions = ff*
4.常用插件
插件列表网址:https://docs.pytest.org/en/latest/reference/plugin_list.html
5.pytest高阶用法
用例跳过
- 有条件跳过测试用例:
@pytest.mark.skipif(condition=3 > 2, reason='不想执行了') - 无条件跳过测试用例:
@pytest.mark.skip
# -*- coding: utf-8 -*-
# @Time    : 2024/2/19 17:30
# @Author  : 居里夫人吃橘子
# @File    : test_01.py
# @Software: PyCharm
import pytest


def test_demo01():
    print('第一条测试用例')


def test_demo02():
    print('第二条测试用例')


# 如果condition中的条件为Ture,则跳过用例
@pytest.mark.skipif(condition=3 > 2, reason='不想执行了')
def test_demo03():
    print('第三条测试用例')


# 无条件跳过测试用例
@pytest.mark.skip(reason='不想跑了')
def test_demo04():
    print('第四条测试用例')


if __name__ == '__main__':
    pytest.main(['-s', 'test_01.py'])
参数化
pytest中的参数化使用装饰器@pytest.mark.parametrize
- 多参数化
import pytest
import math


# pytest 参数化
# "base, exponent, expected"用来定义参数名,通过数组定义时,每一个元组都是一条测试用例使用的数据;ids默认为None代表用例名称
@pytest.mark.parametrize("base, exponent, expected", [(2, 2, 4), (2, 3, 8), (1, 9, 1), (0, 9, 0)],ids=["case1", "case2", "case3", "case4"])
def test_pow(base, exponent, expected):
    assert math.pow(base, exponent) == expected


if __name__ == '__main__':
    pytest.main(['-s', '-v', 'test_fuc.py'])

- 函数参数化
import pytest


def return_data():
    return [('zz', '123456'), ('xz', '123456'), ('qs', '123456')]

# 把函数return_data()的值都赋给'data'上;
@pytest.mark.parametrize('data', return_data())
def test_01(data):
    print(data[0], data[1])


if __name__ == '__main__':
    pytest.main(['-s', 'test_func02.py'])
- yaml文件驱动参数化
demo01.yaml
-
  name : '小李'
  sex : '男'

-
  name: '小王'
  sex: '女'
import yaml
import pytest
def pase_yaml():
with open('./file/demo01.yaml', 'r', encoding='utf-8') as f:
data = yaml.load(f, Loader=yaml.FullLoader)
return data
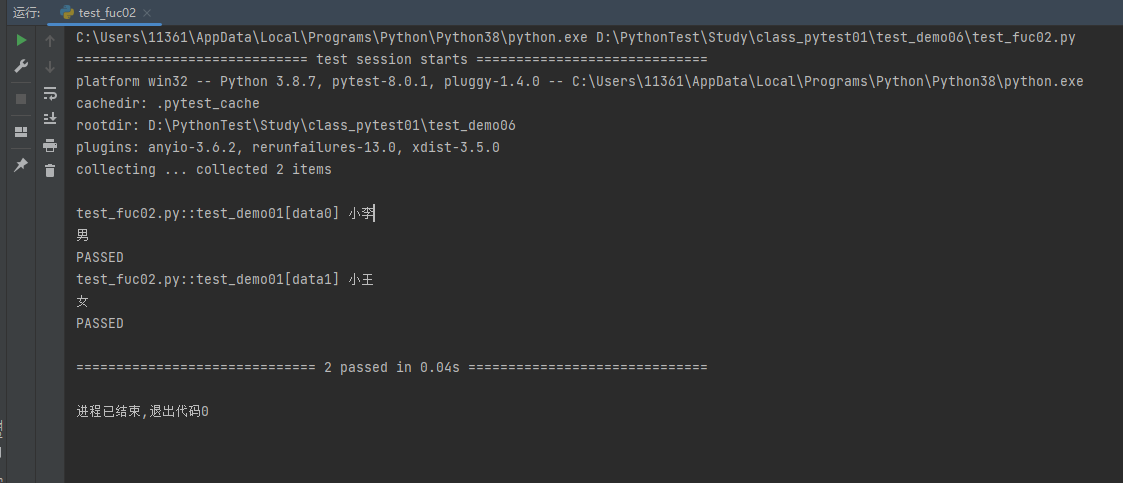
@pytest.mark.parametrize('data', pase_yaml())
def test_demo01(data):
print(data['name'])
print(data['sex'])
if __name__ == '__main__':
pytest.main(['-s', '-v', 'test_fuc02.py'])
输出:
6.pytest之Fixture使用
在测试中,fixture为测试提供了已定义的,可靠的和一致的上下文。这可能包括环境(例如,通过已知的参数配置数据库)或内容(例如,数据集)。Fixtures定义了构成测试准备阶段的步骤和数据。在pytest中,它们是为这些目的而定义的函数。它们也可以用来定义测试执行阶段;这是一个设计复杂用例的强大技术。测试功能通过参数访问由fixtures设置的服务,状态或其他操作环境。对于测试功能使用的每个fixture,通常在测试功能的定义中都有一个参数(在 fixture后命名)。
我们可以通过用修饰器@pytest.fixture来告诉pytest某个特定函数是一个fixture 。
fixture使用
- 单个fix使用
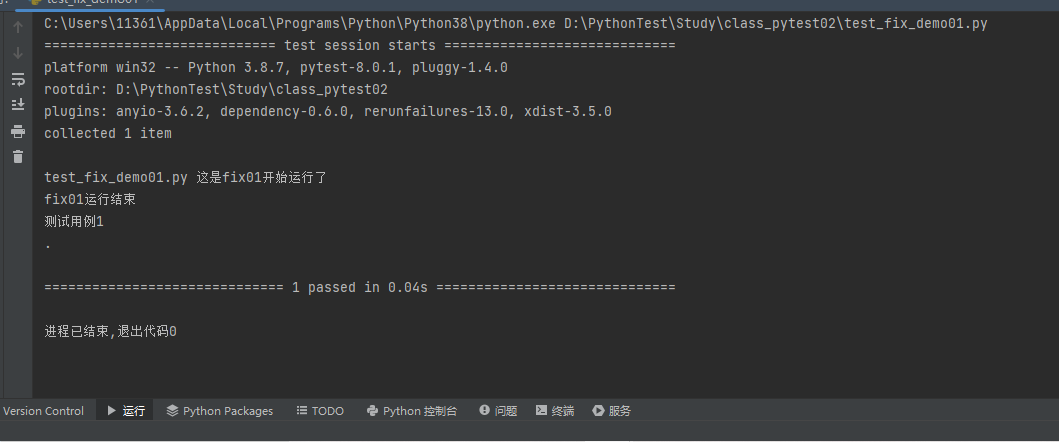
import pytest


@pytest.fixture
def fix01():
    print('这是fix01开始运行了')
    print('fix01运行结束')


def test_demo01(fix01):
    print('测试用例1')


if __name__ == '__main__':
    pytest.main(['-s', 'test_fix_demo01.py'])
- 多个fix使用,并接受fix中的数据
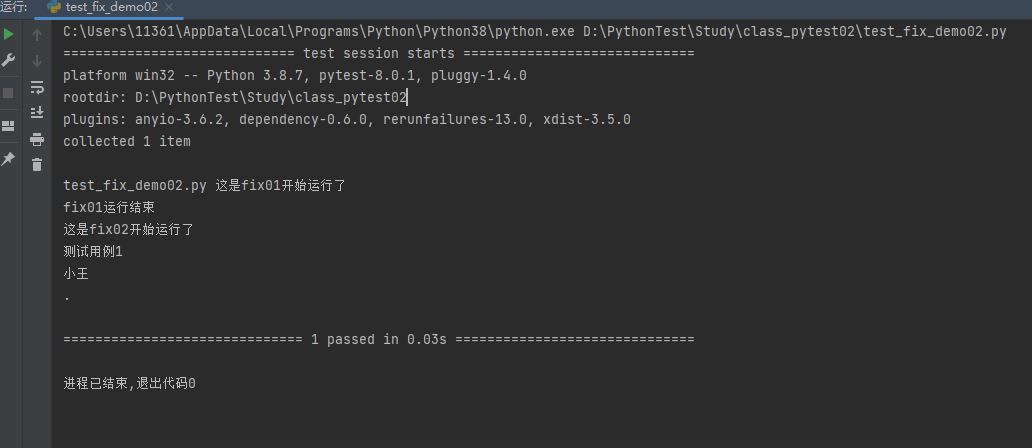
import pytest


@pytest.fixture
def fix01():
    print('这是fix01开始运行了')
    print('fix01运行结束')


@pytest.fixture
def fix02():
    print('这是fix02开始运行了')
    data = ['小王', '小李']
    return data


def test_demo01(fix01, fix02):
    print('测试用例1')
    print(fix02[0])


if __name__ == '__main__':
    pytest.main(['-s', 'test_fix_demo02.py'])
- 多个fix之间互相调用
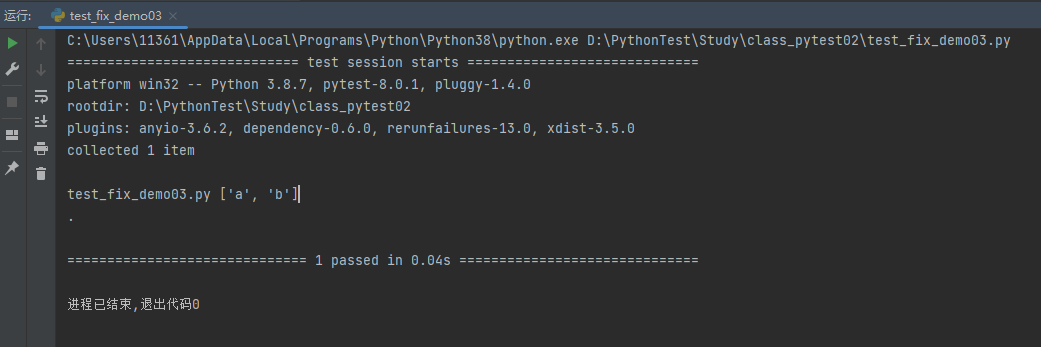
import pytest


@pytest.fixture
def first_fix():
    return "a"


@pytest.fixture
def order(first_fix):
    return [first_fix]


# 测试用例
def test_string(order):
    order.append("b")
    print(order)


if __name__ == '__main__':
    pytest.main(['-s', 'test_fix_demo03.py'])
装饰器usefixtures
说明
@pytest.mark.usefixtures是Pytest调用fixture的方法之一,与直接传入fixture不同的是,它无法获取到被fixture装饰的函数的返回值。
@pytest.mark.usefixtures的使用场景是被测试函数需要多个fixture做前后置工作时使用,个人感觉没啥大用,因为fixture也可以同时传入多个fixture
示例
import pytest


@pytest.fixture
def fix01():
    print('这是fix01开始运行了')
    print('fix01运行结束')


@pytest.fixture
def fix02():
    print('这是fix02开始运行了')
    data = ['小王', '小李']
    return data


@pytest.fixture
def fix03():
    print('这是fix03开始运行了')
    print('fix03运行结束')


# @pytest.mark.usefixtures('fix01', 'fix03')
# # @pytest.mark.usefixtures('fix01','fix02') # 如果使用userfixtures('fix02')则会报错,因为userfixtures无法获取fix中的返回数据
# def test_demo01():
#     print('测试用例1')


@pytest.mark.usefixtures('fix03')
@pytest.mark.usefixtures('fix01')
def test_demo01():
    print('测试用例1')


if __name__ == '__main__':
    pytest.main(['-s', 'test_fix_demo04.py'])
注:@pytest.mark.usefixtures('fix01', 'fix03')叠加使用时按照就近原则执行,先在前的先执行,先在下的先执行;
7.pytest之conftest.py
介绍
conftest.py是fixture函数的一个集合,可以理解为公共的提取出来放在一个文件里,然后供其它模块调用。不同于普通被调用的模块,conftest.py使用时不需要导入,Pytest会自动查找。并且支持多个py文件同时调用其中的fixture
规则
- 文件名必须为conftest.py;
- conftest.py文件必须与测试用例在同一个包下
示例
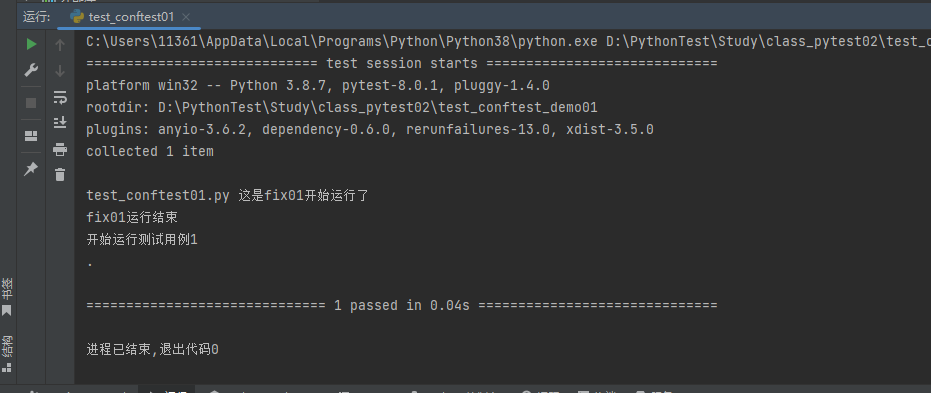
conftest.py文件
import pytest

@pytest.fixture
def fix01():
    print('这是fix01开始运行了')
    print('fix01运行结束')
test_conftest01.py
import pytest


# 测试用例
def test_conf01(fix01):
    print('开始运行测试用例1')


if __name__ == '__main__':
    pytest.main(['-s', 'test_conftest01.py'])
输出:
示例2
conftest.py文件中可以设置@pytest.fixture(scope='',autouse='')中的参数:
scope表示在什么时候执行:session:表示在所有测试文件执行前执行一次
package:在所有包执行前执行一次
module:在每一个py文件前执行一次
class:在每个测试类前执行一次
function:在每个测试用例前执行一次
autouse=Ture表示测试用例中不需要写fixture的名称,自动生效,默认为False
conftest.py
import pytest


@pytest.fixture(scope='session', autouse=True)
def fix01():
    print('开始执行session')


@pytest.fixture(scope='package', autouse=True)
def fix2():
    print('开始执行package')


@pytest.fixture(scope='module', autouse=True)
def fix3():
    print('开始执行module')


@pytest.fixture(scope='class', autouse=True)
def fix4():
    print('开始执行class')
test_conftest01.py
import pytest


# 测试用例
def test_conf01():
    print('开始运行测试用例1')

# 当测试用例没有在class中时,也会默认执行一次class层级的fixture
def test_conf02():
    print('开始运行测试用例2')


class TestDemo:
    def test_conf03(self):
        print('开始运行测试用例3')


if __name__ == '__main__':
    pytest.main(['-s', 'test_conftest01.py'])
输出:
C:\Users\11361\AppData\Local\Programs\Python\Python38\python.exe D:\PythonTest\Study\class_pytest02\test_conftest_demo01\test_conftest01.py
============================= test session starts =============================
platform win32 -- Python 3.8.7, pytest-8.0.1, pluggy-1.4.0
rootdir: D:\PythonTest\Study\class_pytest02\test_conftest_demo01
plugins: anyio-3.6.2, dependency-0.6.0, rerunfailures-13.0, xdist-3.5.0
collected 3 items

test_conftest01.py 开始执行session
开始执行package
开始执行module
开始执行class

开始执行function
开始运行测试用例1
.开始执行class

开始执行function
开始运行测试用例2
.开始执行class

开始执行function
开始运行测试用例3
.

============================== 3 passed in 0.05s ==============================

进程已结束,退出代码0
8.conftest+fixture+yield
yield介绍
"""
    1.程序开始执行以后,因为test函数终有yield关键字,
    所以test函数并不会真正的执行,而是先得到一个生成器g
    2.直到调用next方法,test函数正式开始执行,先执行test函数中的print方法,
    然后进入while循环
    3.程序遇到yield关键字,然后把yield相当于是return,return了一个8之后,程序停止,
    并没有执行赋值给a操作,此时next(g)语句执行完成,所以输出前面两行(第一行是while上面的
    print的结果,第二行是return出来的结果)
    4.程序执行print("=====================")
    5.又开始执行下面的print(next(g)),这个时候是从刚才next程序停止的地方开始执行,
    也就是要执行a的赋值操作,这个时候因为赋值操作的右边是没有值的,已经被return出去了
    这个时候a的值是none,所以接下来的输出是a:none
    6.程序会继续在whili里执行,又一次碰到yield,这个时候同样return出8,然后程序停止。
    print函数输出的8就是这次return出的8
"""


def test():
    print("begin....")
    while True:
        a = yield 8
        print("a:", a)


g = test()
print(next(g))
print("=====================")
print(next(g))
print("=====================")
print(next(g))

#输出
begin....
8
=====================
a: None
8
=====================
a: None
8
前后置使用
conftest.py
import pytest


@pytest.fixture
def fix1():
    print('conftest里的fix1')
    yield
    print("用例执行完成,我来扫尾")
test_yeild01.py
import pytest


def test_case(fix1):
    print("测试用例一")


if __name__ == '__main__':
    pytest.main(['-s'])
输出:
C:\Users\11361\AppData\Local\Programs\Python\Python38\python.exe D:\PythonTest\Study\class_pytest02\test_yeild_demo01\test_yeild01.py
============================= test session starts =============================
platform win32 -- Python 3.8.7, pytest-8.0.1, pluggy-1.4.0
rootdir: D:\PythonTest\Study\class_pytest02\test_yeild_demo01
plugins: anyio-3.6.2, dependency-0.6.0, rerunfailures-13.0, xdist-3.5.0
collected 1 item

test_yeild01.py conftest里的fix1
测试用例一
.用例执行完成,我来扫尾


============================== 1 passed in 0.06s ==============================

进程已结束,退出代码0