前言
最近在做一个功能,然后就发现了一个很有趣的东西,虽然在一定程度上属于偷懒,但是在一些短频快的应用中还是很适用的,下面我就针对于这个测试做一些简单的分享,希望帮助到大家,在实际的开发中获得一些灵感和帮助,具体的实现方式,UE通过Texture2D将每一帧的图片存储到本地,存完以后调用一个本地PythonEXE执行文件进行视频封装和OSS上传,我这里使用的版本UE5.3,大家根据代码自己调试下。
UE开发调试过程
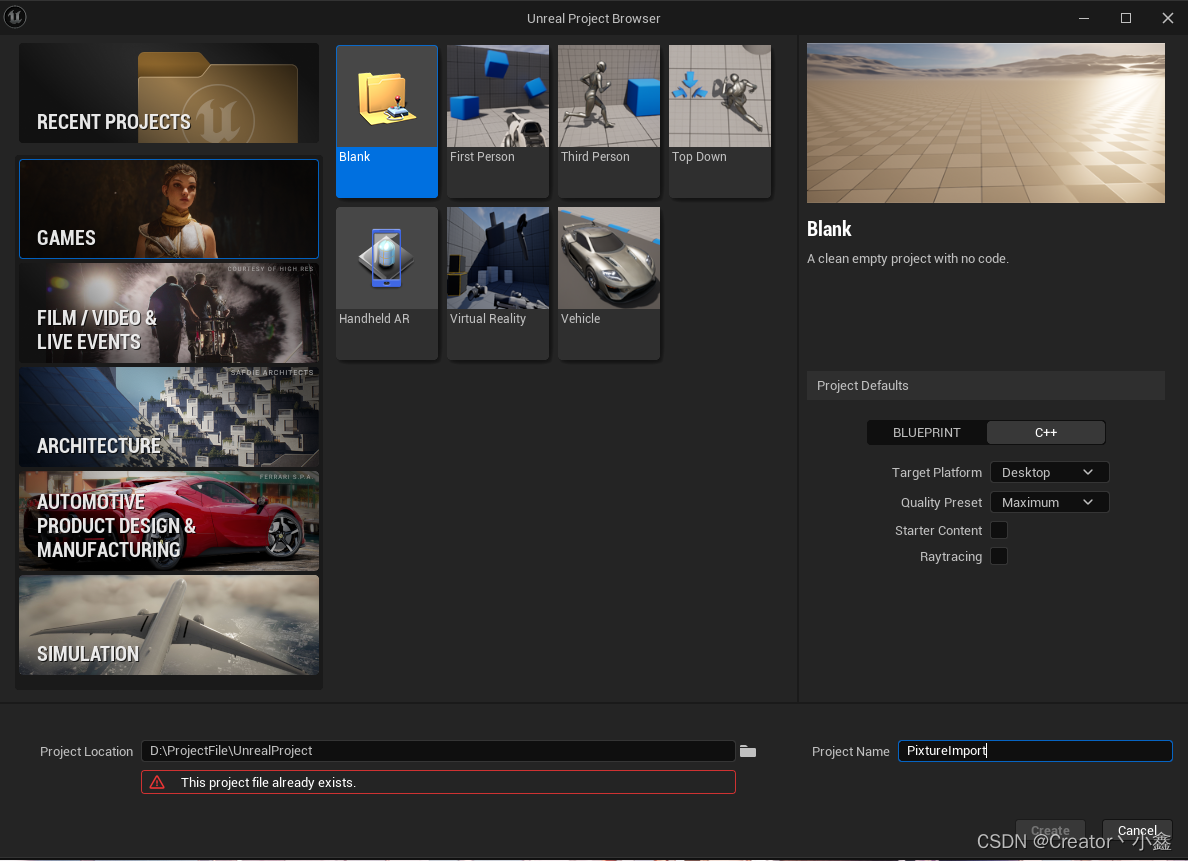
- 新建一个带有C++内容的项目,因为有一些代码功能需要用到C++,我这里的名称因为创建过了所以有个提示。
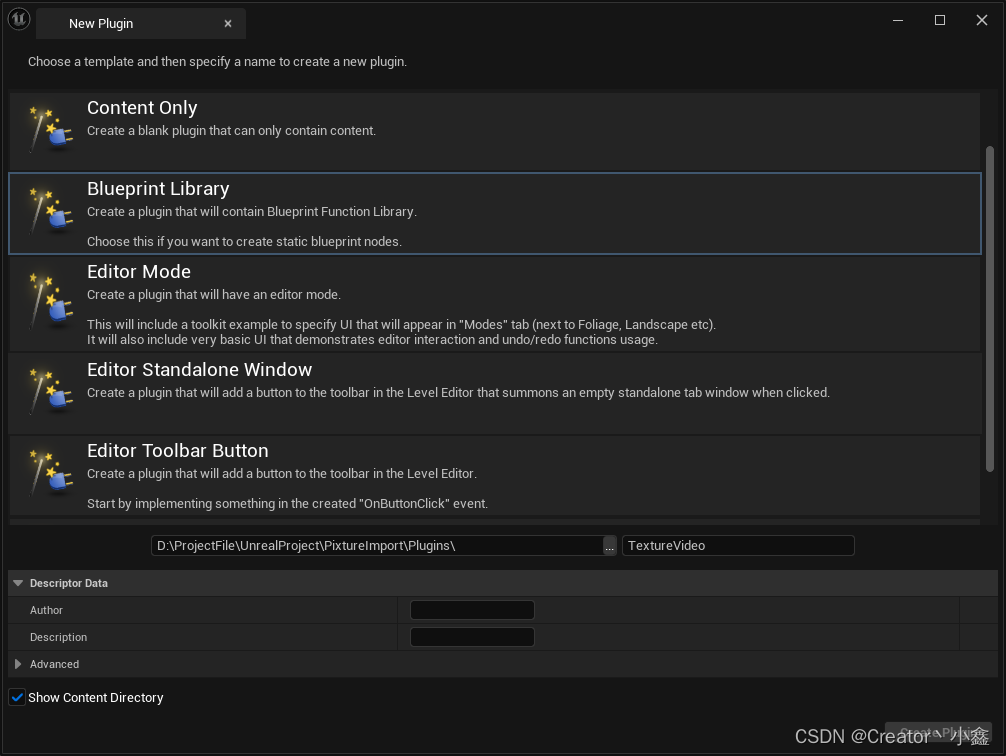
- 然后在Edit -> Plugins -> Add点击新建一个BlueprintLibeary的插件,因为我个人写一些封装性功能的时候喜欢用插件,这样其他的项目用到的时候直接导入调用就可以了,如果你想在类里面使用的话创建一个BlueprintFunctionLibrary的类就可以了。
- 创建完插件后,会在VistualStudio中提示,直接点全部加载,然后点击全部保存关闭项目,因为有时候有些编译会有问题,在UE和VS都关闭的状态下,在你的工程根目录打开sln的VS主文件,我们直接进行操作
- 接下来在插件中TextureVideoBPLibrary.h和TextureVideoBPLibrary.cpp中,我们添加两个功能,打开.h文件将原有的函数进行删除然后添加我们新的函数
// Copyright Epic Games, Inc. All Rights Reserved. #pragma once #include "Kismet/BlueprintFunctionLibrary.h" #include "TextureVideoBPLibrary.generated.h" /* * Function library class. * Each function in it is expected to be static and represents blueprint node that can be called in any blueprint. * * When declaring function you can define metadata for the node. Key function specifiers will be BlueprintPure and BlueprintCallable. * BlueprintPure - means the function does not affect the owning object in any way and thus creates a node without Exec pins. * BlueprintCallable - makes a function which can be executed in Blueprints - Thus it has Exec pins. * DisplayName - full name of the node, shown when you mouse over the node and in the blueprint drop down menu. * Its lets you name the node using characters not allowed in C++ function names. * CompactNodeTitle - the word(s) that appear on the node. * Keywords - the list of keywords that helps you to find node when you search for it using Blueprint drop-down menu. * Good example is "Print String" node which you can find also by using keyword "log". * Category - the category your node will be under in the Blueprint drop-down menu. * * For more info on custom blueprint nodes visit documentation: * https://wiki.unrealengine.com/Custom_Blueprint_Node_Creation */ UCLASS() class UTextureVideoBPLibrary : public UBlueprintFunctionLibrary { GENERATED_UCLASS_BODY() UFUNCTION(BlueprintCallable, meta = (DisplayName = "SavePixtureToFile", KeyWords = "Save Pic To File"), Category = "TextureVideoTesting") static bool SavePicToFile(UTextureRenderTarget2D* rt, const FString& fileDestination); UFUNCTION(BlueprintCallable, meta = (DisplayName = "OpenExeVideo", Keywords = "Open Exe Video"), Category = "TextureVideoTesting") static bool OpenExe(FString URL); }; - 在cpp文件中我们添加以下逻辑,大家看到这里的时候基本已经知道了这两个函数的作用一个是存储图片一个是打开exe
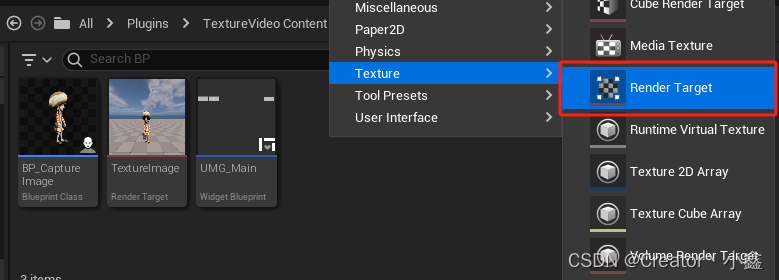
// Copyright Epic Games, Inc. All Rights Reserved. #include "TextureVideoBPLibrary.h" #include "TextureVideo.h" #include "Engine/TextureRenderTarget2D.h" #include "Misc/FileHelper.h" #include <ImageUtils.h> UTextureVideoBPLibrary::UTextureVideoBPLibrary(const FObjectInitializer& ObjectInitializer) : Super(ObjectInitializer) { } bool UTextureVideoBPLibrary::SavePicToFile(UTextureRenderTarget2D* rt, const FString& fileDestination) { FTextureRenderTargetResource* rtResource = rt->GameThread_GetRenderTargetResource(); FReadSurfaceDataFlags readPixelFlags(RCM_UNorm); TArray<FColor> outBMP; for (FColor& color : outBMP) { color.A = 255; } outBMP.AddUninitialized(rt->GetSurfaceWidth() * rt->GetSurfaceHeight()); rtResource->ReadPixels(outBMP, readPixelFlags); FIntPoint destSize(rt->GetSurfaceWidth(), rt->GetSurfaceHeight()); TArray<uint8> CompressedBitmap; FImageUtils::CompressImageArray(destSize.X, destSize.Y, outBMP, CompressedBitmap); bool imageSavedState = FFileHelper::SaveArrayToFile(CompressedBitmap, *fileDestination); return imageSavedState; } bool UTextureVideoBPLibrary::OpenExe(FString URL) { FProcHandle ExeHandle = FPlatformProcess::CreateProc(*URL, nullptr, true, false, false, nullptr, 0, nullptr, nullptr); bool ret = FPlatformProcess::IsProcRunning(ExeHandle); return ret; } - 然后对项目进行清理和重新生成,如果重新编译的过程中出现了报错,别管他,全部保存,然后关闭VS再重新打开再次编译生成即可。编译后打开我们的UE,在UE插件的Content文件中我们可以创建一个BP文件夹放置我们的一些文件,鼠标右键在Texture中创建一个RenderTarget文件用来进行渲染UE画面
- 双击打开我们的RenderTarget,将SizeX和SizeY进行调试,这是我们最终生成图片的比例,但是这块,大家要实际和电脑性能进行以下调试,因为图片分辨率越大输出渲染占用的资源就越高,所以这块自己在用的时候要注意下。
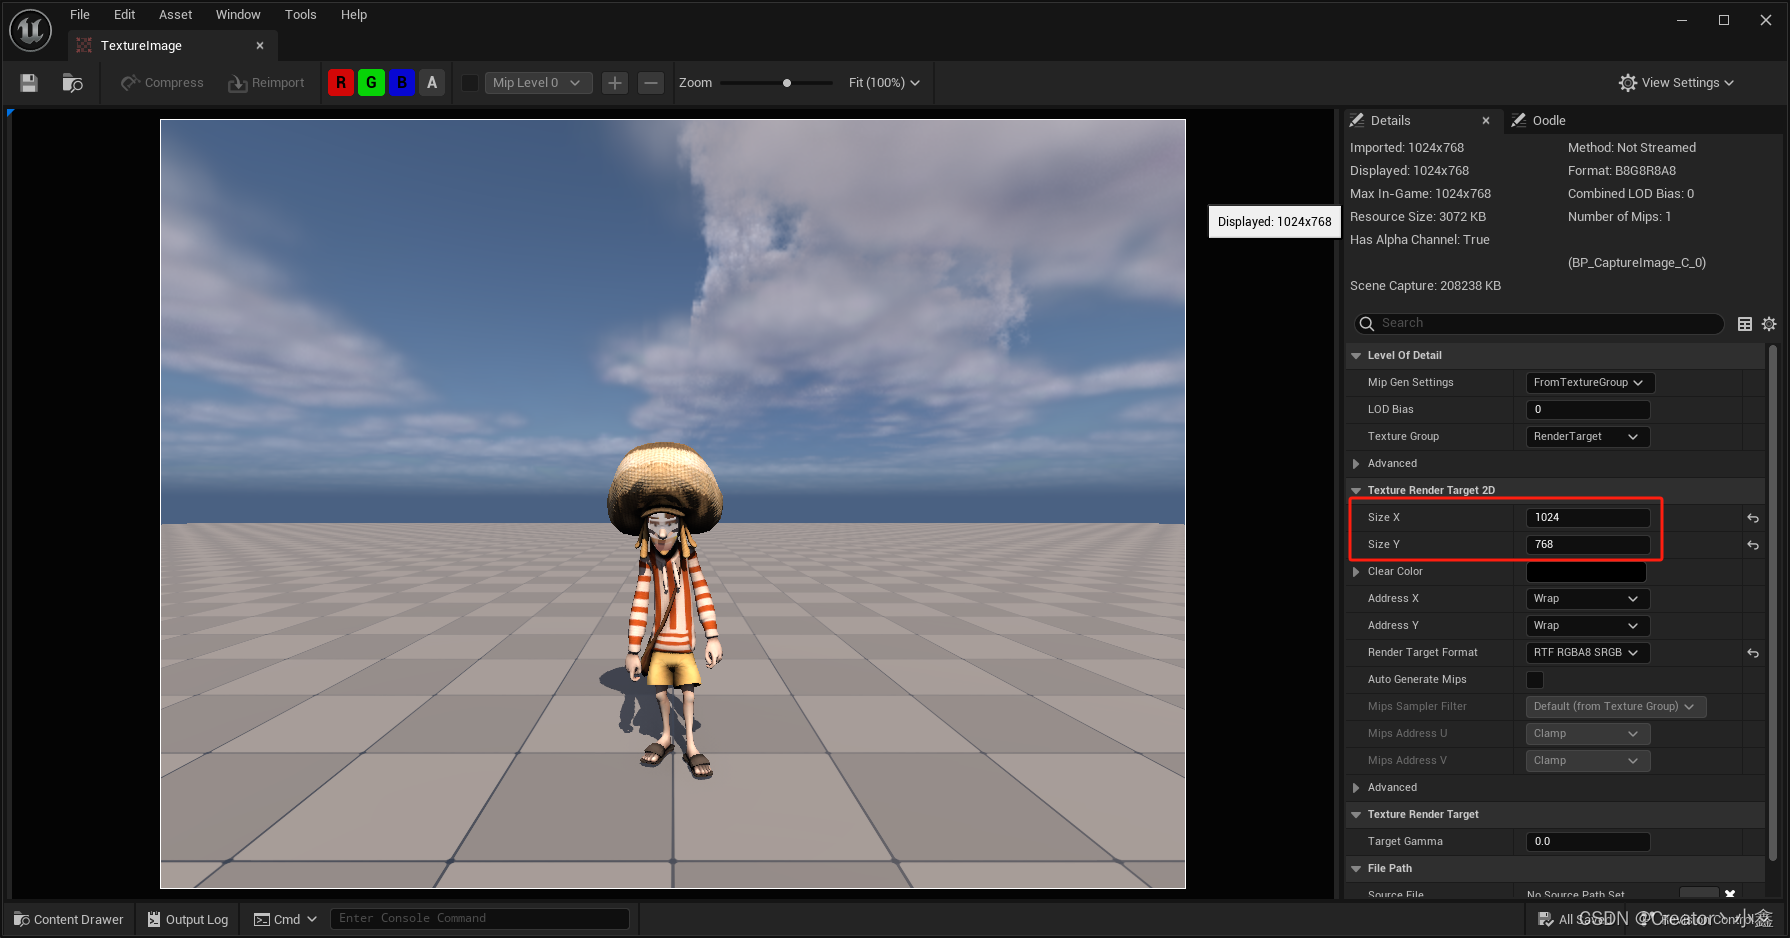
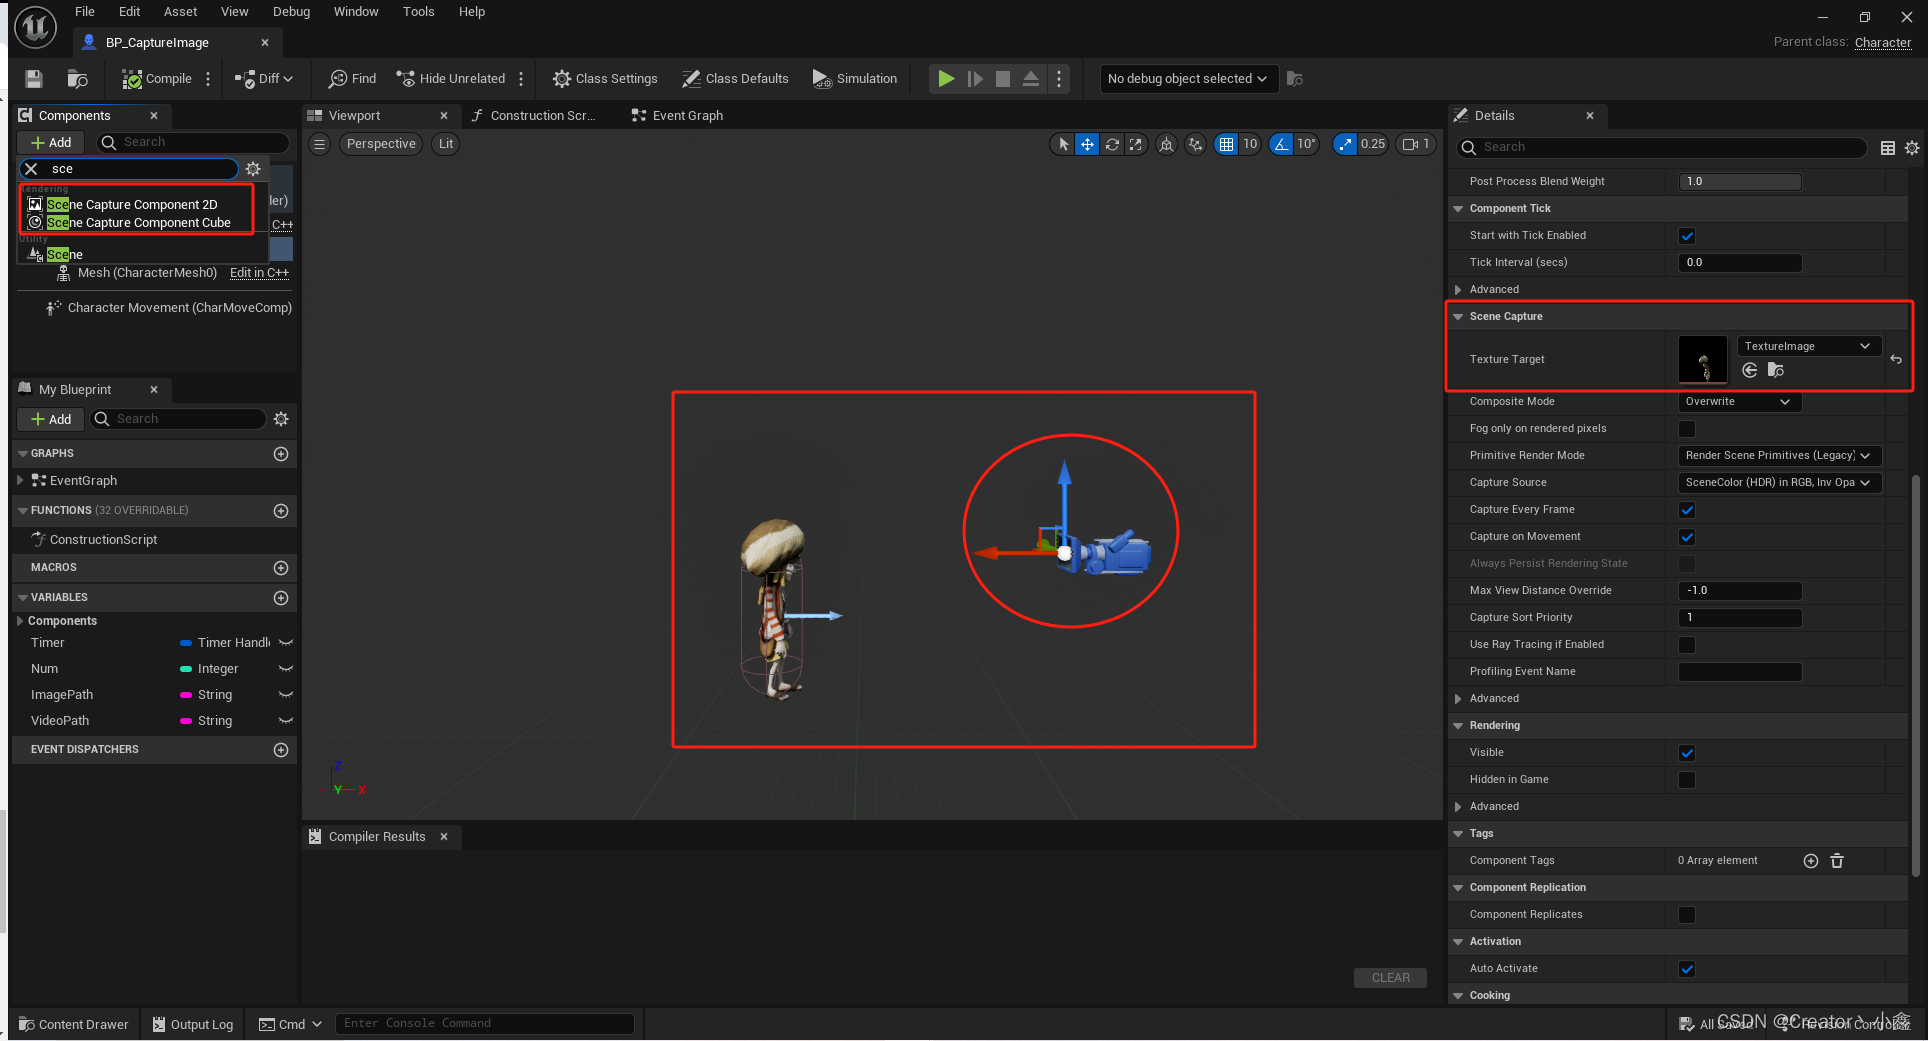
- 新建一个Actor,我这里用的画面是一个角色,所以我就创建了一个Character类型的Actor,这块根据自己需求不需要的话,就创建一个基础的Actor就可以,打开新建的Actor,在Add中添加一个SceneCaptureComponent2D组件,我这里都在一起所以我直接就调整了它们之间的位置关系,如果你这块是不需要的话,那你直接把Actor拖拽到场景中调整位置关系即可,然后点击SceneCaptureComponent2D组件,细节中的TextureTarget设置为刚才创建的RenderTarget
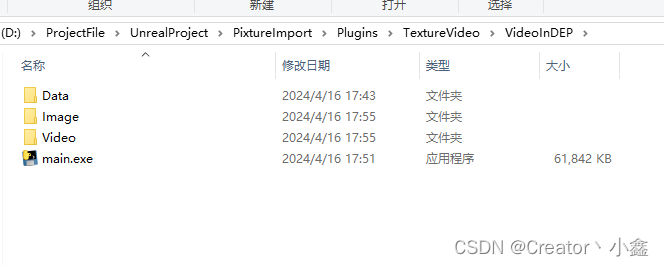
- 现在插件功能开发和基础的设置就已经做完了,接下来我们开始进行调试我们的功能,考虑到后续UE可能进行打包操作,这块的路径我就直接设置为插件路径,在插件目录下创建了一个VideoInDEP的文件下面有三个文件Image;Video;Data,Image和Video就是存放我们的缓存图片和缓存视频,Data是可调整的一个参数文件,EXE为调用执行的文件
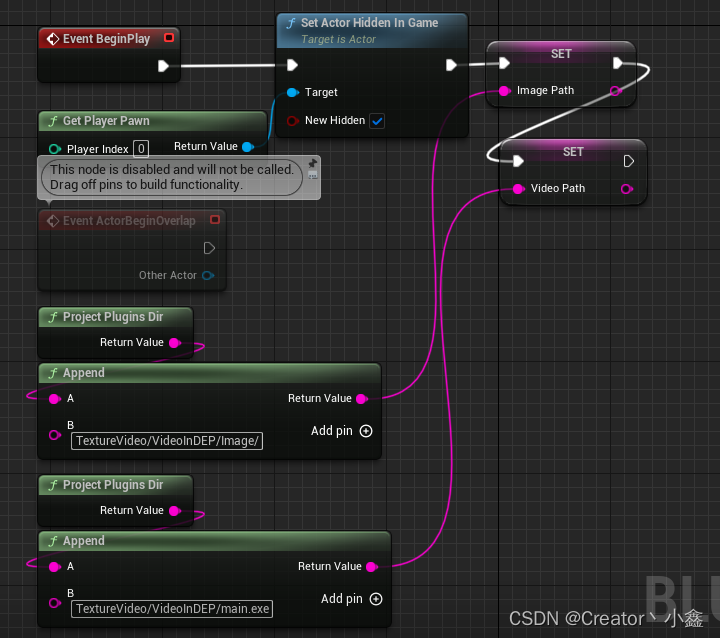
- 在事件开始运行时,我们对图片还有EXE进行了变量存储,这的SetActorHiddenInGame作用是为了隐藏项目运行可能会出现一个控制器小球,然后ImagePath和VideoPath创建两个字符串的变量进行连接即可
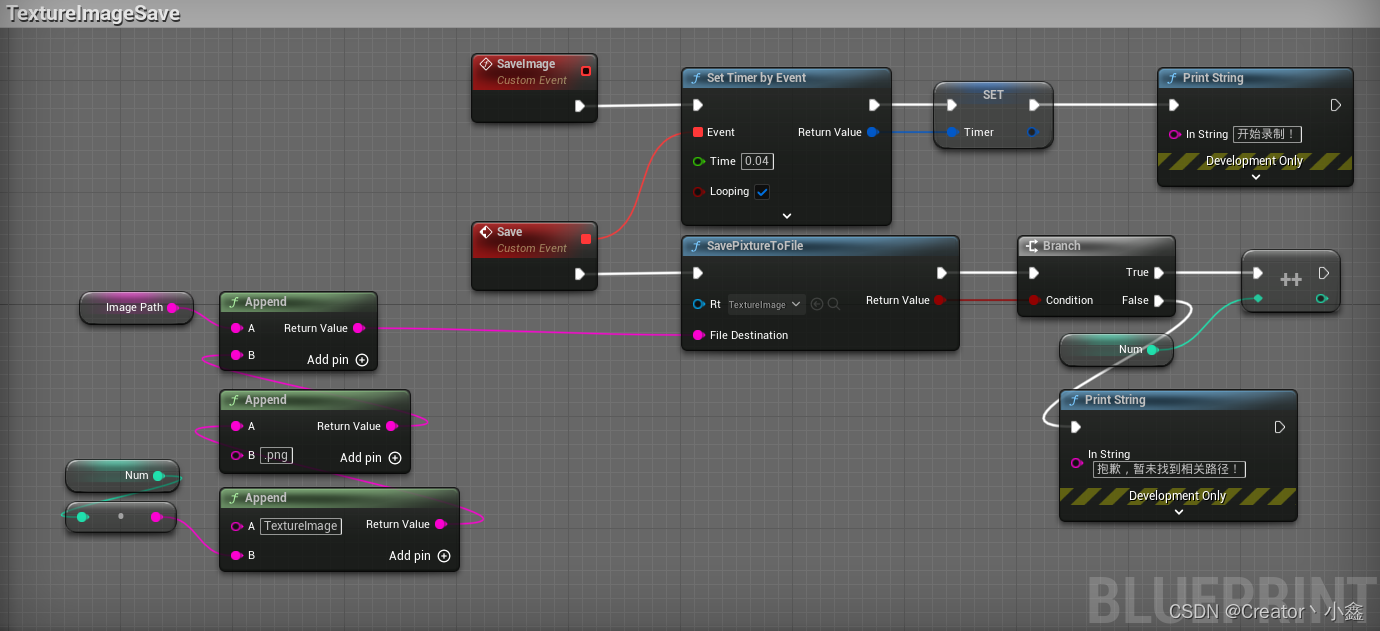
- 现在开始图片存储功能通过一个事件委托,我们调用SavePixtureToFile的函数节点,将其进行设置Rt是我们创建的RnderTarget,Timer提示为变量这个变量作用是在关闭的时候断开捕捉存储图片用的,新建一个int变量初始值为0,然后作为图片下标进行使用,接下来你就可以测试第一个功能图片存储,直接调用SaveImage自定义事件,在我们的插件对应的路径下你就会看到你生成的图片,这里time为0.04秒,就是40毫秒,也就是一秒25帧。
- 第二个功能打开EXE,这块你可以先随便找个exe进行测试只要路径填写对就可以测试

Python开发流程
- 我这用的最新的Pycharm写的,不会Python的也没关系我后面会把插件还有EXE链接放到下面的直接下载也能用,新建一个工程和一个py文件命名为VideoToOSS,这里oss的包的装以下,直接终端pip install oss2就行,有其他包的环境如果提示没有的话记得也装一下,代码
#ImageToVideo import cv2 import os import sys import glob #数据上传 import oss2 import json dataPath = os.path.dirname(os.path.realpath(sys.executable)) + '\\Data\\data.json' def ImageToVideo(ImagePath,VideoPath,Fps,PngImage): print('This is PNG Path:',ImagePath) print('This is Video Path:',VideoPath) fourcc = cv2.VideoWriter_fourcc('m', 'p', '4', 'v') # 设置输出视频为mp4格式 # size要和图片的size一样,但是通过img.shape得到图像的参数是(height,width,channel), # 可以实现在图片文件夹下查看图片属性,获得图片的分辨率 size = (1024, 768) video = cv2.VideoWriter(VideoPath, fourcc, Fps, size) # 设置保存视频的名称和路径,默认在根目录下 file_lst = os.listdir(ImagePath) count = 0 for filename in file_lst: img = cv2.imread(ImagePath + 'TextureImage' + str(count) + '.png') count += 1 video.write(img) video.release() delete_all_pngs(PngImage,VideoPath) def delete_all_pngs(folder_path,Video_Path): # 使用glob查找文件夹下所有的.png文件 png_files = glob.glob(os.path.join(folder_path, '*.png')) # 遍历并删除找到的文件 for png_file in png_files: try: os.remove(png_file) #print(f"已删除: {png_file}") except OSError as e: print(f"删除失败: {png_file} - {e.strerror}") print("This set of data has now been deleted!") VideoToOSS(Video_Path) def JsonToStr(JsPath): with open(JsPath, 'r', encoding='utf-8') as file: json_data = json.load(file) return json_data print(json_data) def VideoToOSS(VideoPath): access_key_id = JsonToStr(dataPath)['access_key_id'] access_key_secret = JsonToStr(dataPath)['access_key_secret'] endpoint = JsonToStr(dataPath)['endpoint'] bucket_name = JsonToStr(dataPath)['bucket_name'] object_name = JsonToStr(dataPath)['object_name'] # OSS上的对象路径和名称 local_file = VideoPath # 创建Bucket的句柄 auth = oss2.Auth(access_key_id, access_key_secret) bucket = oss2.Bucket(auth, endpoint, bucket_name) # 上传文件 bucket.put_object_from_file(object_name, local_file) print(f"文件 {local_file} 已成功上传到 OSS,路径为 {object_name}") if os.path.exists(local_file): os.remove(local_file) print(f"本地缓存文件 {local_file} 已被删除") else: print(f"文件 {local_file} 不存在") # 按装订区域中的绿色按钮以运行脚本。 if __name__ == '__main__': #本地的图片视频地址信息 PathVideo = os.path.dirname(os.path.realpath(sys.executable)) + '\\Video\\result.mp4' PathImage = os.path.dirname(os.path.realpath(sys.executable)) + '\\Image\\' PathDelayImage = os.path.dirname(os.path.realpath(sys.executable)) + '\\Image' FpsPath = JsonToStr(dataPath)['Video_fps'] ImageToVideo(PathImage,PathVideo,FpsPath,PathDelayImage) - 这是完整逻辑,函数ImageToVideo用来将图片转为视频的,delete_all_pngs函数作用是将本地图片进行删除的,JsonToStr是用来读取本地设置信息的,VideoToOSS将本地视频提交OSS然后进行删除,main就是调用了,这块东西很简单自己看下就会了,然后把代码进行打包在终端直接打包,运行完成后会在本地生成一个EXE执行文件
Pyinstaller -F VideoToOSS.py - data.json中是我们的oss的配置信息,这块我就不写了,自己找一下配置一下就行,Videofps是视频生成时的帧数
{
    "Video_fps": 25,
    "access_key_id": "<自己的KeyID>",
    "access_key_secret": "<自己的secre>",
    "endpoint": "<自己的服务地址>",
    "bucket_name": "<自己的bucket文件名称>",
    "object_name": "video/object.mp4"
}
结语
确保最终的UE打开EXE名称为VideoToOSS,基本的使用过程就是这样,因为UE直接做视频和OSS需要对于的FFMPEG或者OSS其他库,处理起来很麻烦,很多应用也不一定能找到,通过这种方式可以巧妙的解决掉这个麻烦,如果你觉得exe没有回调的话出现问题时怎么办,可以做一个简单的通信,让UE和这个EXE去协同处理来解决或者通过句柄的方式,但是这块呢大家各自发挥。
链接:https://pan.baidu.com/s/1DI-iWjwAO9Hy4pQGE6FInA
提取码:8i55