视频:
MQ基础-01.RabbitMQ课程介绍_哔哩哔哩_bilibili https://www.bilibili.com/video/BV1mN4y1Z7t9?p=1&vd_source=d0ea58f1127eed138a4ba5421c577eb1
一、RabbitMQ简介
1.同步调用
优势:时效性强,等待结果后才返回
劣势:拓展性差,性能下降,级联失败问题
2.异步调用
异步调用就是基于消息通知的方式,一般含有三个角色
(1)消息发送者:投递消息的人,原来的调用方
(2)消息代理:管理、暂存、转发消息,可以理解微信服务器
(3)消息接受者:接收和处理消息的人,原来服务提供方
Broker是消息代理

二.RabbitMQ的安装
RabbitMQ是基于Erlang语言开发的开源消息通信中间件,官网地址:RabbitMQ: One broker to queue them all | RabbitMQ![]() https://www.rabbitmq.com/
https://www.rabbitmq.com/
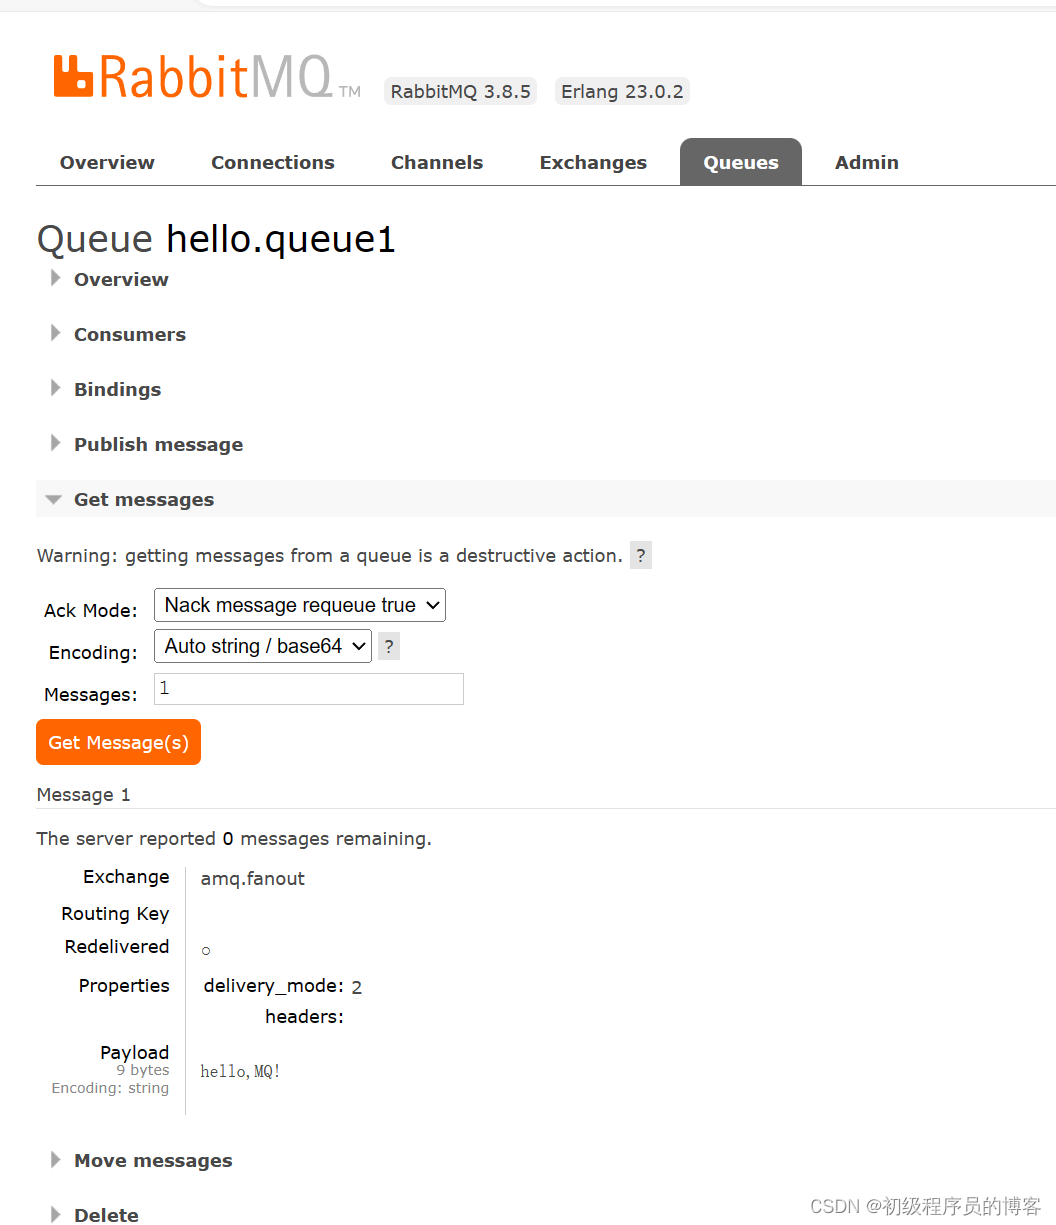
三.RabbitMQ入门
(1)登录RabbitMQ后添加队列

(2)交换机先绑定队列名字

(3)交换机发送消息给队列

队列可以查看接收到的消息
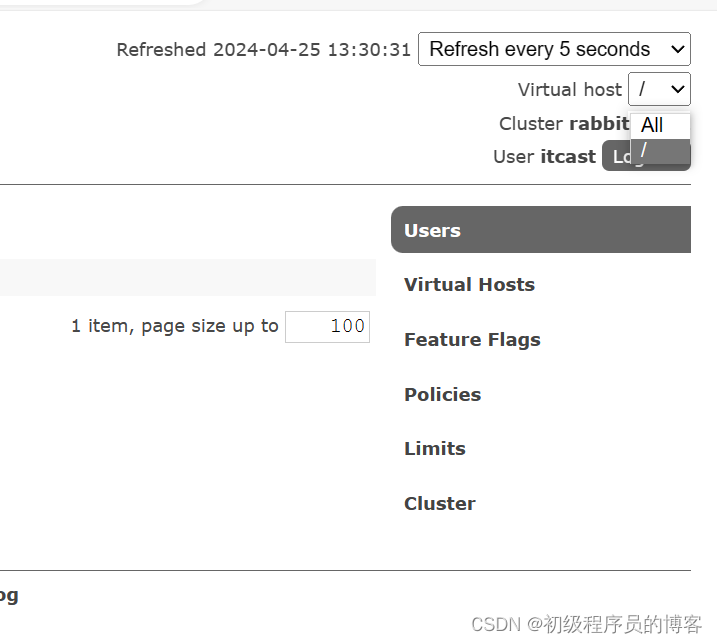
四、数据隔离
将Virtual host切换为/

(1)新建一个用户
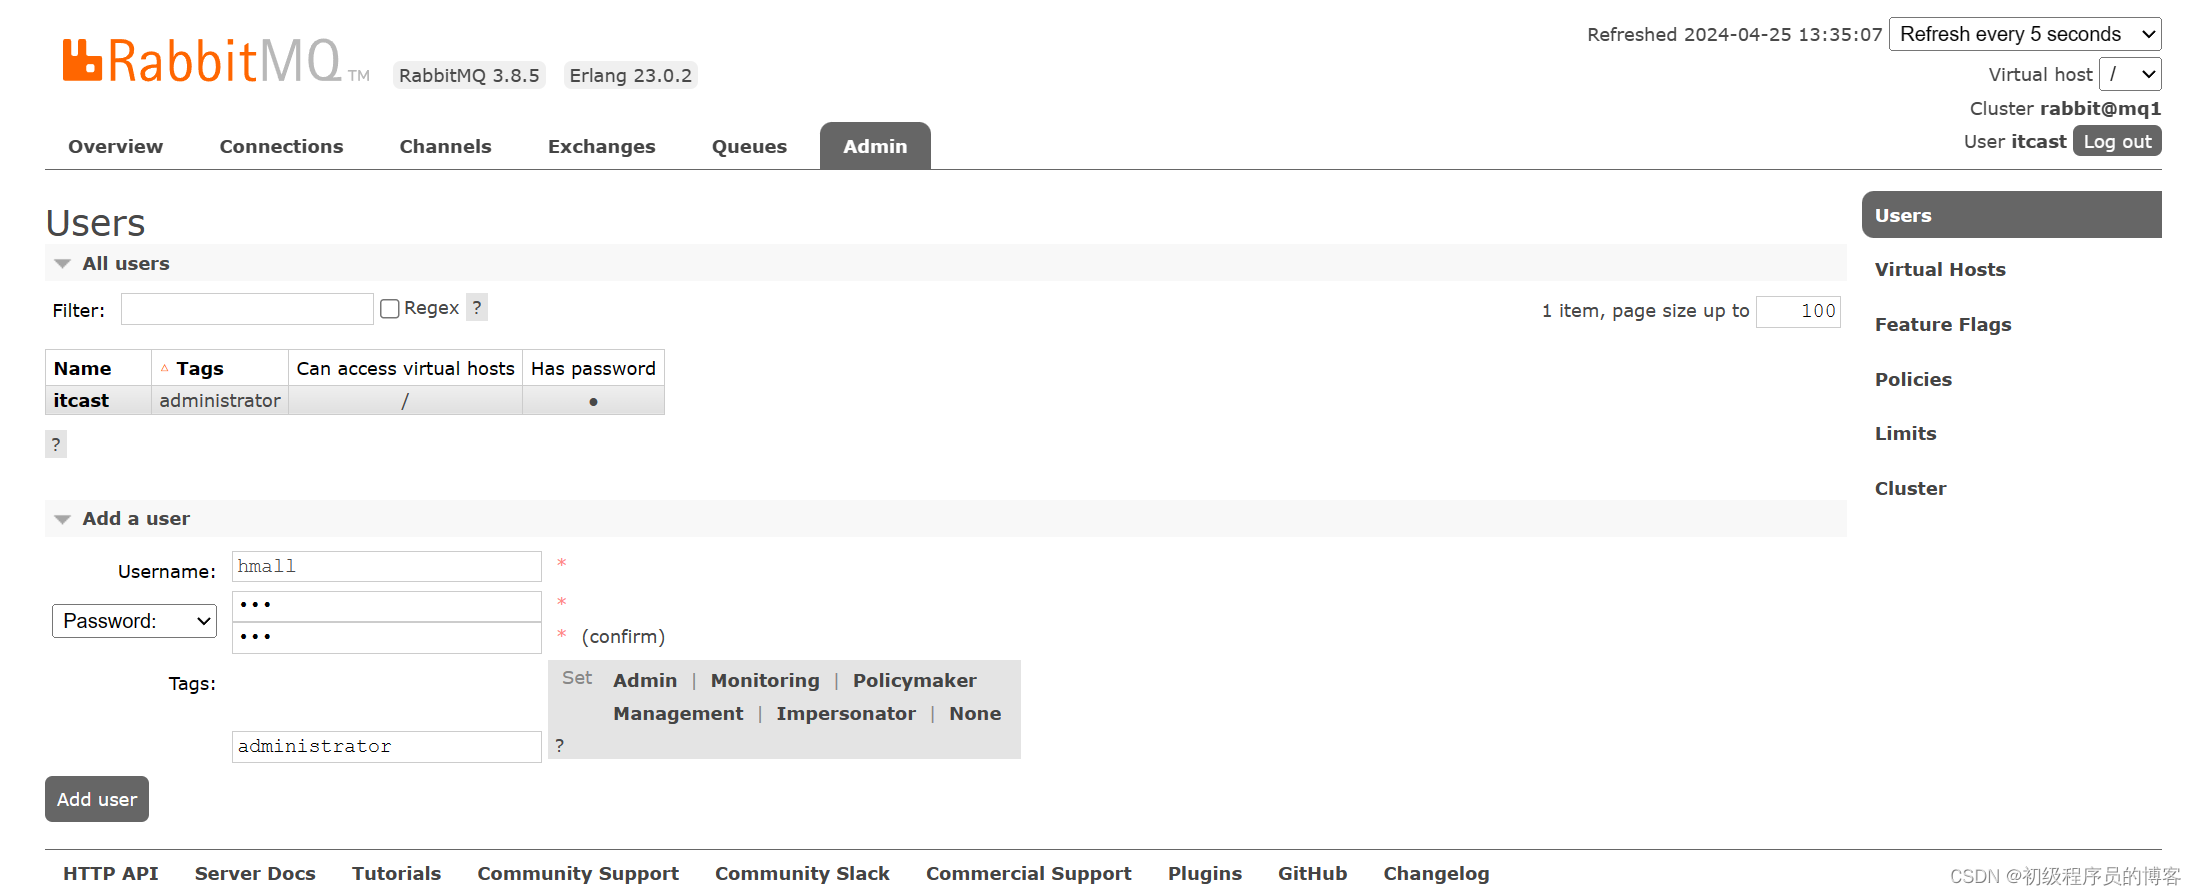
(2)为用户创建virtual host

(3)测试不同virtual host直接数据隔离现象,通过修改virtual host即可
五、Java客户端
(1)入门示例
1.引入依赖
        <!--AMQP依赖,包含RabbitMQ-->
        <dependency>
            <groupId>org.springframework.boot</groupId>
            <artifactId>spring-boot-starter-amqp</artifactId>
        </dependency>
2.配置RabbitMQ服务端信息(消费者和生产者都需要配置)
spring:
  rabbitmq:
    virtual-host: /hamll
    port: 5672
    host: 192.168.92.136
    username: hmall
    password: 123
3.消息发送方
package cn.itcast.mq.helloworld;

import org.junit.jupiter.api.Test;
import org.springframework.amqp.rabbit.core.RabbitTemplate;
import org.springframework.beans.factory.annotation.Autowired;
import org.springframework.boot.test.context.SpringBootTest;

@SpringBootTest
public class SpringAmqpTest {

    @Autowired
    private RabbitTemplate rabbitTemplate;

    @Test
    void testSendMessageQueue(){
        String queueName = "simple.queue";
        String msg = "Hello,amqp";
        rabbitTemplate.convertAndSend(queueName,msg);
    }

}
4.消息接收方(不断接收消息)
package cn.itcast.mq.listeners;

import lombok.extern.slf4j.Slf4j;
import org.springframework.amqp.rabbit.annotation.RabbitListener;
import org.springframework.stereotype.Component;

@Slf4j
@Component
public class MqListener {

    @RabbitListener(queues = "simple.queue")
    public void listenSimpleQueue(String msg){
        System.out.println("消费者收到消息:"+msg);
    }
}
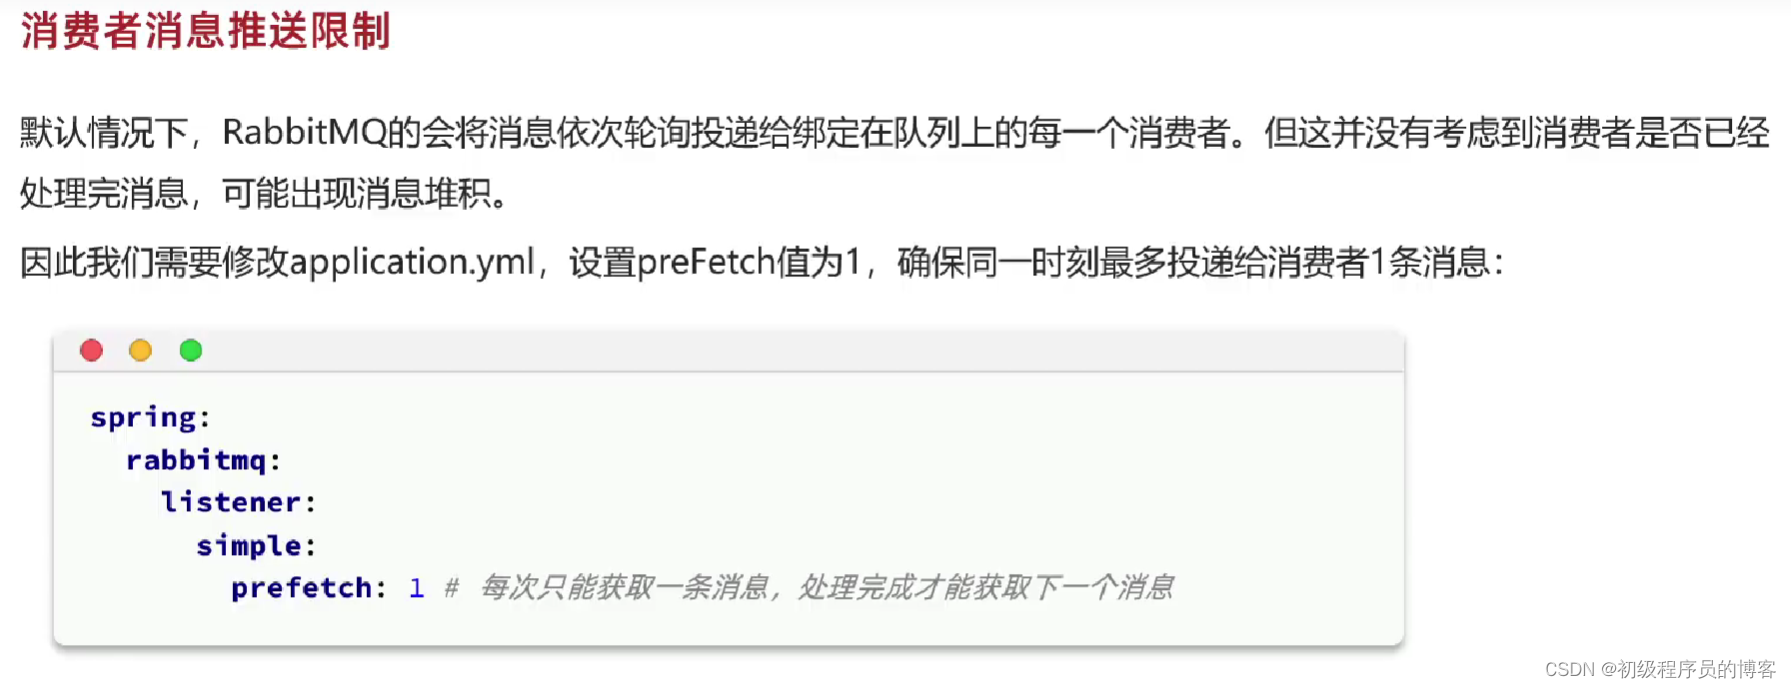
(2)消费者消息推送限制
(3)Fanout交换机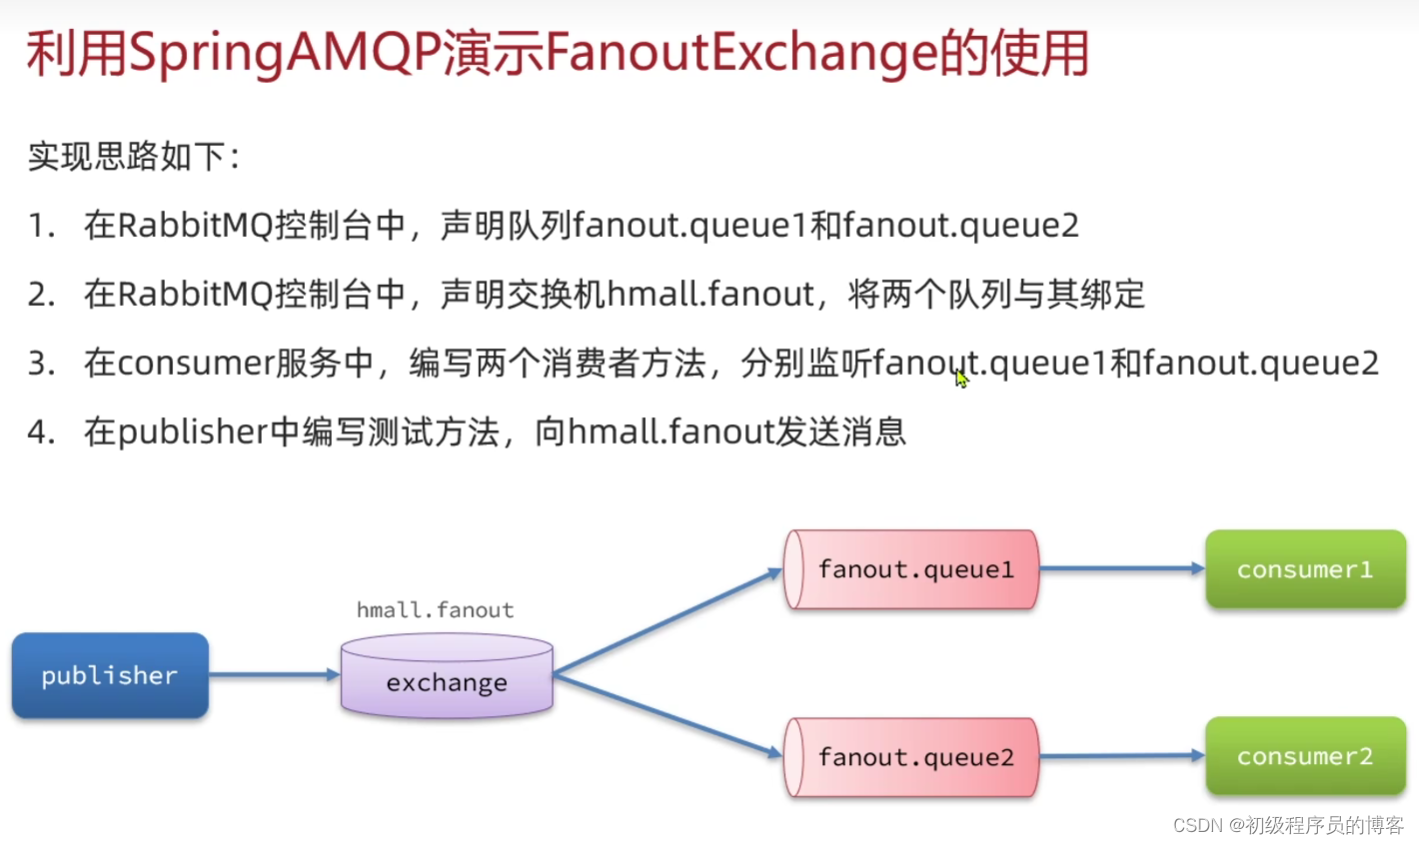
1.创建hmall.fanout交换机,绑定fanout.queue1和fanout.queue2
2.消息发送方
    @Test
    void testSendFanout(){
        String exchangeName = "hmall.fanout";
        String msg = "Hello,everyone!";
        rabbitTemplate.convertAndSend(exchangeName,null,msg);
    }
3.消息接收方
    @RabbitListener(queues = "fanout.queue1")
    public void listenFanoutQueue(String msg) throws InterruptedException {
        System.out.println("消费者1收到消息:"+msg);
    }
    @RabbitListener(queues = "fanout.queue2")
    public void listenFanout2Queue(String msg) throws InterruptedException {
        System.err.println("消费者2收到消息:....."+msg);
    }
(4)Direct交换机
注意:Direct交换机绑定队列时配置Routing Key
如下图所示:
绑定queue1要配置blue和red的Routing Key,而绑定queue2要配置yellow和red的Routing Key
 1.创建hmall.direct交换机,绑定direct.queue1和direct.queue2
2.消息发送方
    @Test
    void testSendDirect(){
        String exchangeName = "hmall.direct";
        String msg = "Hello,every Direct!";
        rabbitTemplate.convertAndSend(exchangeName,"blue",msg);
    }
3.消息接收方
    @RabbitListener(queues = "direct.queue1")
    public void listenDirectQueue(String msg) throws InterruptedException {
        System.out.println("消费者1收到消息:"+msg);
    }
    @RabbitListener(queues = "direct.queue2")
    public void listenDirect2Queue(String msg) throws InterruptedException {
        System.err.println("消费者2收到消息:....."+msg);
    }
(5)Topic交换机
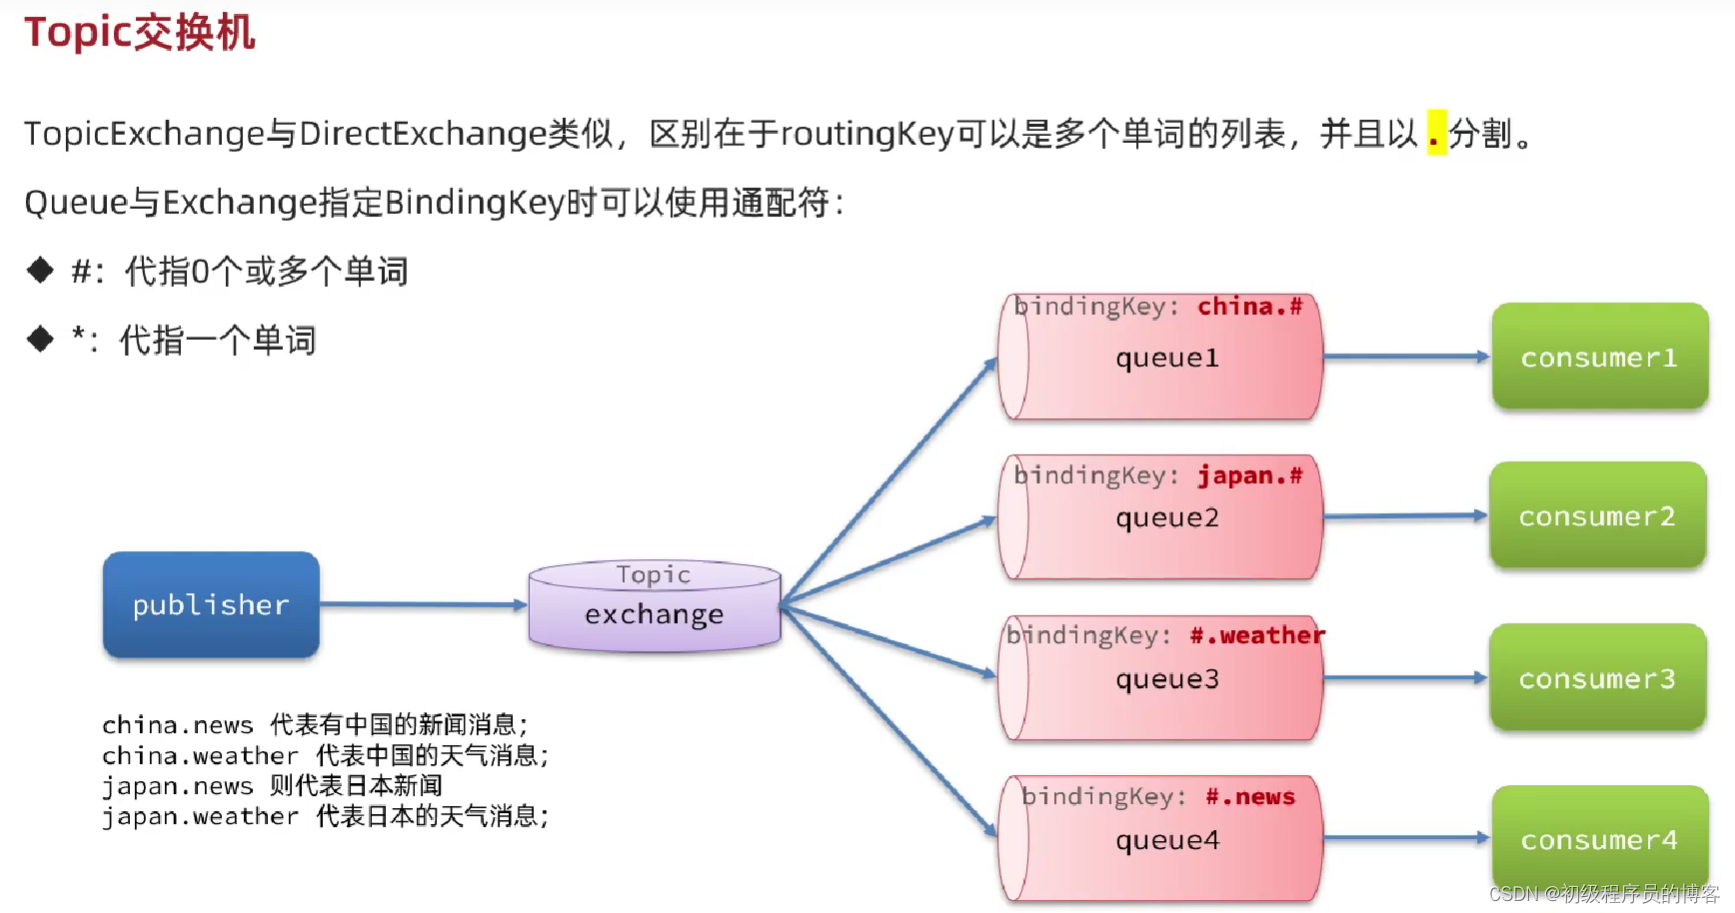

1.Topic交换机绑定队列
注意:Topic交换机绑定队列时配置Routing Key
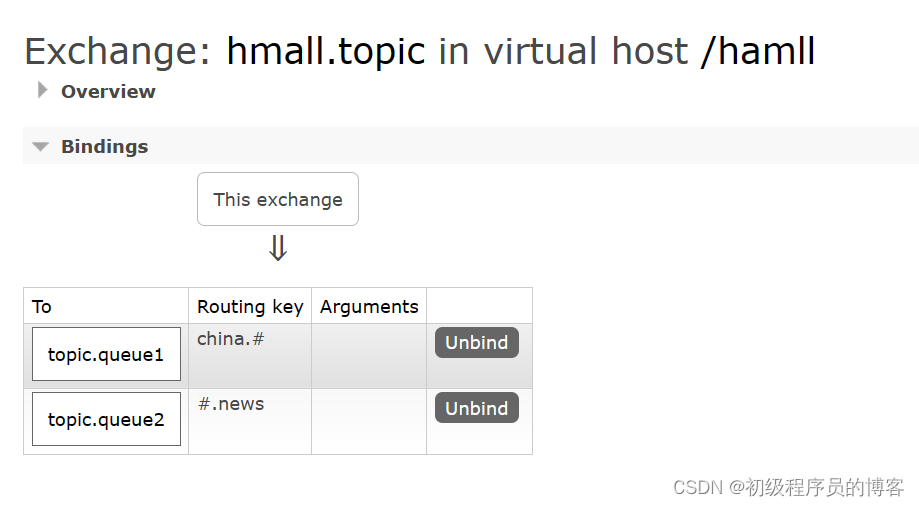
2. 消息发送者
    @Test
    void testSendTopic(){
        String exchangeName = "hmall.topic";
        String msg = "Hello,every Topic!";
        rabbitTemplate.convertAndSend(exchangeName,"china.hello",msg);
    }
3.消息接收方
    @RabbitListener(queues = "topic.queue1")
    public void listenTopicQueue(String msg){
        System.out.println("消费者1收到消息:"+msg);
    }

    @RabbitListener(queues = "topic.queue2")
    public void listenTopicQueue2(String msg){
        System.err.println("消费者2收到消息:....."+msg);
    }
(6)声明队列和交换机方式一
两种创建交换机、队列、和绑定队列的方式
package cn.itcast.mq.config;

import org.springframework.amqp.core.*;
import org.springframework.context.annotation.Bean;
import org.springframework.context.annotation.Configuration;

@Configuration
public class FanoutConfig {

    @Bean
    public FanoutExchange fanoutExchange(){
//       ExchangeBuilder.fanoutExchange("hmall.fanout").build();
        return new FanoutExchange("hmall.fanout1");
    }

    @Bean
    public Queue fanoutQueue3(){
//        QueueBuilder.durable("fanout.queue1").build();
        return new Queue("fanout.queue3");
    }

    @Bean
    public Binding fanoutBinding3(Queue fanoutQueue3,FanoutExchange fanoutExchange){
        return BindingBuilder.bind(fanoutQueue3).to(fanoutExchange);
    }


    @Bean
    public Queue fanoutQueue4(){
        return new Queue("fanout.queue4");
    }

    @Bean
    public Binding fanoutBinding4(){
        return BindingBuilder.bind(fanoutQueue4()).to(fanoutExchange());
    }
}
(7)声明队列和交换机方式二

示例代码:
    @RabbitListener(bindings = @QueueBinding(
            value = @Queue(name = "direct.queue1",durable = "true"),
            exchange = @Exchange(name = "hmall.direct",type = ExchangeTypes.DIRECT),
            key = {"red","blue"}
    ))
    public void listenDirectQueue(String msg) throws InterruptedException {
        System.out.println("消费者1收到消息:"+msg);
    }
    @RabbitListener(bindings = @QueueBinding(
            value = @Queue(value = "direct.queue2",durable = "true"),
            exchange = @Exchange(name = "hmall.direct",type = ExchangeTypes.DIRECT),
            key = {"red","yellow"}
    ))
    public void listenDirect2Queue(String msg) throws InterruptedException {
        System.err.println("消费者2收到消息:....."+msg);
    }
(8)消息转换器
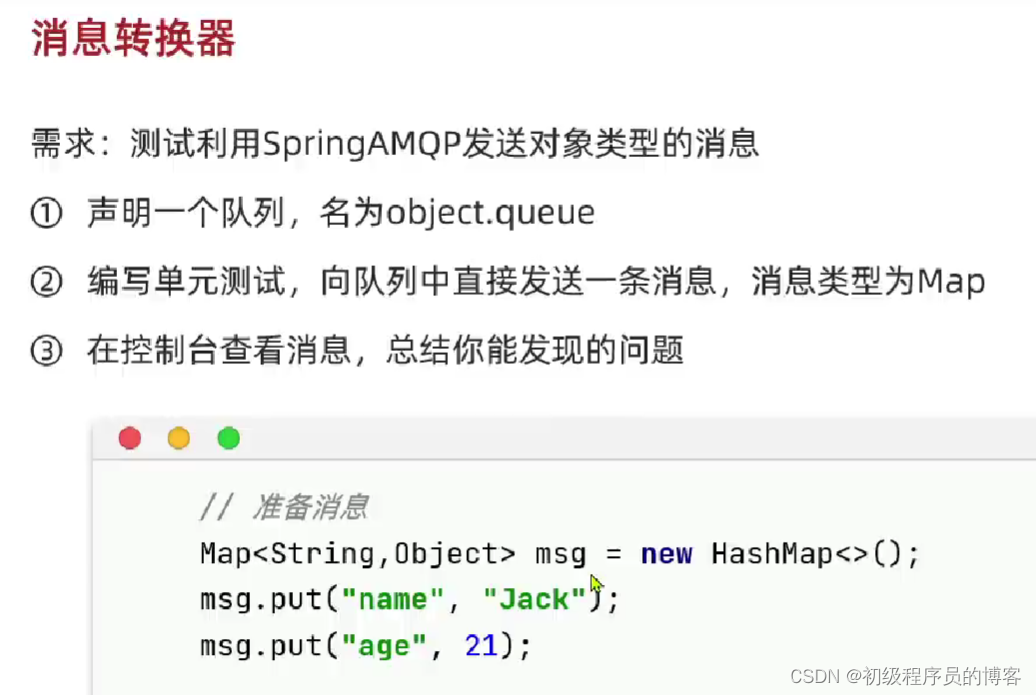
1.添加一个队列,名为object.queue
2.编写单元测试,向队列中发送一条消息,消息的类型为Map
    @Test
    void testSendObject(){
        Map<String, Object> msg = new HashMap<>(2);
        msg.put("name","Jack");
        msg.put("age",21);
        rabbitTemplate.convertAndSend("object.queue",msg);
    }
3.打开控制台,发现发送来的消息是一串乱码,解决方式如下:

3.1引入依赖:
<!--        Jackson-->
        <dependency>
            <groupId>com.fasterxml.jackson.dataformat</groupId>
            <artifactId>jackson-dataformat-xml</artifactId>
        </dependency>
3.2配置MessageConverter
    @Bean
    public MessageConverter messageConverter(){
        return new Jackson2JsonMessageConverter();
    }