#三方框架# #React Native #
1 。环境配置;
安装 DevEco 开发工具;
Node 版本16+;
hdc环境配置
hdc 是 OpenHarmony 为开发人员提供的用于调试的命令行工具,鸿蒙 React Native 工程使用 hdc 进行真机调试。hdc 工具通过 OpenHarmony SDK 获取,存放于 SDK 的 toolchains 目录下,请将 {DevEco Studio安装路径}/sdk/{SDK版本}/openharmony/toolchains 的完整路径添加到环境变量中。
安装 DevEco 的时候 勾选一下。就不用单独的添加环境变量了 。
配置 CAPI 版本环境变量
当前RN框架提供的 Demo 工程默认为 CAPI 版本,您需要配置环境变量 RNOH_C_API_ARCH = 1。
Windows 环境:
在此电脑 > 属性 > 高级系统设置 > 高级 > 环境变量中,在系统变量中点击新建,添加变量名为:
RNOH_C_API_ARCH,变量值为1。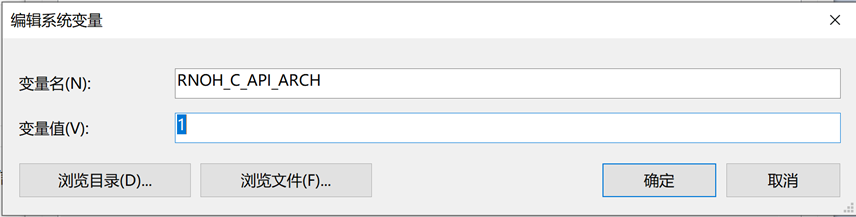
2,创建RN 工程
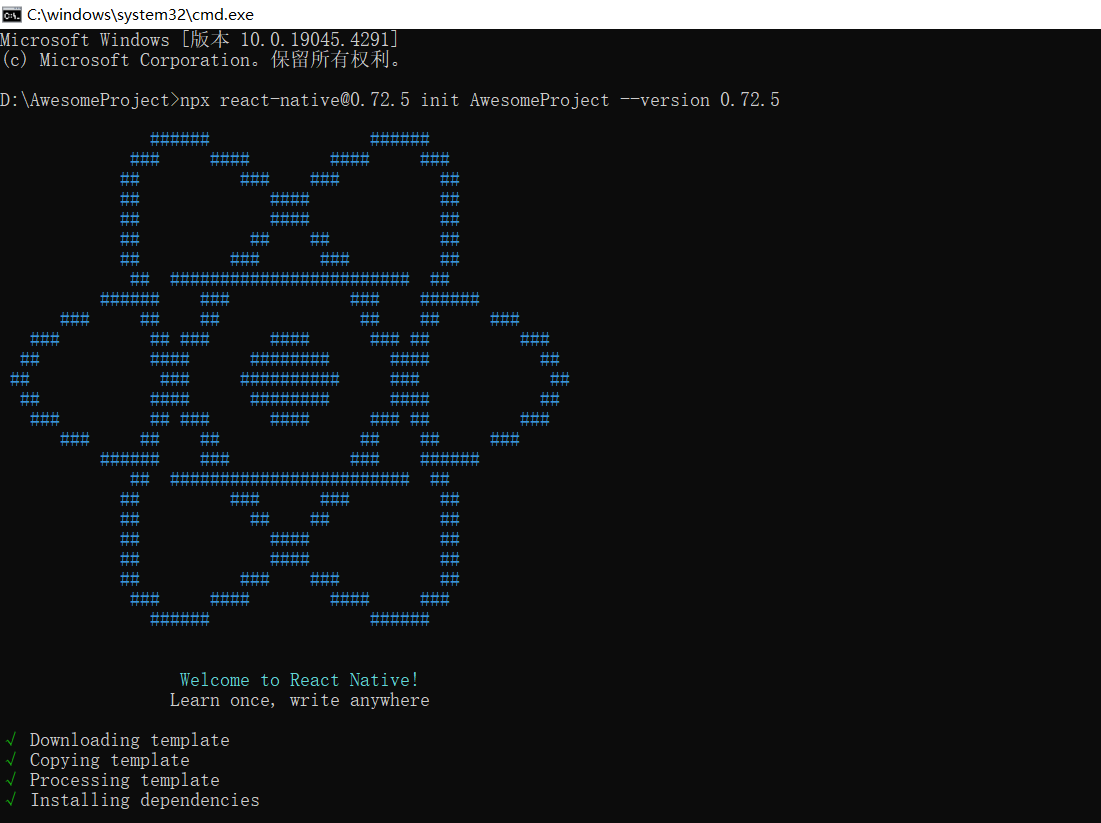
使用 React Native 内置的命令行工具来创建一个名为 “AwesomeProject” 的新项目。这个命令行工具不需要安装,可以直接用 node 自带的 npx 命令来创建,目前 React Native for OpenHarmony 仅支持 0.72.5 版本的 React Native:
npx react-native@0.72.5 init AwesomeProject --version 0.72.5
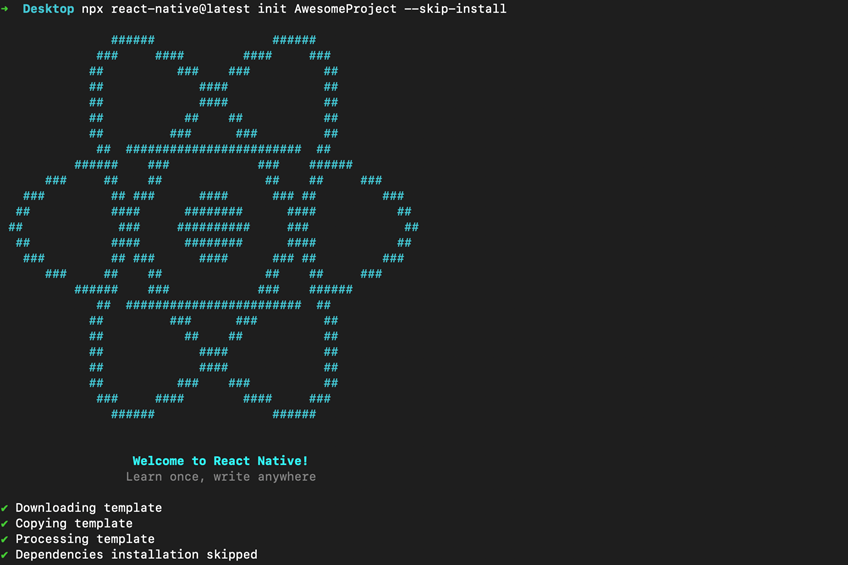
该命令在 mac 环境下初始化 React Native 项目时会下载 iOS 依赖库,耗时较长,开发者可以选择执行以下命令跳过该过程,后续根据需要自行下载,不影响鸿蒙项目开发:
npx react-native@0.72.5 init AwesomeProject --version 0.72.5 --skip-install
安装鸿蒙化依赖
打开
AwesomeProject目录下的package.json,在scripts下新增 OpenHarmony 的依赖:{ "name": "AwesomeProject", "version": "0.0.1", "private": true, "scripts": { "android": "react-native run-android", "ios": "react-native run-ios", "lint": "eslint .", "start": "react-native start", "test": "jest", + "dev": "react-native bundle-harmony --dev" }, "dependencies": { "react": "18.2.0", "react-native": "0.72.5" }, "devDependencies": { "@babel/core": "^7.20.0", "@babel/preset-env": "^7.20.0", "@babel/runtime": "^7.20.0", "@react-native/eslint-config": "^0.72.2", "@react-native/metro-config": "^0.72.11", "@tsconfig/react-native": "^3.0.0", "@types/react": "^18.0.24", "@types/react-test-renderer": "^18.0.0", "babel-jest": "^29.2.1", "eslint": "^8.19.0", "jest": "^29.2.1", "metro-react-native-babel-preset": "0.76.8", "prettier": "^2.4.1", "react-test-renderer": "18.2.0", "typescript": "4.8.4" }, "engines": { "node": ">=16" } }在
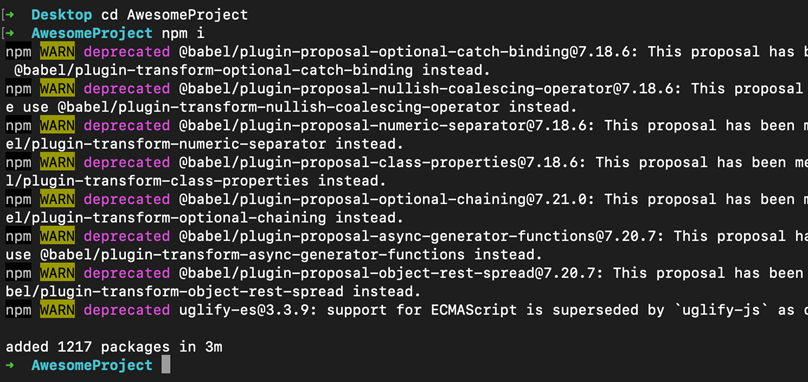
AwesomeProject目录下运行安装依赖包命令:npm i @react-native-oh/react-native-harmony@x.x.x注意:
- 指令中@x.x.x用于指定下载的版本,不指定时默认下载最新版本。
- 本地安装鸿蒙化依赖,请参考如何使用本地安装鸿蒙化依赖。
- 如何从本地依赖切换至远程依赖,请参考如何从本地依赖切换至远程依赖。
生成bundle
打开
AwsomeProject\metro.config.js,并添加 OpenHarmony 的适配代码。配置文件的详细介绍,可以参考React Native 中文网。修改完成后的文件内容如下:const {mergeConfig, getDefaultConfig} = require('@react-native/metro-config'); const {createHarmonyMetroConfig} = require('@react-native-oh/react-native-harmony/metro.config'); /** * @type {import("metro-config").ConfigT} */ const config = { transformer: { getTransformOptions: async () => ({ transform: { experimentalImportSupport: false, inlineRequires: true, }, }), }, }; module.exports = mergeConfig(getDefaultConfig(__dirname), createHarmonyMetroConfig({ reactNativeHarmonyPackageName: '@react-native-oh/react-native-harmony', }), config);在 AwesomeProject 目录下运行生成 bundle 文件的命令。运行成功后,会在
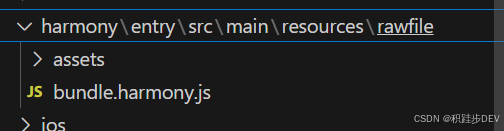
AwesomeProject/harmony/entry/src/main/resources/rawfile目录下生成bundle.harmony.js和assets文件夹,assets用来存放图片(如果bundle中不涉及本地图片,则没有assets文件夹)。npm run dev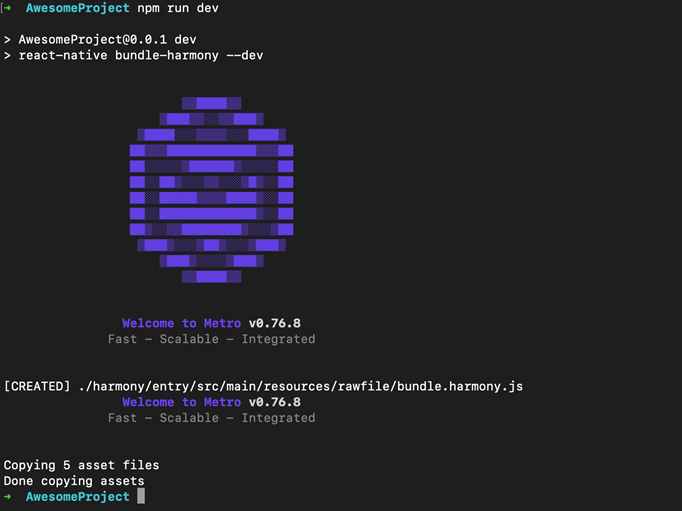
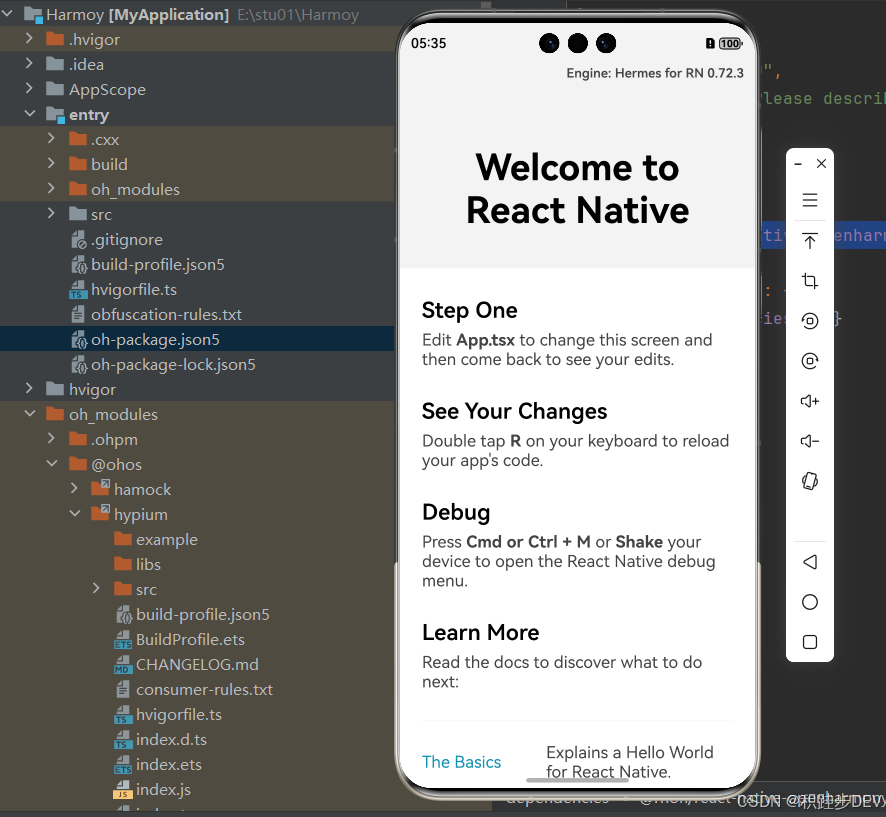
成功之后可以看到如下内容:
创建鸿蒙工程
本章节主要介绍了鸿蒙工程的创建,并加载 React Native 相关的依赖包和 bundle 包,最终完成鸿蒙工程的运行的过程。
您可以按照本节中的操作一步一步完成环境的搭建,也可以使用附件中的
MyApplicationReplace.zip的内容,一一替换对应的文件,修改版本并运行。
新建工程或者在已有工程中集成
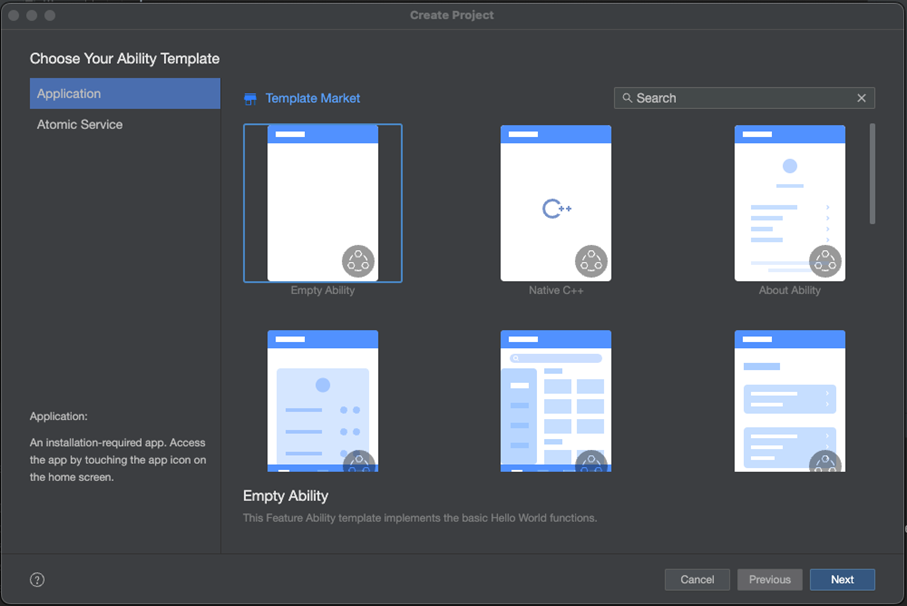
下面演示在新建工程中集成。点击 File > New > Create Project,选择创建 Empty Ability 工程,如图所示:
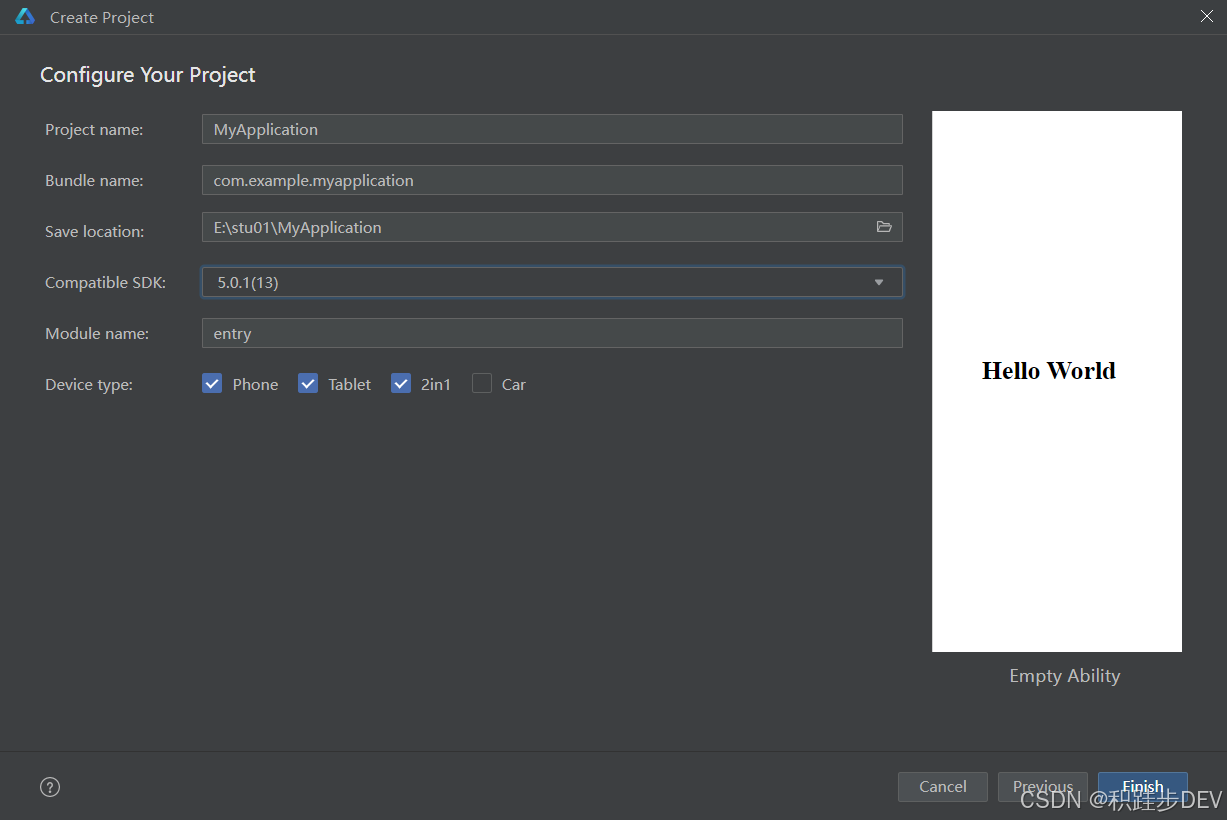
点击 Next 按钮,并在 Compile SDK 中选择 API13,(为了防止最新版本有各种问题)创建一个名为 “MyApplication” 的项目。注意项目路径不要太长,如图所示:
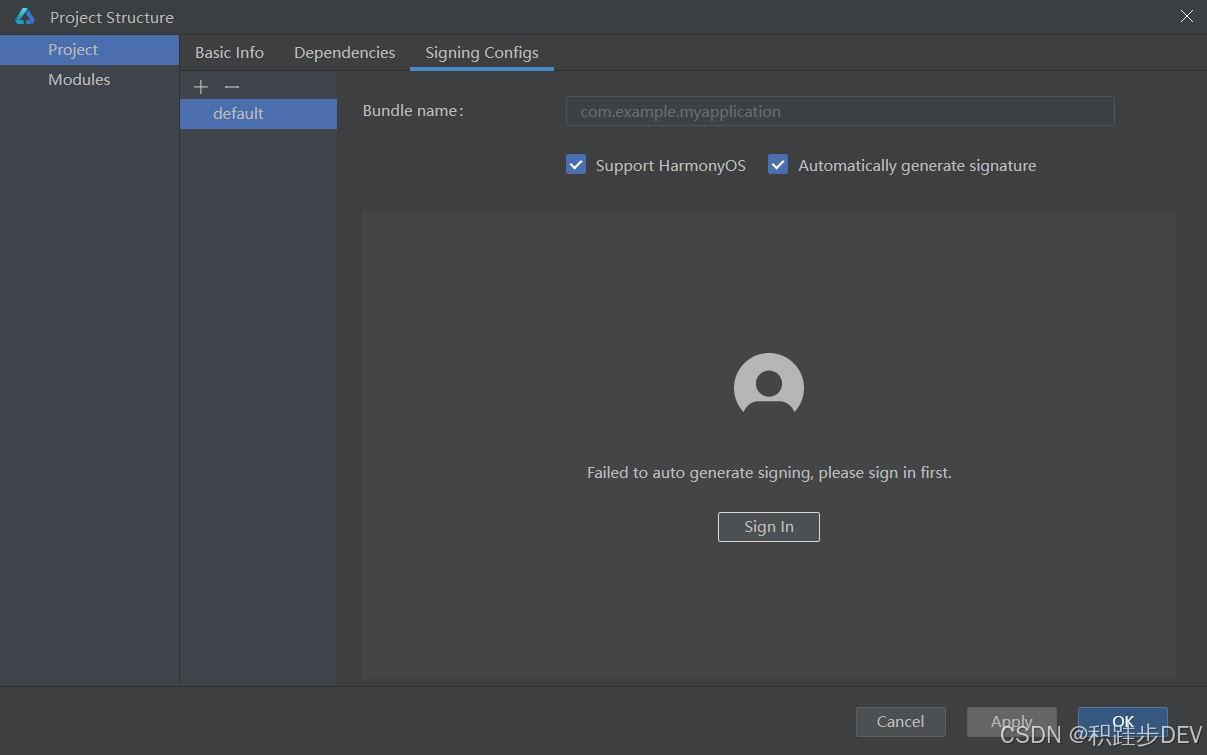
连接真机,点击 File > Project Structure,在弹窗界面点击 Signing Configs,勾选 Support HarmonyOS 和 Automatically generate signature,然后点击 Sign In 登录华为账号,并签名。
添加 React Native 配置
在 entry 目录下执行以下命令:
ohpm i @rnoh/react-native-openharmony@x.x.x
执行完成后会在工程级目录以及模块级目录下生成 oh_modules 文件夹。
注意:
- 指令中@x.x.x用于指定下载的版本,不指定时默认下载最新版本。
- 由于 har 包比较大,这一步耗时会比较长,务必保证
ohpm install和 IDE 自发的SyncData全都完成,否则会导致编译报错。- 如何在三方库或自定义module中引入rnoh的依赖,请参考文档。
在原生工程中集成RNOH
补充CPP侧代码
- 在
MyApplication/entry/src/main目录下新建 cpp 文件夹。 - 在 cpp 目录下新增
CMakeLists.txt,并将 RNOH 的适配层代码添加到编译构建中生成librnoh_app.so:project(rnapp) cmake_minimum_required(VERSION 3.4.1) set(CMAKE_SKIP_BUILD_RPATH TRUE) set(OH_MODULE_DIR "${CMAKE_CURRENT_SOURCE_DIR}/../../../oh_modules") set(RNOH_APP_DIR "${CMAKE_CURRENT_SOURCE_DIR}") set(RNOH_CPP_DIR "${OH_MODULE_DIR}/@rnoh/react-native-openharmony/src/main/cpp") set(RNOH_GENERATED_DIR "${CMAKE_CURRENT_SOURCE_DIR}/generated") set(CMAKE_ASM_FLAGS "-Wno-error=unused-command-line-argument -Qunused-arguments") set(CMAKE_CXX_FLAGS "-fstack-protector-strong -Wl,-z,relro,-z,now,-z,noexecstack -s -fPIE -pie") add_compile_definitions(WITH_HITRACE_SYSTRACE) set(WITH_HITRACE_SYSTRACE 1) # for other CMakeLists.txt files to use add_subdirectory("${RNOH_CPP_DIR}" ./rn) add_library(rnoh_app SHARED "./PackageProvider.cpp" "${RNOH_CPP_DIR}/RNOHAppNapiBridge.cpp" ) target_link_libraries(rnoh_app PUBLIC rnoh) - 在 cpp 目录下新增
PackageProvider.cpp,该文件需要满足以下要求:- 需要导入
RNOH/PackageProvider; - 实现
getPackages方法,用于创建三方库或自定义 TurboModule 或 Fabric 的 package 对象。
此处不涉及三方库与自定义 TurboModule 或组件,需要返回空数组。
#include "RNOH/PackageProvider.h" using namespace rnoh; std::vector<std::shared_ptr<Package>> PackageProvider::getPackages(Package::Context ctx) { return {}; } - 需要导入
- 打开
MyApplicaton\entry\build-profile.json5,将 cpp 中的代码添加到鸿蒙的编译构建任务中,详细介绍可以参考模块级build-profile.json5:{ "apiType": "stageMode", "buildOption": { + "externalNativeOptions": { + "path": "./src/main/cpp/CMakeLists.txt", + "arguments": "", + "cppFlags": "", + } }, "buildOptionSet": [ { "name": "release", "arkOptions": { "obfuscation": { "ruleOptions": { "enable": true, "files": [ "./obfuscation-rules.txt" ] } } } }, ], "targets": [ { "name": "default" }, { "name": "ohosTest", } ] }
补充ArkTS侧的代码
- 打开
MyApplicaton\entry\src\main\ets\entryability\EntryAbility.ets,引入并使用RNAbility,该文件需要满足以下的要求:- 如果需要扩展使用对应的生命周期函数,请在代码中使用 super,
RNAbility在生命周期函数中进行了对应的操作,需要使用 super 保证功能不丢失; - 需要重写
getPagePath,返回程序的入口 page。
import { RNAbility } from '@rnoh/react-native-openharmony'; export default class EntryAbility extends RNAbility { getPagePath() { return 'pages/Index'; } } - 如果需要扩展使用对应的生命周期函数,请在代码中使用 super,
- 在
MyApplicaton\entry\src\main\ets目录下新增RNPackagesFactory.ets,该文件需要满足以下要求:- 在
@rnoh/react-native-openharmony导入RNPackageContext和RNPackage; - 在文件中导出
createRNPackages方法,用于创建三方库或自定义 TurboModule、Fabric的package 对象。
此处不涉及三方库与自定义TurboModule或组件,需要返回空数组。
import { RNPackageContext, RNPackage } from '@rnoh/react-native-openharmony/ts'; export function createRNPackages(ctx: RNPackageContext): RNPackage[] { return []; } - 在
- 打开
MyApplicaton\entry\src\main\ets\pages\Index.ets,添加RNOH的使用代码,修改后如下:RNApp的参数appKey需要与RN工程中AppRegistry.registerComponent注册的appName保持一致,否则会导致白屏。import { AnyJSBundleProvider, ComponentBuilderContext, FileJSBundleProvider, MetroJSBundleProvider, ResourceJSBundleProvider, RNApp, RNOHErrorDialog, RNOHLogger, TraceJSBundleProviderDecorator, RNOHCoreContext } from '@rnoh/react-native-openharmony'; import { createRNPackages } from '../RNPackagesFactory'; @Builder export function buildCustomRNComponent(ctx: ComponentBuilderContext) {} const wrappedCustomRNComponentBuilder = wrapBuilder(buildCustomRNComponent) @Entry @Component struct Index { @StorageLink('RNOHCoreContext') private rnohCoreContext: RNOHCoreContext | undefined = undefined @State shouldShow: boolean = false private logger!: RNOHLogger aboutToAppear() { this.logger = this.rnohCoreContext!.logger.clone("Index") const stopTracing = this.logger.clone("aboutToAppear").startTracing(); this.shouldShow = true stopTracing(); } onBackPress(): boolean | undefined { // NOTE: this is required since `Ability`'s `onBackPressed` function always // terminates or puts the app in the background, but we want Ark to ignore it completely // when handled by RN this.rnohCoreContext!.dispatchBackPress() return true } build() { Column() { if (this.rnohCoreContext && this.shouldShow) { if (this.rnohCoreContext?.isDebugModeEnabled) { RNOHErrorDialog({ ctx: this.rnohCoreContext }) } RNApp({ rnInstanceConfig: { createRNPackages, enableNDKTextMeasuring: true, // 该项必须为true,用于开启NDK文本测算 enableBackgroundExecutor: false, enableCAPIArchitecture: true, // 该项必须为true,用于开启CAPI arkTsComponentNames: [] }, initialProps: { "foo": "bar" } as Record<string, string>, appKey: "AwesomeProject", wrappedCustomRNComponentBuilder: wrappedCustomRNComponentBuilder, onSetUp: (rnInstance) => { rnInstance.enableFeatureFlag("ENABLE_RN_INSTANCE_CLEAN_UP") }, jsBundleProvider: new TraceJSBundleProviderDecorator( new AnyJSBundleProvider([ new MetroJSBundleProvider(), // NOTE: to load the bundle from file, place it in // `/data/app/el2/100/base/com.rnoh.tester/files/bundle.harmony.js` // on your device. The path mismatch is due to app sandboxing on OpenHarmony new FileJSBundleProvider('/data/storage/el2/base/files/bundle.harmony.js'), new ResourceJSBundleProvider(this.rnohCoreContext.uiAbilityContext.resourceManager, 'hermes_bundle.hbc'), new ResourceJSBundleProvider(this.rnohCoreContext.uiAbilityContext.resourceManager, 'bundle.harmony.js') ]), this.rnohCoreContext.logger), }) } } .height('100%') .width('100%') } }
加载bundle包
在上一章节中已经完成了 bundle 文件的生成,接下来将它加载到 DevEco Studio 中以运行 MyApplication 项目。加载 bundle 有三种方式:
方式一:本地加载 bundle。将 bundle 文件和 assets 图片放在
entry/src/main/resources/rawfile路径下,在entry/src/main/ets/pages/Index.ets中使用。
官方文档写了3种方式。我用的第一种!
全量编译 C++ 代码耗时较长,请耐心等待。

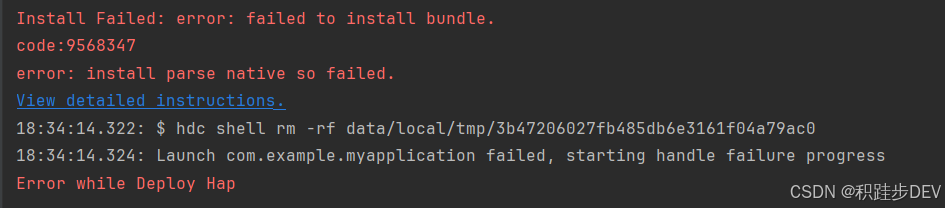
报错:
 由于cpp 目录错误导致。

"externalNativeOptions": {
      "path": "./src/main/cpp/CMakeLists.txt",
      "arguments": "",
      "cppFlags": "",
      "abiFilters": [
        "x86_64",
        "arm64-v8a"
      ]
    }
运行出错:
Error message:Couldn't create bindings between ETS and CPP. libRNOHApp is undefined.
Stacktrace:
SourceMap is not initialized yet
at RNOHError (entry|@rnoh/react-native-openharmony|0.72.27|src/main/ets/RNOH/RNOHError.ts:16:9)
at FatalRNOHError (entry|@rnoh/react-native-openharmony|0.72.27|src/main/ets/RNOH/RNOHError.ts:1:1)
at onInit (entry|@rnoh/react-native-openharmony|0.72.27|src/main/ets/RNOH/NapiBridge.js:12:25)
at create (entry|@rnoh/react-native-openharmony|0.72.27|src/main/ets/RNOH/RNInstancesCoordinator.ts:63:36)
at onCreate (entry|@rnoh/react-native-openharmony|0.72.27|src/main/ets/RNOH/RNAbility.ts:64:39)
始终没有解决 。
最后降低了 @rnoh/react-native-openharmony": 本版。
从 @rnoh/react-native-openharmony@0.72.67 到 @rnoh/react-native-openharmony": "0.72.38"
最终运行通过。
release包使用
在
MyApplication目录下新建 libs 文件夹,将react_native_openharmony-xxx-release.har放入该目录。打开
MyApplication/entry下的oh-package.json5,替换 har 包的依赖为对应版本的 release 包:{ "name": "entry", "version": "1.0.0", "description": "Please describe the basic information.", "main": "", "author": "", "license": "", "dependencies": { + "@rnoh/react-native-openharmony": "file:../libs/react_native_openharmony-xxx-release.har" } }替换
MyApplication\entry\src\main\cpp\CMakeLists.txt文件为以下代码:project(rnapp) cmake_minimum_required(VERSION 3.4.1) set(CMAKE_SKIP_BUILD_RPATH TRUE) set(NATIVERENDER_ROOT_PATH "${CMAKE_CURRENT_SOURCE_DIR}") set(OH_MODULE_DIR "${CMAKE_CURRENT_SOURCE_DIR}/../../../oh_modules") set(RNOH_CPP_DIR "${OH_MODULE_DIR}/@rnoh/react-native-openharmony/src/main/include") set(REACT_COMMON_PATCH_DIR "${RNOH_CPP_DIR}/patches/react_native_core") set(CMAKE_CXX_STANDARD 17) set(LOG_VERBOSITY_LEVEL 1) set(CMAKE_ASM_FLAGS "-Wno-error=unused-command-line-argument -Qunused-arguments") set(RNOH_GENERATED_DIR "${CMAKE_CURRENT_SOURCE_DIR}/generated") set(CMAKE_CXX_FLAGS "-fstack-protector-strong -Wl,-z,relro,-z,now,-z,noexecstack -s -fPIE -pie -DNDEBUG") set(WITH_HITRACE_SYSTRACE 1) # for other CMakeLists.txt files to use add_compile_definitions(WITH_HITRACE_SYSTRACE) # folly的编译选项 set(folly_compile_options -DFOLLY_NO_CONFIG=1 -DFOLLY_MOBILE=1 -DFOLLY_USE_LIBCPP=1 -DFOLLY_HAVE_RECVMMSG=1 -DFOLLY_HAVE_PTHREAD=1 -Wno-comma -Wno-shorten-64-to-32 -Wno-documentation -faligned-new ) add_compile_options("-Wno-unused-command-line-argument") # 添加头文件目录 include_directories(${NATIVERENDER_ROOT_PATH} ${RNOH_CPP_DIR} ${REACT_COMMON_PATCH_DIR} ${RNOH_CPP_DIR}/third-party/folly ${RNOH_CPP_DIR}/third-party/rn/ReactCommon ${RNOH_CPP_DIR}/third-party/rn/ReactCommon/react/nativemodule/core ${RNOH_CPP_DIR}/third-party/rn/ReactCommon/jsi ${RNOH_CPP_DIR}/third-party/rn/ReactCommon/callinvoker ${RNOH_CPP_DIR}/third-party/boost/libs/utility/include ${RNOH_CPP_DIR}/third-party/boost/libs/stacktrace/include ${RNOH_CPP_DIR}/third-party/boost/libs/predef/include ${RNOH_CPP_DIR}/third-party/boost/libs/array/include ${RNOH_CPP_DIR}/third-party/boost/libs/throw_exception/include ${RNOH_CPP_DIR}/third-party/boost/libs/config/include ${RNOH_CPP_DIR}/third-party/boost/libs/core/include ${RNOH_CPP_DIR}/third-party/boost/libs/preprocessor/include ${RNOH_CPP_DIR}/third-party/double-conversion ${RNOH_CPP_DIR}/third-party/rn/ReactCommon/react/renderer/graphics/platform/cxx ${RNOH_CPP_DIR}/third-party/rn/ReactCommon/runtimeexecutor ${RNOH_CPP_DIR}/third-party/glog/src ${RNOH_CPP_DIR}/third-party/boost/libs/mpl/include ${RNOH_CPP_DIR}/third-party/boost/libs/type_traits/include ${RNOH_CPP_DIR}/third-party/rn/ReactCommon/yoga ${RNOH_CPP_DIR}/third-party/boost/libs/intrusive/include ${RNOH_CPP_DIR}/third-party/boost/libs/assert/include ${RNOH_CPP_DIR}/third-party/boost/libs/move/include ${RNOH_CPP_DIR}/third-party/boost/libs/static_assert/include ${RNOH_CPP_DIR}/third-party/boost/libs/container_hash/include ${RNOH_CPP_DIR}/third-party/boost/libs/describe/include ${RNOH_CPP_DIR}/third-party/boost/libs/mp11/include ${RNOH_CPP_DIR}/third-party/boost/libs/iterator/include ${RNOH_CPP_DIR}/third-party/boost/libs/detail/include ${RNOH_CPP_DIR}/patches/react_native_core/react/renderer/textlayoutmanager/platform/harmony ) configure_file( ${RNOH_CPP_DIR}/third-party/folly/CMake/folly-config.h.cmake ${RNOH_CPP_DIR}/third-party/folly/folly/folly-config.h ) file(GLOB GENERATED_CPP_FILES "./generated/*.cpp") # 添加rnoh动态共享包 add_library(rnoh SHARED "${RNOH_CPP_DIR}/RNOHOther.cpp" "${RNOH_CPP_DIR}/third-party/folly/folly/lang/SafeAssert.cpp" ) # 链接其他so target_link_directories(rnoh PUBLIC ${OH_MODULE_DIR}/@rnoh/react-native-openharmony/libs/arm64-v8a) target_link_libraries(rnoh PUBLIC rnoh_semi libace_napi.z.so libace_ndk.z.so librawfile.z.so libhilog_ndk.z.so libnative_vsync.so libnative_drawing.so libc++_shared.so libhitrace_ndk.z.so react_render_scheduler rrc_image rrc_text rrc_textinput rrc_scrollview react_nativemodule_core react_render_animations jsinspector hermes jsi logger react_config react_debug react_render_attributedstring react_render_componentregistry react_render_core react_render_debug react_render_graphics react_render_imagemanager react_render_mapbuffer react_render_mounting react_render_templateprocessor react_render_textlayoutmanager react_render_telemetry react_render_uimanager react_utils rrc_root rrc_view react_render_leakchecker react_render_runtimescheduler runtimeexecutor ) if("$ENV{RNOH_C_API_ARCH}" STREQUAL "1") message("Experimental C-API architecture enabled") target_link_libraries(rnoh PUBLIC libqos.so) target_compile_definitions(rnoh PUBLIC C_API_ARCH) endif() # RNOH_END: add_package_subdirectories # 添加rnoh_app共享包 add_library(rnoh_app SHARED ${GENERATED_CPP_FILES} "./PackageProvider.cpp" "${RNOH_CPP_DIR}/RNOHOther.cpp" "${RNOH_CPP_DIR}/RNOHAppNapiBridge.cpp" ) target_link_libraries(rnoh_app PUBLIC rnoh) target_compile_options(rnoh_app PUBLIC ${folly_compile_options} -DRAW_PROPS_ENABLED -std=c++17)将
MyApplication/entry的oh_modules文件夹删除,点击entry文件夹,再点击顶部菜单栏的build>Clean Project清除项目缓存。点击顶部菜单栏的
File>Sync and Refresh Project来执行ohpm install,执行完成后会在entry目录下生成oh_modules文件夹。点击顶部菜单栏的
Run>Run 'entry'运行工程 。
运行结果:
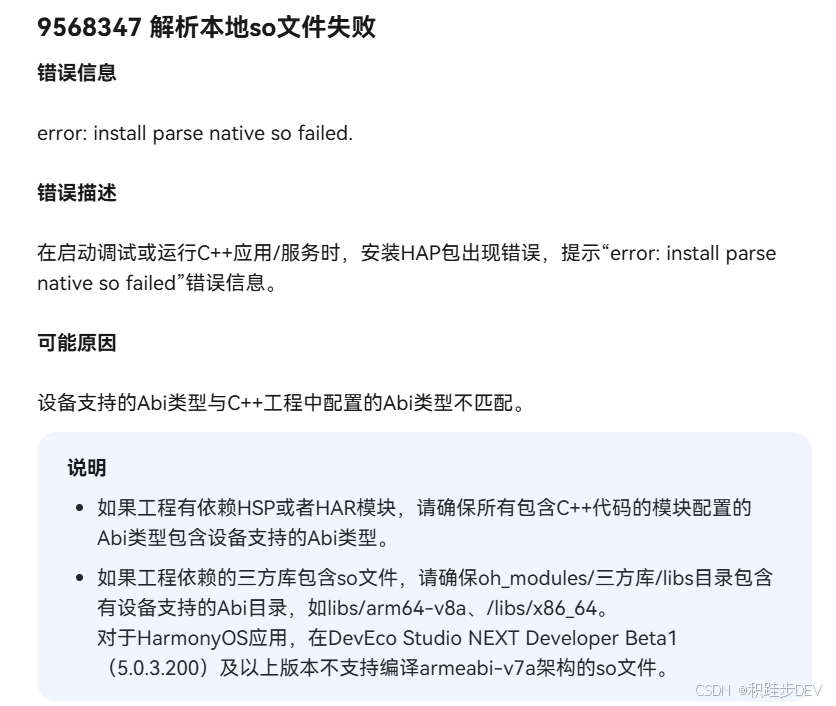
打包 release的时候 ,har中没有 x86_64 。所以最终会运行失败。 有真机的小伙伴可以测试下。