【iOS】ZARA仿写
前言
暑假第一个的任务仿写ZARA 虽然不是特别难却有很多小细节需要注意
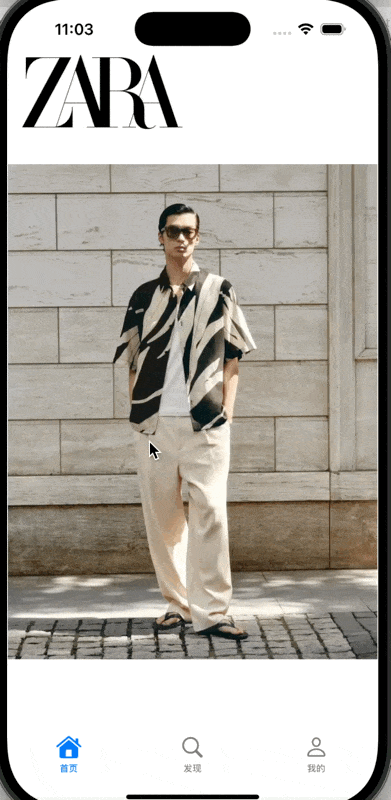
首页
点进程序出现的就是整个项目最主要的一个点,即首页的无限轮播图,不管是自动轮播还是手动滑动,前后图片的滑动都非常丝滑,即在视觉上有一种无限轮播效果,我这里面的具体思路是插入比你想看到的图片多两张图,即在第一张图前面插入最后一张图的假图,在最后一张图后面插入第一张图片的假图,当滚动到假图时悄悄跳回真实内容位置,视觉上实现 “无缝循环“
插入假图代码:
self.images = @[@"zara1.jpg", @"zara2.jpg", @"zara3.jpg", @"zara4.jpg", @"zara5.jpg"];
for (int i = 0; i < self.images.count + 2; i++) {
        NSString *imageName;
        if (i == 0) {
            imageName = [self.images lastObject];
        } else if (i == self.images.count + 1) {
            imageName = [self.images firstObject];
        } else {
            imageName = self.images[i - 1];
        }

        UIImageView *imageView = [[UIImageView alloc] initWithImage:[UIImage imageNamed:imageName]];
        imageView.frame = CGRectMake(bounds.size.width * i, 0, bounds.size.width, bounds.size.height - 280);
        imageView.contentMode = UIViewContentModeScaleAspectFit;
        [self.scrollView addSubview:imageView];
    }
自动播放,是用NSTimer定时滑动,并在滑动后进行自动检测修正
- (void)startTimerScollView {
    self.timerScrollView = [NSTimer scheduledTimerWithTimeInterval: 2.5 target: self selector: @selector(pageToNext) userInfo: self repeats: YES];
    [[NSRunLoop mainRunLoop] addTimer:self.timerScrollView forMode:NSRunLoopCommonModes];
}
- (void)scrollViewDidEndScrollingAnimation:(UIScrollView *)scrollView {
    CGFloat screenWidth = [UIScreen mainScreen].bounds.size.width;
    NSInteger pageIndex = scrollView.contentOffset.x / screenWidth;
    if (pageIndex == 0) {
        [scrollView setContentOffset:CGPointMake(screenWidth * self.images.count, 0) animated:NO];
        self.segmentView.selectedSegmentIndex = self.images.count - 1;
    } else if (pageIndex == self.images.count + 1) {
        [scrollView setContentOffset:CGPointMake(screenWidth, 0) animated:NO];
        self.segmentView.selectedSegmentIndex = 0;
    } else {
        self.segmentView.selectedSegmentIndex = pageIndex - 1;
    }
}
还有一点就是设置拖动时的视图不可移动,以及在拖动前后,对定时器的销毁和重新建立
- (void)scrollViewWillBeginDragging:(UIScrollView *)scrollView {
    [self.timerScrollView invalidate];
    self.timerScrollView = nil;
    self.isDragging = YES;
}
- (void)scrollViewDidEndDragging:(UIScrollView *)scrollView willDecelerate:(BOOL)decelerate {
    self.timerScrollView = [NSTimer scheduledTimerWithTimeInterval: 2.5 target: self selector: @selector(pageToNext) userInfo: self repeats: YES];
    self.isDragging = NO;
}
然后对于下面的页数的指示器可以使用UIPageControl或者设置无字且较小的UISegmentedControl控件来展示
首页效果图:
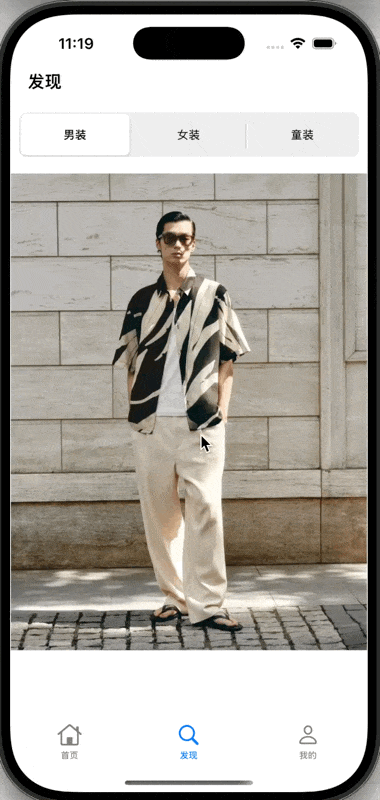
发现
对发现这一页没什么好说的,跟首页基本一样,只不过需要关闭自动滑动的内容,只允许用户手动滑动,再在屏幕上方安置一个分栏控件
- (void)setupSegmentView {
    CGRect bounds = self.view.bounds;
    self.segmentView = [[UISegmentedControl alloc] initWithItems:@[@"男装", @"女装", @"童装"]];
    self.segmentView.frame = CGRectMake(10, 110, bounds.size.width - 20, 50);
    [self.segmentView addTarget:self action:@selector(segmentChanged:) forControlEvents:UIControlEventValueChanged];
    self.segmentView.selectedSegmentIndex = 0;
    [self.view addSubview:self.segmentView];
}
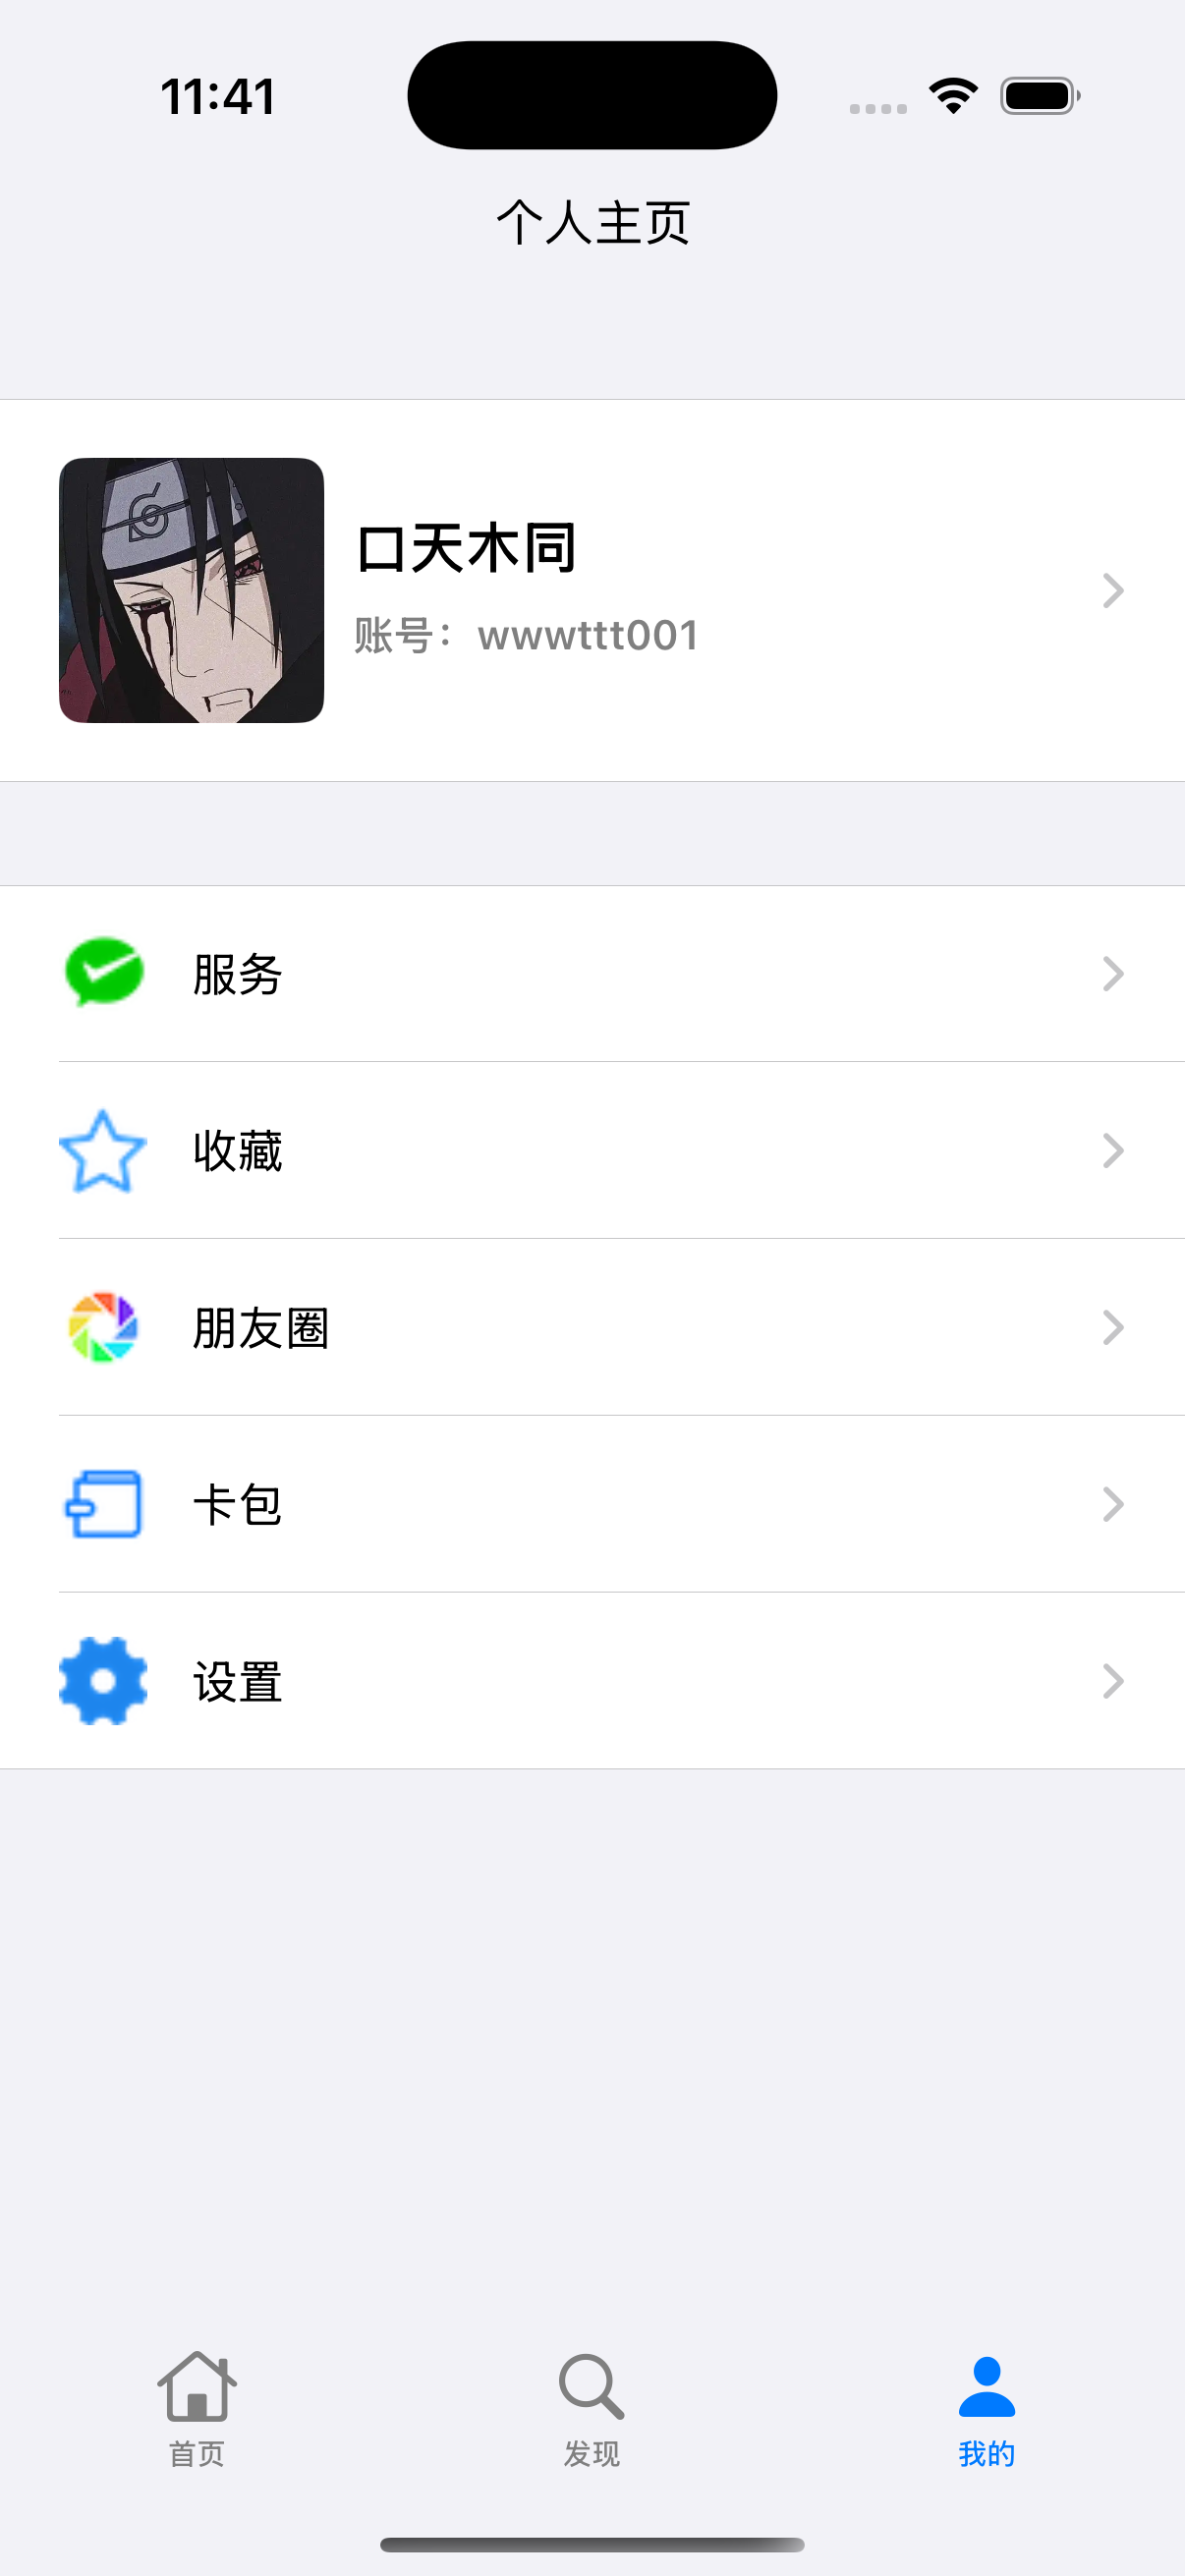
我的
这个界面主要是一个自定义cell的应用,在之前的播客讲过,这里主要通过不同的section索引来进行不同单元格的绘制
- (void)viewDidLoad {
    [super viewDidLoad];
    // Do any additional setup after loading the view.

    self.view.backgroundColor = [UIColor colorWithWhite:1.0 alpha:0.7];
    UILabel *titleLable = [[UILabel alloc] init];
    titleLable.text = @"个人主页";
    titleLable.frame = CGRectMake(168, 60, 200, 30);

    self.tableView = [[UITableView alloc] initWithFrame: self.view.bounds style: UITableViewStyleGrouped];
    self.tableView.delegate = self;
    self.tableView.dataSource = self;
    //self.tableView.backgroundColor = [UIColor grayColor];

    [self.tableView registerClass: [MyTableViewCell class] forCellReuseIdentifier: str];
    [self.view addSubview: self.tableView];
    [self.view addSubview: titleLable];
}
- (NSInteger)numberOfSectionsInTableView:(UITableView *)tableView {
    return 2;
}
- (NSInteger)tableView:(UITableView *)tableView numberOfRowsInSection:(NSInteger)section {
    switch (section) {
        case 0:
            return 1;
            break;
        case 1:
            return 5;
            break;
        default:
            break;
    }
    return 0;
}
- (CGFloat)tableView:(UITableView *)tableView heightForRowAtIndexPath:(NSIndexPath *)indexPath {
    if (indexPath.section == 0) {
        return 130;
    } else if (indexPath.section == 1) {
        return 60;
    }
    return 0;
}
对姓名的更改
在对姓名的更更改这里涉及了多界面传值中协议传值的一部分知识
通过设置 delegate 属性,并实现协议方法来实现从内层视图把name传回ThirdVC界面的传值逻辑
定义协议与代理属性:
@protocol ProfileViewControllerDelegate <NSObject>
- (void)profileViewController:(ProfileViewController *)controller didUpdateName:(NSString *)name;
@end
@property (nonatomic, weak) id<ProfileViewControllerDelegate> delegate;
实现协议方法用于传值
- (void)profileViewController:(ProfileViewController *)controller didUpdateName:(NSString *)name {
    if (!name || name.length == 0) {
        return;
    }
    NSIndexPath *targetIndexPath = [NSIndexPath indexPathForRow:0 inSection:0];
    MyTableViewCell *cell = (MyTableViewCell *)[self.tableView cellForRowAtIndexPath:targetIndexPath];

    if (cell) {
        cell.nameLabel.text = name;
    } else {
        [self.tableView reloadRowsAtIndexPaths:@[targetIndexPath] withRowAnimation:UITableViewRowAnimationNone];
    }

    self.userName = name;
}
其他有关传值的方法我会在后面学习后写出
效果图:
总结
刚开始第一个项目难度不是特别大,但是可能开始的时候对写的逻辑会不清晰从而导致写的时候会比较麻烦或者思路混乱,写的时候还是得理清思路,这样写的时候也会事半功倍