一.消息可靠性
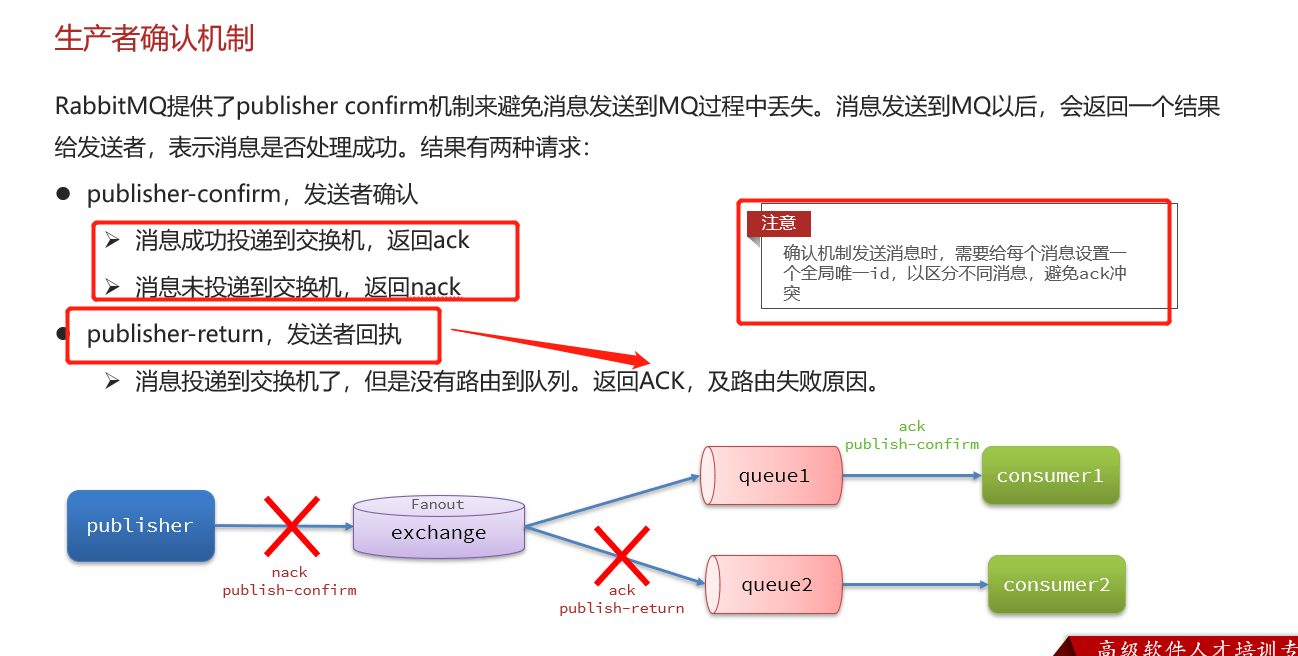
1.生产者消息确定
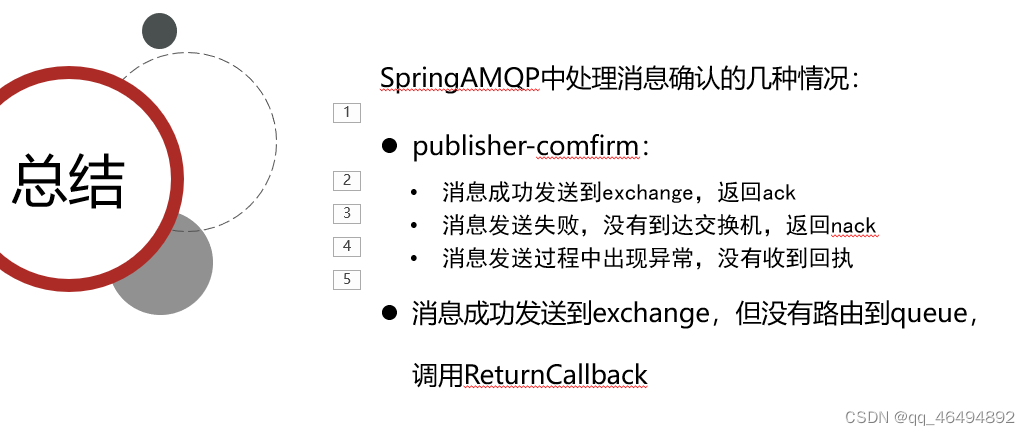
1.1 消息成功发送交换机会返回ack,错误的话返回nack,发送到交换机,没有路由到队列,会将ack和路由失败原因返回
1.2 SpringAMQP实现生产者确认
第一步配置yml文件开启生产者确定
spring:
rabbitmq:
publisher-confirm-type: correlatedpublisher-returns: true
template:
mandatory: true配置说明:
lpublish-confirm-type:开启publisher-confirm,这里支持两种类型:simple:同步等待confirm结果,直到超时correlated:异步回调,定义ConfirmCallback,MQ返回结果时会回调这个ConfirmCallbacklpublish-returns:开启publish-return功能,同样是基于callback机制,不过是定义ReturnCallbackltemplate.mandatory:定义消息路由失败时的策略。true,则调用ReturnCallback;false:则直接丢弃消息
第二步实现ReturnCallback(也就是消息return的处理)
@Configuration
@Slf4j
public class   CommonConfig implements ApplicationContextAware {

    @Override
    public void setApplicationContext(ApplicationContext applicationContext) throws BeansException {
//        获取rabbitTemplate对象
        RabbitTemplate rabbitTemplate = applicationContext.getBean(RabbitTemplate.class);

//        配置ReturnCallback
        rabbitTemplate.setReturnCallback((message, replyCode, replyText, exchange, rouyingKey) -> {
             log.error("消息发送到队列失败,响应码{},失败原因{},交换机{},路由key{} ,消息{}",
                     replyCode,replyText,exchange,rouyingKey,message.toString());

//             如果有需要的话,重发消息
        });

    }
}
第三步 发送消息,指定消息ID、消息ConfirmCallback
中间使用lambda表达式
//        准备消息
        String message = "hello, spring amqp!";
//消息id
        CorrelationData correlationData = new CorrelationData(UUID.randomUUID().toString());

        correlationData.getFuture().addCallback(result -> {
            if (result.isAck()) {
//               ACK ==发送成功
                log.debug("消息成功投递到交换机", correlationData.getId());
            } else {
                log.error("消息投递到交换机失败", correlationData.getId());
            }
        }, ex -> {
            log.error("消息没有发送到交换机", ex);
        });
//        发送消息
        rabbitTemplate.convertAndSend("amq.topic", "simple.test", message, correlationData);
小结
2.消息持久化
① Exchange 的持久化,声明交换机时指定持久化参数为 true 即可。声明时是默认持久化的
/**
 * Construct a new durable, non-auto-delete Exchange with the provided name.
 * @param name the name of the exchange.
 */
public AbstractExchange(String name) {
    this(name, true, false);
}
/**
* Construct a new Exchange, given a name, durability flag, auto-delete flag.
* @param name 交换机的名称
* @param durable 是否持久化
* @param autoDelete 是否自动删除 判断服务器在不再使用该交换机时是否自动删除该交换机
*/
public AbstractExchange(String name, boolean durable, boolean autoDelete) {
    this(name, durable, autoDelete, null);
如果交换机不设置持久化,那么在 RabbitMQ 服务器重启之后,相关的交换机元数据会丢失,不过消息不会丢失,只是不能将消息发送到这个交换机中了。对于一个长期使用的交换机来说,建议将其设置为持久化的。
② queue 的持久化,声明队列时指定持久化参数为 true 即可。声明时是默认持久化
@Bean
public Queue simpleQueue(){
  // 使用QueueBuilder构建队列,durable就是持久化的
   return QueueBuilder.durable("simple.queue").build();
}
③ message 的持久化,使用 convertAndSend 方式发送消息,消息默认是持久化的
//        准备消息
        Message message = MessageBuilder.withBody("hello.spring".getBytes(StandardCharsets.UTF_8))
                .setDeliveryMode(MessageDeliveryMode.PERSISTENT)
                .build();
//        发送消息
        rabbitTemplate.convertAndSend("simple.queue",message);
3消费者确认
RabbitMQ支持消费者确认机制,即:消费者处理消息后可以向MQ发送ack回执,MQ收到ack回执后才会删除该消息。而SpringAMQP则允许配置三种确认模式:(默认是auto)
•manual :手动 ack ,需要在业务代码结束后,调用 api 发送 ack 。•auto :自动 ack ,由 spring 监测 listener 代码是否出现异常,没有异常则返回 ack ;抛出异常则返回 nack•none :关闭 ack , MQ 假定消费者获取消息后会成功处理,因此消息投递后立即被删除
配置消费者确认机制
spring:
  rabbitmq:
    listener:
      simple:
        prefetch: 1
        acknowledge-mode: none # none,关闭ack;manual,手动ack;auto:自动ack
4失败重试机制
当消费者出现异常后,消息会不断requeue(重新入队)到队列,再重新发送给消费者,然后再次异常,再次requeue,无限循环,导致mq的消息处理飙升,带来不必要的压力,所以需要对失败重试进行设置
spring:
  rabbitmq:
    host: 192.168.43.130 # rabbitMQ的ip地址
    port: 5672 # 端口
    username: guest
    password: guest
    virtual-host: /
    listener:
      simple:
        prefetch: 1
        acknowledge-mode: auto  #推荐使用
        retry:
          enabled: true #开启消费者重试
          initial-interval: 1000  # 初始的失败等待时长为1秒
          multiplier: 2   # 下次失败的等待时长倍数,下次等待时长 = multiplier * last-interval
          max-attempts: 4 #重试次数
          max-interval: 10 #最大等待时长
消费者失败消息处理策略
在开启重试模式后,重试次数耗尽,如果消息依然失败,则需要有MessageRecoverer接口来处理,它包含三种不同的实现:
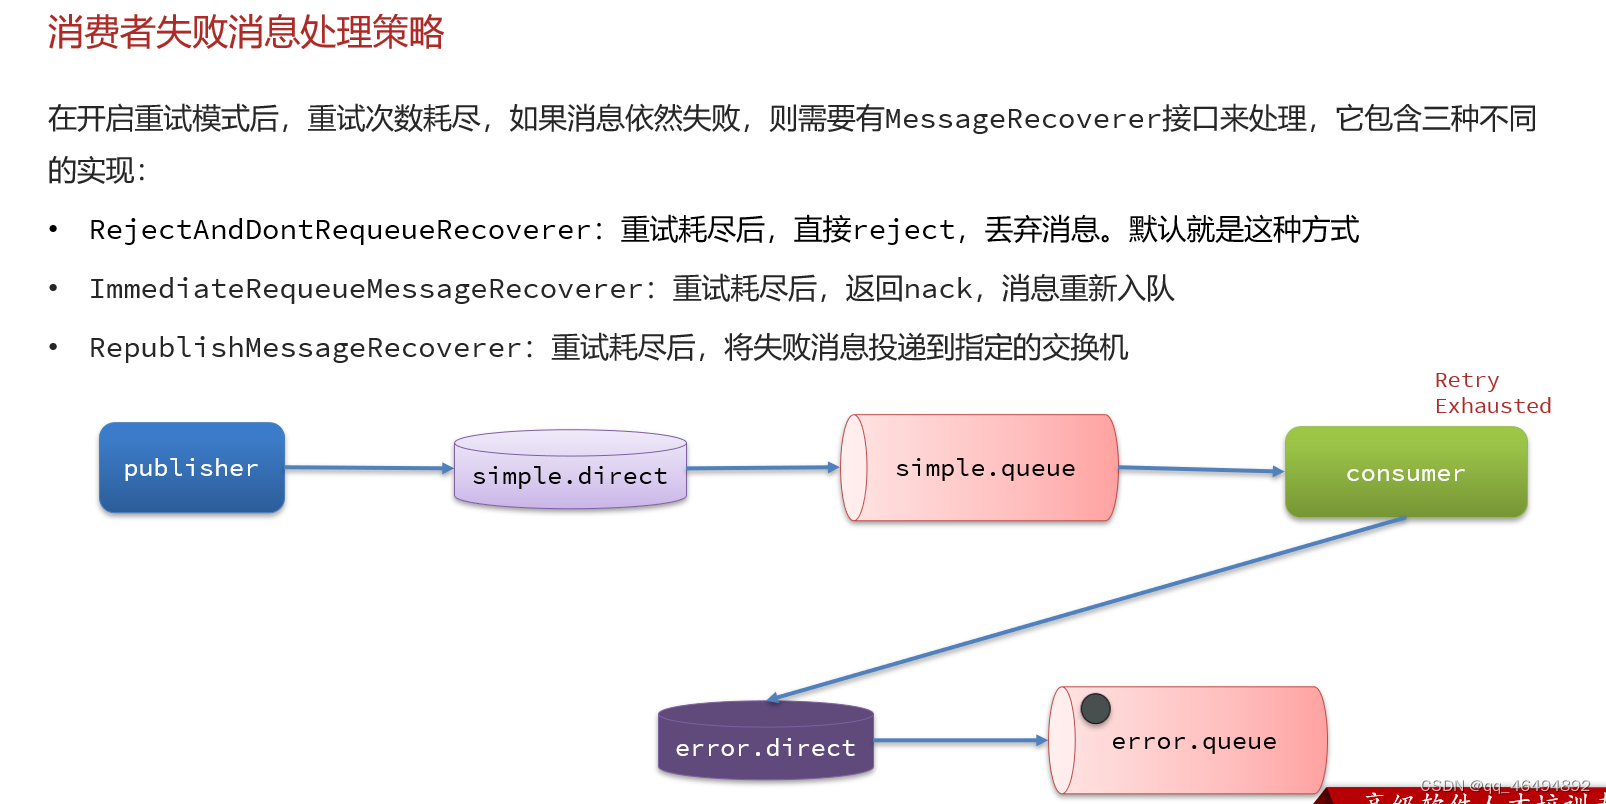
这样错误的消息会在重试失败后进入error.direct中
@Configuration
public class ErrorMessageConfig {
    @Bean
    public DirectExchange errorMessageExchange(){
        return new DirectExchange("error.direct");
    }

    @Bean
    public Queue errorQueue(){
        return new Queue("error.queue",true);
    }


    @Bean
    public Binding errorMessageBinding(){
        return BindingBuilder.bind(errorQueue()).to(errorMessageExchange()).with("error");
    }

    @Bean
    public MessageRecoverer republishMessageCoverer(RabbitTemplate rabbitTemplate){
        return new RepublishMessageRecoverer(rabbitTemplate,"error.direct","error");
    }

}
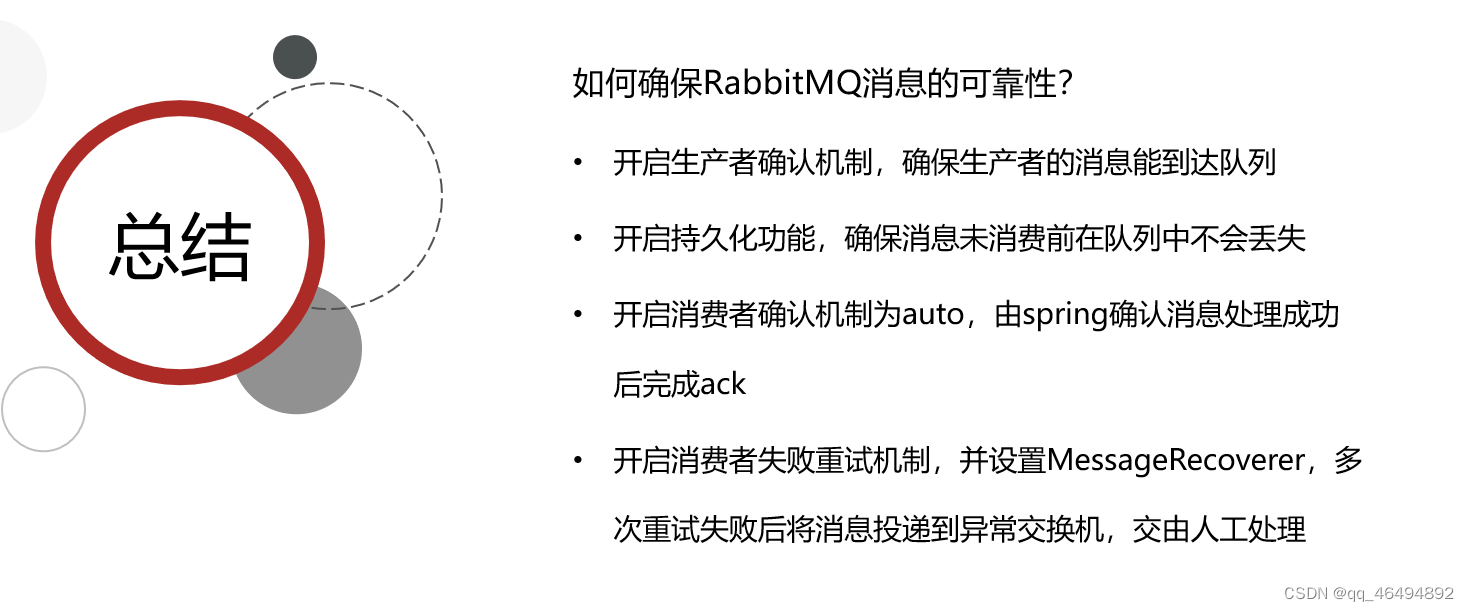
小结
二.死信交换机
1.定义
成为死信的条件
1消息被消费者reject或者返回nack2消息超时未消费3队列满了
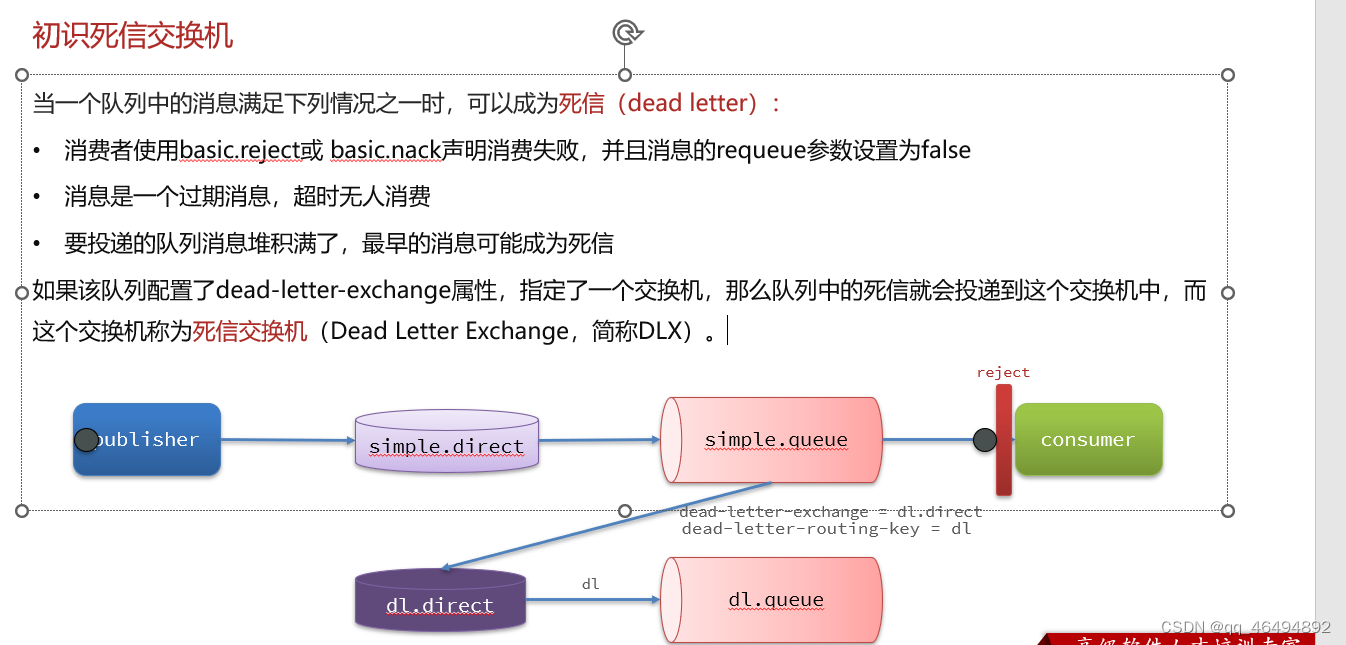
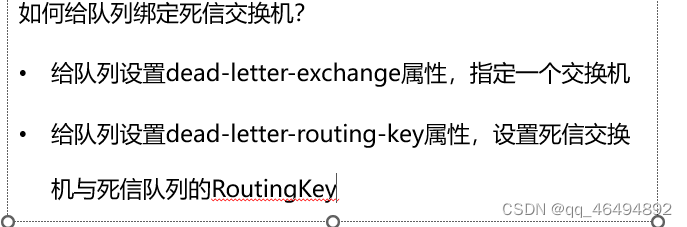
给队列绑定死信交换机
2. TTL
两大条件
1.消息本身设置存活时间
2.队列设置允许的消息最大存活时间

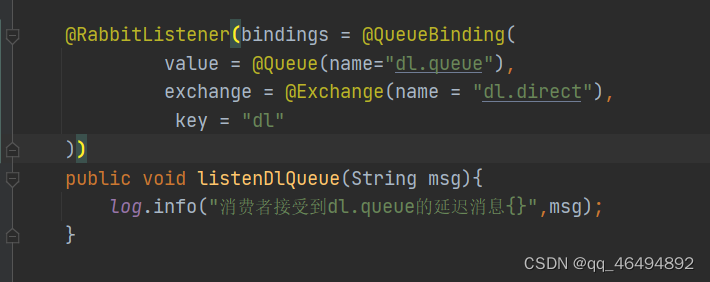
注解方式声明死信交换机
@RabbitListener(bindings = @QueueBinding(
value = @Queue(name="dl.queue"),
exchange = @Exchange(name = "dl.direct"),
key = "dl"
))
public void listenDlQueue(String msg){
log.info("消费者接受到dl.queue的延迟消息{}",msg);
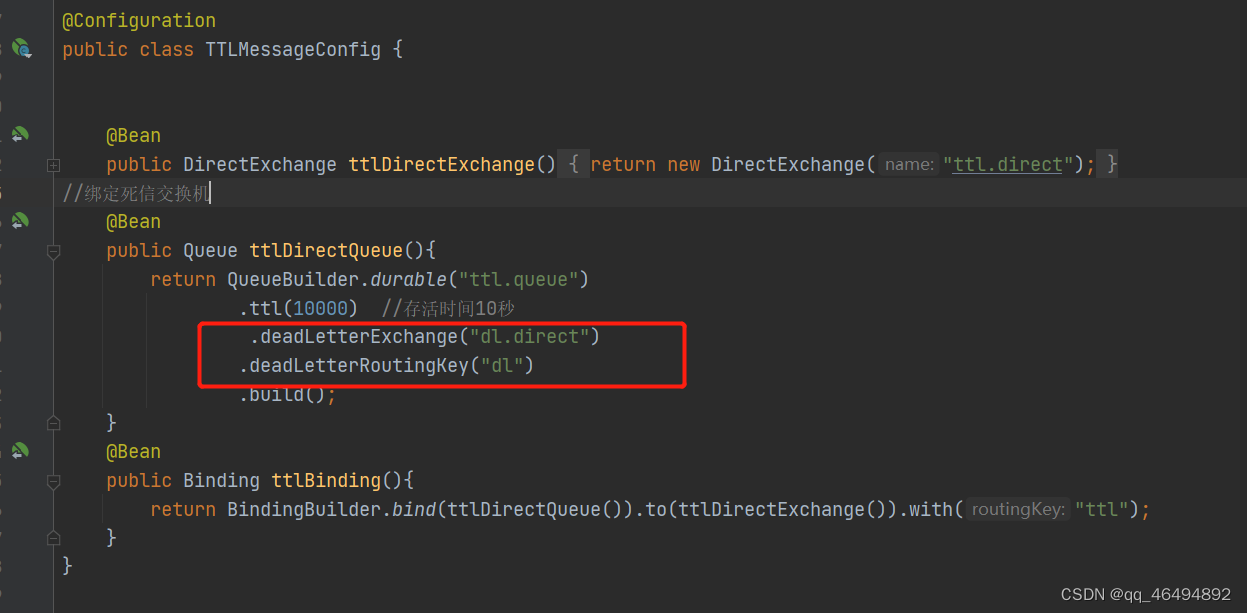
}设置队列允许的消息存活时间,并且绑定死信交换机dl.direct (ttl是正常的队列和交换机)
@Bean
public DirectExchange ttlDirectExchange(){
return new DirectExchange("ttl.direct");
}
//绑定死信交换机
@Bean
public Queue ttlDirectQueue(){
return QueueBuilder.durable("ttl.queue")
.ttl(10000) //存活时间10秒
.deadLetterExchange("dl.direct")
.deadLetterRoutingKey("dl")
.build();
}
@Bean
public Binding ttlBinding(){
return BindingBuilder.bind(ttlDirectQueue()).to(ttlDirectExchange()).with("ttl");
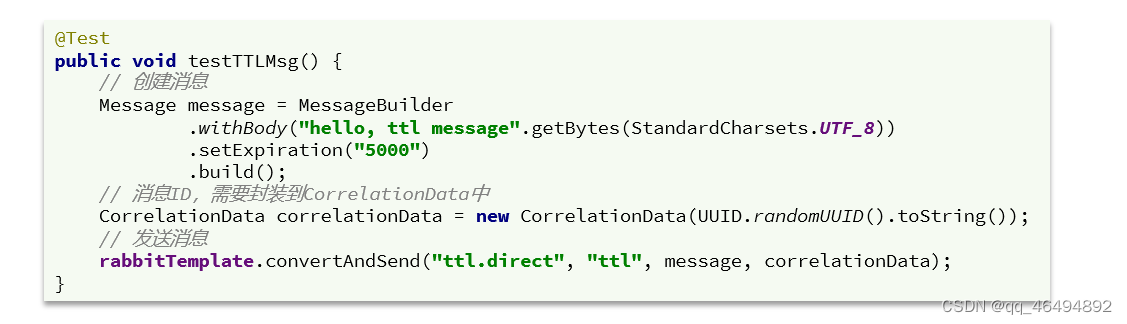
}设置消息本身的存活时间
小结
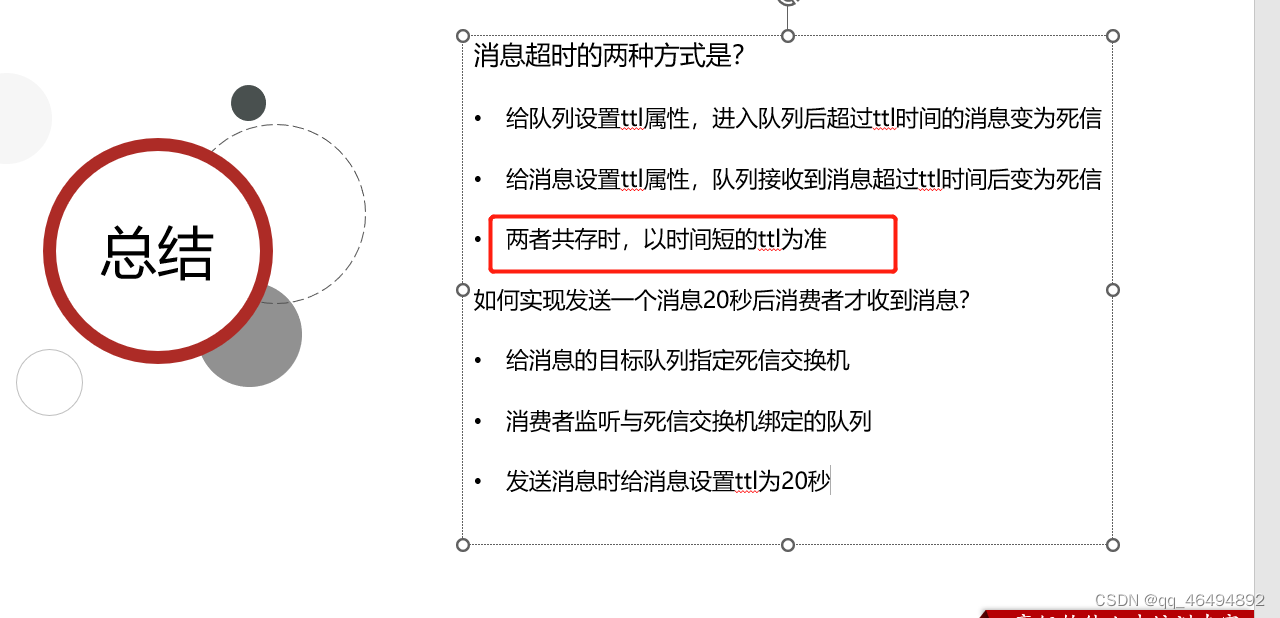
3.延迟队列
利用TTL结合死信交换机,我们实现了消息发出后,消费者延迟收到消息的效果。这种消息模式就称为延迟队列(Delay Queue)模式。
延迟队列的使用场景包括:
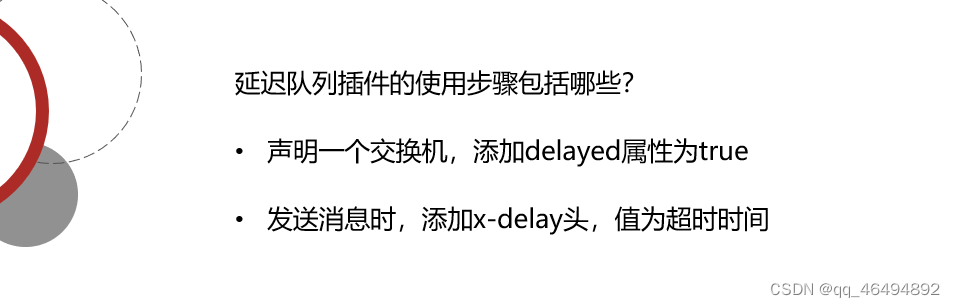
注解方式开启延迟队列
// 在交换机中声明delay为true 开启延迟队列
@RabbitListener(bindings = @QueueBinding(
value = @Queue(name="delay.queue",durable = "true"),
exchange = @Exchange(name = "delay.direct",delayed = "true"),
key = "delay"
))
public void listenDelayExchange(String msg){
log.info("消费者接受到Delay.queue的延迟消息{}",msg);
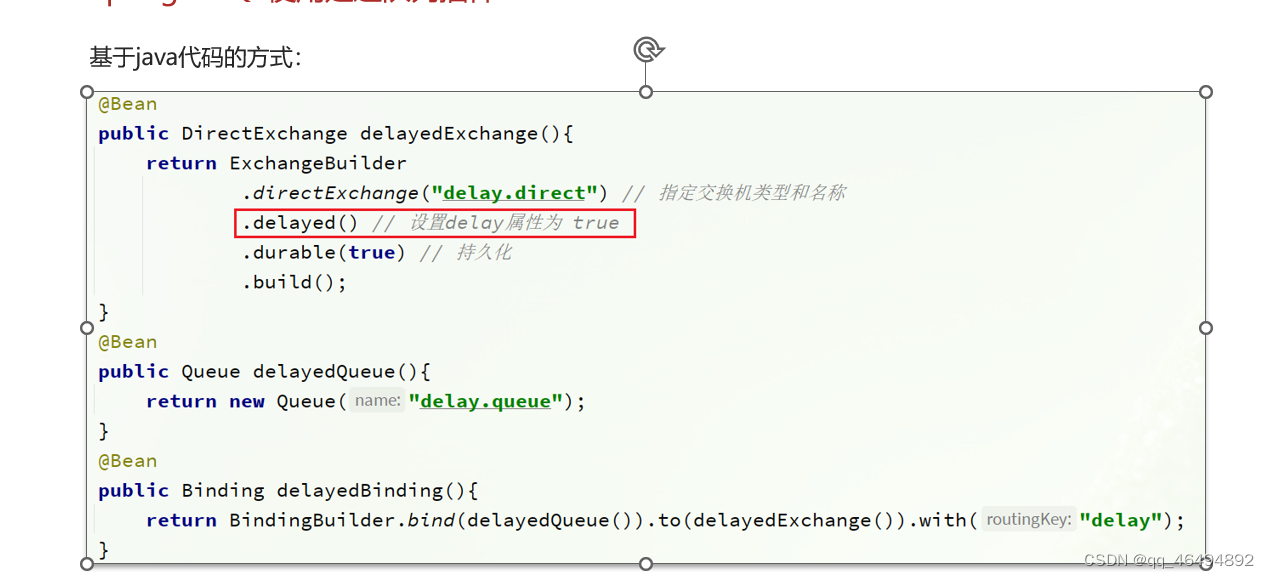
}基于java代码开启延迟队列
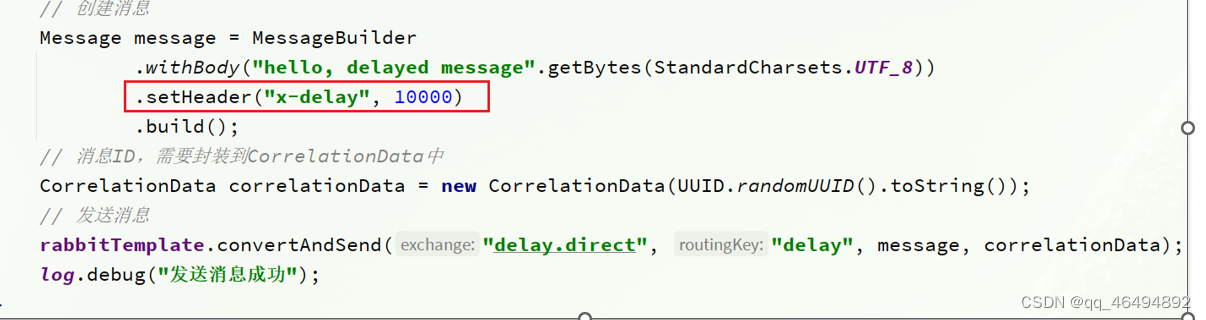
发送延迟消息(设置消息头)
三 消息堆积问题和惰性队列
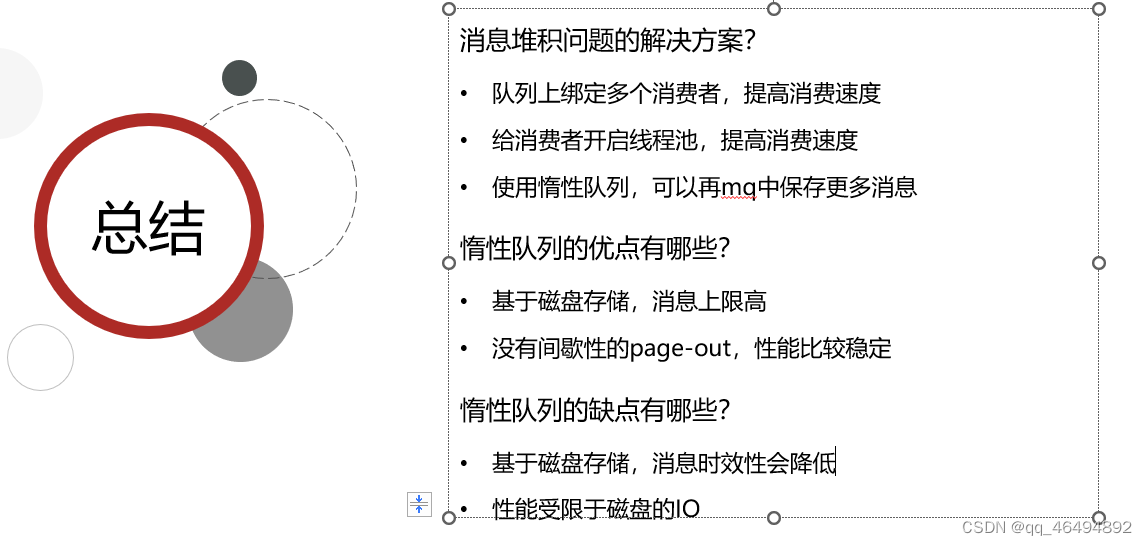
1.消息堆积问题
当生产者发送消息的速度超过了消费者处理消息的速度,就会导致队列中的消息堆积,直到队列存储消息达到上限。最早接收到的消息,可能就会成为死信,会被丢弃,这就是消息堆积问题。
解决思路
2.惰性队列
特点
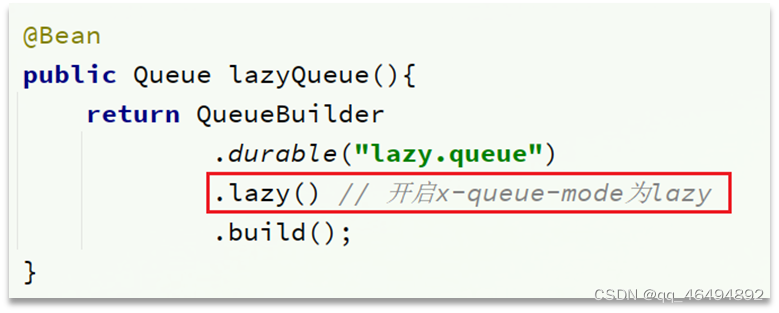
代码方式声明
注解方式声明
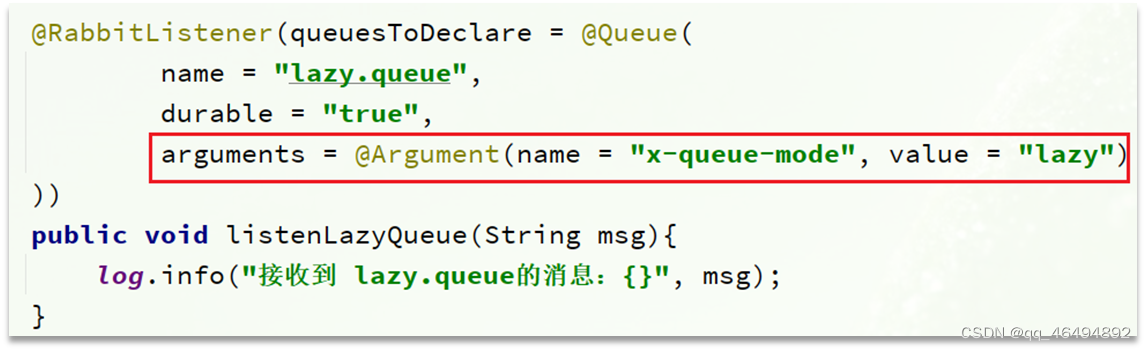
小结
四.集群
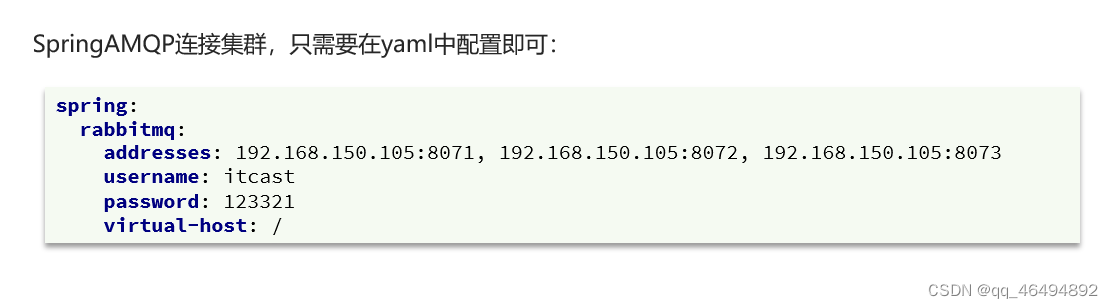
1.普通集群
具备下列特征:(当队列所在节点宕机后,该队列会访问不了,消息会丢失)
2.镜像集群
镜像集群:本质是主从模式,具备下面的特征:
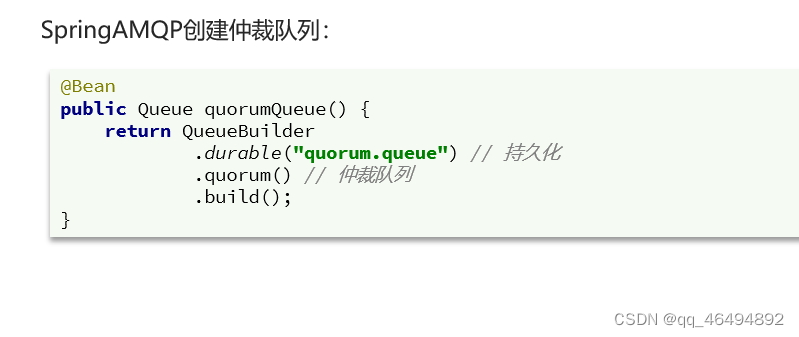
3.仲裁队列
仲裁队列:仲裁队列是3.8版本以后才有的新功能,用来替代镜像队列,具备下列特征: