三三要成为安卓糕手
这小节想告诉我的是:弹窗怎么样去关联自定义布局视图;慢慢体会
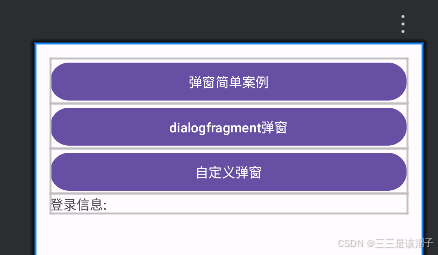
一:需求引入
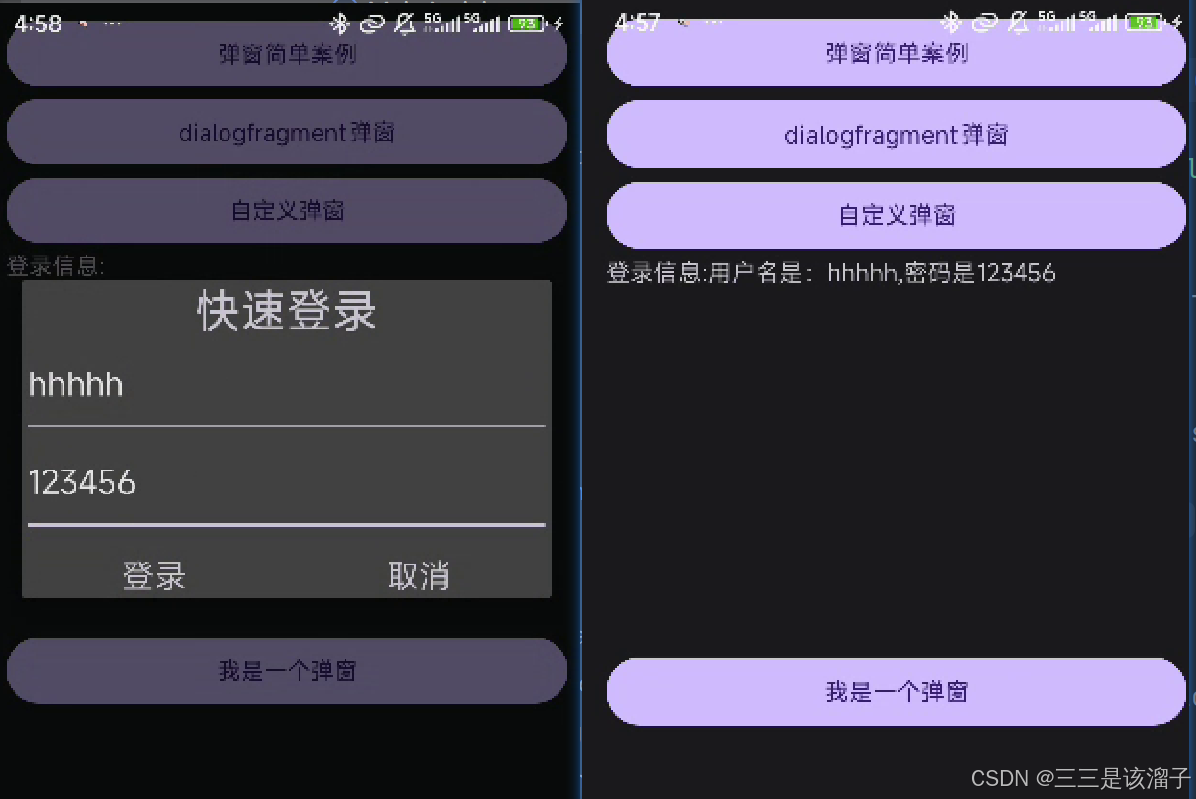
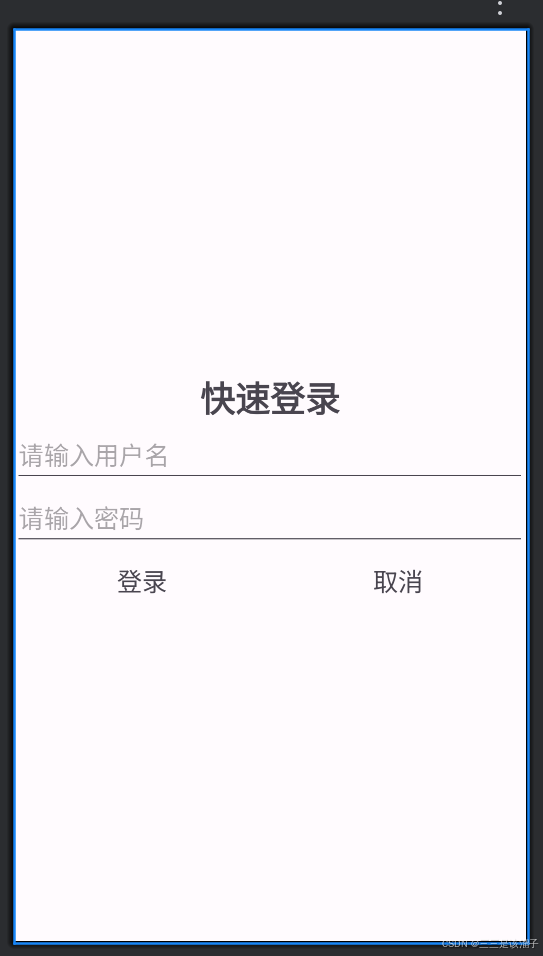
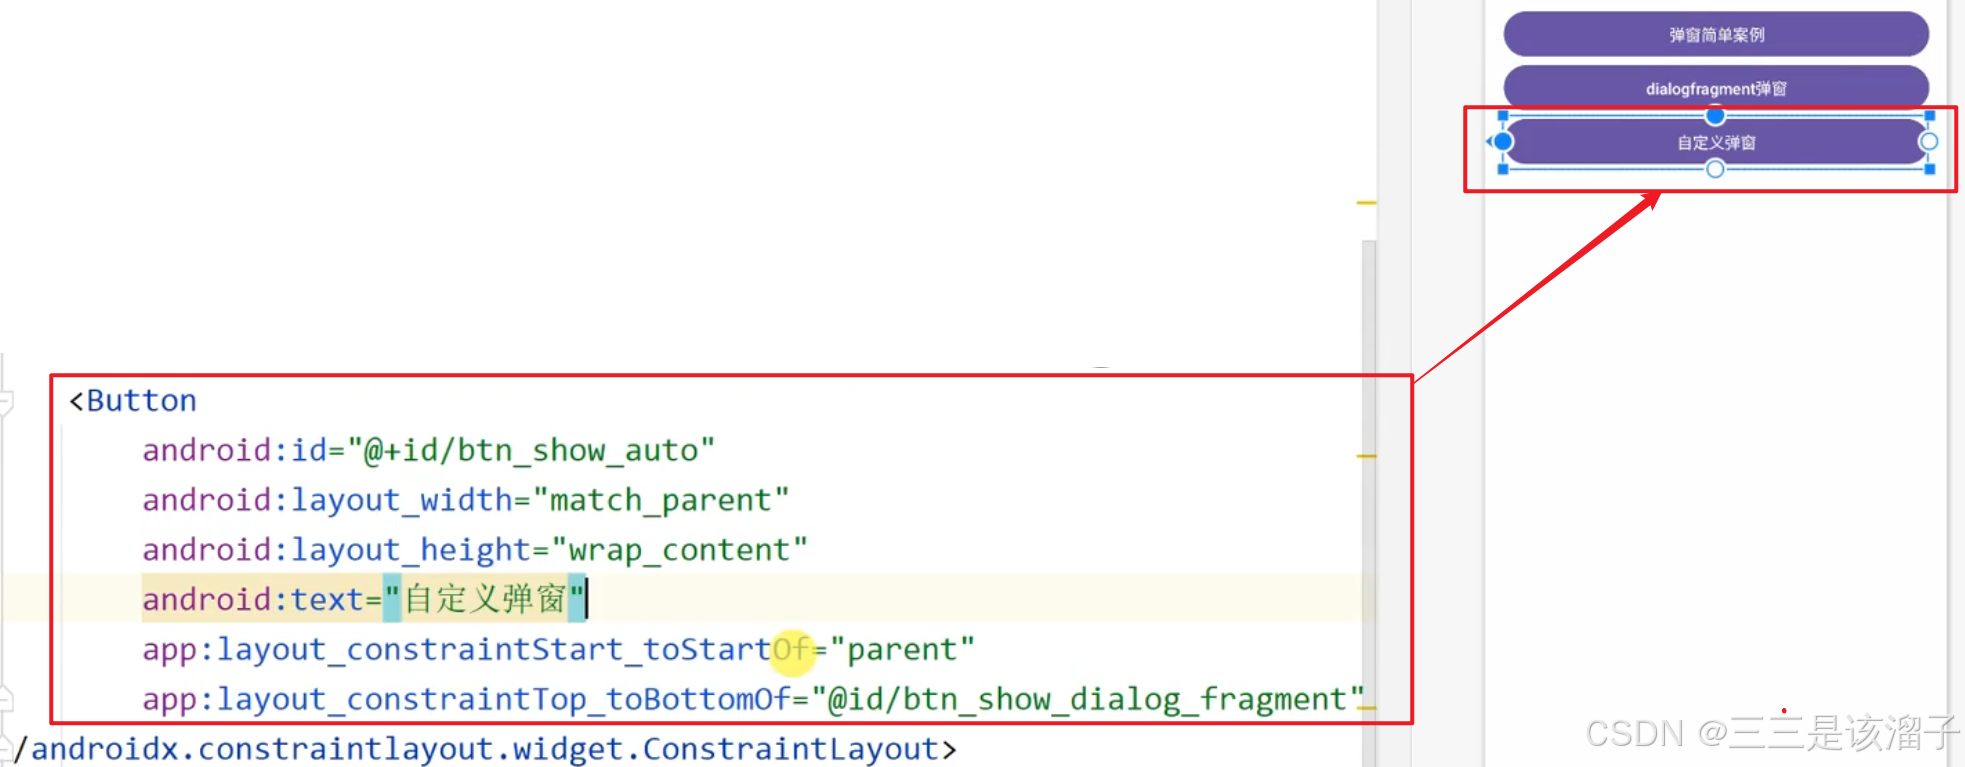
点击自定义弹窗按钮,弹出快速登录界面(自定义的)
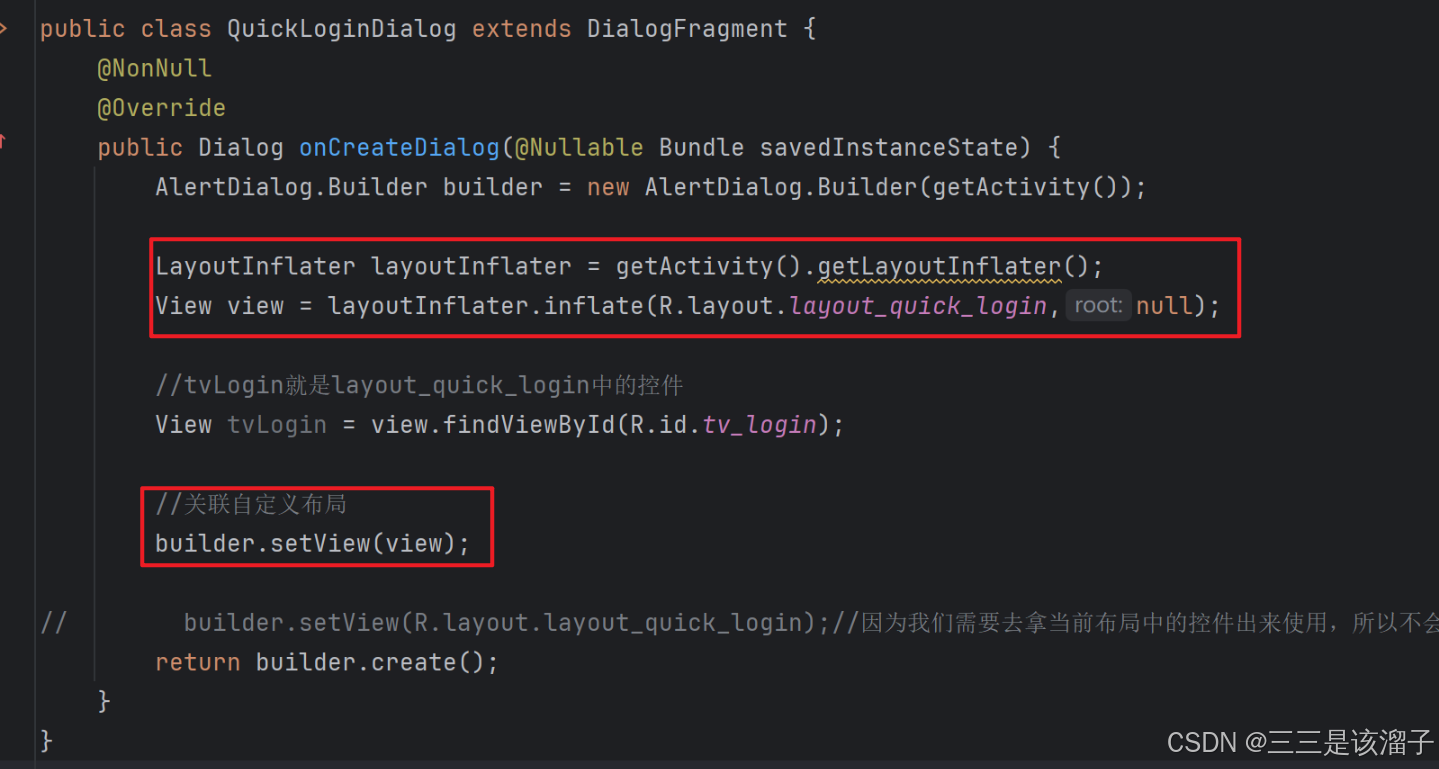
public class QuickLoginDialog extends DialogFragment {
    @NonNull
    @Override
    public Dialog onCreateDialog(@Nullable Bundle savedInstanceState) {
        AlertDialog.Builder builder = new AlertDialog.Builder(getActivity());

        LayoutInflater layoutInflater = getActivity().getLayoutInflater();
        View view = layoutInflater.inflate(R.layout.layout_quick_login,null);

		//tvLogin就是layout_quick_login中的控件
        View tvLogin = view.findViewById(R.id.tv_login);

        //关联自定义布局(重点)——弹窗与自定义布局就关联上了
        builder.setView(view);

//        builder.setView(R.layout.layout_quick_login);//因为我们需要去拿当前布局中的控件出来使用,所以不会直接的去给View设置一个布局的id
        return builder.create();
    }
}
		findViewById(R.id.btn_show_auto).setOnClickListener(new View.OnClickListener() {
            @Override
            public void onClick(View v) {
                QuickLoginDialog quickLoginDialog = new QuickLoginDialog();
                quickLoginDialog.show(getSupportFragmentManager(),"showAuto");

            }
        });
<?xml version="1.0" encoding="utf-8"?>
<LinearLayout xmlns:android="http://schemas.android.com/apk/res/android"
    android:layout_width="match_parent"
    android:layout_height="match_parent"
    android:gravity="center"
    android:orientation="vertical">


    <TextView
        android:layout_width="wrap_content"
        android:layout_height="wrap_content"
        android:text="快速登录"
        android:textSize="28sp"
        android:textStyle="bold" />

    <EditText
        android:id="@+id/et_user_name"
        android:layout_width="match_parent"
        android:layout_height="wrap_content"
        android:hint="请输入用户名"
        android:textSize="20sp" />

    <EditText
        android:id="@+id/et_password"
        android:layout_width="match_parent"
        android:layout_height="wrap_content"
        android:hint="请输入密码"
        android:textSize="20sp" />


    <LinearLayout
        android:layout_width="match_parent"
        android:layout_height="wrap_content"
        android:layout_marginTop="10dp"
        android:orientation="horizontal">

        <TextView
            android:id="@+id/tv_login"
            android:layout_width="0dp"
            android:layout_height="wrap_content"
            android:layout_weight="1"
            android:gravity="center"
            android:text="登录"
            android:textSize="20sp" />

        <TextView
            android:id="@+id/tv_cancel"
            android:layout_width="0dp"
            android:layout_height="wrap_content"
            android:layout_weight="1"
            android:gravity="center"
            android:text="取消"
            android:textSize="20sp" />

    </LinearLayout>


</LinearLayout>
二:代码分析
1:lambda设置点击监听器
设计点击事件也可以用lambda的形式写
		findViewById(R.id.btn_show_auto).setOnClickListener(new View.OnClickListener() {
            @Override
            public void onClick(View v) {
                QuickLoginDialog quickLoginDialog = new QuickLoginDialog();
                quickLoginDialog.show(getSupportFragmentManager(),"showAuto");

            }
        });

        findViewById(R.id.btn_show_auto).setOnClickListener(view ->{
            QuickLoginDialog quickLoginDialog = new QuickLoginDialog();
            quickLoginDialog.show(getSupportFragmentManager(),"showAuto");
        });这两种写法等价对吗
这两种写法在功能上是等价的,都是为按钮设置点击事件监听器,点击后显示一个快速登录对话框。
- 第一种写法:使用匿名内部类实现
View.OnClickListener接口,这是传统的 Java 方式。 - 第二种写法:使用 Lambda 表达式,这是 Java 8 引入的语法,用于简化函数式接口的实现。
2:打气筒Inflater
因为我们需要去拿当前布局中的控件出来使用,比如说第二张图片中的R.id.tv_login的使用,所以不会直接的去给View设置一个布局的id
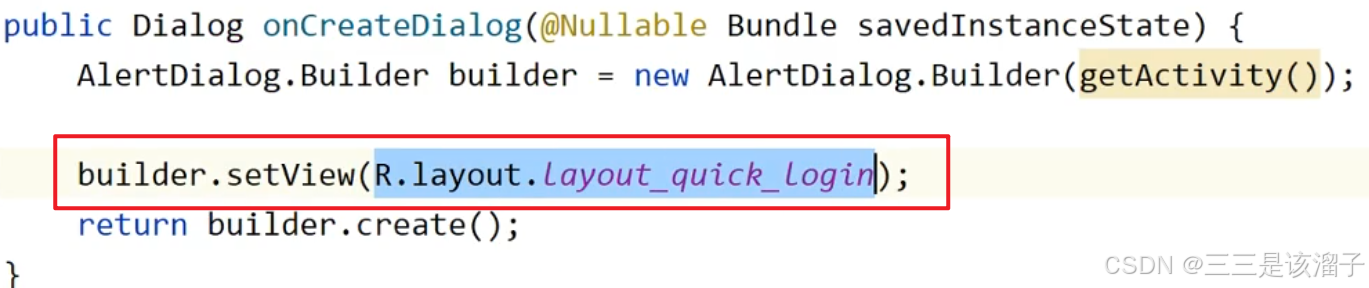
而是
因为我们当前不是一个activity,只是一个普通的类,所以需要手动加载布局
知道非常懵逼,我也很懵逼,慢慢分析不要捉急
((20250723150659-z4l0rja “(1)AlertDialog.Builder”))
这行代码之前分析过了,就是给弹窗建房子,用一些set方法设置title,text啥的;这里我们是直接给弹窗关联一个我们写好的视图view
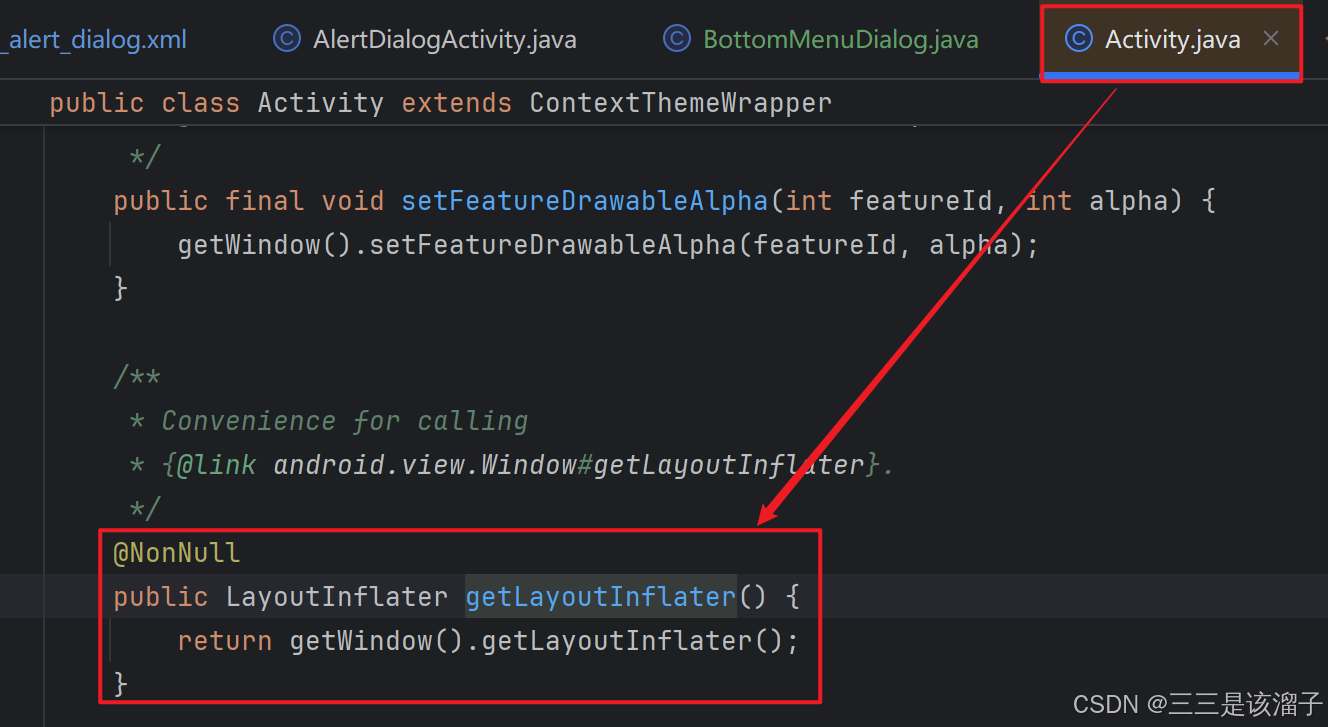
(2)getLayoutInflater
因为我们是在AlertDialogActivity类中实例化QuickLoginDialog,并调用show方法的
            QuickLoginDialog quickLoginDialog = new QuickLoginDialog();
			quickLoginDialog.show(getSupportFragmentManager(),"showAuto");
所以getActivity()获取到的就是AlertDialogActivity类,进而getLayoutInflater()获取到布局加载器,通过这个布局加载器去加载自定义的布局layout_quick_login,进而转为一个视图view,再把这个视图嵌入到我们的builder房子中,返回回去,通了。
		LayoutInflater layoutInflater = getActivity().getLayoutInflater();
        View view = layoutInflater.inflate(R.layout.layout_quick_login,null);
源码
(3)加载布局
- Activity:在
onCreate()中通过setContentView(R.layout.activity_main)加载布局,本质上也是用LayoutInflater解析布局。 - Fragment:在
onCreateView()中必须手动使用LayoutInflater加载布局。
(4)inflate解析布局
LayoutInflater 的作用是 “解析 XML 布局,将其‘膨胀’(转换)为内存里可操作的 View 对象” 。
- XML 布局文件想象成 “未充气的气球”(静态、描述性的文本),
LayoutInflater就像 “打气筒”,调用inflate()方法时,把 XML 里的布局描述 “充气” 成内存中真实存在、可显示 / 交互的View(动态对象 ) - 第二个参数:类型是
ViewGroup,这里填null表示仅仅是将 XML 布局文件实例化为View对象,但不会将该View对象添加到任何父容器中, - 我只能说是非常神奇的比喻方式了
三:登录界面数据的交互和回传
提问:自定义弹窗也需要去与我们的activity做一些数据的交互和回传
如果是点击登录,那登录的数据能不能返回到上一个页面,做一个当前页面的回调
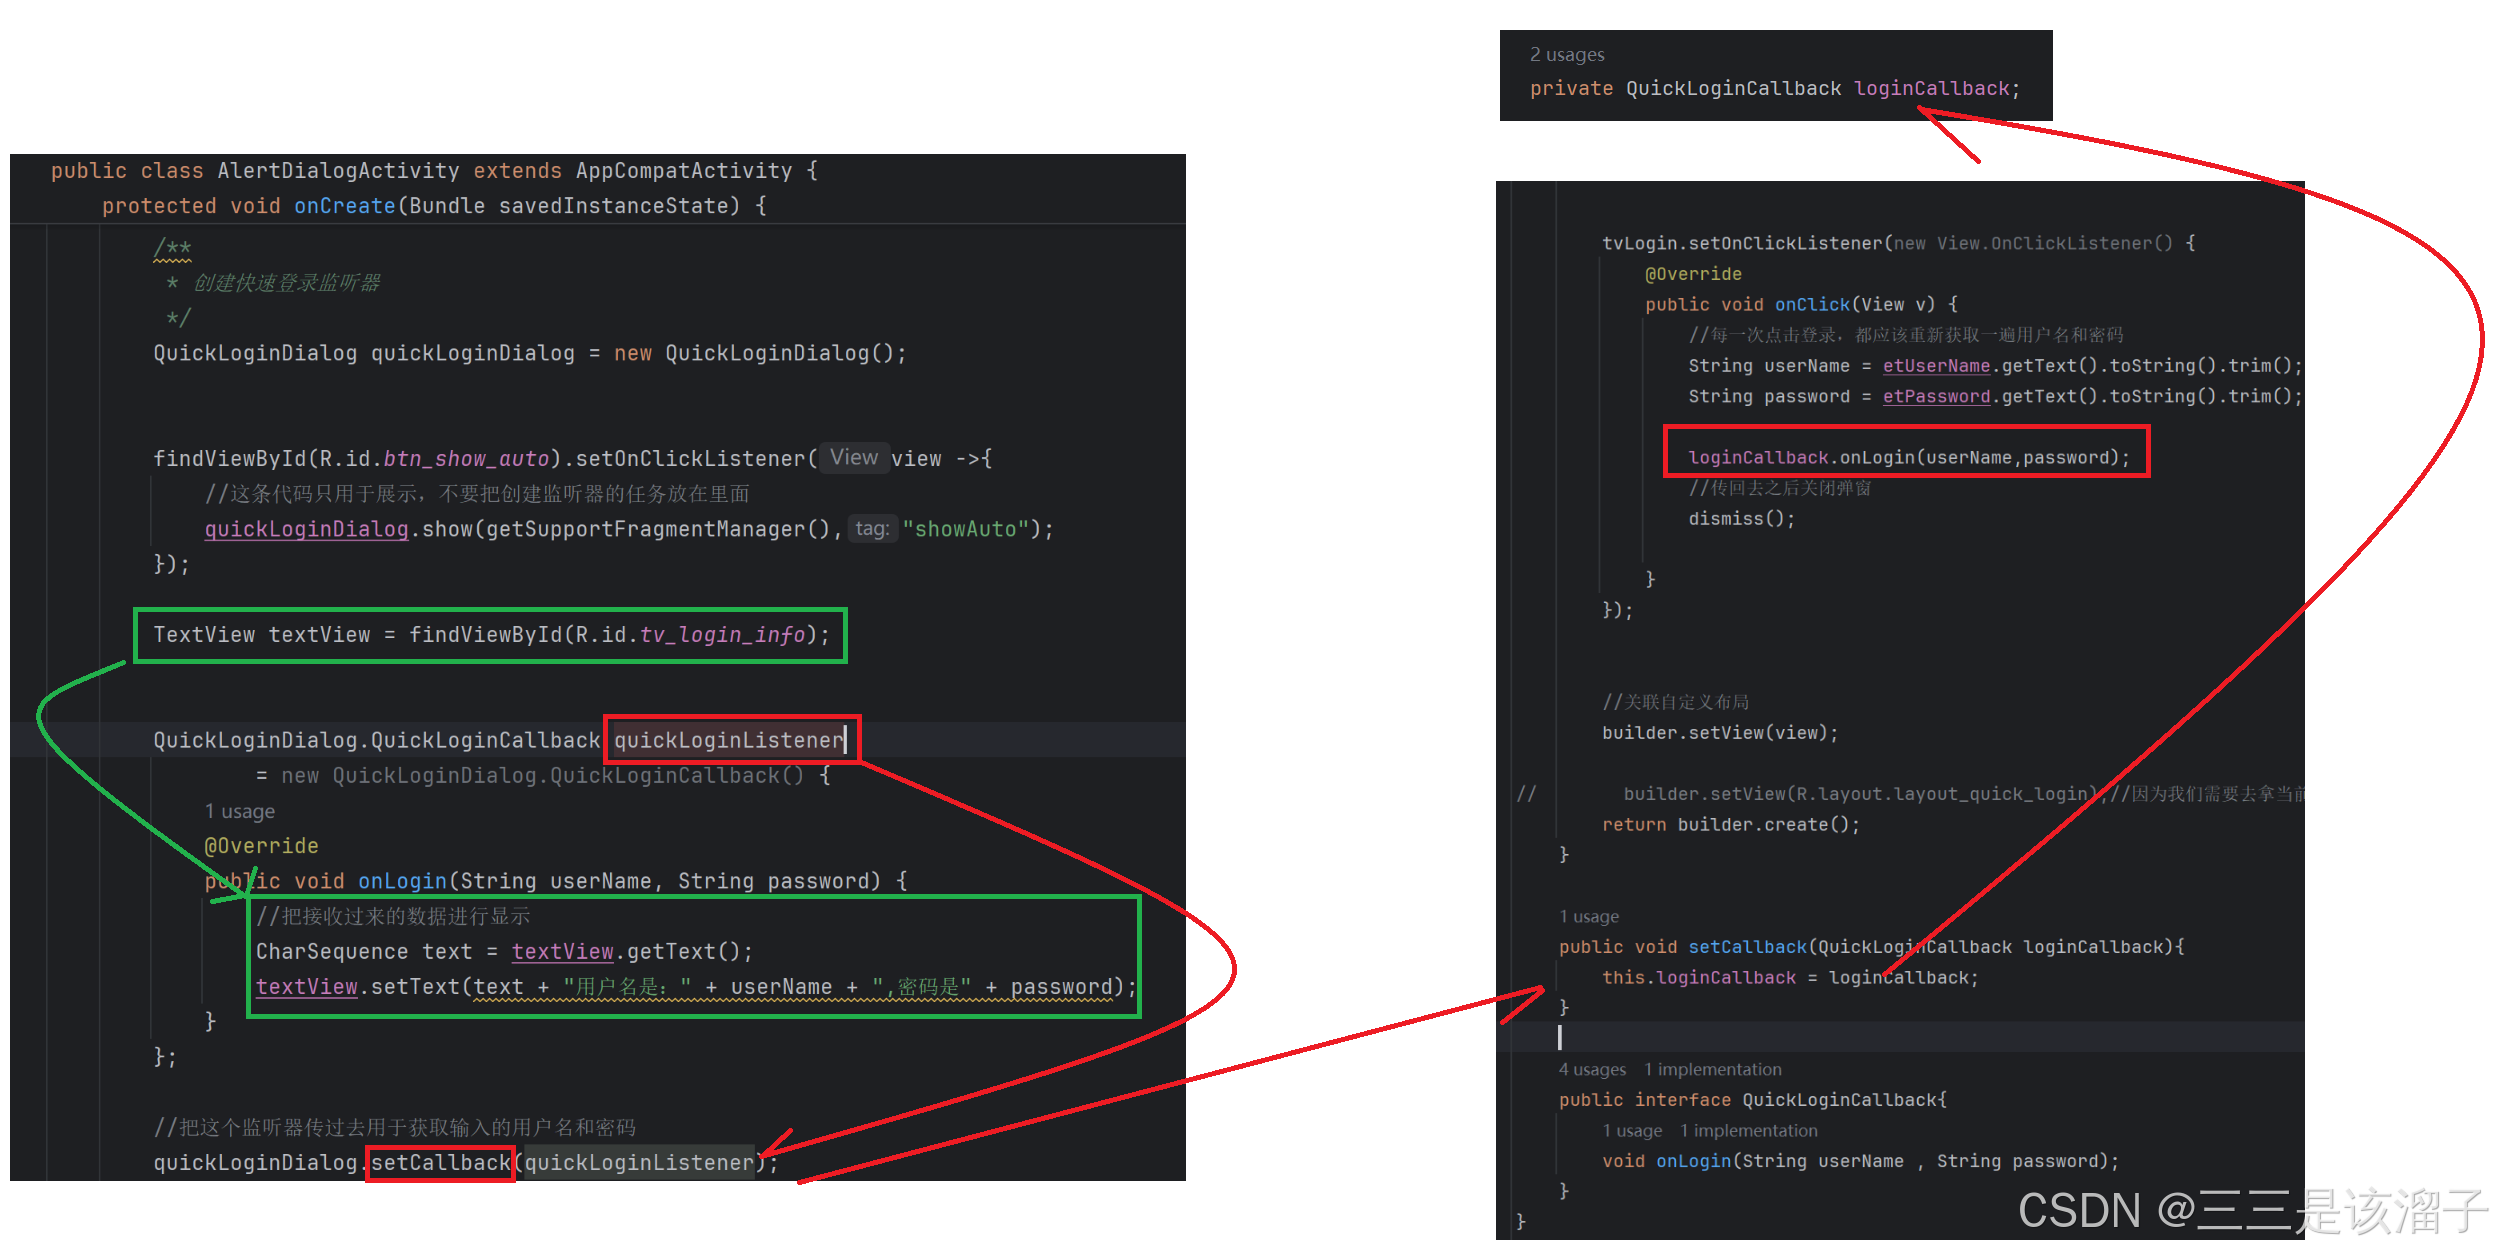
1:代码
public class QuickLoginDialog extends DialogFragment {

    private QuickLoginCallback loginCallback;

    @NonNull
    @Override
    public Dialog onCreateDialog(@Nullable Bundle savedInstanceState) {
        AlertDialog.Builder builder = new AlertDialog.Builder(getActivity());

        LayoutInflater layoutInflater = getActivity().getLayoutInflater();
        View view = layoutInflater.inflate(R.layout.layout_quick_login,null);

        //查找控件
        //用户名和密码编辑框
        EditText etUserName = view.findViewById(R.id.et_user_name);
        EditText etPassword = view.findViewById(R.id.et_password);

        //登录和取消文本框
        View tvLogin = view.findViewById(R.id.tv_login);
        View tvCancel = view.findViewById(R.id.tv_cancel);


        tvLogin.setOnClickListener(new View.OnClickListener() {
            @Override
            public void onClick(View v) {
                //每一次点击登录,都应该重新获取一遍用户名和密码
                String userName = etUserName.getText().toString().trim();
                String password = etPassword.getText().toString().trim();

                loginCallback.onLogin(userName,password);
                //传回去之后关闭弹窗
                dismiss();

            }
        });


        //关联自定义布局
        builder.setView(view);

//        builder.setView(R.layout.layout_quick_login);//因为我们需要去拿当前布局中的控件出来使用,所以不会直接的去给View设置一个布局的id
        return builder.create();
    }

    public void setCallback(QuickLoginCallback loginCallback){
        this.loginCallback = loginCallback;
    }


    public interface QuickLoginCallback{
        void onLogin(String userName , String password);
    }
}
    <TextView
        android:layout_width="match_parent"
        android:layout_height="wrap_content"
        android:id="@+id/tv_login_info"
        android:text="登录信息:"
        app:layout_constraintTop_toBottomOf="@id/btn_show_auto"
        app:layout_constraintStart_toStartOf="parent"/>
        /**
         * 创建快速登录监听器
         */
        QuickLoginDialog quickLoginDialog = new QuickLoginDialog();


        findViewById(R.id.btn_show_auto).setOnClickListener(view ->{
            //这条代码只用于展示,不要把创建监听器的任务放在里面
            quickLoginDialog.show(getSupportFragmentManager(),"showAuto");
        });

        TextView textView = findViewById(R.id.tv_login_info);


        QuickLoginDialog.QuickLoginCallback quickLoginListener
                = new QuickLoginDialog.QuickLoginCallback() {
            @Override
            public void onLogin(String userName, String password) {
                //把接收过来的数据进行显示
                CharSequence text = textView.getText();
                textView.setText(text + "用户名是:" + userName + ",密码是" + password);
            }
        };

        //把这个监听器传过去用于获取输入的用户名和密码
        quickLoginDialog.setCallback(quickLoginListener);
((20250726141159-ax43mx5 “看到了嘛,接口数据回调又来了,属于是学以致用了”))
可以对比我们日期那一章节,数据的回调,基本就是一模一样了,再来画一下流程图,爽战斗爽!!
(1)处理文本拼接问题
这里逻辑差不多,就不过多赘述了;
获取输入框中的数据就不bb了,比较简单
我们想要把传回来的数据拼接上去(是这么个想法),这里并没有那么做,而是选择了,一起重新处理,好好体会。